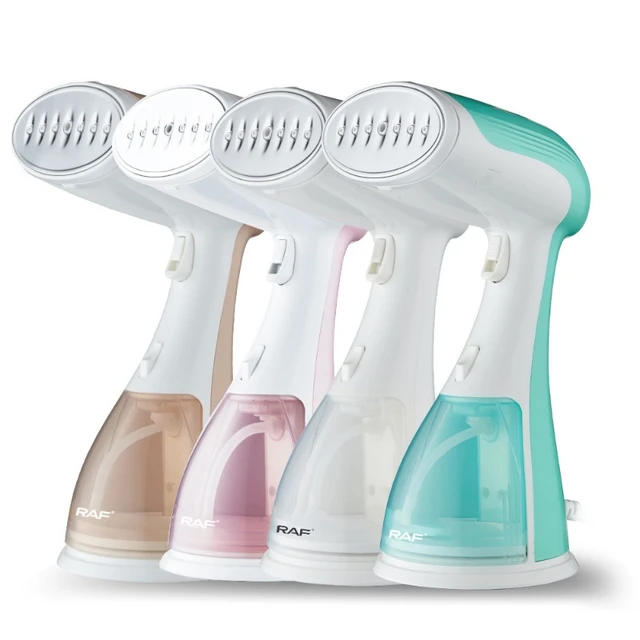
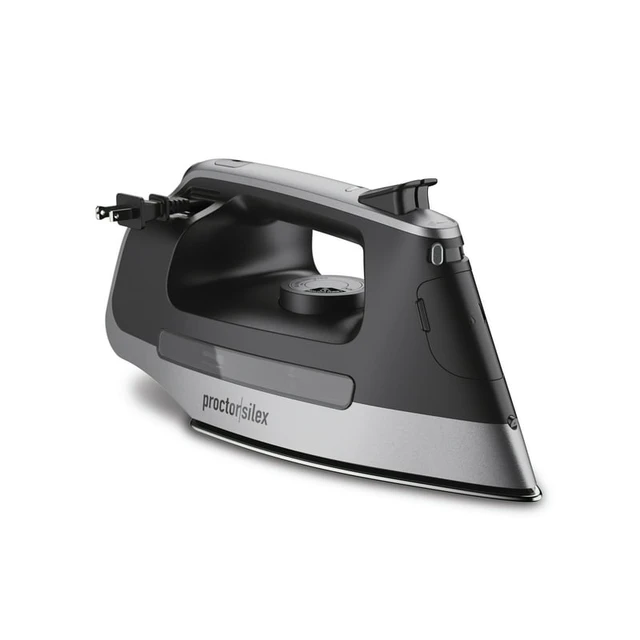
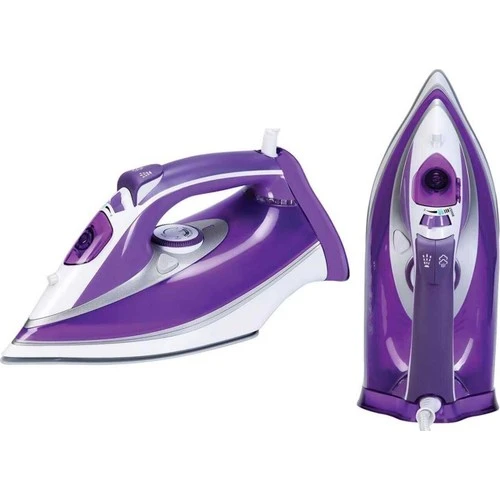
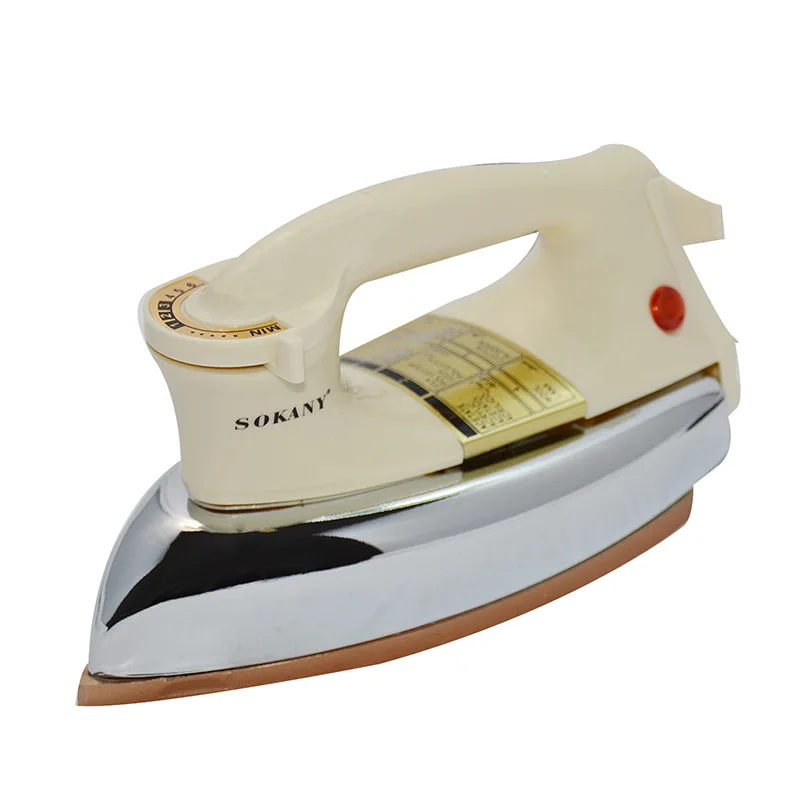
What steps should be taken after noticing an iron burn mark?

clothes iron

Introduction


Discovering an iron burn mark on clothing or fabric can be disheartening, but it’s important to take immediate action to prevent further damage and potentially salvage the affected item. Iron burn marks on clothes occur when the fabric comes into direct contact with a hot iron, resulting in discoloration or scorch marks. In this guide, we will outline the necessary steps to take after noticing an iron burn mark, providing specific instructions of how to remove iron burn marks from clothes, to help minimize the damage and restore the affected fabric.

Understanding Iron Burn Marks

Iron burn marks typically occur due to excessive heat. When a hot iron comes in contact with fabric, it can scorch the fibers. This heat can cause irreversible damage, discoloration, or even holes. Knowing this helps you respond effectively when you notice a burn mark.

Recognizing Types of Burns

There are two main types of iron burns: scorch marks and actual holes. Scorch marks appear as discolored areas. They often turn the fabric a yellowish-brown hue. On the other hand, actual holes indicate more severe damage. In these cases, the fabric has melted or been burned away completely, possibly requiring replacement.

Assessing Damage

Before attempting any cleaning method, you must assess the damage. A careful inspection will help determine if the fabric can be salvaged. Check for discoloration and the integrity of the fibers. If the fabric feels intact but bears a scorch mark, there may be hope yet. However, a hole might limit your recovery options.
clothes iron

What steps should be taken after noticing an iron burn mark?

Assessing the Severity of the Burn

1.1. Determining the Fabric’s Condition

Before proceeding with any remediation steps, carefully assess the fabric’s condition. Determine if the burn mark is minor, affecting only a small area, or if it has caused significant damage to the fabric. This assessment will help you determine the appropriate course of action.


1.2. Checking for Melting or Charring

Inspect the fabric for signs of melting or charring. If the fabric appears melted or charred, it may be irreparable, and professional assistance may be required. In such cases, it is advisable to consult a professional fabric restorer or dry cleaner for further guidance.


Act Quickly to Prevent Further Damage

2.1. Remove the Iron

If you notice an iron burn mark while ironing, immediately remove the iron from the fabric to prevent additional heat and damage. Set it aside on a heat-resistant surface or turn it off.


2.2. Avoid Touching the Burned Area

Steer clear of touching the burned area to prevent further damage or spreading of the burn mark. Touching the affected area with bare hands or fingers can transfer oils or dirt, potentially exacerbating the damage.


2.3. Let the Fabric Cool

Allow the fabric to cool completely. This step is crucial, as attempting any remediation techniques while the fabric is still hot can lead to further damage.


Trim Away Charred Fibers (if applicable)

3.1. Scissors or Razor Blade

If the burn mark has caused charring or melted fibers that are sticking out, carefully trim away the burnt fibers using a pair of sharp scissors or a razor blade. Take caution to only remove the damaged fibers and avoid cutting into the fabric itself.


3.2. Smooth the Edges

After trimming away the charred fibers, use your fingers or a clean cloth to gently smooth and blend the edges of the remaining fabric. This helps create a more even surface and reduce the visibility of the shiny iron marks.


Test for Colorfastness

4.1. Conduct a Colorfastness Test

Before proceeding with any cleaning or remediation methods, perform a colorfastness test on an inconspicuous area of the fabric, such as an inside seam or hem. This test ensures that the cleaning solution or method you choose will not cause color bleeding or discoloration.


4.2. Follow Manufacturer’s Instructions

Follow the instructions provided by the manufacturer of the cleaning solution or method you plan to use for the colorfastness test. This may involve applying a small amount of the solution or method to the fabric, allowing it to sit for a specified time, and then rinsing with water to check for any adverse effects.


Cleaning Methods for Iron Burn Marks

5.1. Mild Detergent and Water Solution

Mix a small amount of mild liquid detergent with lukewarm water to create a solution. Gently dab the affected area with a clean cloth or sponge soaked in the solution. Avoid rubbing or scrubbing vigorously, as this can further damage the fabric. Continue the process until the burn mark begins to fade.


5.2. Hydrogen Peroxide Solution

For white or light-colored fabrics, you can create a hydrogen peroxide solution to help remove burn marks from iron. Mix equal parts hydrogen peroxide and water. Apply a small amount of the solution to the burn mark using a clean cloth or sponge. Blot the area gently, being careful not to rub or scrub forcefully. Repeat the process until the burn mark fades.


5.3. Lemon Juice and Salt Paste

For natural fabrics, such as cotton or linen, you can create a lemon juice and salt paste to help lighten the burn mark. Squeeze fresh lemon juice onto the burn mark and sprinkle a small amount of salt over it. Gently rub the mixture into the fabric using a clean cloth or sponge. Rinse with water and repeat the process until the burn mark diminishes.


Rinse and Air Dry

6.1. Rinse the Fabric

After applying a cleaning solution or method, thoroughly rinse the fabric with clean water to remove any residue or cleaning solution. Rinse until the water runs clear and there are no traces of the cleaning solution left on the fabric.


6.2. Air Dry

Allow the fabric to air dry completely. Avoid using heat or a dryer, as this can potentially set any remaining discoloration or damage caused by the burn mark.


Additional Tips and Considerations

7.1. Iron Temperature Adjustment

To prevent future burn marks, adjust the iron temperature according to the fabric’s care instructions. Use a lower heat setting for delicate fabrics and a higher setting for sturdier materials. It is also advisable to test the iron temperature on an inconspicuous area of the fabric before proceeding with ironing.


7.2. Prevention Techniques

Once you’ve dealt with an iron burn, take steps to prevent future incidents. Being proactive can save you time, money, and frustration in the long run. Implementing preventive measures is key to maintaining the quality of your fabrics.

Understanding Iron Settings

Understanding your iron’s settings is crucial. Always adjust the temperature to match the fabric type. High temperatures are unnecessary for delicate fabrics. Keeping the iron at a lower setting can prevent burns before they occur. Familiarizing yourself with fabric care labels can also reduce the likelihood of mishaps.

Practicing Ironing Techniques

Incorporating proper ironing techniques helps as well. Always keep the iron moving and avoid leaving it in one spot. Also, consider using a pressing cloth between the iron and fabric. This additional layer provides a protective barrier, reducing the chances of burning.


Seeking Professional Help

If you’ve tried all these methods but remain unsatisfied, consider seeking professional help. A cleaner with experience handling fabric can offer solutions. Furthermore, they may have access to specialized tools and cleaning solutions.

Finding a Textile Specialist

Look for a reputable textile specialist in your area. Research their reviews and check their credentials. A seasoned professional can assess the damage further and provide effective cleaning methods. You’ll want someone experienced in handling a variety of fabric types.

Understanding Professional Services

Before engaging any service, understand what you’re paying for. Inquire about the methods they use and the expected outcomes. This knowledge will set your expectations and help you make informed decisions. Additionally, don’t forget to ask about pricing and timelines for their services.


Conclusion

Noticing an iron burn mark on fabric can be distressing, but taking immediate action and following the appropriate steps can help minimize the damage and potentially restore the affected item. Assess the severity of the burn and determine the fabric’s condition before proceeding with any remediation techniques. Act quickly to prevent further damage, and if applicable, trim away charred fibers. Perform a colorfastness test before using any cleaning method or solution. Select an appropriate cleaning method based on the fabric type and colorfastness results. Rinse the fabric thoroughly and air dry it completely. Take preventive measures in the future to avoid burn marks, such as adjusting the iron temperature and using protective measures. If the damage is irreparable or if your efforts are unsuccessful, consult a professional fabric restorer or dry cleaner for further assistance. By following these steps, you can effectively address iron burn marks and potentially salvage the fabric, restoring its appearance and usability.

How do you remove shiny iron marks?

clothes iron

Introduction


Accidents happen, and one common mishap that can occur while ironing is accidentally leaving the iron on one spot for too long, resulting in shiny iron marks on clothing or fabric. These marks are typically caused by the excessive heat of the iron, which can melt or flatten the fibers, leaving behind a shiny, flattened area. Fortunately, there are several effective methods for removing shiny iron marks and restoring the appearance of the affected fabric. In this guide, we will explore various techniques for removing shiny iron marks and provide step-by-step instructions for each method.

clothes iron

How do you remove shiny iron marks?

Assessing the Fabric

1.1. Fabric Type Considerations

Before attempting to remove shiny iron marks, it is important to consider the type of fabric involved. Different fabrics react differently to heat and various cleaning methods. Some fabrics, such as silk or delicate synthetics, may require extra caution and specific techniques to avoid further damage.


1.2. Colorfastness Testing

Perform a colorfastness test on a discreet area of the fabric, such as an inside seam or hem, before applying any cleaning methods. This test helps ensure that the fabric does not lose color or bleed when treated with the selected cleaning solution. Follow the instructions provided by the manufacturer of the cleaning product to conduct the colorfastness test properly.


Method 1: Steam Treatment

2.1. Materials Needed


Clean, white cloth or towel

Steam iron or handheld steamer

2.2. Steps to Remove Shiny Iron Marks with Steam Treatment


Fill the steam iron or handheld steamer with distilled water and set it to the appropriate heat setting for the fabric.

Lay the fabric with the shiny iron mark on a flat surface, with the affected area facing up.

Place the clean, white cloth or towel over the shiny iron mark.

Hold the steam iron or handheld steamer a few inches above the cloth or towel and allow the steam to penetrate the fabric. Move the iron or steamer slowly back and forth over the marked area for approximately 30 seconds to one minute.

Lift the cloth or towel and inspect the fabric. If the shiny mark is still visible, repeat the process until it disappears.

Allow the fabric to air dry completely.

Method 2: Vinegar and Water Solution

3.1. Materials Needed


Distilled water

White vinegar

Clean, white cloth or towel

3.2. Steps to Remove Shiny Iron Marks with Vinegar and Water Solution


Mix equal parts distilled water and white vinegar in a bowl or container.

Dampen a clean, white cloth or towel with the vinegar and water solution.

Gently dab the shiny iron mark with the damp cloth or towel, taking care not to rub or scrub vigorously.

Continue dabbing the mark, periodically rinsing the cloth or towel in the vinegar and water solution, until the shiny mark begins to fade.

Rinse the fabric with clean water to remove any remaining vinegar residue.

Allow the fabric to air dry completely.

Method 3: Soap and Water

4.1. Materials Needed


Mild liquid dish soap

Distilled water

Clean, white cloth or sponge

4.2. Steps to Remove Shiny Iron Marks with Soap and Water


Mix a few drops of mild liquid dish soap with distilled water in a small bowl or basin.

Dampen a clean, white cloth or sponge with the soapy water solution.

Gently blot the shiny iron mark with the damp cloth or sponge, being careful not to rub or scrub forcefully.

Continue blotting the mark, periodically rinsing the cloth or sponge in the soapy water solution, until the shiny mark begins to fade.

Rinse the fabric with clean water to remove any soap residue.

Allow the fabric to air dry completely.

Method 4: Fabric Softener Solution

5.1. Materials Needed


Fabric softener

Distilled water

Clean, white cloth or towel

5.2. Steps to Remove Shiny Iron Marks with Fabric Softener Solution


Mix equal parts fabric softener and distilled water in a bowl or container.

Dampen a clean, white cloth or towel with the fabric softener solution.

Gently dab the shiny iron mark with the damp cloth or towel, taking care not to rub or scrub aggressively.

Continue dabbing the mark, periodically rinsing the cloth or towel in the fabric softener solution, until the shiny mark begins to fade.

Rinse the fabric with clean water to remove any remaining fabric softener residue.

Allow the fabric to air dry completely.

Method 5: Professional Dry Cleaning

6.1. Considerations for Professional Dry Cleaning

In some cases, particularly with delicate fabrics or valuable garments, it may be best to seek professional assistance from a dry cleaner. Professional dry cleaners have the knowledge, experience, and specialized equipment to handle delicate fabrics and remove shiny iron marks effectively. Consult with a reputable dry cleaner to determine the best course of action for your specific fabric and garment.


Preventive Measures for Future Ironing

7.1. Adjusting Iron Temperature

To avoid shiny iron marks in the future, adjust the temperature on your iron according to the fabric’s care instructions. Use a lower heat setting for delicate fabrics and a higher setting for sturdier materials. It is also advisable to test the iron temperature on an inconspicuous area of the fabric before proceeding with ironing.


7.2. Using a Pressing Cloth

When ironing delicate or synthetic fabrics, place a clean, white pressing cloth or thin cotton fabric between the iron and the garment. The pressing cloth acts as a barrier, protecting the fabric from direct contact with the hot iron and reducing the risk of shiny iron marks.


Conclusion

Shiny iron marks on fabric can be frustrating, but with the proper techniques and tools, they can often be effectively removed. The chosen method for removing shiny iron marks depends on the fabric type and personal preference. Steam treatment, vinegar and water solution, soap and water, and fabric softener solution are gentle and accessible options for removing shiny iron marks. Professional dry cleaning may be necessary for delicate or valuable garments. Taking preventive measures, such as adjusting the iron temperature and using a pressing cloth, can help avoid shiny iron marks in the future. By following the step-by-step instructions and considering the fabric’s specific needs, you can successfully restore the appearance of fabric affected by shiny iron marks.

What is the fastest way to iron?

clothes iron

Introduction


Ironing can be a time-consuming task, especially when faced with a pile of wrinkled clothes. However, by employing efficient ironing techniques, you can significantly reduce the time and effort required to achieve wrinkle-free clothes. In this guide, we will explore the fastest ways to iron your garments, providing specific tips and techniques to streamline the ironing process and help you achieve smooth and polished results in no time.

clothes iron

What is the fastest way to iron?

Set Up Your Ironing Station

1.1. Proper Ironing Surface

Choose a sturdy ironing board or an ironing mat placed on a flat, heat-resistant surface. Ensure the board or mat is at a comfortable height to avoid straining your back during the ironing process.


1.2. Heat the Iron

Before you begin ironing, give the iron ample time to heat up to the appropriate temperature for the fabric you will be working with. This ensures optimal ironing efficiency and reduces the need for repeated passes over the fabric.


1.3. Steam Settings

Adjust the steam settings on your iron according to the fabric being ironed. Higher steam settings work well for heavier fabrics like cotton, while lighter steam settings are suitable for delicate fabrics such as silk or synthetic blends.


Sort and Group Clothing

2.1. Sort by Fabric Type and Temperature

Separate your clothes into piles based on fabric type and the recommended ironing temperature. This allows you to work efficiently, as you won’t have to constantly adjust the temperature settings on your iron.


2.2. Group Similar Fabrics Together

Within each fabric type, group similar garments together. This allows you to iron multiple pieces at once without needing to switch between different fabrics. For example, iron all your cotton shirts together before moving on to polyester garments.


Start with the Right Technique

3.1. Top-Down Approach

Adopt a top-down approach when ironing clothes. Begin with the collar or neckline and work your way down to the sleeves and body of the garment. This ensures that any wrinkles created by the ironing process are smoothed out as you progress.


3.2. Work in Sections

Divide larger garments into sections, ironing one section at a time. For shirts, start with the collar and then move to the yoke, sleeves, and body. By breaking the garment into smaller sections, you can focus on specific areas, ensuring thorough wrinkle removal.


3.3. Iron Inside Out

For delicate fabrics or clothes with prints or embellishments, iron them inside out. This helps protect the fabric’s surface and prevents damage to the design or decoration.


Techniques for Efficient Ironing

4.1. Quick Pressing Technique

Adopt a quick pressing technique to save time. Instead of holding the iron in one spot, press and glide the iron across the fabric in smooth, continuous motions. This technique ensures efficient heat distribution and reduces the need for repetitive passes over the same area.


4.2. Steam Bursting

When encountering stubborn wrinkles, utilize the steam burst function on your iron. Hold the iron a few inches away from the fabric and release short bursts of steam onto the wrinkled area. The steam helps relax the fabric, making it easier to remove stubborn wrinkles.


4.3. Double-Sided Ironing

Save time by ironing both sides of a garment simultaneously. Lay the garment flat on the ironing board, folding it in half so that both sides are accessible. Iron over the fabric, working on both sides simultaneously. This technique effectively eliminates wrinkles on both surfaces in one pass.


Wrinkle-Reducing Tips

5.1. Hanging Clothes Immediately

After ironing a garment, hang it on a hanger as soon as possible. The weight of the fabric helps smooth out any residual wrinkles, ensuring a crisp and wrinkle-free appearance.


5.2. Utilizing Gravity

Make use of gravity to your advantage by hanging clothes vertically after ironing. This allows any remaining wrinkles to naturally fall out over time, reducing the need for additional ironing.


5.3. Wrinkle-Release Spray

For garments with stubborn wrinkles, use a wrinkle-release spray. Lightly mist the fabric and gently tug on the wrinkled areas to help release the wrinkles without the need for more ironing. This is particularly useful for delicate fabrics or items that cannot be ironed directly.


Maintenance and Upkeep

6.1. Cleaning the Iron’s Soleplate

Regularly clean the soleplate of your iron to prevent residue buildup. A clean soleplate glides smoothly over the fabric, ensuring efficient and effective ironing.


6.2. Proper Storage

Store your iron in an upright position, allowing it to cool down completely before putting it away. This prevents accidental burns or damage to other items in your storage area.


6.3. Regular Maintenance

Follow the manufacturer’s instructions for maintenance and cleaning of your iron. Regular maintenance, such as descaling and cleaning, ensures the longevity and optimal performance of your iron.


Conclusion


By employing efficient ironing techniques, you can minimize the time and effort required to achieve wrinkle-free clothes. Setting up a proper ironing station, sorting and grouping clothing, adopting the right ironing techniques, and utilizing time-saving tips all contribute to a faster and more effective ironing experience. Remember to work in sections, use quick pressing motions, and utilize steam bursting for stubborn wrinkles. Additionally, employing wrinkle-reducing tips and properly maintaining your iron will ensure optimal results. With these techniques and strategies, you can transform the chore of ironing into a quick and efficient process, leaving you with perfectly pressed and wrinkle-free clothes in no time.

Can I avoid ironing?

clothes iron

Introduction


Ironing can be a time-consuming and tedious chore, especially for those with busy lifestyles. However, achieving wrinkle-free clothing doesn’t necessarily have to involve the traditional approach of ironing. In this guide, we will explore various alternatives to ironing that can help you achieve smooth and wrinkle-free clothing without the need for an iron. From smart laundering techniques to using innovative tools, these alternatives offer convenience and efficiency while ensuring your clothes look their best.

clothes iron

Can I avoid ironing?

Proper Washing Techniques

1.1. Sorting Clothes

Sort your clothes based on fabric type, weight, and color. This ensures that delicate fabrics, heavy items, and dark colors are separated, reducing the chances of wrinkles during the washing process.


1.2. Pre-treat Stains

Treat any stains on your clothes before washing them. Stains that are set in can be more challenging to remove and may contribute to the development of wrinkles.


1.3. Use Fabric Softener or Conditioner

Adding fabric softener or conditioner to your laundry can reduce wrinkles, making it easier to achieve wrinkle-free clothing. These products help relax the fibers in the fabric, preventing them from contracting and forming wrinkles.


1.4. Remove Clothes Immediately

Promptly remove your clothes from the washing machine as soon as the cycle is complete. Leaving clothes sitting in the machine can lead to the development of wrinkles due to the damp environment.


Drying Techniques

2.1. Air Drying

Air drying is an effective method for avoiding wrinkles. Hang your clothes on a clothesline or drying rack and allow them to dry naturally. Smooth out any wrinkles by gently pulling on the fabric while it is still damp.


2.2. Tumble Drying with a Dryer Sheet

If air drying is not feasible or time-efficient, using a dryer can be a suitable alternative. To minimize wrinkles, add a dryer sheet to the dryer with your clothes. The sheet helps reduce static cling and eases the fabric’s movement, preventing excessive wrinkling.


2.3. Shake Out Clothes Before Drying

Before placing your clothes in the dryer, give them a gentle shake to remove any excess water and smooth out any minor wrinkles. This simple action can make a significant difference in the final result.


Steamers and Steam Refresh Cycles

3.1. Handheld Steamers

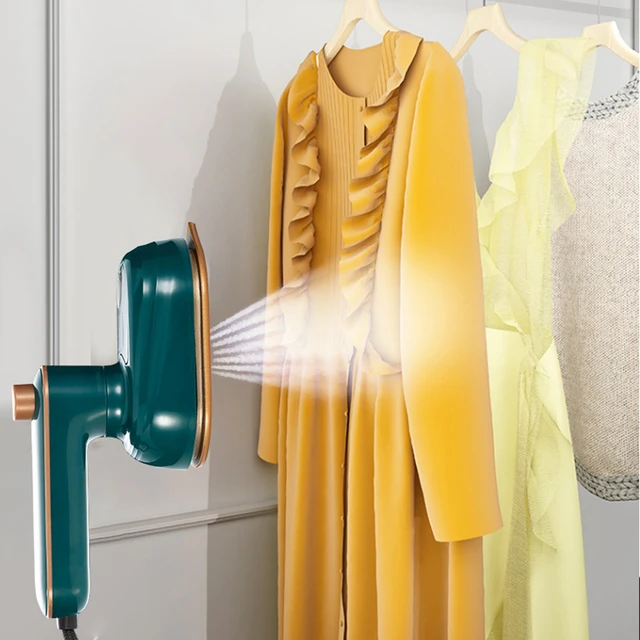
Handheld steamers are a convenient and efficient way to remove wrinkles from your clothing. Simply hang the garment, direct the steamer towards the fabric, and gently glide it across the surface. The steam relaxes the fibers, releasing wrinkles and leaving you with smooth, fresh-looking clothing.


3.2. Garment Steamers

Garment steamers are larger steam-producing devices designed specifically for removing wrinkles from clothing. They offer a more powerful stream of steam and are ideal for steaming multiple garments or larger items like suits and dresses.


3.3. Steam Refresh Cycles on Dryers

Many modern dryers now include a steam refresh cycle. This feature uses steam to freshen and de-wrinkle clothing. Simply place your clothes in the dryer, select the steam refresh cycle, and let the machine do the work. This option is quick, efficient, and requires minimal effort on your part.


Wrinkle-Release Sprays

4.1. How Wrinkle-Release Sprays Work

Wrinkle-release sprays are convenient products that relax fabric fibers, making it easier to remove wrinkles without the need for ironing. These sprays typically contain a mixture of water, fabric softener, and mild conditioning agents.


4.2. Application Process

To use a wrinkle-release spray, lightly mist the garment with the spray, focusing on the wrinkled areas. Then, gently tug and smooth the fabric with your hands to help release the wrinkles. Hang the garment to air dry, and you’ll be left with a refreshed and wrinkle-free piece of clothing.


Folding Techniques

5.1. Folding Immediately After Drying

After your clothes have dried, fold them promptly to prevent wrinkles from setting in. Smooth out any wrinkles with your hands as you fold, paying extra attention to collar areas and sleeves.


5.2. Rolling Method

For items like t-shirts or casual tops, consider using the rolling method. Lay the garment flat on a clean surface, smooth out any wrinkles, and tightly roll it from the bottom to the top. This technique helps minimize the appearance of wrinkles and keeps your clothes compact and organized.


5.3. Layering Folded Clothes

When storing folded clothes, consider layering them with tissue paper or dryer sheets between each item. The paper or sheets act as a barrier, reducing friction and preventing wrinkles from forming during storage.


Choosing Wrinkle-Resistant Fabrics

6.1. Natural Wrinkle-Resistant Fabrics

Certain fabrics naturally resist wrinkles, making them a great choice for those looking to avoid ironing. Fabrics such as wool, cashmere, and silk are known for their wrinkle-resistant properties due to their unique fibers and textures.


6.2. Synthetic Wrinkle-Resistant Fabrics

Synthetic fabrics such as polyester, nylon, and spandex are often treated to be wrinkle-resistant. These fabrics are durable, retain their shape well, and generally require minimal ironing or steaming.


Time-Saving Tips

7.1. Plan Outfits in Advance

To save time and minimize the need for ironing, plan your outfits in advance. This allows you to select clothes that are less prone to wrinkles and ensure they are ready to wear when needed.


7.2. Hang Clothes Properly

Hang your clothes on hangers that are appropriate for their shape and size. Use padded or wide hangers for heavier items like coats or jackets to help maintain their structure and reduce the likelihood of wrinkles.


7.3. Steam While Showering

Utilize the steam generated while showering to help remove wrinkles from your clothes. Hang the garment in the bathroom, ensuring it is positioned safely away from direct water contact, and allow the steam to relax the fabric.


Conclusion


Ironing is not the only solution for achieving wrinkle-free clothing. By incorporating proper washing techniques, utilizing alternate drying methods, and embracing innovative tools and products, you can avoid the hassle of ironing while still enjoying smooth and fresh-looking clothes. From steaming and using wrinkle-release sprays to choosing wrinkle-resistant fabrics, these alternatives provide convenience, efficiency, and excellent results. By adopting these techniques and incorporating them into your laundry routine, you can enjoy the benefits of wrinkle-free clothing without the need for ironing, saving time and effort in the process.


What is the best way to clean a dirty iron?

clothes iron

Introduction

Over time, irons can accumulate dirt, residue, and grime that can affect their performance and potentially transfer onto clothing, causing stains. Cleaning your iron regularly is essential to maintain its functionality and prevent any unwanted marks on your clothes. In this guide, we will explore the best ways to clean a dirty iron using effective methods that can remove residue and restore its performance.

Understanding the Anatomy of an Iron

The Soleplate

The soleplate is the flat, heated surface that makes direct contact with your clothes. It is crucial to keep it clean because any staining or buildup will transfer to your clothing. Residue can include burnt fabric, mineral deposits, and starch, all of which can cause problems. Regularly inspecting the soleplate allows you to identify issues before they worsen. Additionally, a clean soleplate ensures better heat distribution, which can improve your ironing results. A well-maintained soleplate helps glide smoothly over fabrics and prevents snagging or tearing.

The Steam Vents

Steam vents are small holes on the soleplate that emit steam during the ironing process. If these vents become clogged, steam cannot circulate properly. This blockage can result in uneven ironing and increased fabric damage. Clogged vents may also cause water to drip onto your clothes, leaving unsightly marks. To avoid these issues, cleaning your steam iron regularly is essential. Periodically inspecting the vents ensures they remain functional, contributing to more effective ironing.

clothes iron

What is the best way to clean a dirty iron?

Method 1: Cleaning the Soleplate

The soleplate is the most critical part of the iron that comes into direct contact with fabrics. Cleaning it properly is crucial for maintaining smooth and efficient ironing. Here’s how to clean the soleplate:

1.1. Baking Soda and Water Paste Mix baking soda with a small amount of water to create a paste with a toothpaste-like consistency. Apply the paste to the soleplate and gently rub it with a soft cloth or sponge. The baking soda acts as a gentle abrasive to remove residue and stains.

1.2. White Vinegar Dampen a cloth or sponge with white vinegar. Gently wipe the soleplate, paying close attention to any areas with stubborn stains or residue. The acidity of the vinegar helps dissolve and lift the grime.

1.3. Commercial Soleplate Cleaner If the baking soda and vinegar methods do not remove all the residue, consider using a commercial soleplate cleaner. Follow the manufacturer’s instructions carefully, as each product may have specific guidelines. Typically, you will apply the cleaner to the soleplate, allowing it to sit for a specified time, and then wipe it off with a clean cloth.

1.4. Rinse and Wipe After cleaning the soleplate, rinse it with a damp cloth or sponge to remove any residue or cleaning agent. Follow up by wiping the soleplate with a clean, dry cloth to ensure it is completely dry before using the iron again.

clothes iron

Method 2: Cleaning the Steam Vents

Steam vents can become clogged with mineral deposits and residue over time, impacting the iron’s steam output. Here’s how to clean the steam vents:

2.1. White Vinegar and Water Solution Create a solution by mixing equal parts white vinegar and water. Fill the iron’s water reservoir with the solution, ensuring it is not overfilled.

2.2. Steam Function Set the iron to the highest steam setting suitable for your fabric. Hold the iron over a sink or a heat-resistant surface and press the steam button to expel the vinegar solution through the steam vents. Allow the solution to work for a few minutes, ensuring the steam vents expel the solution continuously.

2.3. Rinse and Dry Empty the vinegar solution from the water reservoir and fill it with clean water. Activate the steam function again to flush out any remaining vinegar residue. After rinsing, wipe the soleplate and steam vents with a clean cloth or sponge to remove any loosened deposits. Dry the iron completely before use.

clothes iron

Method 3: Descaling with Citric Acid

Descaling is an effective method to remove mineral deposits and scale build-up from the internal components of the iron. Citric acid, a natural cleaning agent, can be used for descaling. Here’s how:

3.1. Citric Acid and Water Solution Dissolve 1-2 tablespoons of citric acid powder in a cup of water. Stir until the citric acid is fully dissolved.

3.2. Fill the Reservoir Pour the citric acid solution into the iron’s water reservoir, ensuring it is not overfilled. Allow the solution to sit for 10-15 minutes to dissolve the mineral deposits.

3.3. Rinse and Flush Plug in the iron and set it to the highest heat setting suitable for your fabric. Hold the iron over a sink or a heat-resistant surface and activate the steam function to expel the citric acid solution through the steam vents. This helps flush out any dissolved mineral deposits. Repeat this process with clean water to ensure all traces of the citric acid solution are removed.

3.4. Wipe and Dry After rinsing, wipe the soleplate and steam vents with a clean cloth or sponge to remove any remaining residue. Ensure the iron is completely dry before storing or using it again.

clothes iron

Method 4: Removing Residue from the Exterior

The exterior of the iron can also accumulate dirt, residue, and grime, which can affect its appearance and potentially transfer onto your hands or other surfaces. Here’s how to clean the exterior of your iron:

4.1. Unplugging and Cooling the Iron Before cleaning the exterior, ensure that the iron is unplugged and has completely cooled down to prevent any accidents or burns.

4.2. Damp Cloth or Sponge Dampen a clean cloth or sponge with water. Gently wipe the exterior surfaces of the iron, including the handle and buttons. Pay attention to areas with visible dirt or residue.

4.3. Mild Soap Solution If the damp cloth or sponge alone is not sufficient, you can create a mild soap solution. Mix a small amount of mild liquid soap with water to create a soapy solution. Dip the cloth or sponge into the solution, wring out excess liquid, and gently clean the exterior surfaces of the iron.

4.4. Removing Stubborn Stains or Residue For stubborn stains or residue on the exterior, you can use a non-abrasive cleaning agent specifically designed for the material of your iron. Follow the manufacturer’s instructions carefully, apply the cleaning agent to a cloth or sponge, and gently scrub the affected areas. Be cautious not to use abrasive materials or harsh chemicals that could damage the exterior coating of the iron.

4.5. Drying the Iron After cleaning the exterior, use a clean, dry cloth to wipe away any moisture. Ensure that the iron is completely dry before storing or using it again to avoid any potential damage or malfunctions.

clothes iron

Preventative Maintenance Techniques

Regular Cleaning Schedule

Establishing a regular cleaning schedule is invaluable. Just as you take care of your laundry, your iron requires attention, too. Incorporate iron cleaning into your routine to prevent build-up from becoming an issue. After every few uses, take a few minutes to wipe down the soleplate. This simple action will keep it clean and functioning well.

In addition to surface cleaning, periodically empty the water tank to prevent mineral build-up. If you live in an area with hard water, using distilled water can significantly prolong the life of your iron. Combine these practices, and you’ll minimize the effort needed for deep cleaning in the future. By being proactive, you’ll avoid resorting to more intensive cleaning methods. Indeed, prevention is often easier than remedy.

Proper Storage Techniques

The way you store your iron also impacts its cleanliness and longevity. Always ensure it’s completely cool before putting it away. Leaving it hot or warm in an enclosed space can lead to build-up and mildew. Consider storing it upright, allowing air circulation, or using a cotton cover to protect the soleplate.

Ensure that the power cord is wrapped securely but not tightly. This prevents damage to the cord and encourages longevity. Avoid placing heavy objects on top of the iron, as this can lead to scratches or dents on the soleplate. By taking these precautions, you contribute to the overall health and cleanliness of your iron, ensuring that it serves you well for years to come.

Conclusion

Regularly cleaning your iron is crucial to maintain its performance and prevent stains on your clothes. Whether you’re cleaning the soleplate, steam vents, or descaling the internal components, using effective methods such as baking soda, white vinegar, citric acid, or commercial cleaners can restore your iron’s functionality. Remember to follow the manufacturer’s instructions and take appropriate safety precautions when using cleaning agents. By implementing these cleaning methods and practicing regular maintenance, you can keep your iron in optimal condition and enjoy wrinkle-free, stain-free clothes with ease.

How do I get the brown stuff off my iron?

Introduction

Over time, an iron can develop a build-up of brown residue, commonly referred to as “brown stuff,” on its soleplate. This residue is often a combination of mineral deposits, fabric fibers, and other substances that have adhered to the iron during use. Not only can the brown stuff affect the iron’s functionality, but it can also transfer onto clothing, potentially causing stains. In this guide, we will explore effective methods to remove the brown stuff from your iron and restore its performance and appearance.

clothes iron

How do I get the brown stuff off my iron?

Method 1: White Vinegar

White vinegar is a versatile and effective cleaning agent that can be used to remove the brown stuff from your iron. Here’s how to use it:

1.1. Preparing the Vinegar Solution Mix equal parts white vinegar and distilled water to create a solution. The distilled water helps prevent mineral deposits from the tap water from further contributing to the build-up.

1.2. Applying the Solution Turn on your iron and set it to the highest heat setting suitable for your iron’s soleplate material. Once heated, pour the vinegar solution into the iron’s water reservoir, ensuring that it is not overfilled.

1.3. Letting the Solution Work Hold the iron over a sink or a heat-resistant surface and press the steam button to expel the vinegar solution through the steam vents. Allow the solution to work for a few minutes, ensuring that the steam vents expel the solution continuously.

1.4. Emptying the Reservoir After the solution has been expelled, switch off the iron and unplug it from the power source. Empty any remaining vinegar solution from the reservoir.

1.5. Rinsing and Cleaning Fill the reservoir with clean water and repeat the steam process to rinse the iron and flush out any remaining vinegar residue. If necessary, wipe the soleplate with a clean cloth or sponge to remove any loosened brown stuff.

Method 2: Baking Soda

Baking soda is another effective natural cleaning agent that can help remove the brown stuff from your iron. Here’s how to use it:

2.1. Preparing the Baking Soda Paste Mix baking soda with a small amount of water to create a paste with a toothpaste-like consistency. The paste will act as a gentle abrasive to remove the residue.

2.2. Applying the Paste Ensure that the iron is unplugged and cool before applying the paste. Spread the baking soda paste onto the soleplate, focusing on areas with visible brown stuff. Gently rub the paste into the residue using a soft cloth or sponge.

2.3. Letting the Paste Work Allow the baking soda paste to sit on the soleplate for 15-20 minutes. This allows the paste to penetrate and loosen the brown residue.

2.4. Wiping and Rinsing After the waiting period, dampen a clean cloth or sponge with water and wipe away the baking soda paste, along with the loosened brown stuff. Rinse the cloth or sponge frequently to avoid redistributing the residue.

Method 3: Commercial Iron Cleaners

Commercial iron cleaners are specifically formulated to remove stubborn residue, including the brown stuff, from the soleplate of your iron. Follow the manufacturer’s instructions carefully when using these products, as guidelines may vary. Here’s a general overview of how to use them:

3.1. Reading the Instructions Thoroughly read and understand the instructions provided by the manufacturer of the commercial iron cleaner. Pay attention to any safety precautions and recommendations specific to your iron model.

3.2. Applying the Cleaner Apply the cleaner to the soleplate as directed. Some cleaners may require the iron to be heated, while others may work best on a cool soleplate. Follow the instructions regarding the amount of cleaner to use and the duration it should remain on the soleplate.

3.3. Wiping and Rinsing After the recommended waiting period, wipe the soleplate with a clean cloth or sponge to remove the dissolved residue. Rinse the cloth or sponge frequently to prevent re-depositing the residue. Follow up with a clean, damp cloth to remove any remaining cleaner residue.

Preventive Measures: Avoiding Future Build-Up

To minimize the chances of the brown stuff returning on your iron, consider the following preventive measures:

4.1. Use Distilled or Filtered Water Using distilled or filtered water in your iron helps reduce the mineral content that contributes to the build-up of residue. This is especially important if you live in an area with hard water.

4.2. Regular Cleaning Incorporate regular cleaning of your iron into your maintenance routine. This can include wiping the soleplate with a damp cloth after each use or periodically using the vinegar or baking soda methods mentioned earlier.

4.3. Proper Ironing Techniques Practicing proper ironing techniques can help prevent excessive residue build-up. Use the appropriate heat settings for different fabrics, avoid ironing over sticky substances, and ensure the iron is clean before each use.

Conclusion

Removing the brown stuff from your iron is essential to maintain its performance and prevent stains on your clothing. Whether using white vinegar, baking soda, commercial iron cleaners, or a combination of methods, these effective techniques can help eliminate stubborn residue and restore the soleplate of your iron. It is also important to implement preventive measures, such as using distilled or filtered water and regular cleaning, to avoid future build-up. By following these steps, you can enjoy an efficient and residue-free iron, ensuring your clothes look clean, crisp, and freshly pressed.

Can an electric iron remove iron stains from clothes?

clothes iron

Introduction

Iron stains on clothes, caused by accidental contact with a hot iron or rust from metal fixtures, can be stubborn and difficult to remove. While an electric iron is not specifically designed to remove iron stains, it can indirectly help in treating such stains. In this guide, we will explore how an electric iron can assist in removing iron stains from clothes and provide additional methods to effectively treat these stains.

clothes iron

Can an electric iron remove iron stains from clothes?

Using an Electric Iron: Steam and Heat

Steam Function The steam function on an electric iron can be useful in treating iron stains on clothes. Here’s how to use it effectively:

1.1. Pre-Treat the Stain Before using the iron, pre-treat the iron stain using stain-removing techniques such as applying lemon juice, vinegar, or a commercial rust remover directly onto the stain. Gently blot the stain with a clean cloth to lift any excess residue.

1.2. Set the Iron Set the electric iron to a steam setting. Ensure that the water reservoir is filled with clean water as per the manufacturer’s instructions.

1.3. Steam the Stain Hover the iron a few inches above the stained area and activate the steam function. Allow the steam to penetrate the fabric and loosen the stain. Gently press the steam button while moving the iron back and forth over the stain.

1.4. Blot the Stain After steaming, immediately blot the stain with a clean cloth or paper towel. This will help absorb any loosened residue or moisture from the fabric.

1.5. Repeat as Necessary Repeat the steam and blotting process as necessary until the stain is significantly reduced or eliminated. Remember to follow the manufacturer’s instructions for using the steam function on your specific iron model.

Heat Transfer Technique Another indirect method using an electric iron involves transferring the stain from the fabric to another material. Here’s how to do it:

2.1. Preheat the Iron Set the electric iron to a low or medium heat setting and preheat it according to the fabric type and ironing instructions.

2.2. Protecting Material Place a clean white cloth or paper towel over the stained area. This cloth will act as a protective barrier between the iron and the stain.

2.3. Iron Over the Cloth Gently iron over the cloth, applying light pressure and moving the iron in a back-and-forth motion. The heat from the iron will help transfer the stain from the fabric to the cloth.

2.4. Check and Repeat Check the cloth regularly to monitor the transfer of the stain. If necessary, reposition the cloth to expose a clean area and continue ironing until no further transfer is visible.

Alternative Methods for Treating Iron Stains

While an electric iron can indirectly assist in removing iron stains, additional methods can be used to treat such stains effectively:

Lemon Juice and Salt Create a paste by mixing equal parts lemon juice and salt. Apply the paste directly to the stain and gently rub it into the fabric. Allow the paste to sit for 15-30 minutes before rinsing the garment with cold water and laundering as usual.

Vinegar Mix equal parts water and white vinegar to create a solution. Submerge the stained portion of the fabric in the vinegar solution for approximately 30 minutes to 1 hour. Rinse the fabric with cold water and launder as usual to remove any residual vinegar smell.

Oxalic Acid-Based Cleaners Products like Bar Keepers Friend or Iron Out, containing oxalic acid, can effectively treat rust and iron stains. Follow the instructions provided by the manufacturer, apply the cleaner directly to the stain, and rinse the fabric thoroughly after the recommended contact time.

Commercial Rust Removers Several commercial rust removers are specifically formulated to remove difficult stains. Read and follow the instructions on the product packaging, apply the rust remover directly to the stain, and rinse the fabric thoroughly after the specified time.

Seek Professional Help If the iron stain persists despite your efforts, consider taking the garment to a professional cleaner. Professional cleaners have specialized stain-removing techniques and equipment that can effectively treat stubborn iron stains.

Iron stains on giant squishmallows can also be tried to be removed with these methods.

Conclusion

While an electric iron is not designed specifically to remove iron stains, it can indirectly assist in the treatment process. Utilizing the steam function or the heat transfer technique can help loosen and remove stains. However, it is important to remember that these methods may not completely eliminate the stain in some cases. Employing additional stain-removing techniques such as using lemon juice, vinegar, oxalic acid-based cleaners, or commercial rust removers can provide further assistance in treating iron stains effectively. If the stain persists, consider seeking professional help from a cleaner experienced in stain removal. By combining these methods, you can increase your chances of successfully removing iron stains from your clothes and restoring their original appearance.

How to remove iron stains from clothes?

clothes iron

Introduction

Iron stains on clothes can be a frustrating and unsightly issue. Whether caused by an iron accidentally touching the fabric or rust from water or metal fixtures, these stains can be stubborn to remove. However, with the right techniques, you can effectively eliminate iron stains and restore your clothes to their original condition. In this guide, we will explore several methods to remove iron stains from clothes and help you achieve clean and stain-free garments.

clothes iron

How to remove iron stains from clothes?

Method 1: Lemon Juice and Salt

Lemon juice and salt are commonly used as natural cleaning agents and can be effective in treating iron stains. Here’s how to use them:

1.1. Create a Paste Mix equal parts lemon juice and salt to form a paste. The lemon juice acts as a natural bleaching agent, while the salt works as an abrasive to help lift the stain.

1.2. Apply the Paste Apply the paste directly to the iron stain, ensuring it covers the entire affected area. Gently rub the paste into the fabric using your fingers or a soft brush.

1.3. Let it Sit Allow the paste to sit on the stain for approximately 15-30 minutes. This gives the lemon juice and salt time to penetrate the fabric and break down the iron stain.

1.4. Rinse and Launder After the waiting period, rinse the fabric thoroughly with cold water. Launder the garment as usual to remove any remaining residue and ensure the stain is completely eliminated.

Method 2: Vinegar

Vinegar is a versatile cleaning agent that can help remove iron stains from clothes. Here’s how to use it effectively:

2.1. Create a Vinegar Solution Mix equal parts water and white vinegar to create a solution. Vinegar contains acetic acid, which can help dissolve and remove iron stains.

2.2. Soak the Garment Submerge the stained portion of the fabric in the vinegar solution. Allow it to soak for approximately 30 minutes to 1 hour. For more stubborn stains, you can extend the soaking time.

2.3. Rinse and Launder After soaking, rinse the fabric thoroughly with cold water. Launder the garment as usual to remove any residual vinegar smell and ensure the stain is completely eliminated.

Method 3: Oxalic Acid-Based Cleaners

Oxalic acid-based cleaners, such as Bar Keepers Friend or Iron Out, are specifically formulated to remove rust and iron stains. Here’s how to use them:

3.1. Read and Follow Instructions Carefully read and follow the instructions on the product packaging. Different brands may have specific guidelines for usage and safety precautions.

3.2. Apply the Cleaner Apply the oxalic acid-based cleaner directly to the iron stain, ensuring it covers the entire affected area. Use a soft brush or cloth to gently work the cleaner into the fabric.

3.3. Let it Sit Allow the cleaner to sit on the stain for the recommended amount of time specified on the product packaging. This allows the cleaner to penetrate the fabric and dissolve the iron stain.

3.4. Rinse and Launder After the waiting period, rinse the fabric thoroughly with cold water. Launder the garment as usual to remove any remaining residue and ensure the stain is completely eliminated.

Method 4: Lemon Juice and Sunlight

The combination of lemon juice and sunlight can be effective in treating iron stains. Here’s how to use this method:

4.1. Apply Lemon Juice Saturate the iron stain with lemon juice. You can either squeeze fresh lemon juice directly onto the stain or use a cloth soaked in lemon juice.

4.2. Expose to Sunlight Place the garment in direct sunlight, ensuring that the stained portion is exposed. The combination of lemon juice and sunlight acts as a natural bleaching agent and can help fade the iron stain.

4.3. Rinse and Launder After a few hours of sun exposure, rinse the fabric thoroughly with cold water. Launder the garment as usual to remove any residual lemon juice and ensure the stain is completely eliminated.

Method 5: Commercial Rust Removers

Commercial rust removers, such as those containing oxalic acid or hydrogen peroxide, can be effective in treating iron stains. Here’s how to use them:

5.1. Read and Follow Instructions Carefully read and follow the instructions on the product packaging. Different brands may have specific guidelines for usage and safety precautions.

5.2. Apply the Rust Remover Apply the rust remover directly to the iron stain, ensuring it covers the entire affected area. Use a soft brush or cloth to gently work the remover into the fabric.

5.3. Let it Sit Allow the rust remover to sit on the stain for the recommended amount of time specified on the product packaging. This allows the remover to penetrate the fabric and dissolve the iron stain.

5.4. Rinse and Launder After the waiting period, rinse the fabric thoroughly with cold water. Launder the garment as usual to remove any remaining residue and ensure the stain is completely eliminated.

Conclusion

Dealing with iron stains on clothes can be challenging, but with the right techniques, you can successfully remove them and restore your garments to their original condition. Whether using natural remedies such as lemon juice and salt or vinegar, or opting for commercial rust removers, each method offers its own effectiveness in treating iron stains. Remember to always read and follow the instructions provided by the product manufacturer and exercise caution when working with cleaning agents. By utilizing these methods, you can confidently tackle iron stains and enjoy clean, stain-free clothes once again.

How can I Unwrinkle my shirt fast?

clothes iron

Introduction

Discovering wrinkles on your shirt can be a frustrating experience, especially when you’re short on time. Fortunately, there are several fast and effective methods to unwrinkle your shirt and have it looking crisp and presentable. In this guide, we will explore various techniques about how to unwrinkle clothes fast, which you will know how to quickly unwrinkle a shirt, ensuring you look your best in no time.

clothes iron

Understanding the Causes of Wrinkles

Why Wrinkles Form

Wrinkles form due to various factors. Fabrics react to pressure and tension, creating creases over time. When clothing is crammed into closets or drawers, stress builds up. Additionally, when shirts are washed and dried, they tend to ball up. This friction contributes to increased wrinkling. Thus, it’s important to understand the reasons behind these pesky creases.

The Impact of Fabric Types

Different fabrics react to wrinkling in unique ways. Natural fibers like cotton and linen are more prone to wrinkles. Synthetic fabrics, on the other hand, tend to resist wrinkles better. However, that doesn’t mean these materials are wrinkle-proof. Even polyester can develop unsightly creases after heavy use. Wrinkle-resistant materials offer some advantages, but even they need care. Knowing which materials wrinkle more can aid in prevention.

How can I Unwrinkle shirt fast?

Following the methods of how to unwrinkle a shirt fast:

Method 1: Steam it Out

Using steam is a highly effective way to relax fabric fibers and eliminate wrinkles. Here are a few methods to quickly create steam:

1.1. Hot Shower Method Hang your shirt near the bathroom while taking a hot shower. The steam created in the enclosed space will help loosen the wrinkles. After your shower, gently smooth out the fabric with your hands or shake the garment to help release any remaining wrinkles.

1.2. Kettle or Pot Method Boil water in a kettle or pot and carefully hold your shirt over the steam. Be cautious not to get too close to the hot water or let it touch the fabric directly. Allow the steam to penetrate the fabric, and then use your hands to gently smooth out the wrinkles.

1.3. Steamer Investing in a handheld steamer can provide a convenient and efficient way to remove wrinkles. Fill the steamer with water according to the manufacturer’s instructions and hold it a few inches away from the fabric. Move the steamer slowly across the shirt, allowing the steam to penetrate and relax the wrinkles. Gently tug on the fabric to help further smooth out the wrinkles.

Method 2: Damp Towel Method

Utilizing a damp towel can create steam and help relax fabric fibers to remove wrinkles. Here’s how to do it:

2.1. Dampen the Towel Dampen a clean towel with water. Wring it out to remove any excess moisture, ensuring it is damp but not soaking wet.

2.2. Place the Towel Lay the damp towel on a flat surface, such as a table or countertop, and smooth out any wrinkles on the towel itself.

2.3. Lay the Shirt Place your wrinkled shirt on top of the damp towel, aligning it with the towel’s surface.

2.4. Smooth and Roll Starting from one end, gently smooth out the fabric of your shirt with your hands, removing any visible wrinkles. Once smooth, roll the shirt and the towel together, creating a cylinder-like shape.

2.5. Let it Sit Allow the rolled shirt to sit for at least 10-15 minutes. The moisture from the damp towel will help create steam and relax the fabric, reducing the wrinkles.

2.6. Unroll and Shake After the waiting period, carefully unroll the shirt from the towel. Give it a gentle shake to further loosen the wrinkles. If needed, use your hands to smooth out any remaining wrinkles.

Method 3: Blow-Dryer Technique

Using a blow-dryer can provide a quick solution to unwrinkle your shirt. Here’s how to use this method effectively:

3.1. Dampen the Shirt Lightly mist the wrinkled areas of your shirt with water using a spray bottle. The moisture will help relax the fabric and make it more pliable.

3.2. Set the Blow-Dryer Set your blow-dryer to medium heat and choose the “warm” or “low” setting to avoid damaging the fabric with excessive heat.

3.3. Blow-Dry the Shirt Hold the blow-dryer a few inches away from the fabric and move it back and forth over the wrinkled areas. Gently tug on the fabric while blow-drying to help smooth out the wrinkles. Be cautious not to hold the blow-dryer too close or concentrate the heat on one spot for too long to prevent overheating.

Method 4: Steam in the Bathroom

This method utilizes steam generated by a hot shower to remove wrinkles from your shirt quickly:

4.1. Hang the Shirt Hang your shirt in the bathroom while you take a hot shower. The steam generated in the enclosed space will help relax the fabric and release the wrinkles.

4.2. Shake and Smooth After your shower, gently shake your shirt and smooth out the fabric with your hands. This will help further release the wrinkles.

Method 5: Use Your Hands to Smooth Out Wrinkles

Sometimes, manually smoothing out wrinkles with your hands can be a quick solution. Here’s how to do it:

5.1. Mist the Shirt Lightly mist the wrinkled areas of your shirt with water using a spray bottle. The moisture will make the fabric more pliable and easier to work with.

5.2. Gently Stretch and Smooth Hold the shirt taut and gently stretch and pull the fabric in different directions. Smooth out the wrinkles using your hands, focusing on one area at a time. Repeat this process until the wrinkles are minimized or eliminated.

Preventing Wrinkles for the Future

Proper Washing Techniques

Avoiding wrinkles in the first place is often possible through proper washing practices. Always follow the care label instructions for your shirt. Use cold water to prevent shrinking and wrinkling. When drying, use a low heat setting to minimize fabric stress. Alternatively, air-drying can also reduce wrinkle occurrence. This keeps your shirt looking fresh for longer.

Hanging After Laundry

Once your laundry is done, hang your shirts promptly. Hanging clothes helps gravity to pull out wrinkles naturally. If you don’t have time to iron, simply hang your shirt on a hanger. Leaving it hanging for a while can help reduce creases without any extra effort. Make sure to use sturdy hangers that offer support.

Storing Clothes Correctly

The way you store your shirts can impact wrinkling too. Opt for hanging rather than folding whenever possible. Store tightly packed shirts more loosely if you can. Avoid overstuffing drawers and closets, as this can cause pressure on the fabric. This mindful approach can help maintain the integrity of your clothing.

Cleaning Your Shirt

Follow Care Instructions

Always read and follow care instructions on your clothing labels. Mismanagement can lead to irreversible damage. Washing your shirt at the right temperature can aid in maintaining its structure. And remember, proper drying is equally important. Be cautious when using dryers, as they can cause further wrinkles.

Avoid Overdrying

Overdrying your shirts can contribute to wrinkles. Ensure you remove them promptly from the dryer. Allow your shirts to air dry when possible. If using fabric softeners, make sure they are suitable for your shirt’s fabric. This practice can help keep your clothes looking fresh and smooth.

When to Seek Professional Help

Knowing When to Iron

In certain situations, it’s best to seek professional help. If a shirt is heavily wrinkled or made of delicate material, consider dry cleaning. Sometimes, an expert can restore the garment better than at-home methods. This ensures beams of cleanliness that your shirt deserves. It’s good to know your limits, especially for investment pieces.

Assessing Fabric Care Labels

Always read the care labels before attempting to unwind wrinkles. Each fabric type has its own set of instructions. If the label says “dry clean only,” stick to professional services. Ignoring care instructions can lead to damage or discoloration. It’s crucial to respect your clothing to maintain its longevity.

Scheduling Time for Repairs

Sometimes shirts may require more than unwrinkling. Assess for any minor tears or buttons that need replacement. Creating a habit of looking after your wardrobe can save you hassle down the road. Make a note to schedule repairs as necessary. This proactive approach will keep your favorite shirts looking good for longer.

Conclusion

Discovering wrinkles on your shirt doesn’t have to be a cause for panic or a reason to be late. With these quick and effective methods, you can unwrinkle your shirt in no time. Whether using steam from a hot shower, a kettle, or a steamer, or utilizing techniques such as the damp towel method, blow-drying, or manually smoothing out wrinkles with your hands, you have various options to quickly restore the crisp and presentable appearance of your shirt. Experiment with these techniques to find the method that works best for you and ensure you always look your best, even when time is of the essence.

How to get wrinkles out of clothes without iron?

clothes iron

Introduction

Wrinkles can be a source of frustration when it comes to clothing, but not everyone has access to an iron or the time to use one. Fortunately, there are alternative methods to remove wrinkles from clothes without an iron. In this guide, we will explore various techniques and tools that can help smooth out wrinkles and restore the appearance of your garments.

clothes iron

How to get wrinkles out of clothes without iron?

Method 1: Steam It Out

Steam is an effective way to relax fabric fibers and eliminate wrinkles. Here are a few methods to create steam without an iron:

1.1. Shower Steam Hang your wrinkled clothing in the bathroom while you take a hot shower. The steam generated in the enclosed space will help loosen the wrinkles. After your shower, gently smooth out the fabric with your hands or shake the garment to help release the wrinkles.

1.2. Kettle or Pot Method Boil water in a kettle or pot and carefully hold the wrinkled garment over the steam. Be cautious not to get too close to the hot water or let it touch the fabric directly. Allow the steam to penetrate the fabric, and then use your hands to smooth out the wrinkles.

1.3. Steamer Investing in a handheld steamer can provide a convenient and effective way to remove wrinkles. Fill the steamer with water according to the manufacturer’s instructions, and then hold it a few inches away from the fabric. Move the steamer slowly across the fabric, allowing the steam to evenly penetrate and relax the wrinkles. Gently tug on the fabric to help smooth out the wrinkles further.

Method 2: Hang and Smooth

Properly hanging clothes can prevent or minimize wrinkles. Here are some tips:

2.1. Use Hangers Using hangers that match the shape of the garment, such as padded or contoured hangers for delicate items, can help maintain the garment’s structure and prevent wrinkles.

2.2. Hang Immediately Hang clothes immediately after washing or drying them. This prevents the fabric from compressing and settling in a wrinkled position.

2.3. Gravity-Assisted Hanging For heavier garments, such as jackets or coats, hang them upside down by the hemline. Gravity will help pull out some of the wrinkles naturally.

Method 3: Utilize Damp Towel Method

Using a damp towel can create steam and help relax fabric fibers to remove wrinkles. Here’s how to do it:

3.1. Dampen the Towel Dampen a clean towel with water. Wring it out to remove any excess moisture, making sure it is damp but not soaking wet.

3.2. Place the Towel Lay the damp towel on a flat surface, such as a table or countertop. Smooth out any wrinkles on the towel itself.

3.3. Lay the Garment Place the wrinkled garment on top of the damp towel, aligning it with the towel’s surface.

3.4. Smooth and Roll Starting from one end, gently smooth out the fabric of the garment with your hands, removing any visible wrinkles. Once smooth, roll the garment and the towel together, creating a cylinder-like shape.

3.5. Let it Sit Allow the rolled garment to sit for at least 20-30 minutes. The moisture from the damp towel will help relax the fabric and release the wrinkles.

3.6. Unroll and Shake After the waiting period, carefully unroll the garment from the towel. Give it a gentle shake to further loosen the wrinkles. If needed, you can also use your hands to smooth out any remaining wrinkles.

Method 4: Use a Hairdryer

A hairdryer can be a helpful tool in removing wrinkles from clothes. Here’s how to utilize it:

4.1. Dampen the Garment Lightly mist the wrinkled areas of the garment with water using a spray bottle. The moisture will help relax the fabric.

4.2. Set the Hairdryer Set the hairdryer to medium heat or the “warm” setting to avoid damaging the fabric with excessive heat.

4.3. Use the Hairdryer Hold the hairdryer a few inches away from the fabric and move it back and forth over the wrinkled areas. Gently tug on the fabric while blow-drying to help smooth out the wrinkles. Be cautious not to hold the hairdryer too close or concentrate the heat on one spot for too long to prevent overheating.

Method 5: Use Your Hands to Smooth Out Wrinkles

Sometimes, simply using your hands can help smooth out minor wrinkles. Here’s how to do it:

5.1. Mist the Garment Lightly mist the wrinkled areas of the garment with water using a spray bottle. The moisture will make the fabric more pliable and easier to work with.

5.2. Gently Stretch and Pull Hold the garment taut and gently stretch and pull the fabric in different directions. Smooth out the wrinkles using your hands, focusing on one area at a time. Repeat this process until the wrinkles are minimized or eliminated.

Conclusion

Not having access to an iron doesn’t mean you have to settle for wrinkled clothes. By utilizing alternative methods such as steam, proper hanging techniques, damp towels, hairdryers, and your own hands, you can effectively remove wrinkles from your garments. Experiment with these techniques to find the method that works best for you and restore the smooth and polished appearance of your clothes, keeping you looking sharp and wrinkle-free.