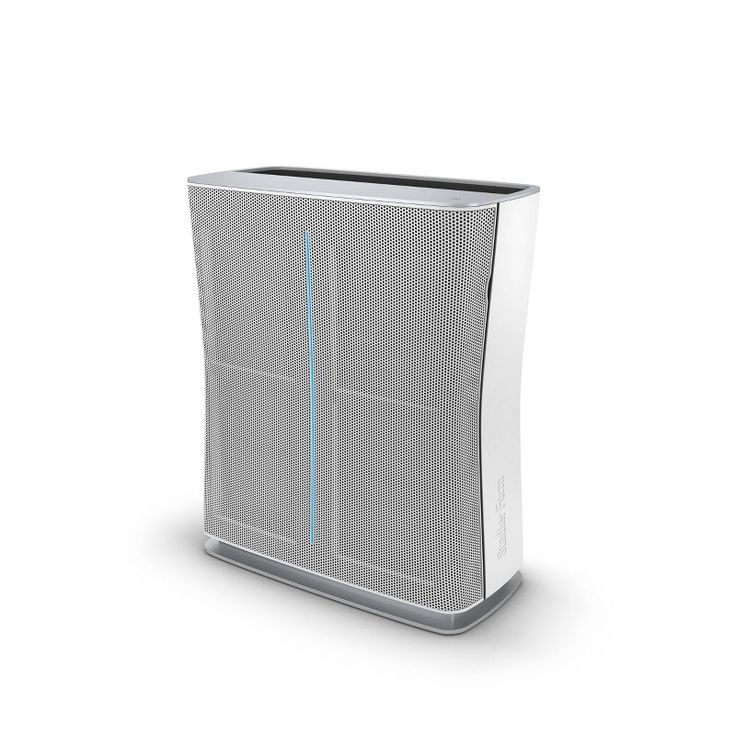
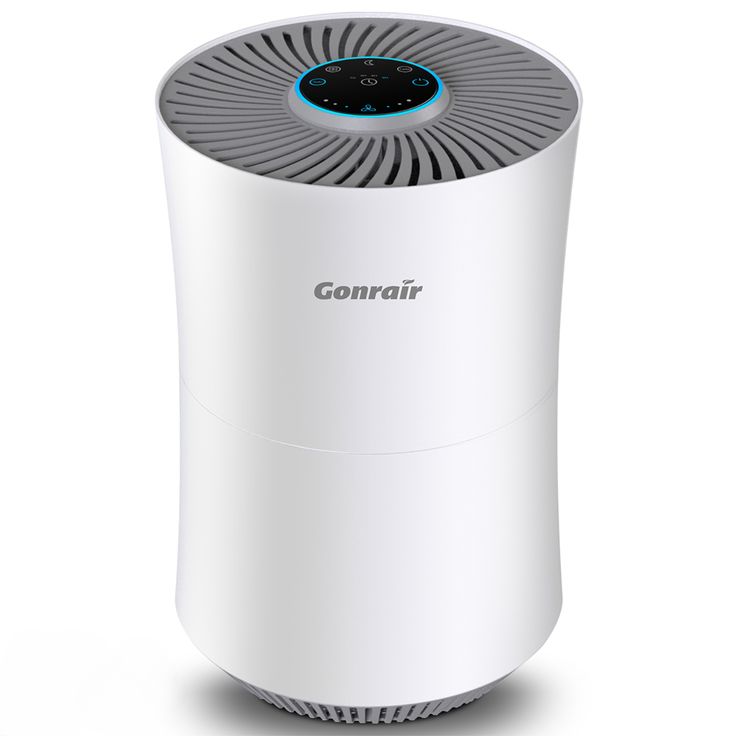
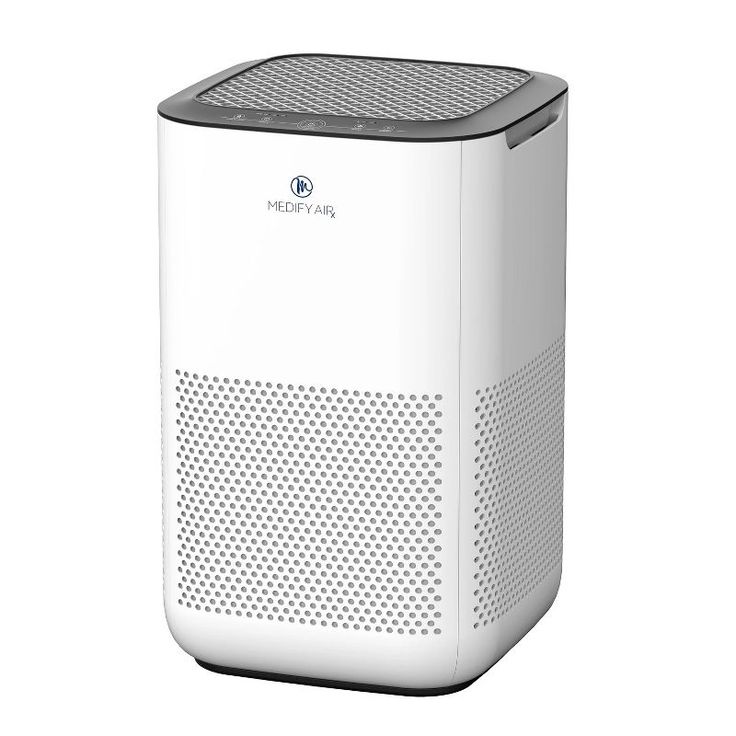
Removing iron stains from clothes: Your Clothes Rescue Guide

removing iron stains

Identifying Iron Stains on Fabric

Learning to identify iron stains on your garments is the first step toward removal. Iron stains can look different depending on the fabric. They often appear as yellow, brown, or rusty spots. Unlike other marks, these stains may have a distinct metallic scent. This is because the iron reacts with the fabric fibers, causing discoloration.

To spot iron stains, look for patches that stand out against the color of your clothing. High-iron water often causes stains after washing. If you find a stain post-laundry, iron could be the culprit. Check areas often in contact with water, like cuffs and hems. These are likely spots for iron stains to show.

Sometimes, iron stains are faint and could be missed. Inspect your clothes in good light to catch any subtle discolorations. Touch the area to feel for any hard or crusty surfaces. This roughness can signal an iron stain setting into the fabric.

Remember these tips when checking for iron stains:

  • Examine the stain’s color; yellow, brown, or rusty tones are common.
  • Smell the stain for a metallic odor, indicating iron.
  • Inspect your clothes post-wash for any new stains.
  • Look at high-contact water areas like cuffs and hems.
  • Use bright light to notice faint stains.

By correctly identifying iron stains, you’re on your way to effectively removing iron stains from clothes.

removing iron stains

The Science Behind Iron Stains and Fabric

Understanding the science helps in removing iron stains from clothes effectively. Iron stains occur when iron particles, often from hard water, cling to fabric. Over time, these particles can react with the air and oxidize. This oxidation process creates the typical rust color that we see as a stain.

Two elements are usually at play in the formation of iron stains on fabric:

  • Iron Particles: These come from iron-rich water sources and can deposit on clothes during washing.
  • Oxidation: Exposure to oxygen in the air can convert iron to rust, leaving a stain.

The fabric type also influences how the stain appears and how tough it is to remove. Natural fibers like cotton and linen absorb iron quickly, making stains more noticeable. Synthetics may resist staining better but can still suffer from discolored patches.

The key to removing iron stains is to act fast. The longer the iron sits on the fabric, the more it bonds with the fibers. This makes the stain harder to remove. Also, high heat can set the stain, so avoid using a hot iron or dryer until the stain is gone.

With the right understanding and methods, you can tackle iron stains successfully. The next section will guide you through the pre-treatment tips for iron-stained clothing.

Pre-Treatment Tips for Iron-Stained Clothing

Before attempting to remove iron stains from clothes, pre-treat the fabric to loosen the iron particles. This initial step can greatly enhance the success of stain removal. Here are some essential pre-treatment tips:

  • Act Quickly: Deal with the stain as soon as possible to prevent the iron from bonding strongly with the fabric.
  • Do Not Apply Heat: Keep the garment away from hot irons and dryers. Heat can set the stain, making it more difficult to remove.
  • Rinse with Cold Water: Flush out as much of the stain as you can by rinsing the affected area thoroughly with cold water.
  • Test Fabric Compatibility: Before you apply any stain removal solution, test it on a small, inconspicuous area of the fabric to ensure it won’t cause damage.
  • Gentle Rubbing: If the fabric allows, gently rub the stained area between your fingers to break up the iron particles.
  • Avoid Bleach: Bleaching agents can react with iron and worsen the stain, so steer clear of bleach when dealing with iron stains.

By carefully pre-treating the garment, you pave the way for easier and more effective methods of removing iron stains from clothes.

removing iron stains

Home Remedies for Removing Iron Stains

After pre-treating your iron-stained clothing, you can try various home remedies to remove the stains. Here are some effective, easy-to-prepare solutions you can use:

  • Lemon Juice and Salt: Squeeze fresh lemon juice onto the stain, sprinkle with table salt, and place the garment in sunlight. The acid in the lemon juice can break down the iron, while the sun helps to lift the stain from the fabric.
  • White Vinegar: Apply white vinegar directly to the stain and gently rub it in. Let it sit for a few minutes before rinsing thoroughly. Vinegar’s acidic properties can dissolve iron particles.
  • Baking Soda Paste: Mix baking soda with a little water to form a paste. Spread this over the stain and lightly rub. After letting it sit for an hour, rinse off the baking soda. It’s known to be gentle yet effective in removing stains.
  • Cream of Tartar: Boil the stained part of the fabric in a solution of cream of tartar and water. The cream of tartar has a mild acid that can help in removing the iron stain.

Always remember to rinse the area well with cold water after any treatment and repeat the process if necessary. For tougher stains, you might need to consider stronger commercial products or seek professional advice.

Trying these home remedies for removing iron stains from clothes could save your favorite outfits from being ruined by unsightly marks. Each method is simple and uses products commonly found in many households.

Commercial Products to Treat Iron Stains

For persistent or severe iron stains, commercial products can be effective. These products are formulated to combat tough stains, including those caused by iron. When choosing a commercial stain remover, look for options specifically designed for iron stains. They typically contain ingredients that react with iron to dissolve and lift it from the fabric.

Start by reading the instructions carefully. Different products may have different application methods. Some require you to apply the product directly to the stain, while others may instruct you to add it to your wash. Always follow the guidelines for the best results.

Here are a few types of commercial products that can aid in removing iron stains from clothes:

  • Stain Remover Sprays: Spray directly onto the stain, let it sit for a few minutes, then wash as usual.
  • Rust Removers: These are formulated to target rust and may be more potent. Use them with care.
  • Laundry Boosters: Add these to your laundry to help break down iron particles during the wash cycle.
  • Pre-Soak Treatments: Soak the stained garment in these solutions before washing to loosen the iron stains.

Always test any product on an inconspicuous area first to ensure it does not damage the fabric. Avoid using chlorine bleach as it can react with iron, worsening the stain. Opt for oxygen-based bleaches if a bleaching agent is needed.

Be patient; some stains may need multiple treatments. If a stain persists after using commercial products, you may need to seek professional cleaning assistance.

Selecting the right commercial product and following the application instructions can help you restore your clothes to their former glory, free from iron stains.

Step-by-Step Guide to Removing Iron Stains

Removing iron stains from clothes requires a careful approach. Here’s a simple guide to follow:

  1. Pre-Treat the Fabric: Quickly act on the stain by rinsing it with cold water. Avoid heat as it sets the stain.
  2. Apply a Home Remedy: Use lemon juice and salt, white vinegar, baking soda paste, or cream of tartar. These substances break down the iron.
  3. Expose to Sunlight: If you’ve used lemon juice and salt, lay the garment in the sun. Sunlight aids the stain removal process.
  4. Rinse Well: After treatment, rinse the fabric thoroughly with cold water to remove any residue of the cleaning agents.
  5. Repeat if Needed: Some stains may need a second or third treatment. Check and treat again if the stain remains.
  6. Use a Commercial Product: For tough stains, apply a commercial stain remover designed for iron stains. Follow the product’s instructions.
  7. Laundry Time: Wash the garment as usual, but avoid using chlorine bleach. Consider oxygen-based bleach if needed.
  8. Check Before Drying: Before putting the garment in the dryer, ensure the stain is gone. Heat can set any remaining stain.
  9. Test Fabric First: Always try the remedy on a small part of the fabric first. This is to avoid damage to the fabric.

Remember, patience is key. Some stains take time to lift, and following these steps can save your clothes from iron stains.

removing iron stains

Preventing Future Iron Stains on Clothes

Preventing iron stains on your clothes can save you time and protect your garments. Here are some steps to help avoid future iron stains:

  • Use Distilled Water: If hard water is the issue, switch to distilled water for laundry. It can prevent iron deposits.
  • Install a Water Softener: A water softener reduces iron in your water supply. This can stop stains before they start.
  • Separate Whites and Colors: Wash white garments separately. This guards against iron stains transferring during the wash.
  • Regularly Clean Your Iron: Keep your iron free of rust by cleaning it often. A dirty iron can cause stains.
  • Check for Leaks: Inspect pipes and taps for leaks that can leave iron-rich water on clothes.
  • Dry Clothes Immediately: Don’t leave wet clothes sitting. Dry them right away to avoid rust marks from metal hangers.
  • Use Rust Stain Prevention Products: Add these to your wash to help protect clothes from iron stains.

By following these tips, you can reduce the risk of iron stains on your clothes. This makes your laundry routine easier and keeps your clothes looking their best.

When to Seek Professional Cleaning Assistance

Even with home remedies and commercial products, some iron stains won’t come out. This is when you might need professional help. Look for these signs that it’s time to seek a professional cleaner:

  • Stain Remains After Multiple Treatments: If a stain doesn’t fade after several attempts, professionals may have stronger tools at hand.
  • Delicate Fabrics: Materials like silk or wool might need expert care to avoid damage.
  • Large or Spread-out Stains: Professionals can handle big stains or those that have spread over a large area.
  • You’re Unsure: If you don’t know how to handle the stain, a professional can offer the right solution.
  • Value and Sentiment: For clothes that are expensive or have sentimental value, taking risks isn’t worth it. Trust them to the experts instead.

Cleaners with specialist knowledge in removing iron stains from clothes have access to industrial-grade solutions. They understand fabric types and how to treat them without causing harm. Their experience means they can remove stains that seem stubborn at home. Getting their help can extend the life of your clothes and save you time. Remember, always check the cleaner’s credentials and reviews before handing over your clothes.

Mastering Goodwill Vacuum Selection: Tips & Tricks

Goodwill Vacuum Selection

The Importance of Choosing the Right Goodwill Vacuum

Choosing the right goodwill vacuum is crucial. It affects cleaning efficiency, ease of use, and longevity. With the right vacuum, you can ensure your home remains spotless. A poor choice may leave you with a machine that struggles with your cleaning needs. When selecting a goodwill vacuum, you must consider various factors. These include your home’s size, flooring type, and any specific cleaning requirements. For those with allergies, a vacuum with a HEPA filter is a must-have. If you have pets, look for vacuums designed to tackle pet hair and dander. The right vacuum can also reduce the time you spend cleaning. It can reach tight spaces and work on multiple surfaces without hassle. Durability is another benefit of choosing wisely. Goodwill vacuums built with quality materials last longer and save you money over time. Convenience is also essential. Lightweight and maneuverable models make vacuuming less of a chore. Remember, the right goodwill vacuum is a worthy investment. It keeps your environment clean and contributes to your overall well-being

Goodwill Vacuum Selection

Types of Goodwill Vacuums Available

When it comes to goodwill vacuums, there is a wide array of types to choose from. Each type caters to different cleaning needs and preferences. Below are the main types of vacuums you might find at a goodwill store or online.

  • Upright Vacuums: These are ideal for larger homes with ample carpeting. They usually have powerful suction and come with various attachments.
  • Canister Vacuums: Canister vacuums are versatile and good for homes with a mix of bare floors and rugs. They are easier to maneuver than upright models.
  • Stick Vacuums: Stick vacuums are lightweight and perfect for quick clean-ups. They work well on hard floors and low-pile carpets.
  • Handheld Vacuums: For small jobs and tight spaces, handheld vacuums are convenient. They are easy to carry around and store.
  • Robot Vacuums: If you want a hands-free cleaning experience, consider a robot vacuum. They can keep floors tidy with minimal effort on your part.
  • Wet/Dry Vacuums: These are great for dealing with spills or cleaning workshops. They can handle both dry dirt and liquid messes.

Considering the type of goodwill vacuum is crucial in making the right choice. Think about the layout of your home and your specific cleaning tasks before deciding. Opt for a vacuum that makes cleaning efficient and effortless. Explore different types to find the one that fits your needs the best.

Key Features to Look for in a Goodwill Vacuum

When hunting for the perfect goodwill vacuum, some features take priority for the best cleaning experience. Here’s what to focus on:

  • Strong Suction Power: A vacuum’s ability to pick up dirt is its most critical function. Ensure it has enough suction for your floor types.
  • Filter Quality: Look for vacuums with HEPA filters or similar high-quality filters. These capture small particles and improve air quality.
  • Ease of Use: A vacuum should be easy to operate. This means simple controls, comfortable handling, and not too heavy to move around.
  • Versatility: The best goodwill vacuums come with attachments. These help clean various surfaces and hard-to-reach places.
  • Cord Length: The longer the cord, the fewer times you’ll have to switch outlets. This is especially important for large rooms.
  • Bagged or Bagless: Decide whether you prefer the simplicity of a bagless model or the hygiene of a bagged vacuum.
  • Battery Life (for cordless models): If you opt for a cordless vacuum, check the battery life. It should last long enough to complete your cleaning.
  • Warranty and Support: A good warranty and accessible customer support reflect the manufacturer’s confidence in the product.

When you look for these key features, you pick a goodwill vacuum that tailors to your cleaning habits. A perfect match can make your cleaning routine more efficient and enjoyable. Keep these features in mind to navigate the sea of options and find a vacuum that stands out for its quality and usefulness.

Understanding Vacuum Specifications for Optimal Performance

To ensure you get the most out of your goodwill vacuum, understanding its specifications is key. Here are important specs to consider for optimal performance:

  • Motor Power: Indicated in watts or amps, higher motor power often means stronger suction.
  • Filtration System: Look beyond HEPA; check for multi-stage filtration for best air quality.
  • Noise Level: Measured in decibels, a lower noise level means a quieter operation.
  • Capacity: The size of the dustbin or bag affects how often you need to empty it.
  • Weight and Dimensions: Lighter vacuums are easier to handle; dimensions tell if it’ll fit in your storage space.

By paying attention to these specifications, you can match a vacuum’s performance to your home’s needs. A strong motor ensures effective debris pick-up. Multi-stage filtration systems maintain clean air. A reasonable noise level keeps the peace in your home. Ample capacity reduces the hassle of frequent emptying. Light weight and proper size guarantee comfortable use and easy storage. Consider these specifications carefully when choosing your goodwill vacuum.

Goodwill Vacuum Selection

Price Vs. Quality: Finding the Best Value Goodwill Vacuum

Navigating the balance between cost and quality is vital when looking for a goodwill vacuum. It’s easy to lean towards cheaper options. But low prices could mean lower quality and a shorter lifespan. Conversely, high-end models come with a hefty price tag. They may offer advanced features that you might not need. To find the best value, consider these points:

  • Set a Budget: Decide on your spending limits before you start shopping.
  • Check Reviews: Look for user feedback on performance and durability.
  • Compare Features: Match the vacuum’s features with your specific needs.
  • Look for Deals: Sometimes, higher-priced vacuums are discounted. Keep an eye out for sales.
  • Consider Longevity: Investing a bit more in a vacuum might save you money in the long run.

You want a vacuum that cleans effectively without breaking the bank. So, take your time to research. A little extra upfront can mean a better performing, longer-lasting appliance. Cheap purchases might lead to frequent replacements. That’s not good for your wallet or the environment. Aim for the sweet spot. Choose a goodwill vacuum that provides the best mix of price and quality.

The Top Goodwill Vacuum Brands to Consider

When you’re in the market for a goodwill vacuum, brand reputation can guide your choice. Here are some top brands to have on your radar:

  • Dyson: Known for powerful suction and innovative design. Dyson vacuums are often a top pick.
  • Hoover: A trusted name with a range of affordable and reliable options.
  • Shark: Offers versatility and functionality, with many models performing well on various surfaces.
  • Bissell: Specializes in vacuums for pet owners and provides good value for the price.
  • Miele: Delivers high-quality and durable vacuums, often featuring exceptional filtration systems.

Each of these brands has a strong history in producing quality vacuums. They cater to different needs and budgets. Dyson, for example, might be on the higher end of the price spectrum. However, its vacuums are known for their longevity and high-tech features. Hoover and Bissell are more wallet-friendly and still offer dependable performance. Shark straddles the line with innovative features at a mid-range price. Miele, while usually more expensive, is synonymous with durability and excellent filtration.

What’s important is finding a blend of quality and price that fits your specific situation. Check reviews and compare models within these recommended brands. Look for features that align with the key points discussed in previous sections of this blog. Remember, investing in a reputable brand can mean better performance and fewer headaches down the road. Make sure to choose a goodwill vacuum that won’t just clean your home, but will also last for many years to come.

Goodwill Vacuum Selection

Goodwill Vacuum Maintenance and Care Tips

Keeping your goodwill vacuum in top condition is crucial for longevity and performance. Regular maintenance not only extends your vacuum’s life but also ensures it cleans effectively each time. Here’s how you should care for your goodwill vacuum:

  • Clean Filters Regularly: Dust and debris clogging the filters can diminish suction power. Wash or replace filters as advised by the manufacturer.
  • Empty Dustbins or Change Bags Often: Don’t wait for the dustbin to fill up completely. Empty it after use to maintain good airflow.
  • Check and Clear Blockages: Inspect the hose, brush roll, and attachments for any blockages. Clear them immediately to prevent motor strain.
  • Monitor Belt and Brush Roll: A worn belt or tangled brush roll reduces efficiency. Replace belts every 6-12 months and cut away trapped hair or threads from the brush roll.
  • Store Properly: After each use, coil the cord loosely to prevent damage. Store the vacuum in a dry place, away from direct sunlight.
  • Use Correctly: Avoid picking up hard or sharp objects that can harm internal components. Follow the user manual for proper operation.

For optimal performance, it’s also smart to have your goodwill vacuum checked by a professional once a year. This can help spot potential problems early. Remember, well-maintained vacuums save time and effort in the long run. Take good care of your cleaning companion, and it will continue to make your chores easier.

Troubleshooting Common Goodwill Vacuum Issues

When your goodwill vacuum faces issues, it can be frustrating. But many problems have simple fixes. Let’s dive into common issues and how to resolve them.

  • Loss of Suction: This is often due to a full dustbin or clog. Empty the bin and check for blockages in hoses and attachments. Replace or clean filters if needed.
  • Strange Noises: Unusual sounds can signal a blockage or a damaged belt. Turn off the vacuum and inspect for obstructions. If the belt is broken or stretched, it may need replacing.
  • Not Turning On: Ensure the vacuum is plugged in correctly. Check the outlet with another device. If it’s battery-powered, confirm the battery is charged.
  • Poor Performance on Carpet: Adjust the height setting. Clean the brush roll of hair and debris to improve cleaning efficiency.
  • Odor From Vacuum: This can happen if the dustbin is not emptied regularly. Also, look for dampness that might cause mildew. Replace any filters that may be causing the smell.

By addressing these common issues, you can maintain your goodwill vacuum’s performance. Keep it clean, check for clogs, and replace parts as necessary. With regular care, your vacuum should serve you well for a long time.

Electric Window Washer: Revolutionizing Cleanliness

Electric Window Washer

In today’s fast-paced world, cleanliness has never been more important. Homes, offices, and commercial spaces demand constant upkeep to maintain a pristine appearance. One of the most significant challenges in achieving this cleanliness is keeping windows spotless. Dirty windows can affect not only the aesthetics of a place but also the overall ambiance. Traditional cleaning methods often require physical labor and time, which can be quite cumbersome. However, the advent of the electric window washer has transformed how we approach window cleaning.

Electric Window Washer

The Evolution of Window Cleaning Technology

A Brief History of Window Cleaning Tools

Historically, window cleaning has evolved significantly over the years. Ancient civilizations used rags and simple tools to wipe glass surfaces. In the early 20th century, window cleaning started to become more organized. As urban cities grew, professional window washers emerged to meet the increasing demand. They often employed scaffolding and long poles, making the process risky and labor-intensive. As technology advanced, so did the tools.

In the late 20th century, innovations like squeegees became widespread. These tools improved efficiency, yet they still required considerable manpower. This limitation often discouraged many people from maintaining clean windows. The introduction of the electric window washer changed the landscape. This new technology promised efficiency and ease. Manufacturers began developing units that could clean windows automatically.

Features of Modern Electric Window Washers

Modern electric window washers come equipped with various features that enhance their functionality. Many models are designed with an ergonomic handle for comfort during use. They are lightweight, making them easy to maneuver. Furthermore, some come with interchangeable heads to handle different surfaces. Additionally, they are often cordless, providing users with the freedom to navigate any space easily.

Most electric window washers include built-in water tanks. These tanks allow for continuous spraying while cleaning. This feature is particularly beneficial when tackling large windows. Some models even come with specialized cleaning solutions that break down dirt more effectively. As a result, users achieve streak-free windows quickly and efficiently.

Electric Window Washer

Advantages of Electric Window Washers

Time-Saving Benefits

One of the most notable advantages of electric window washers is their time-saving ability. Traditional window cleaning can take hours to complete. However, with advanced electric models, users can clean multiple windows in a fraction of the time. This efficiency means more time for other tasks or leisure activities.

Moreover, the speed of electric window washers doesn’t compromise quality. Users can still achieve a deep clean in record time. Manufacturers often emphasize the importance of time efficiency in their marketing. Therefore, many consumers are attracted to the promise of faster results.

Increased Safety

Safety is another crucial benefit of using electric window washers. Traditional methods often require ladders or scaffolding, presenting a fall hazard. Electric models eliminate the need for such equipment. Users can maintain their safety while achieving spotless windows.

In addition, many electric window washers come with security features. For example, some units have anti-slip grips that reduce the chance of dropping the device. This feature reinforces user confidence when cleaning hard-to-reach windows. Thus, opting for an electric model not only improves efficiency but also enhances safety.

Electric Window Washer

Choosing the Right Electric Window Washer

Factors to Consider

When selecting an electric window washer, it’s essential to consider several factors. First, examine the size and weight of the unit. A lightweight model is easier to handle and maneuver. Additionally, think about battery life, especially for larger cleaning jobs.

Next, assess the tank capacity. A larger water tank means less frequent refills during cleaning. Some users also prioritize features like different spray settings or interchangeable heads. These can enhance versatility across various surfaces and conditions.

Popular Brands and Models

Several brands have gained prominence in the electric window washer market. Companies like Bissell, Karcher, and Black+Decker offer reliable options. Each brand has its own unique selling points and features. Thus, conducting thorough research is vital when making a choice.

For instance, Bissell’s model emphasizes lightweight design and portability. Karcher, on the other hand, boasts a robust cleaning solution and powerful suction. Black+Decker combines affordability with efficiency in its offerings. Evaluating these brands, along with customer reviews, helps consumers make informed decisions.

Electric Window Washer

Innovations in Electric Window Washer Technology

In recent years, innovations in electric window washer technology have led to dramatic improvements. Manufacturers are continually seeking ways to enhance efficiency and user experience. These advancements cater to evolving consumer preferences for both convenience and effectiveness.

Smart Features

Many new electric window washers include smart features, such as automatic sensor-based activation. These sensors detect water or dirt on the windshield and activate cleaning as needed. Drivers no longer have to remember to engage the washer. This feature is particularly beneficial during sudden weather changes or when driving through muddy roads.

Eco-Friendly Solutions

As environmental concerns grow, manufacturers are introducing eco-friendly solutions. Some models now utilize biodegradable washer fluid, reducing chemical impact on the environment. Additionally, more efficient pumps consume less energy, furthering sustainability efforts within the automotive industry. These innovations signal a commitment from manufacturers to prioritize environmentally friendly practices.

Maintenance Tips for Electric Window Washers

Regular Cleaning and Checks

To ensure optimal performance, regular maintenance is essential. Begin by cleaning the blades and water tank after each use. This keeps the unit free of debris that could impair its effectiveness. A simple cloth can often suffice for wiping down surfaces.

It’s also wise to check the battery regularly. Ensuring that it’s charged and functioning properly can prevent inconvenient breakdowns. Over time, dirt may build up in the water tank. Therefore, periodically flushing it out with clean water can enhance longevity and performance.

Storage Recommendations

Proper storage of the electric window washer prolongs its lifespan. Avoid leaving the unit exposed to extreme temperatures or moisture. Instead, store it in a cool, dry place. Additionally, if possible, place it in its original packaging or a protective cover.

This precaution prevents scratches or other damage during storage. If the model comes with suction storage pads, ensure they remain clean as well. Following these maintenance and storage tips will keep your electric window washer in excellent condition for years to come.

Electric Window Washer

Environmental Impact of Electric Window Washers

Reducing Chemical Use

Electric window washers can have a significant positive impact on the environment. Traditional window cleaning methods often rely heavily on chemicals. These chemicals can harm both the environment and human health. In contrast, many electric models utilize water or natural solutions. As a result, these devices often reduce overall chemical usage.

By minimizing chemical runoff, these products contribute to cleaner water sources. Moreover, they promote healthier indoor air quality. Consumers are increasingly aware of the importance of sustainable practices. Choosing an electric window washer can align with these values and help businesses or homeowners reduce their ecological footprint.

Energy Consumption

Although electric window washers do consume energy, they tend to be efficient. Many modern units are designed with energy-saving features. Thus, they use significantly less electricity compared to other cleaning methods. For instance, traditional cleaners often require extensive lighting and power for various equipment.

By reducing energy consumption, electric window washers help lower overall utility bills. They can also lead to a more sustainable cleaning process. When selecting energy-efficient models, consumers can further amplify these benefits. Therefore, investing in an electric window washer can enhance both cleanliness and sustainability efforts.

Common Issues and Troubleshooting

Like any automotive feature, electric window washers can encounter issues. Recognizing these problems early can save time and money. It is essential to understand common issues associated with electric window washers.

Fluid Clogs

One of the most common problems is clogged washer nozzles. Dirt or debris can obstruct the nozzle, preventing fluid from reaching the windshield. Regularly inspecting and cleaning the nozzles can prevent this issue. A simple needle or pin often suffices for unclogging.

Electrical Failures

Another issue involves electrical failures within the system. A blown fuse or malfunctioning motor can lead to complete inoperability. It is advisable to consult with a professional mechanic for proper diagnosis. Regular inspections can help catch these issues before they lead to more severe problems.

Conclusion

In conclusion, electric window washers present a revolutionary approach to maintaining clean glass surfaces. Their evolution from simple tools to advanced technology has transformed cleaning practices. With various features, time-saving benefits, and safety enhancements, they represent the future of window cleaning.

When choosing an electric window washer, it’s crucial to consider factors like weight and tank capacity. Additionally, popular brands offer unique advantages that cater to different user needs. Regular maintenance and proper storage can prolong the lifespan of these devices.

Furthermore, the environmental impact of electric window washers cannot be understated. By promoting chemical-free cleaning and reducing energy consumption, they align with sustainable practices. Thus, opting for an electric window washer is not merely a practical choice; it also reflects a commitment to a cleaner, greener future.

Primo water dispenser buttons on back: Troubleshooting

primo water dispenser

Introduction to Primo Water Dispenser Back Buttons

The Primo water dispenser has become a vital appliance in many homes and offices. It offers a convenient way to access hot and cold water instantly. One key feature that users interact with is the set of buttons located on the back. These primo water dispenser buttons on the back are crucial for adjusting settings and ensuring the machine operates correctly. Typically, they include controls for temperature and power, among others. Understanding how these buttons work is vital for both daily use and when troubleshooting issues.

Knowing what each button on your Primo water dispenser does can save time and prevent confusion. Generally, these back buttons control various aspects of the water dispenser’s functionality. For example, you might find a power switch, a hot water toggle, or a cold water control button. Some models also include buttons to reset the machine or to initiate a self-cleaning cycle. To effectively troubleshoot and maintain your dispenser, familiarity with these back buttons is essential.

However, users occasionally encounter problems with these back buttons. Issues may range from the buttons being unresponsive to difficulties with programming the dispenser settings. In such cases, understanding the layout and purpose of each button can help you identify the cause of the malfunction. This knowledge is particularly important for performing initial diagnostics before diving into more detailed troubleshooting steps.

As you continue to use your Primo water dispenser, keep in mind the importance of these buttons. Regular checks and familiarity with their functions can enhance the lifespan and performance of your dispenser. The following sections of this blog post will guide you through common issues, troubleshooting steps, and maintenance tips for the primo water dispenser buttons on the back. So, let’s dive in and learn how to keep your water dispenser running smoothly.

primo water dispenser

Common Issues with Back Buttons

Identifying common issues with the primo water dispenser buttons on back is the first step towards resolving them. Users often report specific problems that can hinder the dispenser’s functionality. Here are the most frequent issues encountered:

  • Unresponsiveness: At times, the back buttons may not react when pressed. This could indicate a power issue or faulty wiring.
  • Sticking buttons: Buttons that stick or fail to pop back up can be frustrating. Accumulation of dirt or a mechanical failure might be the cause.
  • Erratic temperature control: If adjusting the hot or cold water does not yield the expected temperature, the control buttons might malfunction.
  • Flashing lights: Some models have indicator lights on the back buttons which may start flashing as an error signal.
  • Inability to reset or start self-cleaning: When the reset or self-cleaning buttons do not work, it could suggest a software glitch or electronic control problem.

Recognizing these issues early can prevent further complications with your Primo water dispenser. Regular use and inspection of the primo water dispenser buttons on back will help you become familiar with their normal operation, making it easier to detect when something is amiss. In the next section, we will provide a step-by-step guide to help you troubleshoot these common button-related problems. Stay tuned to learn how to quickly get your dispenser back to optimal working condition.

Step-by-Step Guide on Troubleshooting Back Buttons

Troubleshooting the primo water dispenser buttons on back is straightforward with the correct approach. Follow these steps to diagnose and resolve the issues you’re facing:

  1. Check Power Supply: Ensure your dispenser is plugged in and the power outlet is functional.
  2. Inspect for Visible Damage: Look for signs of damage on the buttons and wiring.
  3. Clean the Buttons: Use a soft cloth to gently clean around the buttons, removing any dirt or grime.
  4. Test Each Button: Press each button to check for responsiveness or sticking issues.
  5. Reset the Dispenser: Locate the reset button on the back and press it to reboot the system.
  6. Check Temperature Settings: Verify the hot and cold controls are set correctly.
  7. Consult the Manual: Refer to your dispenser’s manual for specific troubleshooting steps.
  8. Unplug for a Short Period: Sometimes, powering down the unit for a few minutes can resolve minor glitches.

Note: If the buttons are still not functioning after these steps, the issue may require professional attention. Keep in mind that opening the dispenser’s casing or attempting repairs on your own might void the warranty or cause additional damage. If you’re unsure, it’s always best to contact customer support for assistance.

primo water dispenser

Maintenance Tips for Primo Water Dispenser Buttons

Keeping the primo water dispenser buttons on back in top condition is crucial. Here are some effective maintenance tips:

  • Clean Regularly: Dust and grime can build up around the buttons. Gently wipe them with a soft, damp cloth. Avoid harsh chemicals that could damage the buttons.
  • Check for Wear and Tear: Inspect the buttons often for signs of wear. Replace any buttons that show significant damage to prevent further issues.
  • Avoid Spills: Keep liquids away from the back buttons. Spills can cause stickiness or electrical malfunctions.
  • Operate with Care: Press the buttons gently. Using excessive force can damage their internal mechanism.
  • Listen for Clicks: Each button should make a click sound when pressed. If there’s no sound, the button may not be functioning properly.
  • Follow Manufacturer’s Guidelines: Use the dispenser as directed by the manual. Correct usage helps prevent button malfunctions.

Performing these simple tasks can prolong the life of your primo water dispenser and help avoid the common issues. Keep these tips in mind as part of your regular appliance upkeep routine.

When to Contact Support for Back Button Issues

Even with dedicated maintenance and careful troubleshooting, there may come a time when you need to contact support for your Primo water dispenser. Understanding when to seek professional help can save you time and ensure your dispenser gets the necessary repairs. Here are situations that indicate it’s time to reach out to Primo customer support:

  • Persistent Unresponsiveness: If the primo water dispenser buttons on back remain unresponsive after you’ve completed all troubleshooting steps, it’s time to call for help.
  • Repeated Malfunctions: Occasional glitches are common, but if the back button issues keep coming back, expert intervention is required.
  • Flashing Lights Without Resolution: Persistent flashing or error indicator lights after troubleshooting suggest a deeper electronic issue.
  • Physical Damage: If you notice any physical damage to the buttons or the machine that you can’t fix, professional repairs are necessary.
  • After a Power Surge: Should your dispenser malfunction after a power surge or an electrical outage, it’s wise to get it checked by a technician.
  • Lack of Confidence: If you feel unsure about handling the issues yourself, it’s better to be safe than sorry by contacting support.

Remember, it’s crucial to avoid opening the machine yourself, as this can void warranties or cause further damage. Always refer to the manufacturer’s guidelines and seek professional assistance when needed to protect the longevity of your primo water dispenser.

Preventive Measures to Avoid Back Button Malfunctions

Taking proactive steps can help prevent malfunctions with the primo water dispenser buttons on back. Here is what you can do:

  • Conduct Regular Inspections: Check the back buttons often for any signs of damage or wear.
  • Gentle Use: Always press the buttons with care. Avoid using too much force, which can cause damage.
  • Keep It Clean: Make it a habit to clean the dispenser area regularly. This stops dirt from collecting around the buttons.
  • Avoid Moisture: Keep liquids far from the buttons to prevent electrical issues or stickiness.
  • Follow the Manual: Use your dispenser following the manufacturer’s instructions. This helps avoid misuse that could lead to button problems.
  • Use a Surge Protector: Protect your dispenser from power surges with a surge protector. This can spare the electrical components from damage.

By practicing these preventive measures, you can reduce the risk of encountering issues with the primo water dispenser buttons on back. This will ensure that your dispenser continues to provide service without interruption.

primo water dispenser

Upgrading Your Primo Water Dispenser: Are Back Buttons Worth It?

When considering an upgrade to your Primo water dispenser, the value of back buttons may arise. These buttons are not simply for show; they hold pivotal roles in controlling and maintaining the dispenser’s performance. Here’s why upgrading to a model with primo water dispenser buttons on back can be a good decision:

  • Enhanced Control: Newer models often come with improved button functionality. This can lead to better temperature precision and more user-friendly options.
  • Modern Features: Upgrades may include advanced features such as energy-saving modes or smart technology. These are often accessed via the back buttons.
  • Reliability: As models evolve, the buttons become more durable and responsive. Investing in an updated version can reduce the likelihood of the common issues discussed earlier.
  • Convenience: Having easily accessible back buttons means you can quickly adjust settings without moving the entire unit or bending over.
  • Safety: Upgraded back buttons sometimes come with safety locks, especially for the hot water function. This is crucial if you have children around.

However, before upgrading, consider if the current issues with your dispenser are truly due to the buttons. Often, thorough cleaning or targeted troubleshooting, as outlined previously, can resolve button-related problems. If your primo water dispenser is still functioning well, and the issues are minor, it may not be worth the upgrade. On the other hand, if you’re facing persistent problems or you desire the new features that come with upgraded models, new primo water dispenser buttons on back might justify the investment.

In conclusion, whether upgrading your dispenser’s back buttons is worth it depends on your needs. Weigh the benefits of new features and improved reliability against the cost and necessity. Remember, regular maintenance and correct use are still the best ways to ensure optimal performance of your primo water dispenser.

Conclusion: Ensuring Optimal Performance of Your Primo Water Dispenser

To ensure the best performance of your Primo water dispenser, it’s key to know how the primo water dispenser buttons on back function. Regular checks and cleanings can avoid most button issues. When in doubt, it’s wise to consult the manual or reach out to support for help. If you’re facing constant problems, an upgrade might be in order.

Remember, most button troubles are fixable with simple troubleshooting. If an issue does arise, follow the step-by-step guide we’ve discussed. Maintenance is easy, focus on clean surroundings and gentle use. Additionally, preventive steps can ward off future malfunctions.

If you do decide to upgrade for enhanced control and modern features, consider it carefully. Check if your needs justify the investment. After all, taking care of the primo water dispenser buttons on back can extend your unit’s life and keep it running like new.

How to unwrinkle clothes fast? Quick Fixes

unwrinkle clothes

The Hassle-Free Approach to Removing Wrinkles

No iron? No problem. You can still obtain smooth, unwrinkled clothes with a few inventive methods.

Using a Dryer to Smooth Out Clothes

A quick and easy method to unwrinkle clothes fast is using your humble dryer. Here’s how:

  1. Place your wrinkled garment in the dryer.
  2. Add a moist cloth or a few dryer sheets to the mix.
  3. Set the dryer on a medium to high heat for around 15 minutes.
  4. Remove your clothes promptly and hang them up to preserve the smoothness.

Remember to not overload the dryer to ensure even heat distribution.

The Ice Cube Steam Hack

This trick turns your dryer into a steam machine:

  1. Toss one or two ice cubes into the dryer with your wrinkled items.
  2. Run the dryer on a hot cycle for about 5 minutes.
  3. As ice melts, it creates steam which helps to release the wrinkles.

This method suits lightweight fabrics best and saves you precious time.

Creating a Homemade Wrinkle Releaser

You can mix up a DIY solution using items from your pantry:

  1. Fill a spray bottle with water and add a teaspoon of fabric softener or hair conditioner.
  2. Shake well to mix.
  3. Lightly mist your wrinkled garment and gently stretch the fabric.
  4. Allow it to air dry for a wrinkle-free finish.

This customized mix is cost-effective and a quick fix for unexpected creases.

unwrinkle clothes

Time-Saving Techniques for De-Wrinkling

Getting smooth clothes should not eat up your time. Using the right techniques can make unwrinkling fast and effortless.

Utilizing Shower Steam

Have no time to iron? Try shower steam. Hang your clothes in the bathroom while you shower. The steam from a hot shower can help relax wrinkles. Just make sure not to get your clothes wet. Do this for a few minutes while you get ready. Your clothes will look neater without much effort.

The Damp Towel Method

Another quick fix involves a damp towel. Lay the wrinkled garment on a flat surface. Place a damp towel on top of it. Press down gently to add pressure. Leave it in place for a few minutes. The moisture and weight smooth out wrinkles. Hang the garment to dry for a crisp finish.

Using these methods, you can easily learn how to unwrinkle clothes fast. They save time and can be done while you take care of other tasks. Remember to test any method on a small area first, to see how your fabric reacts.

Garment Care Without an Iron

To keep clothes looking fresh without ironing, proper handling and storage are key.

Proper Hanging and Storage

Good garment care begins after laundry. Hang clothes as soon as they’re dry. Swift hanging prevents wrinkles from setting in. Use padded hangers for delicate items. These hangers maintain shape and prevent creases. For trousers, use hangers with clips or a bar. Store heavier clothes folded to avoid stretching. Space out clothes in your closet. This gives fabrics room to breathe and reduces crumples.

Choosing Wrinkle-Resistant Fabrics

Select fabrics wisely to lessen ironing chores. Look for labels that say ‘wrinkle-resistant’. Synthetic blends often fare better than pure cotton. Though comfortable, cotton wrinkles easily without proper care. Wrinkle-resistant items save time and effort. If you buy cotton, choose thicker weaves as they resist wrinkles. Fabrics like polyester, nylon, and spandex barely wrinkle. They are ideal for those who want to unwrinkle clothes fast and with less effort.

unwrinkle clothes

Quick Solutions for Last-Minute Touch-ups

Need to unwrinkle clothes fast before heading out? These quick fixes have you covered.

The Power of Hair Straighteners

If you’re in a pinch, hair straighteners work wonders on wrinkles. They are perfect for collars, cuffs, and hems. Here’s how to use them effectively:

  1. Heat up your straightener.
  2. Clamp down on the wrinkled area.
  3. Gently slide the straightener over the fabric, just like you would with hair.

Be sure to check the fabric’s heat tolerance to prevent damage.

Using a Mattress to Press Clothing Flat

Pressed for time and no ironing tools in sight? Use your mattress. Lay the item flat underneath your mattress. Leave it there for an hour while you do other things. The weight of the mattress helps to smooth out the creases. This works best for fabrics that aren’t too delicate. Always make sure the garment is clean to avoid staining your mattress.

Implement these methods to learn how to unwrinkle clothes fast and keep your style sharp, even on the go.

The Role of Fabric Softeners in Preventing Wrinkles

Fabric softeners serve more purposes than just softening fabrics. They play a notable role in reducing wrinkles as well. By coating fibers with lubricating chemicals, fabric softeners help your clothes resist wrinkling during the wash and dry cycle. Not only does this make your clothes feel softer to the touch, but it also means you can spend less time de-wrinkling. Here’s why fabric softeners should be part of your laundry routine:

  • Reduces Friction: Fabric softener lessens friction between fibers, which prevents creases from forming while your clothes tumble in the dryer.
  • Eases Ironing: If you do choose to iron, fabric softener-treated clothes iron out faster. This can save you precious time in your day.
  • Keeps Clothes Looking Newer: Regular use of fabric softeners can help clothes maintain their shape and texture, appearing newer for longer and cutting down on the need to iron.

It’s important to use fabric softeners correctly to reap these benefits. Always follow the instructions on the bottle and avoid using too much, as this can lead to build-up that may actually make fabrics stiffer. Additionally, some fabrics, such as microfiber or wicking sportswear, should not be treated with fabric softeners as they can reduce the material’s performance.

For those learning how to unwrinkle clothes fast, incorporating fabric softener into your washing routine could be a game-changer. Not only do they help with current wrinkles, but they also prevent future ones. The result? Smooth clothes and less time worrying about unsightly creases.

unwrinkle clothes

Alternative Tools and Devices for De-Wrinkling

When learning how to unwrinkle clothes fast, consider some handy gadgets designed for this specific purpose.

Handheld Steaming Devices

Handheld steamers offer a quick, safe way to smooth out wrinkles. They are easy to use:

  1. Fill the steamer with water.
  2. Turn it on and let it heat up.
  3. Glide the device across the fabric for instant wrinkle removal.

They’re great for delicate fabrics and travel. When you buy one, check for features like heat-up time and water capacity. Safety features are also important.

Wrinkle-Removing Sprays Available in the Market

There are sprays you can buy that relax fabrics and thus remove wrinkles. Here’s how to use them:

  1. Lay the garment flat or hang it up.
  2. Spray the wrinkled areas lightly.
  3. Smooth the fabric with your hands or let it hang for the spray to work.

These sprays are perfect for a last-minute fix. They come in travel sizes too. Ensure the spray is suitable for your fabric type. And read the label for instructions and warnings.

Both options can save you time and help you learn how to unwrinkle clothes fast. They also prevent damage from iron heat. Remember to test a small patch first, especially with new fabrics or sprays.

Conclusion: Choose Your Method Wisely

In conclusion, there are numerous methods available for unwrinkling clothes quickly and efficiently. Each approach offers unique advantages, depending on your specific needs and context. Traditional tactics like ironing and steaming have their merits, while quick fixes can save you time in a pinch.

Moreover, fabric-specific techniques can ensure that your clothes are treated delicately. Preventative strategies can minimize wrinkles altogether, saving you time in the long run. Advanced methods like commercial wrinkle release sprays and professional services are available for those truly stubborn wrinkles.

By combining these approaches, you can achieve wrinkle-free clothing in various situations. Choose a technique that aligns with your lifestyle, and enjoy the benefits of well-pressed garments every day. With practice and experimentation, you’ll soon find the methods that work best for you.

Erase Iron Stains from White Clothes Effectively

iron stain removing

Introduction to Rust Stains

Rust stains on clothes are stubborn and unsightly. They form when iron meets moisture and oxygen. This reaction creates iron oxide, or rust, that clings to fabric. White clothes can show rust stains more prominently, making them a challenge to clean. Most rust stains come from metal objects like screws, zippers, or even water with high iron content. These stains do not mean the end of your garment. How to remove iron stain from white clothes? With the right approach, you can remove rust stains from your white clothes effectively.

Pre-Treatment Measures

Before tackling iron stains on white clothes, it’s critical to prepare. Proper pre-treatment can improve the effectiveness of the stain removal process.

Equipment and Materials Required

To start, gather the following items:

  1. A soft-bristled brush or an old toothbrush. Use this to gently dislodge surface rust particles.
  2. Cold water for initial rust dilution. Cold water helps to loosen the stain without setting it.
  3. White vinegar, renowned for its stain removal properties.
  4. Baking soda, another potent stain-fighting agent.
  5. Lemon juice for its natural bleaching effect on rust stains.
  6. A clean white towel or microfiber cloth to blot and absorb fluids.
  7. Protective gloves to shield your hands from cleaning agents.
  8. A plastic bucket or a sink for soaking garments.

Initial Steps to Take Before Washing

Follow these simple steps to prep your garment:

  1. Lay the stained clothing on a flat surface.
  2. Use the brush to gently remove as much surface rust as possible.
  3. Rinse the area with cold water to further dilute and lift the stain.
  4. Mix a pre-treatment solution if using homemade remedies.
  5. Test any commercial cleaners on an inconspicuous area of the clothing.
  6. Apply the chosen pre-treatment solution directly to the stain.

By preparing and using the right materials, you are setting the stage for successful stain removal.

iron stain removing

Homemade Solutions for Stain Removal

Discover how to tackle iron stains on your white clothes with everyday items found in your home.

Utilizing White Vinegar and Baking Soda

White vinegar and baking soda are powerful allies in fighting rust stains. Here’s how to use them:

  1. Create a paste of three parts baking soda to one part water.
  2. Spread this paste over the stain on your garment.
  3. Pour white vinegar onto the paste-coated stain; it will fizz.
  4. Let this mixture work on the stain for 30 minutes.
  5. Rinse the garment with cold water and check the results.

Repeat these steps if needed before placing your clothes in the wash.

Harnessing the Power of Lemon Juice

Lemon juice is a natural bleaching agent perfect for white clothes. Here’s a simple method:

  1. Squeeze fresh lemon juice directly onto the rust stain.
  2. Spread the juice evenly with your fingers or a brush.
  3. Allow it to sit in the sun; sunlight boosts the lemon’s bleaching effect.
  4. After an hour in the sun, rinse the area with water.
  5. If the stain persists, repeat the process or proceed to washing.

Combining lemon juice and sunlight can be a gentle yet effective way to bid farewell to those stubborn marks.

Commercial Rust Removers

When home remedies don’t work, commercial rust removers are a good next step. These products often contain oxalic acid or hydrofluoric acid – chemicals effective at rust removal.

Choosing the Right Commercial Cleaner

Select a cleaner designed for clothing fabrics. Look for one that is gentle on whites without containing bleach. Check online reviews or ask friends for recommendations. Always select a product made for the type of fabric your clothing is made of.

Precautions and Usage Instructions

Test the cleaner on a small, hidden part of the garment first. This will ensure it won’t damage the fabric or alter the color. Wear gloves to protect your hands from harsh chemicals. Follow the instructions carefully. Apply the cleaner, wait for the specified time, and then rinse thoroughly. After using a commercial rust remover, wash the garment with a high-quality detergent. Remember to use the washing cycle and temperature recommended on the clothing’s care label.

iron stain removing

Washing Techniques for White Clothes

Successfully removing iron stains from white clothes is not just about the pre-treatment. The washing process itself is crucial to ensure stains are fully removed and clothes are not damaged. With the right techniques and detergents, you can restore your white garments to their original state.

Selecting Appropriate Detergent

When choosing a detergent, consider one that’s formulated for white fabrics. This type of detergent often contains optical brighteners that make whites appear whiter. Avoid using detergents with bleach if you’ve already used a rust remover since harsh chemicals can interact negatively. Prefer high-quality brands, such as Ariel Matic or Persil, for their stain-fighting capabilities.

The Importance of Washing Cycle and Temperature

Always check the care label on your clothing before selecting the washing cycle and temperature. Typically, white clothes benefit from a warm wash cycle, but if you’re dealing with rust stains, it’s best to stick with cold water to prevent setting the stain. Use a gentle or regular cycle based on the fabric type. For example, delicate fabrics need a gentler wash cycle, even if they are white.

After washing, check that the stain has been removed before putting the clothes in the dryer. Heat can set stains permanently. If a trace of the stain remains, repeat the pre-treatment and washing process. Once the stain is out, hang the clothes to dry in the sun, which can also help to naturally bleach and freshen the fabric.

By selecting the appropriate detergent, and understanding the importance of the washing cycle and temperature, you’re well-equipped to tackle those tough iron stains on your white clothes.

Post-Wash Tips

After washing, it’s crucial to follow some post-wash tips to ensure stain removal success and maintain the quality of your white clothes.

Checking Stain Removal Success

Once the wash cycle completes, examine your clothes before drying. Look carefully for any rust signs. If stains linger, repeat the pre-treatment and wash again. Never dry clothes with visible stains, as the heat may set them in.

Drying and Sun Exposure Benefits

Air-drying in the sun helps further bleach white fabrics naturally. Lay clothes flat to avoid lines or wrinkles. The sun’s UV rays can aid in breaking down any remaining stain particles. But, monitor your garments to prevent excessive sun exposure which may weaken the fabric.

iron stain removing

Preventative Measures

Taking preventive measures is as vital as knowing how to remove iron stains from white clothes. By avoiding rust exposure and maintaining regular garment care, you can keep your white clothes pristine.

Avoiding Rust Exposure

To avoid rust stains, keep white clothes away from metal that could corrode. This includes avoiding contact with metal hangers, pipes, and old machinery when wearing white garments. Ensure your water source is free of high iron levels by installing water filters if necessary.

  1. Use Plastic or Wooden Hangers: Replace metal hangers with plastic or wooden ones to prevent rust transference from hanger to garment.
  2. Install Water Softeners: High iron in water can lead to rust stains during laundry cycles. Consider installing a water softener system.
  3. Avoid Wet Contact: Don’t let white clothes stay wet next to metal objects. Dry white laundry immediately after washing.
  4. Check for Leaks: Regularly inspect areas near water pipes or water heaters for leaks that could cause rust.

By taking these precautions, you lower the risk of unexpected rust stains on your favorite white pieces.

Regular Garment Care and Inspection

Consistent checking and care of your garments can prevent rust stains before they become a problem. Wash whites frequently and inspect them for any specks of rust or discoloration. If you spot a stain, immediate treatment is essential.

  1. Frequent Washing: Keep your white clothes clean by washing them regularly, which can prevent rust from building up.
  2. Prompt Inspection: Examine your whites after each wash to catch potential rust stains early.
  3. Immediate Treatment: When you detect a small rust stain, treat it instantly to avoid it setting in.
  4. Professional Advice: If unsure how to deal with a rust stain, seek professional cleaning advice.

By incorporating these maintenance and inspection routines, you extend the lifespan of your white clothes and maintain their appearance without being troubled by rust stains.

The Honeywell HPA300 Air Purifier: A Comprehensive Guide

the Honeywell HPA300 air purifier

The Honeywell HPA300 air purifier stands out in a crowded marketplace. With numerous options available, consumers seek reliable details. This article delves into what makes the HPA300 unique. It examines its features, performance, and practical benefits while also addressing common concerns. Let’s explore how this device may enhance your indoor air quality.

Key Features of the Honeywell HPA300 Air Purifier

The Honeywell HPA300 boasts several impressive features. First and foremost, it covers large room sizes with ease. Its CADR (Clean Air Delivery Rate) rating is particularly noteworthy. This unit efficiently filters air in spaces up to 465 square feet. Thus, it serves both large living rooms and bedrooms effectively.

HEPA Filtration and Particle Removal

One defining element of the HPA300 is its HEPA filtration system. This advanced technology captures up to 99.97% of airborne particles. This includes dust, pollen, pet dander, and smoke. HEPA filters operate at a size of 0.3 microns. This means even the tiniest particles are trapped efficiently. Consequently, air quality improves significantly, leading to a healthier environment.

In addition to HEPA filters, the HPA300 employs activated carbon pre-filters. These filters work wonders in reducing odors and harmful gases. As a result, cooking smells and pet odors become less prominent. The combination of HEPA and activated carbon filtration provides comprehensive air cleaning. Hence, the appliance addresses a wide range of air quality issues.

User-Friendly Design and Controls

Another appealing aspect of the Honeywell HPA300 is its user-friendly design. Equipped with intuitive controls, it offers an effortless experience. The unit features soft-touch buttons that make operation simple. Additionally, an integrated LED display showcases the current mode. Thus, users can easily select desired settings without confusion.

Moreover, the HPA300 includes multiple cleaning modes for customization. It has three different fan speeds catering to various needs. Whether you require quiet nighttime operation or maximum power, this purifier adapts. The Turbo setting quickly circulates air, perfect for large gatherings or allergy seasons. Consequently, users can tailor the device’s performance according to specific situations.

the Honeywell HPA300 air purifier

Performance: Effectiveness in Real-Life Situations

When it comes to performance, the Honeywell HPA300 excels remarkably. It effectively removes allergens and pollutants from your home. Many users have reported noticeable enhancements in air quality after use. Removing airborne irritants significantly benefits individuals with allergies and respiratory issues. Thus, this air purifier fosters a healthier living environment.

Testing and Reviews

Many independent reviews support the HPA300’s reputation for excellence. Various testing environments have demonstrated its filtering capabilities. Consumers often notice an immediate difference in air clarity after activation. The robust CADR ratings confirm that it reduces particles efficiently. Overall, the performance of this unit has earned overwhelmingly positive consumer feedback.

Additionally, the feedback often highlights its noise levels. Many reviewers claim that the HPA300 operates relatively quietly on lower settings. This aspect makes it suitable for bedrooms and living areas alike. Furthermore, even when on the Turbo setting, noise levels remain manageable. Thus, users can enjoy cleaner air without disruptive noise pollution.

Energy Efficiency

Another aspect worth mentioning is the HPA300’s energy efficiency. This air purifier is ENERGY STAR certified. This means it meets stringent guidelines for energy consumption. Consequently, you can enjoy clean air without exorbitant energy bills. Users often appreciate the cost-effectiveness of this appliance.

Being energy-efficient doesn’t diminish its cleaning capabilities. On the contrary, the HPA300 balances performance with power consumption effectively. This kind of efficiency is crucial, especially for continuous use. Therefore, homeowners can confidently operate this air purifier without guilt.

Maintenance and Care Requirements

Maintaining the Honeywell HPA300 is straightforward, making it user-friendly. Regular maintenance ensures optimal functioning over time. The most significant part involves replacing filters regularly. Both the HEPA and activated carbon pre-filters require routine checks. Depending on usage, these typically need replacement every 3 to 6 months.

Filter Replacement Process

Replacing the filters is easy and quick. First, unplug the air purifier for safety. Open the front cover, and remove the old filters with care. Then, insert the new ones by following the provided instructions. Lastly, close the front cover and plug the unit back in.

This simple process ensures that it continues to operate effectively. Filter replacements are crucial, as clogged filters reduce performance significantly. Moreover, Honeywell helps users by providing filter replacement indicators on the device. Thus, you can keep track of when replacements are needed.

Cleaning the Unit

In addition to filter replacements, routine cleaning is essential. Dust and dirt can accumulate on the exterior of the unit. Using a soft, damp cloth helps maintain its appearance. Avoid using harsh chemicals, as they may damage the surface. Keeping the unit clean not only improves aesthetics but also performance.

Make it a habit to check the unit monthly. Simple maintenance prolongs the life of your air purifier, ensuring optimal operation. In essence, taking these small steps contributes to the overall effectiveness of the device.

the Honeywell HPA300 air purifier

Practical Benefits of Using the HPA300

The Honeywell HPA300 serves a variety of needs. Its air-cleansing capabilities provide tangible health benefits. Reducing allergens and irritants contributes significantly to overall well-being. Many users find that proactive air quality management is pivotal to health.

Improved Sleep Quality

Better air quality directly correlates with improved sleep. For those suffering from allergies or asthma, cleaner air makes a difference. The HPA300 effectively creates a more conducive sleep environment. Users often report fewer interruptions during the night, which enhances sleep quality.

Additionally, this air purifier operates quietly at lower settings. Thus, it won’t disrupt peaceful moments, ensuring restful sleep. Consequently, investing in the HPA300 can lead to beneficial lifestyle changes. Prioritizing sleep is crucial for overall health and productivity. Many individuals experience increased alertness and energy levels after quality sleep.

Protection Against Viruses and Bacteria

Beyond allergens, this air purifier also helps combat viruses and bacteria. Many people are increasingly aware of the importance of indoor air quality. Investing in a solid air purification system becomes essential for health-conscious individuals.

The HPA300 captures and reduces harmful microorganisms in the air. This adds an extra layer of protection for families. Therefore, the unit is particularly beneficial during cold and flu seasons. Healthy indoor air can potentially lessen the risk of illness.

Where to Purchase and Pricing Considerations

Purchasing the Honeywell HPA300 is convenient. Many retailers offer this air purifier both in-store and online. Major retailers, such as Amazon, Home Depot, and Best Buy, typically carry it. Be sure to compare prices across various platforms to find the best deal.

Cost-Effectiveness and Long-Term Value

While the initial investment may seem significant, consider its long-term value. The HPA300 saves costs related to health issues resulting from poor air quality. Therefore, it might be considered a valuable health investment.

Moreover, its energy efficiency further contributes to its cost-effectiveness. Users can enjoy cleaner air without incurring significant energy costs. Over time, the benefits of improved health and productivity outweigh the initial expense.

Promotions and Discounts

Often, seasonal sales or promotional offers can provide savings. Keeping an eye on various retailers can lead to advantageous deals. Utilize online price comparison websites to maximize savings. Furthermore, some retailers may offer bundle deals that include extra filters. Taking advantage of these promotions can enhance the overall purchase experience.

Customer Support and Resources

Honeywell provides excellent customer support for its products. The official website contains useful resources for users. This includes FAQs, troubleshooting tips, and downloadable manuals.

Warranty Information

Another critical aspect to consider is the warranty. The HPA300 typically comes with a five-year warranty. This coverage offers peace of mind to consumers one purchase is made. Understanding warranty terms is crucial for long-term satisfaction.

Community and Online Resources

Additionally, the Honeywell community is active online. Users often share their experiences, tips, and best practices. Engaging in these communities can foster a supportive atmosphere. They also provide various insights into maximizing device performance.

the Honeywell HPA300 air purifier

Conclusion: A Worthy Investment

In conclusion, the Honeywell HPA300 air purifier is an exceptional choice. Its combination of technology, performance, and ease-of-use appeals to numerous users. With powerful filtration capabilities and a user-friendly design, it sets itself apart. Investing in cleaner air has tangible benefits for health and well-being.

Considering all factors, this device makes a compelling choice for consumers. By prioritizing air quality, you’re prioritizing health. Thus, the Honeywell HPA300 is undoubtedly a worthy investment for any household. Don’t underestimate the importance of breathing clean air—it plays a crucial role in enhancing life quality.

What is the purpose of an air purifier?

Purpose of an Air Purifier

Indoor air quality significantly influences health and comfort. In recent years, the attention on air quality has surged. This growing concern stems from increased pollution levels outdoors and indoors. Air purifiers have become essential devices in homes and offices. They serve specific functions that improve air breathing conditions. Understanding the purpose of an air purifier is crucial for making informed choices.

Understanding Air Purifiers

At their core, air purifiers aim to cleanse the air in an enclosed space. They work by filtering out impurities present in the air. Common contaminants include dust, pollen, pet dander, and smoke. Some models also target microbial agents, such as bacteria and viruses. This dual purpose is vital, especially for allergy sufferers and asthmatics.

How Do Air Purifiers Work?

Most air purifiers operate using a few key technologies. These technologies include HEPA filters, activated carbon, and ultraviolet (UV) light. HEPA filters capture particles as small as 0.3 microns effectively. They are highly efficient in trapping allergens. Activated carbon, on the other hand, neutralizes odors and chemicals. It effectively reduces volatile organic compounds (VOCs).

Further, some purifiers use UV light to eliminate germs in the air. This method is effective against bacteria and viruses. Thus, a combination of these technologies maximizes purification effectiveness. Homeowners should evaluate these features when selecting a purifier.

Types of Air Purifiers

Numerous types of air purifiers exist on the market today. Each type serves specific needs. Portable air purifiers are ideal for small spaces. Meanwhile, larger models can purify entire homes. Additionally, some air purifiers are designed for specific rooms, like bedrooms or living areas.

Furthermore, some purifiers come with advanced features. Smart technology allows users to monitor air quality remotely. Others boast quiet modes, ideal for nighttime use. Understanding different types helps consumers pick the best option for their homes.

Purpose of an Air Purifier

Health Benefits of Air Purifiers

The health benefits of using air purifiers are manifold. Air purifiers enhance overall indoor air quality significantly. For individuals with allergies, a cleaner environment can reduce symptoms. This improvement allows for better focus and productivity. Moreover, a noticeable reduction in allergens equals up to better sleep.

Reduced Allergens and Irritants

Air purifiers effectively reduce allergens in indoor environments. Pollen, pet dander, and mold spores are common indoor allergens. A significant advantage of these devices is their ability to trap these particles. Thus, they prevent irritants from circulating in the air. A cleaner indoor environment means fewer allergy flare-ups. Many users notice a marked improvement in their overall well-being.

Moreover, air purifiers can also reduce irritants like smoke and dust. For smokers, using an air purifier can lessen the effects of secondhand smoke. Similarly, it minimizes the presence of household dust. Over time, reduced irritants lead to improved respiratory health.

Mental Health Benefits

Surprisingly, cleaner air can also contribute to better mental health. Poor air quality often correlates with increased stress levels. On the contrary, good air quality promotes relaxation and focus. When individuals breathe cleaner air, they can think more clearly. Enhanced focus and clarity can improve productivity and satisfaction.

Furthermore, better air quality can lead to improved sleep quality. Sleep deprivation affects many aspects of life, including mood and performance. A well-oxygenated room results in more restorative sleep. Consequently, this leads to enhanced mental resilience and overall happiness.

Purpose of an Air Purifier

Environmental Impact of Air Purifiers

Choosing to use air purifiers can also impact the environment positively. Cleaner indoor air reduces the carbon footprint of a home or office. Many air purifiers consume less energy than traditional heating or cooling systems. This efficiency can lead to lower utility bills over time.

Improved Energy Efficiency

Investing in an energy-efficient air purifier benefits both the individual and the environment. Users can save money while promoting eco-friendly practices. An energy-efficient model consumes less electricity. This reduced energy consumption translates to a smaller carbon footprint.

Moreover, improved indoor air quality can reduce reliance on HVAC systems. Environments with cleaner air do not need constant heating and cooling. Over time, this leads to lower energy consumption. Reducing overall energy use contributes to a healthier planet.

Indoor vs. Outdoor Air Quality

Air purifiers primarily improve indoor air quality. However, their effects impact outdoor air quality positively. When people operate efficient air purifiers, they breathe cleaner air indoors. Consequently, they may spend less time outdoors, helping to reduce outdoor pollution levels.

Furthermore, with growing awareness of climate change, cleaner air has never been more crucial. Experts agree that every little action counts. Using air purifiers can be part of a broader effort to maintain air quality. Therefore, investing in one contributes to overall environmental health.

Purpose of an Air Purifier

Smart Features in Modern Air Purifiers

Modern air purifiers come equipped with various smart features. These features not only enhance usability but also improve efficiency. For instance, many models offer app connectivity. This connectivity allows users to track indoor air quality in real-time. Additionally, some purifiers can adjust their settings automatically based on air quality.

App Integration and Control

Smart air purifiers often feature mobile applications for user convenience. With remote monitoring, users can keep track of their indoor environment. These applications usually offer data about air quality levels. Moreover, users can operate the purifier while away from home. This flexibility promotes healthier living without interrupting daily routines.

Additionally, some purifiers provide alerts regarding filter replacement. These notifications ensure users maintain optimal performance. Consequently, it prolongs the lifespan of the device and enhances air purification. Overall, modern air purifiers combine convenience and intelligence.

Filter Maintenance and Longevity

Maintaining filters is crucial for the performance of air purifiers. Many models alert users when filters require replacement or cleaning. Regular maintenance determines the efficiency of air cleansing.

Further, some purifiers are designed for longevity. For instance, washable filters reduce waste and costs over time. Additionally, improved filter technology often allows for longer usage periods. Users can enjoy cleaner air without frequent replacements. Understanding filter maintenance assures smooth operation.

Choosing the Right Air Purifier

Selecting the right air purifier can seem overwhelming. Many models have various features, sizes, and prices. However, making informed choices based on individual needs is essential. Consideration of specific requirements enables better decisions.

Size and Coverage Area

Before purchasing, assess the size of the space needing purification. Each model is designed for specific square footage. Choosing a purifier that matches the space ensures effectiveness.

Furthermore, larger areas may require multiple units for optimal purification. Thus, it’s essential to check product specifications carefully. Understanding these details contributes to better air quality management.

Filter Types and Efficiency Ratings

While evaluating purifiers, consider the types of filters used. HEPA filters are among the most efficient. They trap small particles effectively, making them ideal for allergies.

Also, consider the Clean Air Delivery Rate (CADR). This rating indicates the purifier’s efficiency at cleaning air in specific conditions. Higher ratings generally indicate better performance. Evaluating these aspects helps users select the right model for their needs.

Conclusion: The Lasting Benefits of Air Purifiers

Air purifiers play an integral role in modern living spaces. The benefits, including health, environmental, and comfort aspects, make them invaluable. Investing in a good air purifier equips individuals with better indoor air quality. This improvement translates directly into enhanced well-being.

Furthermore, awareness of the significance of air quality is essential. Poor air quality can lead to numerous health problems. Conversely, clean air fosters healing and mental clarity.

As society continues to grapple with pollution, the relevance of air purifiers will remain high. Their role as guardians of indoor environments cannot be overstated. Implementing air purifiers represents a small step toward better health and happiness. Thus, understanding their purpose is crucial in today’s world. Overall, air purifiers provide a pathway to healthier living for everyone.

How to Connect Levoit Air Purifier to WiFi?

connecting your Levoit air purifier to WiFi

In today’s world, air quality is a critical concern for many people. Levoit air purifiers have made a name for themselves in ensuring clean air and improved indoor environments. With the advancement in technology, these devices often come with WiFi connectivity. By connecting your Levoit air purifier to WiFi, you can enjoy more convenience and control through your smartphone. This article will provide a step-by-step guide to help you connect your Levoit air purifier to WiFi effectively.

Understanding Your Levoit Air Purifier

Features of Levoit Air Purifiers

Levoit air purifiers come with a variety of innovative features. These features generally include high-efficiency particulate air (HEPA) filters that can capture allergens and pollutants. This type of filtration system is excellent for helping individuals with asthma or allergies. Additionally, many Levoit models have smart technology built-in, allowing for remote control and scheduling.

Moreover, they often come with different fan speeds to adjust to your preference or needs. Many models also include air quality sensors that detect how clean your air is. Thus, you can monitor and control the air purification process more effectively.

In the age of smart technology, these features make Levoit air purifiers a desirable choice. They not only serve their primary function of purifying the air but also integrate seamlessly into your smart home ecosystem. You’ll find that these devices can enhance your daily life with their innovative capabilities.

connecting your Levoit air purifier to WiFi

Benefits of WiFi Connectivity

Connecting your Levoit air purifier to WiFi unlocks a variety of benefits. Firstly, it allows you to control the device from anywhere. You can turn it on or off through an app on your smartphone. This convenience is especially helpful if you’re away from home.

Additionally, WiFi connectivity enables scheduling. You can set up when you want the air purifier to operate through the app. This scheduling feature ensures that you have clean air when you need it the most.

Another significant advantage is the ability to receive real-time air quality updates. By monitoring air quality on your smartphone, you can make informed decisions. This capability allows you to take action to improve your indoor air environment swiftly.

In summary, the WiFi connectivity of your Levoit air purifier enhances your user experience. It provides convenience, real-time information, and scheduling options that make managing your indoor air quality easier.

Preparing Your Levoit Air Purifier

Unboxing and Placement

When you first unbox your Levoit air purifier, ensure that all components are present. Check the user manual for any specific items that should be included. Proper placement of your air purifier is essential for optimal performance. Ideally, the device should be placed in an open area away from walls or furniture.

You should select a location that allows for unrestricted airflow. Blocking air vents can significantly reduce the air purifier’s efficiency. Therefore, placing it in a corner or behind furniture is not recommended.

Equally important is ensuring that the unit is within range of your WiFi network. If the device is too far away from your router, you may experience connectivity issues. Therefore, it’s a good practice to perform a preliminary internet connection test in its intended location.

In conclusion, proper unboxing and placement can significantly impact the effectiveness of your Levoit air purifier. By ensuring you have everything and placing it optimally, you lay the groundwork for a successful connection to WiFi.

Downloading the App

Next, you’ll need to download the appropriate app for your Levoit air purifier. Depending on the model, this may be the “VeSync” app or another dedicated application. Visit the App Store for iOS devices or Google Play for Android devices.

Simply search for the app by name and follow the prompts to download and install it. Ensure you have a stable Internet connection while doing this. Once the app is installed, open it, and create an account if you haven’t done so.

The process usually involves entering your email and setting a password. Be sure to remember your login credentials. After setting up your account, proceed to add your device to the app.

Connecting the Levoit air purifier to the app is the next crucial step. Without successfully adding the device, you won’t be able to manage the air purifier via WiFi. Therefore, ensure that you’re following the subsequent steps carefully for a seamless connection.

connecting your Levoit air purifier to WiFi

Connecting to WiFi

Initial WiFi Settings

Once you have the app installed, initial WiFi settings must be configured. Start by ensuring the air purifier is plugged in and powered on. Look for the WiFi button on the control panel and hold it down for a few seconds. Typically, this action will put the device into pairing mode.

You will notice the WiFi indicator light start to flash, signaling that it’s ready to connect. Open the app you previously installed and log into your account. Once you’re in the app, look for an option that says “Add Device” or a similar phrase.

Next, you’ll need to select your specific air purifier model from the list. Make sure your smartphone is connected to the same WiFi network you wish to connect the device to. This is a common requirement for many smart devices.

Therefore, it’s crucial to double-check your WiFi settings before proceeding further. If the network details do not match, you may run into issues during the connection process.

Completing the Connection

After ensuring that your WiFi settings are correct, it’s time to complete the connection. Follow the prompts given in the app carefully. You will likely be asked to enter your WiFi password next. Once entered, click on the “Connect” or “Next” button.

Wait a few moments as the app communicates with your air purifier. A successful connection usually results in a confirmation message appearing on your phone. The WiFi light on the air purifier will change from flashing to solid, indicating it is now connected.

If the connection fails, you may need to double-check your WiFi password and repeat the process. Ensure that your smartphone remains close to the air purifier during this time.

In some cases, restarting both your router and the air purifier can resolve connectivity problems. You can also refer to the user manual for specific troubleshooting tips related to your model.

Utilizing the App Features

Operation Controls

Once your Levoit air purifier is connected to WiFi, you can start using the app’s various features. The primary control option allows you to turn the device on or off remotely. This means even if you are not at home, you can ensure that your air is being purified.

Moreover, you can adjust fan speeds or switch between various modes via the app. The settings can be tailored to your preferences or needs. For example, you can select a “Sleep” mode for quieter operation at night.

Another useful feature is the scheduling option. You can set specific times for the purifying process to begin or end. This ensures maximum efficiency and minimizes energy consumption.

The app provides a user-friendly interface, making it easy to navigate through different features. Multiple devices can often be monitored simultaneously if you own more than one Levoit product.

Utilizing the app’s operational features makes managing your air purifier significantly easier. You will find that remote control enhances your daily convenience.

Monitoring Air Quality

In addition to operational controls, the app allows you to monitor your air quality in real-time. Many Levoit models come equipped with sensors that provide data on indoor air quality. This might include monitoring dust, pollen, or VOC levels.

This air quality data can be especially useful if you have allergies or other respiratory issues. The app’s interface typically presents this information in an easy-to-read format. You can view current levels and even historical data.

Having access to this information allows you to make informed decisions. If the air quality drops, you can increase the purifier’s settings immediately. Thus, you can ensure optimal air quality at all times.

Additionally, some models send notifications to your device when air quality declines. This feature keeps you updated even when you’re not actively monitoring.

In summary, utilizing the air quality monitoring feature in the app greatly enhances the effectiveness of your Levoit air purifier. You expend less energy trying to control your environment and can focus on other tasks.

connecting your Levoit air purifier to WiFi

Troubleshooting Common Issues

Connection Problems

Even with the best preparations, you may encounter connection problems. If your Levoit air purifier fails to connect to WiFi, the first step is to check your network. Ensure that your WiFi is functioning properly.

It’s advisable to restart your router if you’re experiencing issues. Also, make sure your smartphone is still connected to the same network. Sometimes devices disconnect from networks without user awareness.

If these steps don’t work, consider moving your air purifier closer to the router. This can improve connectivity due to reduced interference. If your air purifier works well after moving it, you can then place it back in its original location.

Lastly, ensure the firmware of your smart device and the app is updated. Updates fix bugs and improve performance. Regularly checking for updates is always a good practice.

In conclusion, troubleshooting connection issues involves checking your network, proximity, and ensuring that your apps are up to date. Taking systematic steps will typically address most connectivity problems.

App Functionality Issues

In addition to connection problems, you might encounter app functionality issues. If the app crashes or becomes unresponsive, try restarting it. Closing the app completely before reopening often resolves minor glitches.

If problems persist, consider uninstalling and then reinstalling the app. This can give you a fresh installation and often corrects many issues. You could also check the app store for updates that may solve ongoing problems.

In cases where the app does not display air quality data accurately, restart the air purifier. This action can help reset any internal sensors that may have malfunctioned.

If you’ve done all of this and still encounter issues, consult the user manual or customer service. They often provide specific troubleshooting tips tailored to your model.

By being proactive and knowing how to troubleshoot, you can ensure your Levoit air purifier performs optimally. Addressing these issues strengthens the overall experience of using the device.

Conclusion

In summary, connecting your Levoit air purifier to WiFi enhances its usability. Throughout this article, we have discussed essential steps to ensure a smooth connection. Starting from understanding your air purifier to troubleshooting common issues, you are now well-equipped.

By utilizing the app, you can control your device, monitor air quality, and optimize its performance. These features provide you with the convenience you need in modern living.

Moreover, knowing how to troubleshoot can save you time and frustration in the long run. An efficient air purification system not only improves your air quality but also enhances your overall well-being.

As the demand for cleaner air continues to grow, Levoit remains a leader in this essential market. By embracing their technology, you can take significant steps toward a healthier indoor environment.

Consider sharing this information with friends and family who might find it helpful. Clean air is essential for everyone, and having the right tools at your disposal makes a significant difference. Enjoy your fresh, purified air!

Can you use air purifier and humidifier at the same time?

air purifier and a humidifier

Air quality is a concern for many individuals, especially those with allergies or respiratory conditions. Understanding how to effectively maintain indoor air quality is crucial. Both air purifiers and humidifiers play important roles, yet many wonder if they can be used together. This article will explore their functions, benefits, and the dynamics of using them simultaneously.

Understanding Air Purifiers

Air purifiers are designed to eliminate airborne particles. They can filter out dust, pollen, pet dander, and other allergens. Typically, these devices use various technologies, like HEPA filters. Consequently, air purifiers can significantly improve indoor air quality. The cleaner air can help individuals breathe easier. Furthermore, using an air purifier can reduce health risks associated with poor air quality.

The Mechanism of Air Purifiers

Air purifiers work by drawing air into the device. Once inside, air passes through the filter system. There, harmful particles and allergens are trapped. The clean air is then released back into the room. Essentially, this continuous cycle helps maintain cleaner indoor environments. Many models also feature activated carbon filters to remove odors. Hence, air purifiers not only clean air but also enhance overall freshness.

Benefits of Air Purifiers

Using an air purifier offers numerous benefits. First, they reduce allergy symptoms. Many individuals experience relief from sneezing, itching, and congestion. Moreover, these devices help combat asthma triggers. In addition, reducing indoor pollutants improves respiratory health. Families with children or elderly members may find them especially beneficial. Overall, investing in an air purifier is vital for a healthier lifestyle.

air purifier and a humidifier

The Role of Humidifiers

On the other hand, humidifiers add moisture to the air. Dry air can lead to various health issues, including dry skin and respiratory discomfort. Humidifiers work by releasing water vapor or steam into the environment. This process increases humidity levels, making the air feel more comfortable. Consequently, using a humidifier can contribute to overall well-being.

Different Types of Humidifiers

There are several types of humidifiers available in the market. Evaporative humidifiers rely on a fan to blow air through a wet wick. On the contrary, ultrasonic humidifiers use high-frequency vibrations to create a fine mist. Steam vaporizers boil water and release steam into the air. Each type serves a similar purpose but may cater to different needs. Choosing the right humidifier can depend on personal preferences and specific goals.

Advantages of Humidifiers

The advantages of using a humidifier are substantial. For instance, they alleviate dry skin issues. During winter months, indoor air tends to become overly dry. This can lead to chapped lips and skin irritation. Furthermore, humidifiers can help relieve sinus congestion. They provide comfort to individuals suffering from colds or allergies. Overall, maintaining optimal humidity levels can improve quality of life.

air purifier and a humidifier

Using Air Purifiers and Humidifiers Together

Now that we understand each device’s function, let’s explore using them together. Many people question whether these devices can coexist without issues. In short, yes, air purifiers and humidifiers can be used simultaneously for better indoor air quality. When combined, they can complement each other’s functions effectively. Hence, individuals can enjoy both clean and comfortably moist air.

The Benefits of Combination

Using both devices yields several benefits. First, it creates a balanced atmosphere indoors. While air purifiers clean the air, humidifiers maintain optimal humidity levels. This balance is essential for health, especially in winter months. Dry air can aggravate respiratory issues and skin problems. By employing both devices, individuals can mitigate these effects effectively.

Considerations When Using Both Devices

However, some considerations arise when using both devices. First, it’s essential to choose the right locations. Ideally, position the humidifier away from the air purifier. This placement ensures the purifier can effectively filter the air. Additionally, monitor humidity levels. Excess humidity can introduce mold growth. Therefore, maintaining humidity levels between 30% and 50% is advisable.

Health Considerations

Both air purifiers and humidifiers offer notable health benefits. However, it’s crucial to take certain considerations into account. For instance, not all air purifiers are created equal. High-efficiency models effectively capture smaller particles. Likewise, humidifiers require regular maintenance to prevent bacterial growth.

The Importance of Regular Maintenance

Regular maintenance is important for both devices. For air purifiers, ensure the filters are changed regularly. Typically, the filters should be changed every 6 months. Likewise, thorough cleaning of the device is crucial to prevent dust buildup. Humidifiers also need regular attention. Cleaning them weekly hinders mold and bacteria from developing. Following the manufacturer’s recommendations will ensure optimal performance.

Recognizing Allergens and Irritants

Understanding specific allergens and irritants in your home is key. Identify sources of indoor pollution, like pets or tobacco smoke. Additionally, recognize pollutants from cooking or outdoor air entering your home. By being aware, you can make informed decisions. Selecting an air purifier that specializes in those pollutants can further enhance air quality. Consequently, this personalized approach improves overall respiratory health.

Operational Efficiency of Combined Devices

Energy Consumption

When using an air purifier and humidifier at the same time, energy consumption can be a concern. Both devices consume electricity, which may affect your utility bills. However, modern air purifiers and humidifiers have become more energy-efficient. Choosing Energy Star-rated appliances can help reduce energy usage. It’s beneficial to evaluate how much energy each device consumes. Understanding this factor will aid in making informed choices based on your budget.

Noise Levels

Each device has different noise levels that can affect your comfort. Air purifiers often operate quietly, with many models having noise-reducing technology. However, some humidifiers can produce white noise or operational sounds when in use. If you are sensitive to noise, look for quiet models of both devices. Noise can disrupt your daily activities or sleep patterns. Therefore, choosing quieter devices can significantly improve your overall experience.

air purifier and a humidifier

Best Practices for Using Air Purifiers and Humidifiers

Choosing Compatible Devices

When selecting an air purifier and a humidifier to use together, compatibility is important. Look for models that are designed to work well in conjunction. Some brands even offer combo units that serve both purposes. These devices often come with features tailored for optimal performance. When choosing your appliances, read reviews and check specifications for compatibility. It can save you both time and money in the long run.

Monitoring Humidity Levels

Using a hygrometer can help you monitor indoor humidity levels. Ideally, indoor humidity should be between 30% and 50%. Too much humidity can promote mold growth and dust mites. In contrast, too little humidity can lead to dry skin and respiratory irritation. Regularly monitoring these levels ensures you maintain a comfortable and healthy environment. By understanding how both devices affect humidity, you can make better adjustments as needed.

Creating an Optimal Indoor Environment

To create an optimal indoor environment, reach a balance between humidity and cleanliness. Employing both an air purifier and a humidifier can lead to such an atmosphere. However, this balance requires monitoring and adjustments. Use a hygrometer to measure humidity levels in your home. Continuous adjustment will help to ensure that the environment remains comfortable.

Tips for Maintaining a Healthy Balance

Consider using a programmable humidifier for convenience. Some models can adjust humidity levels automatically. This feature is helpful in fluctuating weather conditions. Likewise, a smart air purifier can track air quality and adjust accordingly. Thus, keeping both devices efficient can offer a seamless experience.

Evaluating Your Space

Evaluate the size of your space before making decisions. Ensure the capacity of each device matches your requirements. Overusing appliances designed for smaller areas may lead to ineffective results. Similarly, small units in large spaces will struggle to maintain optimal conditions. Understanding your space ensures that both devices work effectively.

Conclusion

The combination of air purifiers and humidifiers can greatly enhance indoor air quality. Each device serves unique functions that complement one another. Thus, using them together creates a healthier living environment. Nonetheless, appropriate maintenance and monitoring are vital. Taking these steps will ensure both devices operate smoothly. Therefore, enjoying fresh, comfortable air in your home becomes a reality.