History of Microwaves: Who created microwaves?

Legacy of the Microwave Oven

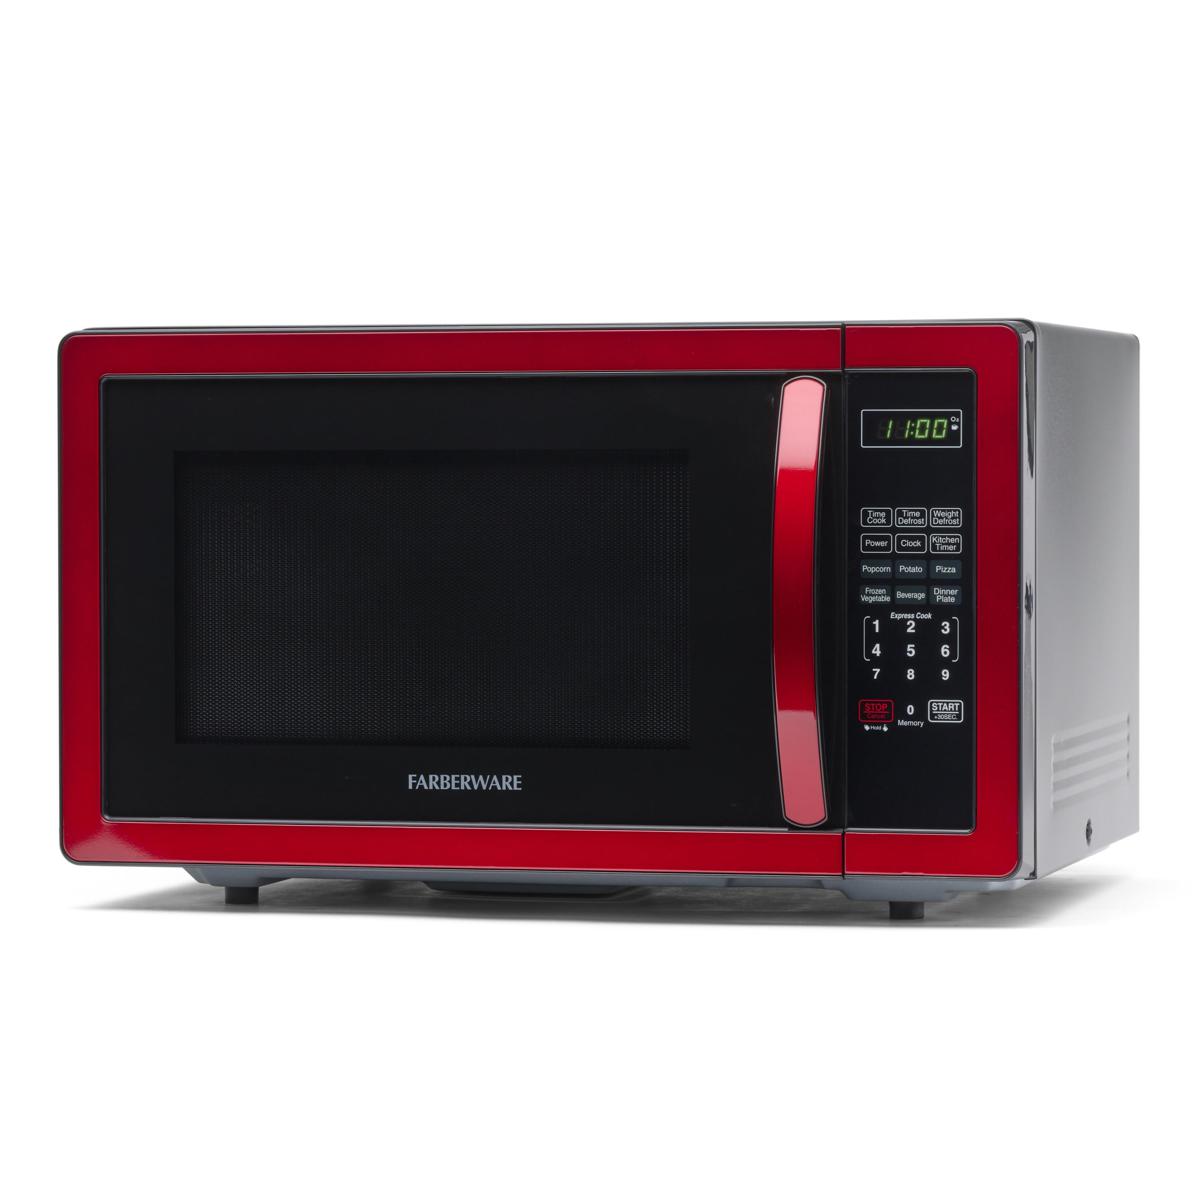
Who created microwaves? The humble microwave oven has become a ubiquitous appliance in modern kitchens, transforming the way we prepare and enjoy our meals. Yet, the origins of this revolutionary technology can be traced back to the pioneering efforts of a few visionary individuals who dared to push the boundaries of what was possible in the realm of electromagnetic waves and their practical applications.

From the early experiments with radar technology during World War II to the commercialization of the first consumer-oriented microwave ovens, the story of the microwave’s creation is a captivating one, so filled with scientific breakthroughs, so serendipitous discoveries, and the relentless pursuit of innovation. It is a tale that sheds light on the remarkable individuals who laid the foundation for this culinary revolution. Forever changing the way we approach the art of cooking and the convenience of meal preparation.


In this comprehensive article, we will delve into the fascinating history of the microwave. Exploring the key figures and their contributions that have shaped the evolution of this ubiquitous kitchen appliance. Prepare to be inspired by the ingenuity and perseverance of those who dared to harness the power of electromagnetic radiation and transform it into a household staple.

Who created microwaves? The Pioneering Roots of Microwave Technology

The origins of the microwave can be traced back to the pioneering work of scientists and researchers who were exploring the potential of electromagnetic waves for various applications.

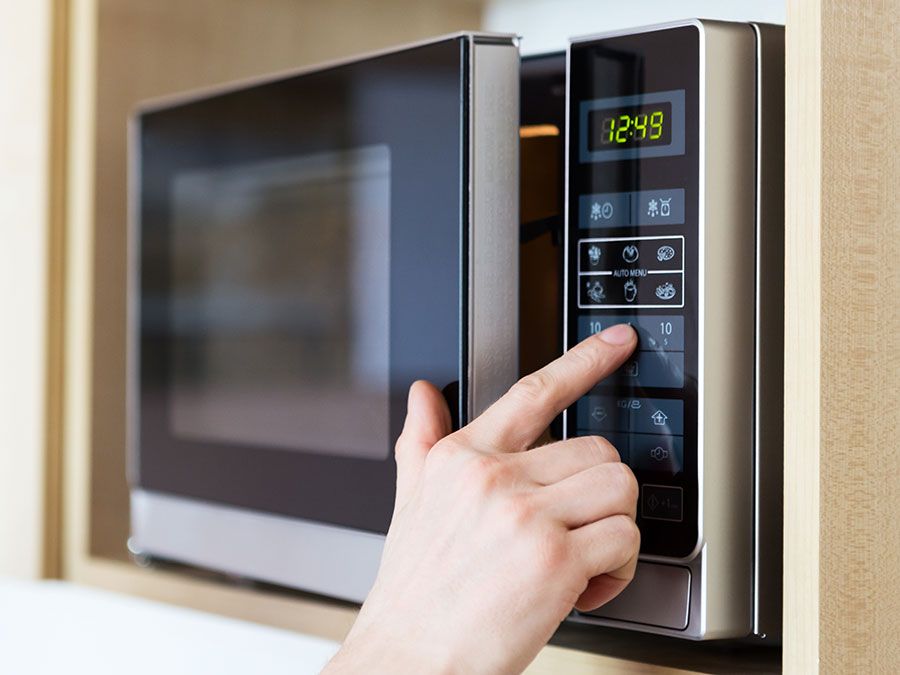
Who created microwaves? The Discovery of Microwave Radiation

The foundation for the microwave’s development was laid in the late 19th and early 20th centuries, as scientists delved deeper into the nature of electromagnetic radiation.

The Experiments of Heinrich Hertz

German physicist Heinrich Hertz conducted groundbreaking experiments in the 1880s, so demonstrating the existence of electromagnetic waves and laying the groundwork for future developments in radar and microwave technology.

Who created microwaves?  The Contributions of James Clerk Maxwell

Scottish physicist James Clerk Maxwell’s theoretical work on electromagnetic theory in the 1860s provided the scientific framework for understanding the behavior and properties of microwaves.

The Wartime Advancement of Radar Technology

The outbreak of World War II sparked a surge of research and development in the field of radar, which would later pave the way for the microwave oven.

The Radar Pioneers

Prominent scientists and engineers, such as Robert Watson-Watt in the United Kingdom and Percy Spencer in the United States, so played pivotal roles in advancing radar technology during the war.

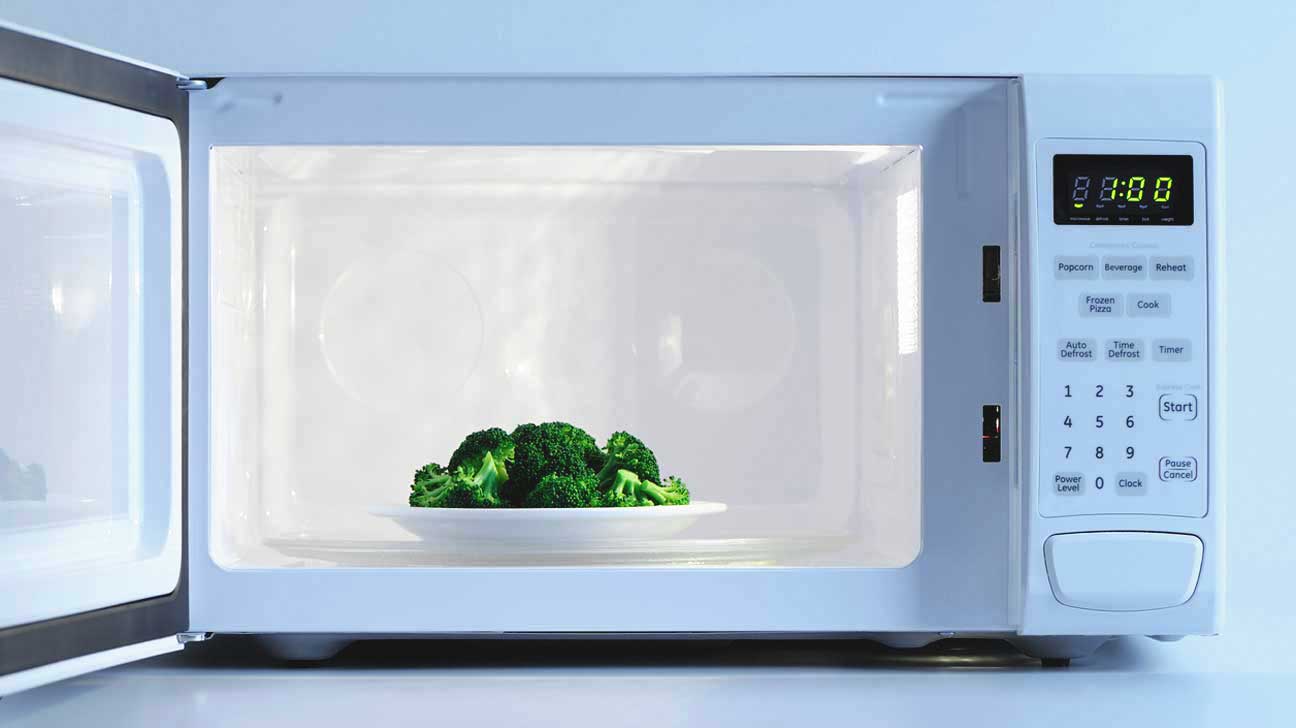
The Discovery of the Magnetron

The invention of the magnetron, a crucial component in radar systems. Was a significant milestone that would later prove essential in the creation of the microwave oven.

The Birth of the Microwave Oven

While the origins of microwave technology can be traced back to the early 20th century, so it was the serendipitous discovery of its cooking potential that led to the development of the first commercial microwave ovens.

The Accidental Discovery by Percy Spencer

The story of the microwave oven’s invention is often attributed to the chance discovery made by Percy Spencer, as an American engineer working for Raytheon.

Percy Spencer’s Encounter with a Melted Candy Bar

During his work on radar technology, Spencer noticed that a candy bar in his pocket had unexpectedly melted, so leading him to investigate the cause.

The Popcorn Experiment

Intrigued by the potential of microwave radiation, Spencer conducted experiments that led to the discovery of the ability to quickly and efficiently pop kernels of popcorn.

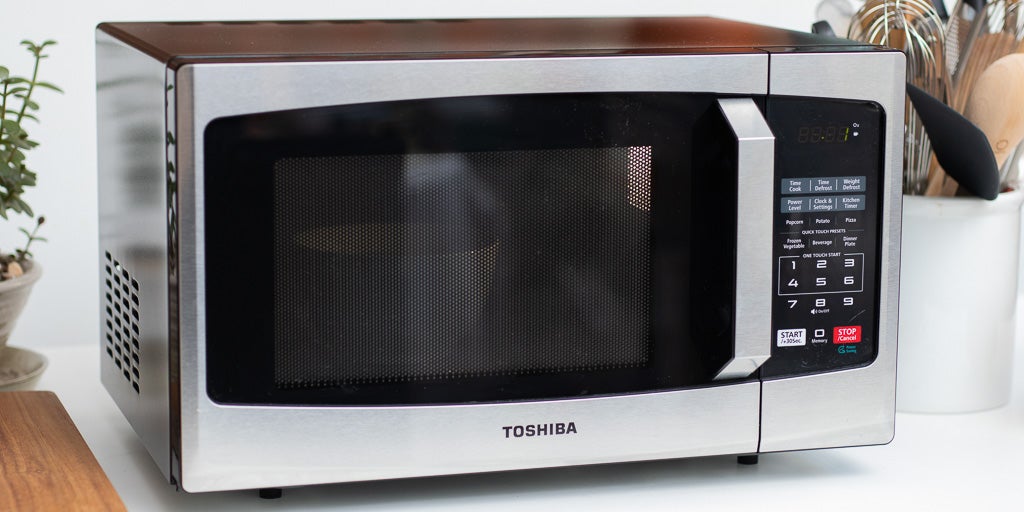
The Commercialization of the Microwave Oven

With the potential of microwave cooking identified, Raytheon and other companies worked to develop and market the first consumer-oriented microwave ovens.

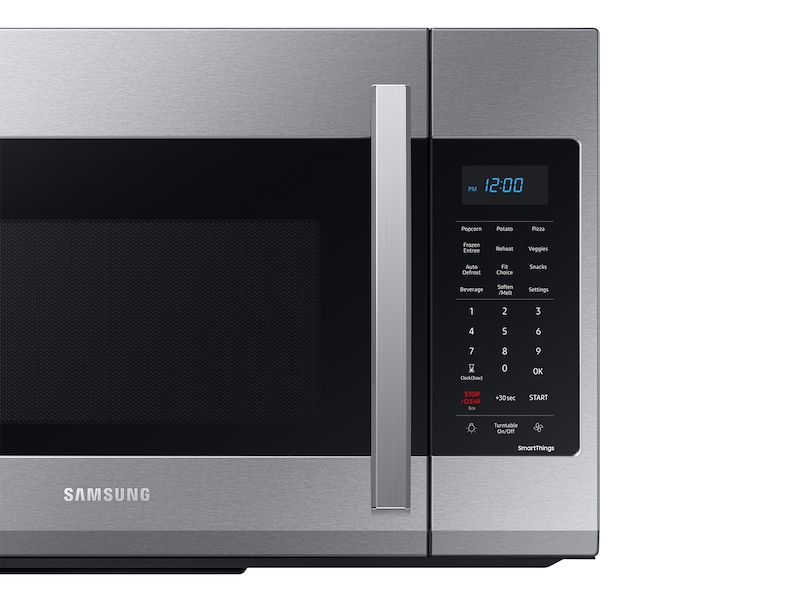
The Radarange: The First Commercial Microwave Oven

In 1947, Raytheon introduced the Radarange, the world’s first commercially available microwave oven. Targeting commercial and institutional kitchens.

The Gradual Adoption of Microwave Ovens

As the technology improved and costs decreased, microwave ovens gradually became more accessible to the general public, so transforming home cooking and meal preparation.

The Pioneers Behind the Microwave Oven

While the accidental discovery by Percy Spencer is often highlighted, the development of the microwave oven involved the contributions of numerous other scientists and engineers.

The Influence of Raytheon and Other Companies

The microwave oven’s journey to commercial viability was supported by the efforts of several major corporations and their research teams.Legacy of the Microwave Oven

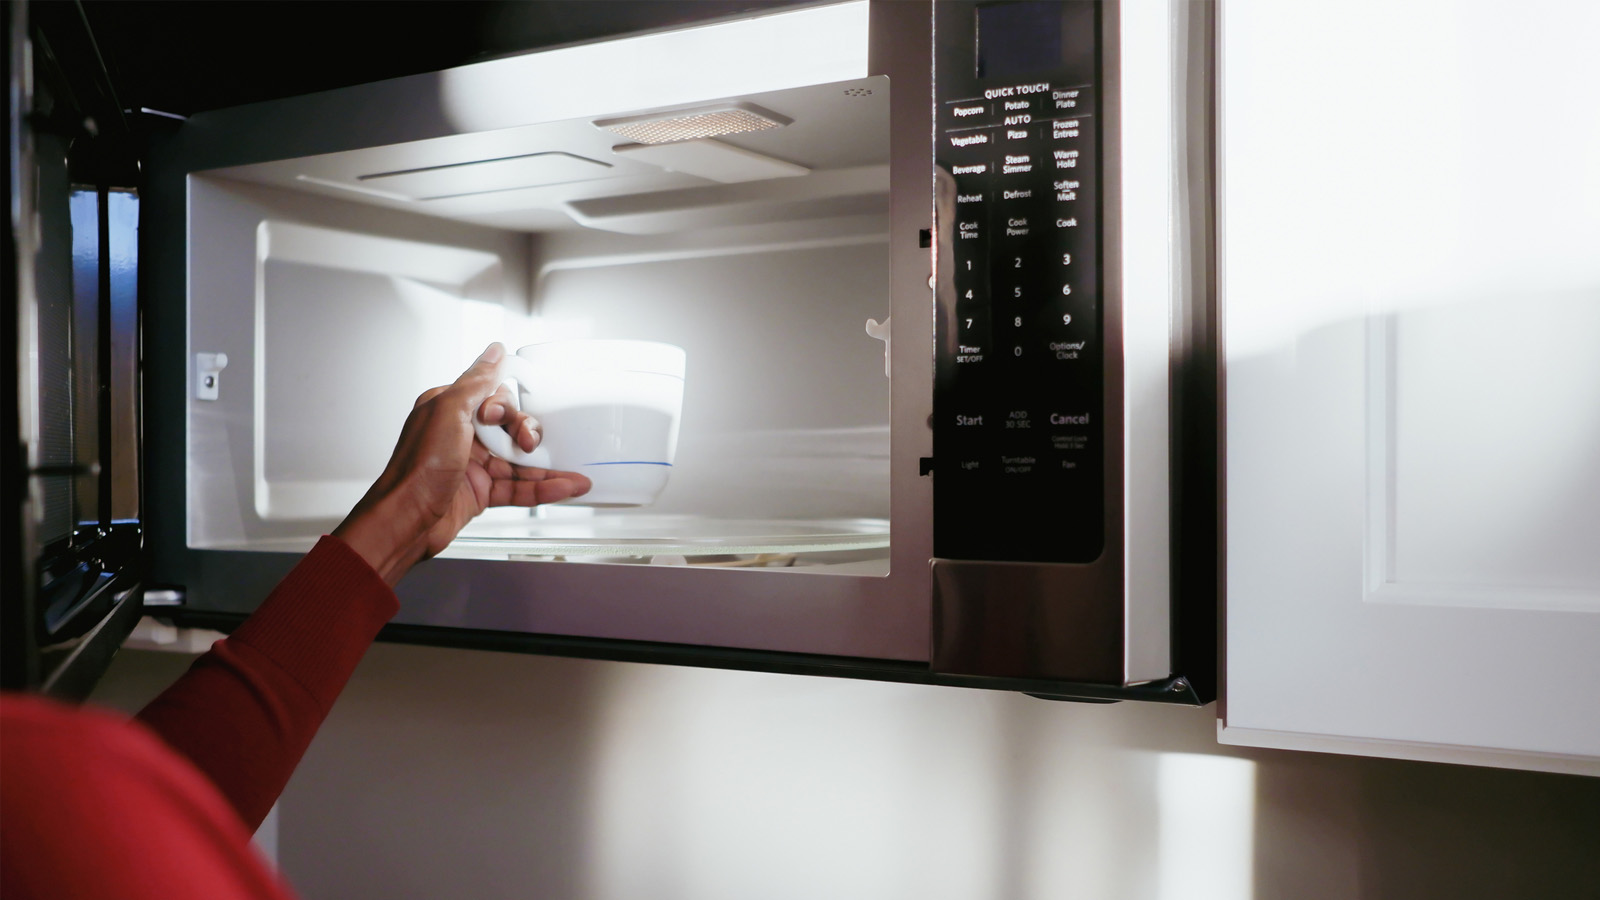
Raytheon’s Role in Microwave Oven Development

As the employer of both Spencer and Batcher, Raytheon played a central role in driving the research, development. And commercialization of the microwave oven.

Contributions from Other Companies

While Raytheon was a pioneer, other companies, such as Amana and General Electric, also made significant contributions to the evolution of the microwave oven.

The Impact of Microwave Ovens on Culinary Practices

The introduction of the microwave oven revolutionized the way we approach meal preparation and cooking, so transforming the culinary landscape.

The Convenience and Time-Saving Benefits

One of the primary drivers behind the widespread adoption of microwave ovens was the significant time and effort they saved in the kitchen.

Rapid Heating and Cooking Times

Microwave ovens’ ability to quickly heat and cook food made them an attractive option for busy households and individuals.

Reduced Prep and Cleanup Time

The convenience of microwave cooking,  so with its minimal preparation and easy cleanup. Appealed to consumers seeking to streamline their kitchen routines.

The Influence on Meal Preparation and Eating Habits

The microwave oven’s impact extended beyond just the cooking process, so shaping broader cultural and societal trends.Legacy of the Microwave Oven

The Rise of Microwavable Prepared Foods

The availability of pre-packaged, microwave-friendly meals and snacks transformed the grocery landscape and consumer eating habits.

Changes in Meal Times and Dining Patterns

The speed and convenience of microwave ovens contributed to the shift towards more frequent, so individualized meal times and the decline of traditional family dining.

The Adaptation of Culinary Techniques

As microwave ovens became more prevalent, chefs, home cooks. And food manufacturers had to adapt their recipes and cooking methods to leverage the unique properties of microwave technology.Legacy of the Microwave Oven

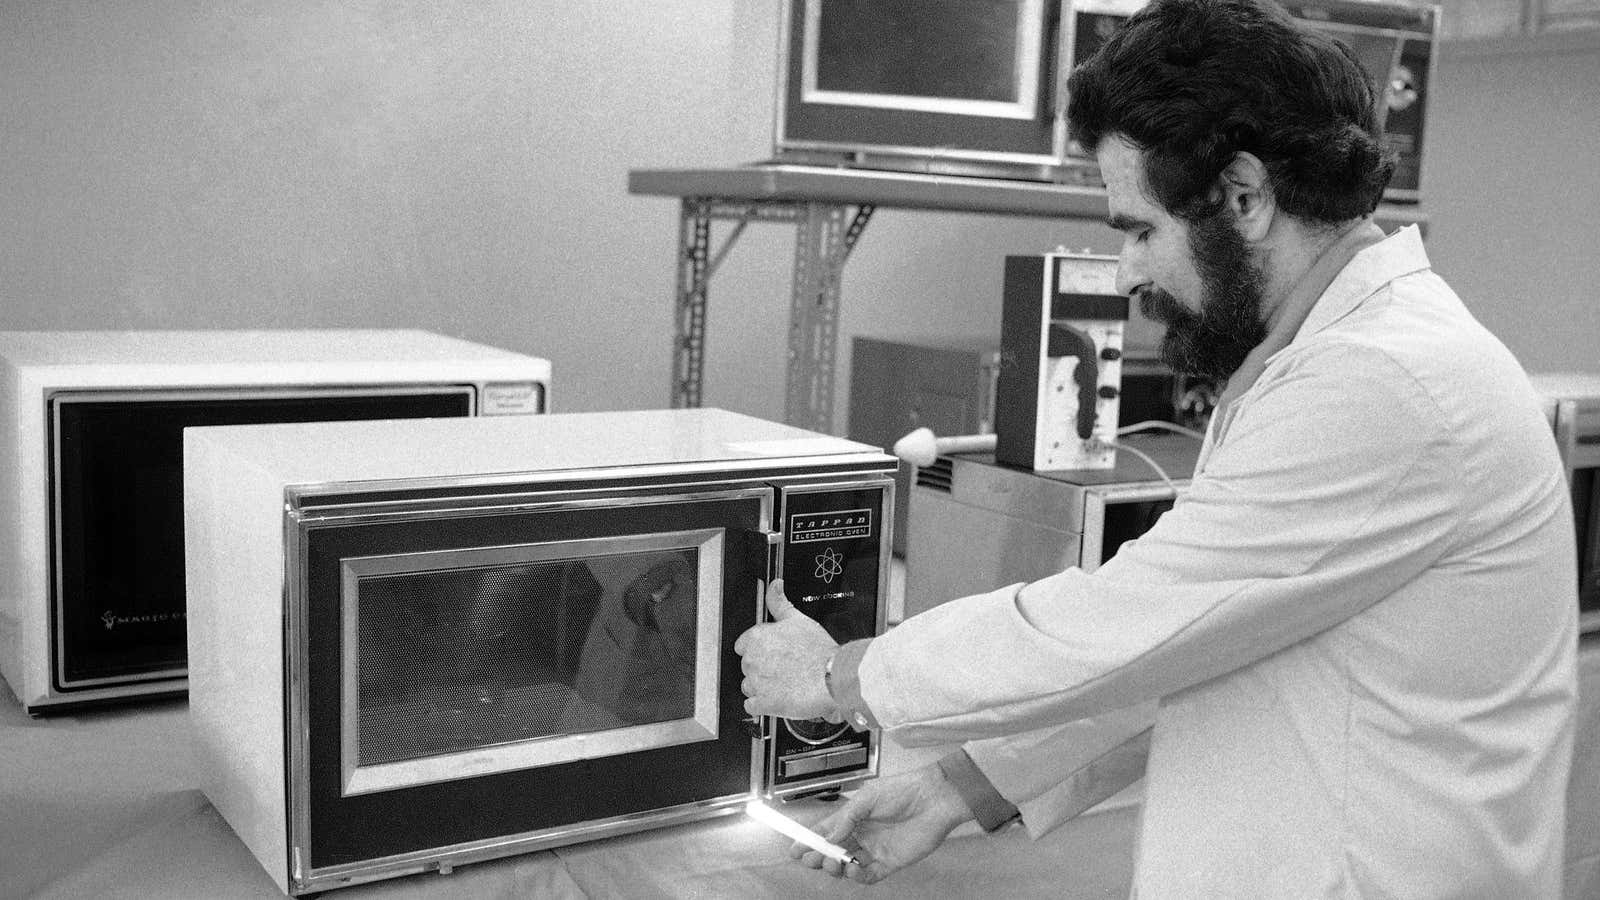
Developing Microwave-Specific Recipes and Techniques

Cooks and culinary professionals explored new ways of preparing food in the microwave. Experimenting with different techniques and ingredients.

The Integration of Microwave Ovens into Modern Kitchens

The microwave oven became a staple appliance in homes and commercial kitchens.Seamlessly integrating into the overall culinary ecosystem.

Conclusion: The Enduring Legacy of the Microwave Oven

The microwave oven’s journey from a serendipitous discovery to a ubiquitous kitchen appliance is a testament to the power of innovation. The pursuit of scientific understanding, and the relentless drive to improve the human experience.

How to get iron stain out of clothes?

Removing Stubborn Marks from Clothing

How to get iron stain out of clothes? Iron stains on clothing can be a frustrating and persistent problem, leaving unsightly marks that seem impossible to remove. Whether it’s the result of an iron mishap or the accumulation of mineral deposits, these stubborn stains can quickly ruin the appearance of your favorite fabrics. However, with the right knowledge and techniques, you can effectively eradicate iron stains and restore your clothes to their former glory.

In this comprehensive guide, we’ll explore a variety of proven methods and expert tips for removing iron stains from garments, helping you tackle this common laundry challenge with confidence. From pre-treating strategies to specialized cleaning solutions, we’ll cover all the essential steps to ensure your clothes look fresh and stain-free, no matter the severity of the iron marks.

Prepare to bid farewell to those unsightly iron stains and reclaim the pristine appearance of your wardrobe. With the knowledge and tools provided in this article, you’ll be equipped to tackle even the most stubborn iron stains, keeping your clothes looking their best and prolonging their lifespan.

Understanding the Nature of Iron Stains

Before diving into the removal process, it’s crucial to understand the underlying causes and characteristics of iron stains, as this knowledge will inform the most effective approach.

How to get iron stain out of clothes? Identifying the Source of Iron Stains

Iron stains can originate from a variety of sources, each with its own unique properties and challenges.Removing Stubborn Marks from Clothing

Ironing Mishaps

When an iron is left on a garment for too long or the temperature is set too high, it can lead to the transfer of iron deposits, resulting in stubborn stains.

Mineral-Rich Water

In areas with high mineral content in the water, the accumulation of iron and other minerals can leave behind persistent stains on fabrics during the washing process.

Environmental Factors

Exposure to iron-rich soil, rust, or other environmental sources can also contribute to the formation of iron stains on clothing.

Understanding the Chemical Composition of Iron Stains

Iron stains are typically composed of ferric oxide, a reddish-brown compound that can be challenging to remove from fabrics.

The Oxidation Process

The chemical reaction between iron and oxygen leads to the formation of ferric oxide, which becomes embedded in the fabric’s fibers, making it difficult to extract.

The Stubborn Nature of Iron Stains

The strong bond between the iron compounds and the fabric’s fibers is what makes iron stains particularly persistent and resistant to traditional cleaning methods.

How to get iron stain out of clothes? Effective Strategies for Removing Iron Stains

Tackling iron stains requires a multifaceted approach, utilizing a combination of pre-treating techniques and specialized cleaning solutions to effectively break down and remove the stubborn marks.

Pre-Treating the Iron Stain

Proper pre-treatment is the crucial first step in the stain removal process, helping to loosen and lift the iron compounds from the fabric.

Soaking in Acidic Solutions

Submersing the stained garment in a solution of water and an acidic substance, such as white vinegar or lemon juice, can help to dissolve the ferric oxide.

Applying Stain-Lifting Powders

Specialized stain-lifting powders, often containing oxalic acid or other chelating agents, can be directly applied to the stain and allowed to sit before washing.

Agitating the Stain

Gently scrubbing or rubbing the stained area with a soft-bristled brush or sponge can help to physically dislodge the embedded iron compounds.

Leveraging Specialized Cleaning Solutions

Once the pre-treatment has loosened the iron stain, the next step is to utilize specialized cleaning products designed to effectively remove the stubborn marks.

Oxygen-Based Bleaches

Oxygen-based bleaches, such as hydrogen peroxide or sodium percarbonate, can break down the ferric oxide and lift the stain from the fabric.

Iron-Specific Cleaners

Commercial iron stain removers, often containing acids or chelating agents, are formulated specifically to target and eliminate iron-based stains.

Homemade Cleaning Mixtures

A simple solution of water, white vinegar, and a small amount of dish soap can also be an effective homemade iron stain remover.

Employing Proper Washing Techniques

Ensuring that you follow the correct washing and drying procedures can further enhance the effectiveness of your iron stain removal efforts.

Washing in Hot Water

Washing the stained garment in hot water can help to activate the cleaning agents and facilitate the removal of the iron compounds.

Avoiding High Heat Drying

Allowing the garment to air dry or using a low-heat setting can prevent the iron stain from setting further during the drying process.

Repeating the Removal Process

In some cases, multiple treatment and washing cycles may be necessary to fully eradicate stubborn iron stains, so be patient and persistent.

Preventing Future Iron Stains

Alongside effective removal techniques, implementing preventive measures can help you avoid the frustration of dealing with iron stains in the future.

Adjusting Ironing Practices

Proper ironing techniques and maintenance of your iron can go a long way in preventing iron transfer stains.Removing Stubborn Marks from Clothing

Regulating Iron Temperature

Ensure that the iron temperature is appropriate for the fabric being ironed and avoid leaving the iron on a garment for too long.

Cleaning and Maintaining the Iron

Regularly cleaning and descaling your iron can remove any built-up mineral deposits that could potentially transfer to your clothing.

Addressing Water Quality Issues

If you suspect that your water supply is contributing to the formation of iron stains, there are steps you can take to mitigate the problem.

Installing a Water Softener

Investing in a water softener system can effectively remove excess minerals, including iron, from your water supply.

Using Distilled Water for Washing

Switching to distilled water for laundry tasks can prevent the introduction of iron and other mineral deposits onto your fabrics.

Incorporating Preventive Measures into Laundry Routines

Implementing simple, proactive steps into your regular laundry routine can help you stay ahead of potential iron stain issues.

Pre-Treating Clothing Before Washing

Making a habit of pre-treating garments with an appropriate stain remover or soaking solution can help prevent iron stains from setting in.

Monitoring Wash Water Temperatures

Ensuring that you’re washing clothes in the recommended water temperature range can also contribute to the prevention of iron stain formation.Removing Stubborn Marks from Clothing

Tackling Stubborn Iron Stains on Specialized Fabrics

While the methods discussed earlier are effective for a wide range of fabrics, certain delicate or specialized materials may require additional care and consideration when dealing with iron stains.

Addressing Iron Stains on Silk or Satin

Silk and satin fabrics require a more gentle approach to avoid damaging the delicate fibers.

Using Mild Detergents and Spot-Cleaning

Opt for gentle, pH-neutral detergents and focus on spot-cleaning the affected areas rather than subjecting the entire garment to harsh treatments.

Avoiding Harsh Chemicals

Steer clear of harsh chemicals, such as bleach or harsh stain removers, as they can compromise the integrity of silk and satin fabrics.

Removing Iron Stains from Wool or Cashmere

Wool and cashmere require extra care, as the fibers can be sensitive to certain cleaning methods.

Gentle Hand-Washing Techniques

Hand-washing the garment in a mild, wool-safe detergent solution can be a more effective and less damaging approach for these delicate fabrics.

Considering Professional Dry Cleaning

For particularly stubborn iron stains on wool or cashmere, it may be best to seek the expertise of a professional dry cleaner.

Tackling Iron Stains on Delicate Fabrics

Certain lightweight or sheer fabrics, such as chiffon or lace, may need specialized handling to remove iron stains without causing damage.

Testing Stain Removal Methods

Always perform a spot test on a small, inconspicuous area of the garment to ensure the chosen treatment method is safe for the fabric.

Seeking Professional Assistance

For delicate fabrics or particularly challenging iron stains, it’s often best to consult with a professional dry cleaner or fabric restoration expert.

Conclusion: Reclaiming the Pristine Appearance of Your Wardrobe

Eradicating iron stains from your clothing can be a daunting task, but with the right knowledge and techniques, you can effectively tackle even the most stubborn marks and reclaim the pristine appearance of your wardrobe. Through this comprehensive guide, you have uncovered the underlying causes of iron stains, explored a range of proven removal strategies, and learned about preventive measures to avoid future issues.

Whether it’s an ironing mishap, mineral-rich water, or environmental factors, the ability to successfully remove iron stains from your clothing can save you the frustration of having to replace or discard favorite garments. By incorporating the pre-treating techniques, specialized cleaning solutions, and proper washing procedures outlined in this article, you’ll be equipped to tackle even the most persistent iron stains, restoring your clothes to their former glory.

As you continue to navigate the laundry challenges presented by iron stains, remember to approach the problem with a systematic and persistent mindset. Embrace the knowledge you’ve gained, experiment with different removal methods, and don’t be afraid to seek professional assistance for delicate or particularly stubborn cases. With dedication and the right tools, you can effectively eradicate iron stains and maintain the pristine appearance of your clothing for years to come.

Reclaim the beauty and longevity of your wardrobe by conquering the battle against iron stains. Let this comprehensive guide be your trusted resource, empowering you to tackle this common laundry obstacle with confidence and restore your clothes to their optimal condition.

Banishing Iron Burn Marks: Effective Strategies to Restore Clothes

Iron Burn Marks

The dreaded sight of an iron burn marks on clothes can be a disheartening experience, leaving you feeling frustrated and helpless. These unsightly blemishes, caused by the intense heat of an iron, can seem nearly impossible to remove, causing us to resign ourselves to the fate of a permanently damaged garment. However, with the right techniques and a bit of perseverance, it is possible to effectively tackle these stubborn iron burn marks and restore the pristine appearance of your clothing.

In this comprehensive guide, we’ll explore a variety of proven methods and strategies to address and remove iron burn marks from your clothes. Whether you’re dealing with a recent mishap or have been struggling with a long-standing stain, this article will equip you with the knowledge and tools to conquer these challenging marks and keep your wardrobe looking its best.

Prepare to bid farewell to those unsightly iron burn marks and embrace a future of seamlessly pristine and well-cared-for clothing.

Understanding the Nature of Iron Burn Marks

Before delving into the removal techniques, it’s essential to understand the underlying causes and characteristics of iron burn marks, as this knowledge can inform the most effective approach to addressing them.

Iron Burn Marks

The Science Behind Iron Burn Marks

Iron burn marks are the result of the intense heat and pressure of an iron, which can cause irreversible damage to the fabric’s fibers.

Thermal Degradation of Fibers

The high temperature of the iron can literally melt and degrade the fabric’s fibers, leading to the formation of the characteristic burn mark.

The Role of Moisture and Steam

The presence of moisture or steam from the iron can exacerbate the thermal degradation, making the burn marks more pronounced and difficult to remove.

Common Causes of Iron Burn Marks

Identifying the potential sources of iron burn marks can help you prevent them from occurring in the first place and address them more effectively.

Leaving the Iron Stationary

Allowing the hot iron to rest on a single spot for an extended period can quickly lead to the formation of a burn mark.

Ironing Delicate Fabrics

Certain fabrics, such as silk or synthetic blends, are more susceptible to iron burn marks due to their delicate nature.

Improper Ironing Technique

Applying excessive pressure or passing the iron over the same area repeatedly can also contribute to the development of burn marks.

Immediate Intervention and Stain Removal

When an iron burn mark occurs, acting quickly is crucial to minimize the damage and increase the chances of successful removal. Here are some immediate intervention techniques to try.

Blotting and Cooling the Affected Area

The first step in addressing an iron burn mark is to quickly cool the affected area and prevent further damage to the fabric.

Blotting with a Damp Cloth

Gently blot the burn mark with a clean, damp cloth to absorb any residual heat and moisture.

Allowing the Area to Cool Completely

Ensure the affected area has cooled completely before attempting any further treatment or cleaning.

Applying a Stain Removal Solution

Once the burn mark has cooled, you can apply a targeted stain removal solution to help lift and neutralize the damage.

Using Laundry Detergent or Dish Soap

Mix a small amount of gentle laundry detergent or dish soap with water and apply it directly to the burn mark.

Letting the Solution Sit and Rinse

Allow the solution to sit for a few minutes before rinsing the area thoroughly with clean water.

Attempting a Mild Abrasive Treatment

In some cases, a gentle abrasive treatment can help lift and remove the most stubborn iron burn marks.

Using a Soft-Bristled Brush

Gently brush the affected area with a soft-bristled brush, applying light pressure to help lift the damaged fibers.

Avoiding Excessive Scrubbing

Be cautious not to scrub too vigorously, as this could further damage the fabric.

Advanced Removal Techniques

For more persistent or deeply set-in iron burn marks, you may need to employ more advanced techniques to effectively restore your clothing.

Utilizing Vinegar or Lemon Juice

The acidic properties of vinegar and lemon juice can help neutralize and lift stubborn iron burn marks.

Iron Burn Marks

Applying Vinegar or Lemon Juice

Soak a clean cloth in undiluted white vinegar or lemon juice and gently dab the affected area.

Allowing Time for the Acid to Work

Let the vinegar or lemon juice sit on the burn mark for several minutes before rinsing.

Trying a Hydrogen Peroxide Solution

Hydrogen peroxide is a powerful oxidizing agent that can effectively break down and lift stubborn stains, including iron burn marks.

Preparing the Hydrogen Peroxide Solution

Mix a small amount of hydrogen peroxide with water in a spray bottle or apply it directly to the affected area.

Monitoring the Stain Removal Process

Carefully observe the area as the hydrogen peroxide works, adjusting the application time as needed.

Seeking Professional Dry Cleaning

For the most challenging or delicate iron burn marks, enlisting the help of a professional dry cleaner can be a game-changer.

Leveraging Specialized Cleaning Techniques

Experienced dry cleaners have access to specialized solvents, equipment, and techniques that can effectively address even the toughest iron burn marks.

Providing Detailed Information

When delivering the garment to the dry cleaner, be sure to provide as much information as possible about the nature and origin of the burn mark.

Preventing Future Iron Burn Marks

While the removal techniques mentioned above can effectively address existing iron burn marks, incorporating preventative measures into your laundry routine can help you avoid these unsightly blemishes in the first place.

Maintaining a Clean and Well-Functioning Iron

Regularly cleaning and servicing your iron can go a long way in preventing the transfer of heat-related damage to your clothes.

Cleaning the Iron Soleplate

Carefully remove any built-up residue or deposits on the iron’s soleplate to ensure a smooth and consistent heat transfer.

Checking for Damage or Malfunctions

Inspect your iron for any signs of wear, damage, or malfunction that could lead to the formation of burn marks.

Practicing Proper Ironing Techniques

Adopting good ironing habits and techniques can significantly reduce the risk of inadvertently creating iron burn marks on your clothes.

Avoiding Excessive Heat and Pressure

Use the appropriate heat setting for the fabric and apply only the necessary amount of pressure when ironing.Iron Burn Marks

Implementing a Consistent Ironing Motion

Develop a consistent, sweeping motion when ironing, rather than letting the iron rest in one spot for too long.

Caring for Delicate Fabrics

Extra care and caution must be taken when ironing delicate or synthetic fabrics to prevent the formation of stubborn iron burn marks.

Using a Pressing Cloth or Steam Setting

Consider using a pressing cloth or the steam setting on your iron to provide a protective barrier for delicate fabrics.

Exploring Alternative Garment Care Methods

In some cases, it may be best to avoid ironing altogether and explore alternative garment care methods, such as steaming or hand-washing.

Conclusion: Reclaiming the Pristine Appearance of Your Clothes

Iron burn marks can be a frustrating and seemingly intractable problem, but with the right techniques and a bit of persistence, it is possible to effectively remove these unsightly blemishes and restore the pristine appearance of your clothing. Through this comprehensive guide, you now have the knowledge and tools to conquer iron burn marks and maintain a well-cared-for wardrobe.

Whether you’re faced with a recent mishap or have been battling long-standing iron burn marks, the strategies outlined in this article will empower you to take swift and effective action. From employing immediate cooling and blotting techniques to leveraging advanced stain removal solutions, you now have a diverse arsenal of methods at your fingertips.

As you embark on the journey to banish iron burn marks from your clothes, embrace the satisfaction of reclaiming the flawless look of your garments. Implement the preventative measures discussed in this guide to minimize the risk of future burn marks and enjoy the confidence that comes with wearing clothes that are always looking their best.

Celebrate the triumph over iron burn marks and let this experience inspire you to approach other challenges in your life with the same determination and resourcefulness. The ability to effectively remove these stubborn marks is a testament to the power of perseverance, and its impact will extend far beyond the confines of your wardrobe, shaping the way you approach problem-solving and personal growth.

The Remarkable and Original Microwave Oven

microwave

The microwave oven has become a ubiquitous appliance in modern kitchens, revolutionizing the way we cook, heat, and prepare our meals. It’s hard to imagine a time when this now-indispensable device was not a part of our daily lives. However, the journey of the microwave oven from its humble beginnings to its widespread adoption is a fascinating story of innovation, serendipity, and the relentless pursuit of technological advancements. In this comprehensive article, we’ll delve into the original microwave oven, exploring the pivotal moments, key figures, and the remarkable scientific breakthroughs that paved the way for this transformative kitchen appliance. From the accidental discovery of the microwave effect to the tireless efforts of pioneering engineers, this article will offer a captivating glimpse into the evolution of the original microwave oven and its lasting impact on our culinary landscape.

Prepare to be transported back in time and witness the birth of a technological marvel that has forever changed the way we approach food and mealtime.microwave

The Accidental Discovery of Microwave Technology

The original microwave oven can be traced back to a serendipitous discovery made by a brilliant scientist, whose work would ultimately revolutionize the world of cooking and food preparation.

The Magnetron and the Microwave Effect

At the heart of the microwave oven’s technology lies the magnetron, a device that was initially developed for use in radar systems during World War II.

The Magnetron’s Pivotal Role

The magnetron’s ability to generate high-frequency electromagnetic waves, known as microwaves, was the key to its success in radar applications.

The Accidental Microwave Discovery

While testing a magnetron, Percy Spencer, an American engineer, made a remarkable observation – the candy bar in his pocket had melted, marking the accidental discovery of the microwave effect.

The Potential of Microwave Technology

Once the potential of microwave technology was recognized, scientists and engineers began to explore its practical applications, with a particular focus on the field of cooking and food preparation.

Recognizing the Heating Capabilities

The ability of microwaves to rapidly and efficiently heat various materials, including food, was a game-changing revelation.

Exploring Culinary Possibilities

The unique heating properties of microwaves opened up a world of possibilities for revolutionizing traditional cooking methods and creating new culinary experiences.

The Pioneering Efforts of Microwave Oven Development

The path from the accidental discovery of the microwave effect to the creation of the first practical microwave oven involved the dedicated efforts of a team of visionary engineers and researchers.

The Raytheon Company and the Magnetron’s Adaptation

The Raytheon Company, a leading defense contractor, played a pivotal role in the early development of the microwave oven.

Adapting the Magnetron for Domestic Use

Raytheon’s engineers recognized the potential of the magnetron for domestic applications and began exploring ways to adapt the technology for home use.

Overcoming Technical Challenges

The transformation of the magnetron from a radar component to a safe and reliable cooking appliance required overcoming a series of technical challenges.

The Invention of the First Microwave Oven

The Invention: After years of research and development, the first practical microwave oven, known as the Radarange, was introduced to the public in 1947.

The Radarange’s Groundbreaking Features

The Radarange, with its unique cooking capabilities, compact design, and safety features, represented a significant leap forward in the evolution of kitchen appliances.

The Initial Adoption and Challenges

Despite the Radarange’s innovative nature, its initial adoption was slow due to its high cost and the public’s unfamiliarity with microwave cooking.

The Refinement and Mass Adoption of Microwave Ovens

As the technology behind microwave ovens continued to evolve, the appliance gradually gained widespread acceptance and became an indispensable part of modern kitchens.

Improving Affordability and Accessibility

One of the key factors that contributed to the mass adoption of microwave ovens was the gradual reduction in their cost and the increased availability of these appliances.

Advances in Manufacturing and Materials

Improvements in manufacturing processes and the use of more cost-effective materials helped to make microwave ovens more affordable for the average consumer.microwave

Increased Adoption and Market Penetration

As microwave ovens became more accessible and affordable, their presence in homes and kitchens steadily grew, transforming them into a ubiquitous household appliance.

Enhancing Functionality and Usability

Alongside the efforts to improve affordability, manufacturers also focused on enhancing the functionality and usability of microwave ovens to meet the evolving needs of consumers.

Incorporating Advanced Features

Microwave ovens began to incorporate a range of advanced features, such as preset cooking programs, sensor technology, and digital controls, making them more user-friendly and efficient.

Improving Design and Aesthetics

The aesthetic appeal of microwave ovens also evolved, with manufacturers incorporating sleek designs and modern finishes to better complement the style of modern kitchens.

The Societal Impact of Microwave Ovens

The widespread adoption of microwave ovens had a profound impact on various aspects of society, from changing culinary habits to influencing the way we approach food and meal preparation.

Revolutionizing Cooking and Meal Preparation

Microwave ovens significantly reduced the time and effort required for cooking, allowing people to prepare meals more quickly and conveniently.

Influencing Dietary Habits and Nutrition

The convenience of microwave cooking, along with the availability of pre-packaged microwave-ready meals, had a notable impact on dietary habits and overall nutrition.

The Legacy and Future of Microwave Oven Technology

The microwave oven’s journey from an accidental discovery to a ubiquitous kitchen appliance has left an indelible mark on our culinary landscape, and its evolution continues to shape the future of food preparation.

The Ongoing Advancements in Microwave Technology

As technology advances, microwave oven design and functionality continue to evolve, offering new and innovative features to enhance the user experience.

Improving Energy Efficiency and Sustainability

Efforts to develop more energy-efficient microwave ovens, as well as the integration of sustainable materials and manufacturing processes, are underway.

Exploring Emerging Microwave-Based Technologies

Beyond traditional cooking applications, researchers are exploring the potential of microwave technology in diverse fields, such as medical diagnostics and industrial processing.

The Microwave Oven’s Enduring Impact on Society

The microwave oven’s influence has extended far beyond the kitchen, shaping various aspects of modern life and culture.

Transforming Culinary Habits and Expectations

The convenience and speed of microwave cooking have fundamentally altered the way we approach meal preparation and consumption.

Influencing the Food Industry and Product Development

The widespread use of microwave ovens has also impacted the food industry, leading to the development of specialized microwave-ready products and packaging.

The Microwave Oven’s Legacy and Future Innovations

As the microwave oven continues to evolve, its legacy as a transformative kitchen appliance and its potential for future innovations are undeniable.

Celebrating the Pioneering Spirit of Innovation

The remarkable story of the original microwave oven’s origins serves as a testament to the power of serendipity, perseverance, and the relentless pursuit of technological advancement.microwave

Envisioning the Microwave Oven of the Future

With ongoing research and development, the microwave oven of the future may offer even more sophisticated features, energy-efficient performance, and innovative culinary capabilities.

Conclusion: Honoring the Legacy of the Original Microwave Oven

The microwave oven’s journey from an accidental discovery to a ubiquitous kitchen appliance is a captivating tale of innovation, perseverance, and the transformative power of technology. Through this comprehensive article, we have delved into the remarkable origins of the microwave oven, exploring the pivotal moments, key figures, and the remarkable scientific breakthroughs that paved the way for this revolutionary cooking device.

The story of the microwave oven’s development is a testament to the enduring human spirit of innovation and the relentless pursuit of technological advancements. From the accidental melting of a candy bar to the tireless efforts of pioneering engineers, the path that led to the creation of the first practical microwave oven was paved with serendipity, determination, and a vision for the future.

As we honor the legacy of the original microwave oven, we must also celebrate the ongoing advancements in microwave technology and the boundless potential that lies ahead. The microwave oven’s impact on our culinary landscape, dietary habits, and overall lifestyle has been profound, and its continued evolution promises to unlock even more transformative possibilities in the years to come.

Embrace the remarkable story of the microwave oven and let it inspire you to approach the challenges of the present and the future with the same pioneering spirit that gave birth to this technological marvel. The microwave oven’s journey from accidental discovery to ubiquitous household appliance is a testament to the power of innovation, and its legacy will continue to shape the way we cook, eat, and experience the joy of food for generations to come.

Is refrigerator water safe?

The convenience of having a constant supply of chilled, filtered water at our fingertips is undoubtedly one of the modern kitchen’s greatest assets. Whether you’re filling a glass, brewing a refreshing cup of tea, or mixing up a healthy smoothie, the water dispenser built into your refrigerator can be a lifesaver. However, as with any source of drinking water, it’s important to consider the safety and quality of the water that flows from your fridge.

In this comprehensive guide, we’ll delve into the world of refrigerator water, exploring the factors that determine its safety and quality. From evaluating the filtration system to understanding potential contaminants, we’ll provide you with the information you need to make an informed decision about using your refrigerator’s water supply. Whether you’re a health-conscious individual or simply want to ensure the safety of your family’s hydration, this article will equip you with the knowledge to confidently enjoy the convenience of refrigerator water.

Prepare to quench your thirst and put your mind at ease as we uncover the truth about the safety of refrigerator water.Refrigerator Water

Understanding Refrigerator Water Filtration

The water that flows from your refrigerator’s dispenser or ice maker is typically filtered to remove impurities and improve the taste. However, the effectiveness and quality of this filtration process can vary significantly depending on the specific system installed in your appliance.

The Role of Refrigerator Water Filters

Refrigerator water filters play a crucial role in ensuring the safety and purity of the water that is dispensed or used to make ice.

Removal of Contaminants

Refrigerator filters are designed to remove a range of potential contaminants, including chlorine, lead, and other heavy metals, as well as sediment and bacteria.

Improving Taste and Odor

Beyond just removing harmful substances, refrigerator filters can also improve the overall taste and odor of the water, making it more pleasant to drink.

Types of Refrigerator Water Filters

There are several different types of filters used in refrigerators, each with its own unique capabilities and performance characteristics.

Carbon Filters

Carbon filters are the most common type, effectively removing chlorine, volatile organic compounds (VOCs), and other impurities.

Reverse Osmosis Filters

Reverse osmosis filters use a semi-permeable membrane to remove a wider range of contaminants, including dissolved minerals and salts.

Combination Filters

Some refrigerator models utilize a combination of filter types to provide more comprehensive water purification.

Proper Filter Maintenance and Replacement

Maintaining and replacing your refrigerator’s water filter as recommended is crucial for ensuring the ongoing safety and quality of the water.

Filter Replacement Schedules

Follow the manufacturer’s recommendations for how often to replace your refrigerator’s water filter, typically every 6 to 12 months.

Recognizing Filter Lifespan Indicators

Be aware of any signs that your filter may be reaching the end of its useful life, such as decreased water flow or changes in taste or odor.

Evaluating the Safety of Refrigerator Water

While refrigerator water filters can effectively remove many contaminants, it’s essential to consider the potential risks and understand the factors that can impact the overall safety of the water.Refrigerator Water

Common Contaminants in Refrigerator Water

Depending on the source of the water and the condition of your home’s plumbing, a variety of contaminants may be present in the water that flows through your refrigerator.

Lead and Heavy Metals

Older homes with lead-based plumbing or fixtures may be at risk of lead contamination, which can have serious health consequences, especially for children.

Bacteria and Microorganisms

Stagnant water in the refrigerator’s water lines or ice maker can potentially harbor bacteria, such as Legionella, if the system is not properly maintained.

Disinfection Byproducts

The chlorine used to treat municipal water supplies can interact with organic matter to form potentially harmful disinfection byproducts.

Factors that Affect Water Quality

Several factors, both within and outside of your control, can influence the safety and quality of the water dispensed by your refrigerator.

Water Source and Treatment

The quality of the water that enters your home, whether from a municipal supply or a private well, can play a significant role in the water’s final composition.

Condition of Plumbing and Refrigerator Components

Aging or deteriorating plumbing, as well as the condition of the refrigerator’s internal water lines and storage tanks, can contribute to water quality issues.Refrigerator Water

Filter Replacement and Maintenance

Neglecting to replace your refrigerator’s water filter as recommended can allow contaminants to bypass the filtration system.

Ensuring the Safety of Refrigerator Water

To safeguard the health and well-being of your family, it’s crucial to take proactive steps to ensure the safety and quality of the water provided by your refrigerator’s dispenser or ice maker.

Testing and Monitoring Water Quality

Regularly testing the water from your refrigerator can help you identify any potential contaminants and take appropriate action.

Conducting In-Home Water Tests

Consider using at-home water testing kits to check for the presence of common contaminants, such as lead, bacteria, or nitrates.

Engaging Professional Water Testing Services

For a more comprehensive analysis, you can consult with a certified water testing laboratory to conduct a detailed evaluation of your refrigerator water.

Upgrading or Replacing Filtration Systems

If your refrigerator’s water quality is found to be unsatisfactory, upgrading or replacing the filtration system may be necessary.

Selecting High-Quality Replacement Filters

Research and invest in high-quality replacement filters that are specifically designed to remove the contaminants of concern in your water.

Considering Whole-Home Water Filtration

For more extensive water quality issues, you may want to explore the option of installing a whole-home water filtration system.Refrigerator Water

Implementing Proper Maintenance Practices

Maintaining your refrigerator’s water dispenser and ice maker in accordance with the manufacturer’s instructions is crucial for ensuring ongoing water safety.

Regular Cleaning and Sanitization

Periodically clean and sanitize the water lines, storage tanks, and dispenser components to prevent the buildup of bacteria and mineral deposits.

Promptly Addressing Any Issues

If you notice any changes in the taste, odor, or appearance of the water, promptly address the issue and consider testing the water or contacting a professional.

Benefits of Enjoying Safe Refrigerator Water

By taking the necessary steps to ensure the safety and quality of your refrigerator’s water, you can enjoy a wealth of benefits that extend beyond just the water itself.

Improved Hydration and Health

Accessing safe, filtered water through your refrigerator can encourage increased water consumption, leading to better overall hydration and health.

Reduced Exposure to Contaminants

Removing harmful contaminants, such as lead and bacteria, from your drinking water can help protect your family’s well-being.

Enhanced Taste and Enjoyment

Filtered refrigerator water often has a crisp, refreshing taste that can make staying hydrated a more enjoyable experience.

Cost Savings and Environmental Benefits

Utilizing your refrigerator’s water dispenser can provide financial and environmental advantages compared to relying on bottled water.

Reduced Spending on Bottled Water

Eliminating the need to purchase bottled water can result in significant long-term cost savings.

Decreased Plastic Waste

Encouraging the use of reusable water bottles instead of disposable plastic bottles helps reduce environmental impact.

Peace of Mind and Convenience

Knowing that your refrigerator’s water is safe and of high quality can provide a sense of reassurance and convenience.

Confidence in Water Quality

Regularly testing and maintaining your refrigerator’s water filtration system can give you the peace of mind that your family is drinking safe, clean water.

Effortless Hydration on Demand

The easily accessible water dispenser in your refrigerator makes staying hydrated throughout the day a hassle-free experience.

Conclusion: Embrace the Safety and Convenience of Refrigerator Water

The water that flows from your refrigerator’s dispenser or ice maker can be a valuable and convenient source of hydration, but it’s essential to ensure its safety and quality. Through this comprehensive guide, you now have the knowledge and tools to evaluate the safety of your refrigerator water and take the necessary steps to protect your family’s well-being.

By understanding the role of refrigerator water filters, recognizing potential contaminants, and implementing proper maintenance practices, you can confidently enjoy the benefits of your refrigerator’s water supply. Whether you choose to conduct in-home water tests, upgrade your filtration system, or simply stay vigilant about filter replacements, you’re empowered to make informed decisions that prioritize the safety and purity of the water you and your loved ones consume.

Embrace the convenience and peace of mind that comes with knowing your refrigerator water is safe and of high quality. Quench your thirst, mix your beverages, and ice your drinks without a second thought, secure in the knowledge that your family’s hydration is in good hands. Unlock the full potential of your refrigerator’s water dispenser and enjoy the countless benefits of accessing clean, filtered water with the simple press of a button.

Navigating LG Refrigerator Issues: Problems and Solutions

LG refrigerators

Introduction

LG refrigerators are known for their innovative features and reliability, but like any appliance, they may experience issues. In this article, we’ll explore common problems that owners might face with their LG refrigerators and how to troubleshoot or resolve them effectively.

Common Cooling Issues with LG Refrigerators

Inconsistent or Insufficient Cooling

Discuss how LG refrigerator users might report that their appliance is not cooling properly and the potential reasons behind it.

Simple Fixes for Cooling Problems

Outline basic troubleshooting steps a user can take, such as checking for obstructions or setting temperatures.

Ice Maker Complications in LG Fridors

Ice Maker Not Producing Ice

Explain common reasons why an LG refrigerator’s ice maker may stop working and potential solutions.LG refrigerators

Tips to Maintain Your Ice Maker

Provide maintenance tips to prevent future ice maker issues in LG refrigerators.

LG Refrigerator Noise Problems

Sudden or Unusual Sounds

Describe the types of noises that might emanate from an LG refrigerator and what they might indicate.

Quieting Down Your LG Fridge

Share strategies to identify the cause of refrigerator noise and how to mitigate it.

LG Refrigerator Electronic Malfunctions

Faulty Control Panel

Address issues related to LG refrigerator control panels, such as unresponsive buttons or error codes.LG refrigerators

Resetting Electronic Controls

Offer advice on resetting the refrigerator to possibly resolve electronic glitches.

Water Dispenser and Water Filter Issues

Water Dispenser Not Working

Investigate common problems with LG refrigerator water dispensers, from water line clogs to filter problems.

Changing and Troubleshooting Water Filters

Instructions on how to change the water filter and troubleshoot related issues.

Problems with Refrigerator Doors

Compromised Door Seal Integrity

Reveal how a broken or worn-out door seal can impact the refrigerator’s performance.

Door Alignment and Seal Repairs

Guide on how to properly align LG refrigerator doors and fix or replace seals.

Managing Defrosting Dilemmas in LG Refrigerators

Build-Up of Frost and Ice

Delve into why frost might accumulate in an LG refrigerator and the steps to remedy it.

Automating the Defrost Process

Discuss the refrigerator’s automatic defrost feature and what to do if it’s not functioning correctly.

Error Codes and Diagnostic Messages

Understanding LG Refrigerator Error Codes

Translate common LG refrigerator error codes and what they signal about the appliance’s condition.

Step-By-Step Error Code Troubleshooting

Walkthrough a step-by-step process for diagnosing issues indicated by error codes.

When to Contact Professional Support

Assessing the Need for a Technician

Determine when a problem with an LG refrigerator requires the expertise of a licensed professional.

Finding Authorized LG Repair Services

Provide insights on locating a reputable service provider for LG refrigerator repairs.

LG Refrigerator Common Problems: Troubleshooting Your Appliance

LG refrigerators are popular for their sleek design and innovative features. However, like any appliance, they can encounter issues. This article addresses common LG refrigerator problems and offers troubleshooting tips. We’ll cover everything from temperature control to ice maker malfunctions, empowering you to solve problems and keep your food fresh.LG refrigerators

LG Refrigerator Not Cooling: Temperature Control Issues

One of the most common LG refrigerator problems is inadequate cooling. If your LG refrigerator isn’t keeping your food cold enough, several culprits could be at play.

Dirty Condenser Coils

Keywords: LG refrigerator not cooling, condenser coils, cleaning

Condenser coils play a vital role in releasing heat. Dirty coils can’t efficiently release heat, impacting cooling capacity.

Solution: Locate the condenser coils, usually on the back or bottom of the refrigerator. Unplug the refrigerator and carefully vacuum the coils using a brush attachment. Clean the coils every six months for optimal performance.

Faulty Thermostat

Keywords: LG refrigerator not cooling, thermostat, temperature control

A malfunctioning thermostat can disrupt temperature regulation, leading to inconsistent cooling.

Solution: Check if the thermostat is properly set. If adjusting the thermostat doesn’t resolve the issue, it may need replacement. Contact an LG-authorized technician for diagnosis and repair.

Blocked Air Vents

Keywords: LG refrigerator not cooling, air vents, airflow

Blocked air vents hinder proper airflow within the refrigerator, compromising cooling efficiency.

Solution: Ensure nothing obstructs the air vents inside the refrigerator. Avoid overpacking the refrigerator to allow for adequate airflow.

LG Refrigerator Ice Maker Not Working: Troubleshooting Tips

A malfunctioning ice maker is a common LG refrigerator problem, leading to frustration and warm drinks. Here are some troubleshooting tips:

Frozen Water Line

Keywords: LG refrigerator ice maker not working, frozen water line, ice production

A frozen water line can prevent water from reaching the ice maker, halting ice production.

Solution: Locate the water line supplying the ice maker, usually at the back of the refrigerator. If frozen, use a hairdryer on a low setting to thaw the line.LG refrigerators

Defective Water Inlet Valve

Keywords: LG refrigerator ice maker not working, water inlet valve, water supply

The water inlet valve controls the water flow to the ice maker. A faulty valve can disrupt water supply.

Solution: The water inlet valve is usually located at the back of the refrigerator. Check if the valve is receiving power and if it’s opening and closing correctly. If faulty, it may need replacement.

Ice Maker Assembly Issues

Keywords: LG refrigerator ice maker not working, ice maker assembly, ice tray, motor

Problems within the ice maker assembly, such as a jammed ice tray or a faulty motor, can prevent ice production.

Solution: Check the ice tray for any jams or blockages. If the motor is running but no ice is being produced, the motor may be faulty. Contact an LG-authorized technician for diagnosis and repair.

LG Refrigerator Leaking Water: Identifying the Source

Water leaks from your LG refrigerator can indicate various issues, ranging from minor to major.

Clogged Defrost Drain

Keywords: LG refrigerator leaking water, defrost drain, clogged drain

A clogged defrost drain can cause water to overflow and leak from the refrigerator.

Solution: The defrost drain is typically located at the back of the refrigerator near the condenser coils. Use a pipe cleaner or a solution of warm water and baking soda to clear any clogs.

Damaged Water Line

Keywords: LG refrigerator leaking water, water line, leak, damage

A damaged or cracked water line can lead to water leaks, requiring prompt attention.

Solution: Carefully inspect the water line supplying the refrigerator and the ice maker. If you detect any damage or leaks, turn off the water supply and contact a plumber for repairs.

Faulty Water Inlet Valve

Keywords: LG refrigerator leaking water, water inlet valve, leak, malfunction

A malfunctioning water inlet valve can cause uncontrolled water flow, leading to leaks.

Solution: If the water inlet valve isn’t properly closing, it can cause leaks. Check for any visible signs of damage or malfunction. If faulty, the valve may need replacement.

LG Refrigerator Making Noise: Diagnosing the Sounds

Unusual noises coming from your LG refrigerator can be unsettling, but often have simple solutions.

Evaporator Fan Noise

Keywords: LG refrigerator making noise, evaporator fan, buzzing, humming

The evaporator fan circulates cold air within the refrigerator. A noisy fan can indicate a malfunction.

Solution: Check if anything obstructs the fan blades. If the fan is loose or damaged, it may need replacement.

Condenser Fan Noise

Keywords: LG refrigerator making noise, condenser fan, buzzing, humming

The condenser fan helps dissipate heat from the condenser coils. A noisy condenser fan can indicate a problem.

Solution: Like the evaporator fan, ensure nothing is blocking the condenser fan blades. If the fan is loose or damaged, it may need replacement.

Compressor Noise

Keywords: LG refrigerator making noise, compressor, clicking, buzzing

The compressor is the heart of the refrigerator, circulating refrigerant. Unusual noises from the compressor can signal a problem.

Solution: Compressor noises can be more complex to diagnose. If you hear clicking, buzzing, or grinding sounds from the compressor, it’s best to contact an LG-authorized technician.

LG Refrigerator Door Not Closing Properly: Alignment and Seal Issues

A refrigerator door that doesn’t close properly can lead to temperature fluctuations and food spoilage.

Misaligned Door

Keywords: LG refrigerator door not closing, misaligned door, door adjustment

A misaligned door can prevent it from sealing properly, causing cold air to escape.

Solution: Check if the refrigerator is level. If not, adjust the feet to level the appliance. You can also adjust the hinges to align the door properly.

Worn Door Gasket

Keywords: LG refrigerator door not closing, door gasket, door seal, replacement

The door gasket creates a seal to prevent cold air from escaping. A worn or damaged gasket can compromise the seal.

Solution: Inspect the door gasket for any cracks, tears, or debris. Clean the gasket regularly with warm, soapy water. If the gasket is damaged, it will need replacement.

Conclusion

LG refrigerators offer convenience and style, but encountering common problems can be frustrating. Understanding these common LG refrigerator problems and their solutions can help you keep your appliance running smoothly. By following the troubleshooting tips in this article, you can address temperature control issues, fix ice maker malfunctions, solve water leaks, diagnose unusual noises, and ensure your refrigerator door closes properly. If you encounter complex issues or are unsure about repairs, contact an LG-authorized technician for expert assistance.

How to remove iron stain from white clothes?

Remove Stubborn Marks from White Clothes

We’ve all been there – the frustrating moment when a fresh white shirt or a crisp pair of trousers falls victim to the dreaded iron stain. These unsightly marks can quickly turn a pristine garment into an eyesore, leaving us feeling dismayed and defeated. But fear not! With the right techniques and a bit of know-how, you can effectively remove those stubborn iron stains and restore your beloved white clothes to their former glory.

In this comprehensive guide, we’ll explore a variety of proven methods to tackle iron stains on white fabrics, from simple household hacks to more advanced stain-removal solutions. Whether you’re tackling a recent mishap or dealing with a long-standing stain, these strategies will empower you to conquer those pesky iron marks and keep your wardrobe looking fresh and clean.

Prepare to bid farewell to discolored white clothes and embrace a future of effortlessly stain-free garments.

Understanding Iron Stains

Before we dive into the removal techniques, it’s essential to understand the nature of iron stains and what causes them to form on white clothes.Remove Stubborn Marks from White Clothes

The Science Behind Iron Stains

Iron stains, also known as rust stains, occur when the iron in the water or the iron soleplate of an iron interacts with the fabric of the clothing.

The Oxidation Process

When iron comes into contact with water and oxygen, it undergoes an oxidation process that results in the formation of rust, which then transfers to the fabric.

The Impact of Heat

The heat from the iron accelerates the oxidation process, leading to more pronounced and stubborn stains.

Common Causes of Iron Stains

Identifying the potential sources of iron stains can help you prevent them from occurring in the first place and tackle them more effectively.

Ironing with a Dirty Iron

Using an iron with a dirty or rusty soleplate can directly transfer the iron particles to the fabric, leaving unsightly stains.

Iron Residue in Water

Areas with high iron content in the water supply can also contribute to the formation of iron stains on white clothes.

Fabric Composition and Weave

Certain fabrics, such as cotton and linen, are more susceptible to iron stains due to their natural fiber structure and weave.

Immediate Stain Removal Techniques

When an iron stain occurs, acting quickly is crucial to prevent the stain from setting and becoming more difficult to remove. Here are some effective immediate stain removal techniques to try.

Using Lemon Juice or White Vinegar

The acidic properties of lemon juice and white vinegar can help neutralize and lift iron stains from white clothes.Remove Stubborn Marks from White Clothes

Applying Lemon Juice or Vinegar

Directly apply the lemon juice or white vinegar to the affected area, ensuring it’s fully saturated.

Allowing Time for the Acid to Work

Let the acidic solution sit on the stain for 10-15 minutes before attempting to rinse or blot the area.

Applying Salt and Water

The abrasive nature of salt, combined with water, can help physically lift and remove iron stains.

Creating a Salt Paste

Mix a small amount of salt with water to form a slightly gritty paste.

Gently Rubbing the Stain

Carefully rub the salt paste into the stained area, using a soft-bristled brush or your fingers.

Utilizing Stain-Removal Pens or Sprays

Commercial stain-removal products formulated for iron stains can be a convenient and effective solution.

Applying the Stain Remover

Follow the instructions on the product, applying it directly to the affected area.

Allowing Time for the Treatment

Let the stain remover work its magic, as directed, before rinsing or laundering the item.

Advanced Stain Removal Techniques

For more stubborn or set-in iron stains, you may need to employ more advanced techniques to effectively remove them from your white clothes.

Soaking in Oxalic Acid Solution

Oxalic acid is a powerful stain remover that can effectively tackle even the most persistent iron marks.

Preparing the Oxalic Acid Solution

Carefully mix a solution of oxalic acid and water, following the recommended ratios for safe and effective use.

Submerging the Stained Garment

Fully immerse the affected garment in the oxalic acid solution and allow it to soak for the recommended duration.

Rinsing and Laundering

Thoroughly rinse the garment after the soaking process and then launder it as usual.

Using Hydrogen Peroxide

Hydrogen peroxide is a versatile stain-removal agent that can work wonders on stubborn iron marks.

Creating a Hydrogen Peroxide Solution

Mix hydrogen peroxide with water in the appropriate ratio to create an effective stain-removing solution.Remove Stubborn Marks from White Clothes

Applying the Solution and Allowing Time

Apply the hydrogen peroxide solution directly to the stain and let it sit for the recommended time before rinsing.

Monitoring the Stain Removal Process

Keep a close eye on the stain as the hydrogen peroxide works, adjusting the application time as needed.

Enlisting the Help of Professional Dry Cleaning

For the most challenging iron stains or delicate fabrics, seeking the expertise of a professional dry cleaner can be a game-changer.

Leveraging the Dry Cleaning Process

Experienced dry cleaners have access to specialized equipment and solvents that can effectively remove even the toughest iron stains.

Providing Detailed Stain Information

When delivering the stained garment, be sure to provide the dry cleaner with as much information about the stain as possible to ensure the best possible outcome.

Preventing Future Iron Stains

While the removal techniques mentioned above can effectively address existing iron stains, incorporating preventative measures into your laundry routine can help you avoid these unsightly marks in the first place.

Maintaining a Clean Iron

Regularly cleaning and maintaining your iron is crucial for preventing the transfer of iron residue to your white clothes.

Cleaning the Iron Soleplate

Thoroughly clean the iron’s soleplate to remove any built-up dirt, rust, or mineral deposits.Remove Stubborn Marks from White Clothes

Descaling the Iron

Perform regular descaling to eliminate any limescale or mineral buildup that could lead to staining.

Using Distilled or Purified Water

If your tap water is known to have a high iron content, consider using distilled or purified water when ironing to prevent staining.

Checking Water Quality

Research the water quality in your area and make an informed decision about the best water to use for ironing.

Investing in a Water Filter

Install a water filter, if necessary, to remove any excess iron or other minerals from the water supply.

Laundry Habits and Fabric Care

Adopting proper laundry habits and caring for your white fabrics can also help minimize the risk of iron stains.

Sorting Clothes and Fabrics

Separate your white clothes from any items that may contain rust or metallic elements.

Proper Laundering and Drying

Use the appropriate wash cycle, water temperature, and drying methods to protect your white clothes from iron stains.

Conclusion: Reclaim the Brilliance of Your White Clothes

Iron stains can be a frustrating and stubborn problem, but with the right techniques and a bit of persistence, you can effectively remove these unsightly marks and restore the pristine appearance of your white clothes. Through this comprehensive guide, you now have the knowledge and tools to conquer iron stains and maintain a well-cared-for wardrobe.

Whether you’re faced with a recent iron mishap or have been battling long-standing stains, the strategies outlined in this article will empower you to take swift and effective action. From utilizing simple household ingredients like lemon juice and vinegar to employing more advanced stain-removal solutions, you now have a diverse arsenal of techniques at your fingertips.

Embrace the satisfaction of reclaiming the brilliance of your white clothes and bid farewell to the frustration of stubborn iron stains. Implement the preventative measures discussed in this guide to maintain a stain-free wardrobe and enjoy the confidence that comes with knowing your clothes are always looking their best. Unlock the true potential of your white garments and experience the joy of effortlessly clean and pristine clothing.

Clearing the Clutter: Does Goodwill Accept Vacuum Cleaners?

Donated Vacuum Cleaners

Does goodwill accept vacuum cleaners? In the constant quest to declutter and organize our living spaces, the question of what to do with unwanted household items often arises. One such item that frequently finds its way to the back of the closet or the garage is the humble vacuum cleaner. As we upgrade our cleaning equipment or simply seek to remove unused appliances, the dilemma of where to donate or dispose of these items can be perplexing.

Enter Goodwill, the renowned thrift store and donation center that has become a go-to destination for many seeking to responsibly rehome their unwanted possessions. But does Goodwill actually accept vacuum cleaners? In this comprehensive guide, we’ll explore the policies and practices of Goodwill when it comes to accepting and reselling donated vacuum cleaners, providing you with the information you need to make an informed decision about your cleaning equipment and contribute to the greater good.

Prepare to declutter your home and support a worthy cause as we uncover the truth about Goodwill’s stance on vacuum cleaner donations.Donated Vacuum Cleaners

Does goodwill accept vacuum cleaners? Understanding Goodwill’s Donation Policies

Goodwill, a nonprofit organization with a mission to provide job training and employment services, relies heavily on the generosity of donors to stock its shelves and support its initiatives. When it comes to the types of items accepted, Goodwill’s policies can vary, and it’s essential to understand the nuances.

Goodwill’s Acceptance of Household Appliances

One of the key questions surrounding Goodwill donations is the organization’s stance on household appliances, including vacuum cleaners.

Criteria for Accepting Vacuum Cleaners

Goodwill generally accepts vacuum cleaners, provided they are in working condition and meet specific safety and functionality requirements.

Exceptions and Limitations

Certain types of vacuum cleaners, such as commercial-grade or specialized models, may not be accepted due to resale or safety concerns.Donated Vacuum Cleaners

Evaluating the Condition of Donated Items

Goodwill takes great care in ensuring the quality and safety of the donated items it receives, including a thorough inspection process.

Assessing the Functionality and Cleanliness

Vacuum cleaners must be in good working order and free from visible signs of damage or excessive wear and tear.

Adhering to Safety Standards

Goodwill may reject vacuum cleaners that pose potential safety risks or do not meet applicable electrical and mechanical standards.

Preparing Vacuum Cleaners for Donation

To increase the likelihood of your vacuum cleaner being accepted, it’s essential to prepare the item properly for donation.

Cleaning and Maintenance

Ensure the vacuum cleaner is thoroughly cleaned, with all filters and attachments in place.

Providing Necessary Accessories

Include any essential accessories, such as power cords and hoses, to enhance the item’s resale value.

Does goodwill accept vacuum cleaners? The Benefits of Donating Vacuum Cleaners to Goodwill

When you choose to donate your unwanted vacuum cleaner to Goodwill, you’re not only decluttering your home but also contributing to a greater good.

Supporting Goodwill’s Mission

By donating your vacuum cleaner, you’re directly supporting Goodwill’s core mission of providing job training and employment services to individuals in need.Donated Vacuum Cleaners

Funding Workforce Development Programs

The revenue generated from the sale of donated items, including vacuum cleaners, helps fund Goodwill’s various workforce development initiatives.

Empowering Individuals and Communities

Your donation plays a role in enabling Goodwill to offer job placement, skills training, and other support services to those seeking to improve their employment prospects.

Promoting Sustainability and Responsible Disposal

Donating your vacuum cleaner to Goodwill aligns with the principles of sustainability and responsible waste management.

Extending the Lifespan of Appliances

By donating your vacuum cleaner, you’re ensuring it finds a new home and continues to be utilized, rather than ending up in a landfill.

Avoiding Environmental Harm

Proper disposal of electrical appliances, such as vacuum cleaners, is crucial to prevent the release of harmful materials into the environment.

Potential Tax Benefits for Donors

Depending on your location and personal tax situation, donating your vacuum cleaner to Goodwill may even provide you with certain tax advantages.

Claiming Charitable Deductions

In some cases, you may be able to claim the fair market value of your donated vacuum cleaner as a charitable deduction on your tax return.Donated Vacuum Cleaners

Consulting Tax Professionals

It’s always advisable to consult with a tax professional to understand the specific tax implications of your Goodwill donation.

The Resale and Repurposing of Donated Vacuum Cleaners

Once a vacuum cleaner is accepted and processed by Goodwill, it embarks on a new journey, ultimately contributing to the organization’s overall impact.

Inspection and Refurbishment

Goodwill’s staff carefully inspects and evaluates each donated vacuum cleaner to determine its condition and suitability for resale.

Testing and Repair

If needed, Goodwill’s technicians may perform minor repairs or maintenance to ensure the vacuum cleaner is in safe and working order.

Cleaning and Sanitization

Donated vacuum cleaners undergo a thorough cleaning and sanitization process to meet Goodwill’s high standards of cleanliness and safety.

Pricing and Resale

After the inspection and refurbishment process, Goodwill determines the appropriate price point for the vacuum cleaner based on its condition and market demand.

Affordable Pricing for Shoppers

Goodwill’s pricing strategy aims to make donated vacuum cleaners accessible to a wide range of shoppers, offering significant savings compared to new models.

Supporting Goodwill’s Programs

The revenue generated from the sale of vacuum cleaners and other donated items directly supports Goodwill’s various workforce development and community outreach initiatives.

Repurposing and Recycling

In cases where a donated vacuum cleaner is not suitable for resale, Goodwill explores alternative ways to responsibly handle the item.

Salvaging Usable Components

Goodwill may disassemble the vacuum cleaner and repurpose any salvageable parts or materials.

Proper Disposal and Recycling

For vacuum cleaners that cannot be repaired or resold, Goodwill ensures they are disposed of in an environmentally responsible manner, often through recycling programs.Donated Vacuum Cleaners

Maximizing the Impact of Your Vacuum Cleaner Donation

By donating your vacuum cleaner to Goodwill, you have the power to make a meaningful impact on your community and the environment. Here are some ways to further enhance the positive outcomes of your donation.

Spreading Awareness and Encouraging Others

Sharing your experience with donating your vacuum cleaner to Goodwill can inspire and motivate others to follow suit.

Sharing Your Donation Story

Consider sharing your donation experience on social media or through word-of-mouth to encourage friends and neighbors to donate their unwanted items.

Advocating for Goodwill’s Mission

Become an ambassador for Goodwill by educating others about the organization’s mission and the positive impact of their donation programs.

Exploring Additional Donation Opportunities

Once you’ve donated your vacuum cleaner, you may discover other household items that could also benefit from a new home.

Identifying Suitable Donation Items

Examine your possessions and identify any other gently used items, from clothing to furniture, that could be donated to Goodwill or similar organizations.

Coordinating Larger Donations

If you have a substantial number of items to donate, consider coordinating a larger donation pickup or drop-off to maximize the impact of your contribution.

Maintaining a Decluttered and Organized Home

Donating your vacuum cleaner to Goodwill not only supports a worthy cause but also helps you maintain a clutter-free and organized living space.

Adopting Minimalist Principles

Embrace the principles of minimalism and thoughtful consumption to prevent unnecessary accumulation of items in the future.

Establishing Donation Routines

Incorporate regular donation cycles into your home maintenance routine to ensure a continual flow of unneeded items to Goodwill and other charitable organizations.

Conclusion: Donating Your Vacuum Cleaner, Clearing the Clutter, and Supporting Goodwill

Donating your vacuum cleaner to Goodwill is a simple yet impactful way to declutter your home, support a worthy cause, and contribute to a more sustainable future. Through this comprehensive guide, you now have a clear understanding of Goodwill’s policies, the benefits of donating your vacuum cleaner, and the enduring impact your contribution can make.

By choosing to donate your vacuum cleaner to Goodwill, you’re not only freeing up valuable space in your home but also empowering individuals in your community through Goodwill’s workforce development programs. Your donation helps to extend the lifespan of the appliance, prevent environmental harm, and provide affordable access to essential household items for those in need.

Embrace the joy of decluttering and the satisfaction of contributing to a greater good. Donate your vacuum cleaner to Goodwill and witness the ripple effect of your generosity. As you continue to maintain a clutter-free and organized living space, remember that your donation has the power to transform lives, support sustainability, and make a meaningful difference in your community and beyond.

Quick and Effective Techniques to Unwrinkle Clothes Fast

Wrinkle-Free Clothing

We’ve all been there: you pull that perfect shirt or dress out of the closet, only to find it heavily wrinkled and in need of some serious attention. Wrinkled clothes can quickly dampen your mood and leave you feeling frumpy and unprepared. But fear not! With the right techniques and a bit of know-how, you can quickly and effortlessly unwrinkle your clothes, restoring them to a crisp, fresh appearance in no time.

In this comprehensive guide, we’ll explore a variety of proven methods to unwrinkle clothes fast, from simple household hacks to more advanced techniques. Whether you’re in a rush before a big event or simply want to maintain a well-groomed appearance, these strategies will equip you with the tools to conquer wrinkles and keep your wardrobe looking its best.

Prepare to bid farewell to wrinkled garments and embrace a world of effortlessly smooth, wrinkle-free clothing.

Understanding the Causes of Wrinkles

Before we dive into the various techniques for unwrinkling clothes, it’s important to understand the underlying causes of wrinkles, as this knowledge can help you prevent and address them more effectively.Wrinkle-Free Clothing

The Science Behind Wrinkles

Wrinkles in clothing are primarily caused by the rearrangement and distortion of the fabric’s fibers, which can occur due to a variety of factors.

The Role of Moisture and Heat

Exposure to moisture and heat can cause the fibers in fabric to relax and become more pliable, leading to the formation of wrinkles.

The Effect of Mechanical Forces

The physical forces exerted on clothing, such as folding, creasing, or compression, can also contribute to the development of wrinkles.

Common Culprits of Wrinkles

Identifying the common sources of wrinkles can help you better anticipate and address them before they become a problem.

Improper Laundering and Storage

Careless washing, drying, and storage practices can all contribute to the formation of wrinkles in your clothes.

Wearing and Packing Clothes

The act of wearing and packing clothes can also lead to the development of wrinkles, particularly if the garments are not properly cared for.

Quick and Easy Unwrinkling Techniques

When time is of the essence, there are several quick and easy techniques you can employ to swiftly unwrinkle your clothes and restore their crisp, polished appearance.

The Power of Steam

Harnessing the power of steam is one of the most effective and quickest ways to remove wrinkles from your clothing.

Using a Handheld Steamer

Invest in a high-quality handheld garment steamer and use it to gently steam your clothes, smoothing out wrinkles as you go.Wrinkle-Free Clothing

Improvising with a Shower or Kettle

In a pinch, you can create a makeshift steaming environment by hanging your clothes in the bathroom during a hot shower or holding them over a boiling kettle.

The Damp Towel Method

This simple yet effective technique utilizes the natural moisture in a damp towel to help relax and smooth out wrinkles.

Wrapping the Garment in a Damp Towel

Lightly dampen a clean towel and wrap it around the wrinkled garment, ensuring good contact between the fabric and the towel.

Applying Heat with an Iron or Dryer

Gently press the damp towel-wrapped garment with a warm iron or toss it in the clothes dryer on a low heat setting.

Harnessing the Power of Ice Cubes

While it may seem unconventional, the use of ice cubes can be a surprisingly effective way to quickly unwrinkle clothes.

Placing Ice Cubes in the Dryer

Toss a few ice cubes into the clothes dryer along with your wrinkled garment and run it on a low heat setting.Wrinkle-Free Clothing

Pressing with an Ice Cube

For more targeted wrinkle removal, try gently pressing an ice cube directly onto the wrinkled areas of your clothing.

Advanced Unwrinkling Techniques

For stubborn or heavily wrinkled garments, you may need to employ more advanced techniques to achieve a smooth, wrinkle-free finish.

The Ironing Approach

Ironing remains one of the most reliable and time-honored methods for effectively removing wrinkles from clothing.

Proper Ironing Techniques

Master the art of ironing, including the optimal temperature settings, steam usage, and the right motions to effectively smooth out wrinkles.

Utilizing Ironing Accessories

Invest in helpful ironing accessories, such as spray bottles, pressing cloths, and ironing boards, to enhance your wrinkle-busting efforts.

The Power of the Clothes Dryer

Harnessing the heat and tumbling action of the clothes dryer can be a highly effective way to unwrinkle garments.

The Damp Towel Trick Revisited

Combine the damp towel method with the clothes dryer for a potent wrinkle-removal duo.

Utilizing Dryer Balls or Sheets

Adding dryer balls or sheets to the cycle can help further reduce wrinkles and static cling.

Professional Dry Cleaning and Pressing

For those stubbornly wrinkled items or when time is of the essence, enlisting the help of professional dry cleaners and pressers can be a game-changer.

The Expertise of Dry Cleaners

Skilled dry cleaning staff have access to specialized equipment and techniques to expertly remove wrinkles from even the most delicate fabrics.Wrinkle-Free Clothing

The Precision of Professional Pressing

High-quality pressing services can provide a level of wrinkle-free perfection that is difficult to achieve at home.

Preventing Future Wrinkles

While the techniques mentioned above can effectively address existing wrinkles, incorporating preventative measures into your clothing care routine can help you avoid wrinkles in the first place.

Proper Laundering Practices

Adopting good laundering habits can go a long way in keeping your clothes wrinkle-free.

Optimal Washing and Drying Settings

Ensure you’re using the appropriate wash and dry cycles for each fabric type to minimize wrinkle formation.

Folding and Storing Clothes Correctly

Fold and store your garments properly, using techniques like rolling or using garment organizers to maintain their shape.

Thoughtful Packing and Wearing

Being mindful of how you pack and wear your clothes can also help prevent wrinkles from setting in.

Packing Techniques for Travel

When packing for a trip, employ strategies like rolling, using packing cubes, or investing in a garment bag to keep clothes wrinkle-free.

Wearing Clothes with Care

Avoid unnecessary folding, creasing, or compression when wearing your clothes throughout the day.

Incorporating Wrinkle-Resistant Fabrics

Choosing fabrics that are inherently more wrinkle-resistant can make maintaining a polished appearance much easier.

Identifying Wrinkle-Resistant Fibers

Look for fabrics made with synthetic fibers, such as polyester or nylon, which are less prone to wrinkling.

Utilizing Wrinkle-Release Sprays

Supplement your wrinkle-resistant fabrics with wrinkle-release sprays to further enhance their smoothness.

Conclusion: Embrace the Effortless Elegance of Wrinkle-Free Clothing

Wrinkled clothes can be a frustrating and confidence-dampening problem, but with the right techniques and a bit of know-how, you can quickly and easily restore your garments to a crisp, polished appearance. Through this comprehensive guide, you have gained the knowledge and tools to conquer wrinkles and embrace the effortless elegance of wrinkle-free clothing.

Whether you’re faced with a last-minute wardrobe crisis or simply want to maintain a well-groomed look, the strategies outlined in this article will empower you to swiftly and effectively unwrinkle your clothes. From harnessing the power of steam and damp towels to mastering advanced ironing techniques and professional dry cleaning, you now have a diverse arsenal of wrinkle-busting methods at your fingertips.

Embrace the freedom and confidence that comes with knowing how to quickly and easily unwrinkle your clothes. Implement the preventative measures outlined in this guide to maintain a wrinkle-free wardrobe, and be prepared to face any sartorial challenge with poise and elegance. Bid farewell to wrinkled garments and welcome a world of effortlessly smooth, perfectly presented clothing – your key to looking and feeling your best, no matter the occasion.

Sparkling Results: Guide to Clean Your Oven with Ammonia

clean your oven


Introduction

Clean oven with ammonia: Cleaning your oven can be a daunting task, but ammonia offers a powerful solution. With its potent cleaning properties, ammonia can tackle even the most stubborn oven grime and grease. In this article, we’ll guide you through the process step-by-step, ensuring you get sparkling results safely and efficiently.

Understanding Ammonia’s Cleaning Power

Clean oven with ammonia: What is Ammonia?

Ammonia is a highly effective, naturally occurring compound often used in household cleaning products.

How Ammonia Works on Oven Grime

The chemical properties of ammonia make it perfect for cutting through baked-on residue without the need for harsh scrubbing.clean your oven

Preparing to Clean Your Oven with Ammonia

Ensuring a Safe Cleaning Environment

Safety comes first. Ventilate your kitchen and wear protective gear before you begin.

Gathering Your Cleaning Supplies

List everything you’ll need, from ammonia to protective gloves and baking dishes for the process.

The Ammonia Oven Cleaning Process

The Initial Setup

Start by heating your oven. Warmer temperatures help ammonia work faster.

Overnight Ammonia Method for Effortless Cleaning

Place a pot of boiling water in your oven alongside a dish of ammonia and let the combination work overnight.

Tips for Maximizing Ammonia’s Effectiveness

When to Apply Ammonia Directly

In some cases, applying ammonia directly to tough spots can be necessary.

Controlling Ammonia Fumes

Discover how to minimize ammonia exposure while ensuring it still cleans effectively.

After Cleaning: Removing Ammonia Residue

Proper Ventilation and Wiping Down

After cleaning, it’s essential to air out your oven and wipe down all surfaces thoroughly.

Ensuring Your Oven is Ammonia-Free Before Use

Guidelines on making sure all ammonia residue is gone to ensure your next meal is contamination-free.

Handling Tough Stains with Ammonia

Spot Cleaning with Ammonia

Detail how to target tough spots with diluted ammonia for a spotless oven interior.

Balancing Ammonia Use with Baking Soda for Extra Tough Grime

Combine ammonia’s strength with baking soda for a double-action approach on those troublesome areas.clean your oven

Safety Tips: Ammonia Use Best Practices

Understanding Ammonia’s Risks

Outline the potential risks of using ammonia and how to avoid them.

What Never to Mix with Ammonia

Stress the importance of never combining ammonia with other chemicals like bleach to prevent dangerous reactions.

Alternative Cleaning Methods

Eco-Friendly Options for Oven Cleaning

Provide information on non-chemical methods for those who prefer a natural approach.

Comparing Ammonia with Commercial Oven Cleaners

Evaluate how ammonia stands up against over-the-counter oven cleaners in terms of effectiveness and safety.

Cleaning Your Oven with Ammonia: An Effective and Affordable Approach

Cleaning your oven doesn’t have to involve harsh chemicals or expensive commercial cleaners. Ammonia, a common household cleaner, offers a surprisingly effective and budget-friendly solution for removing stubborn grease and grime. This article provides a comprehensive guide to cleaning your oven with ammonia, ensuring a sparkling clean appliance without the use of harsh chemicals.

Understanding Ammonia as an Oven Cleaner

Ammonia is a powerful alkaline cleaner, capable of breaking down grease and baked-on food residue. It works by emitting fumes that soften grime, making it easier to wipe away. While effective, it’s essential to use ammonia cautiously, following safety guidelines to prevent accidents.clean your oven

Advantages of Using Ammonia for Oven Cleaning

  • Effective Grease Removal: Ammonia effectively cuts through tough grease, making it ideal for heavily soiled ovens.
  • Affordable: Ammonia is significantly cheaper than specialized oven cleaners, making it a budget-friendly option.
  • Fume-Based Cleaning: Ammonia’s fumes work to loosen grime, minimizing the need for extensive scrubbing.

Safety Precautions When Using Ammonia

  • Ventilation: Always use ammonia in a well-ventilated area to avoid inhaling strong fumes. Open windows and doors to ensure adequate airflow.
  • Protective Gear: Wear rubber gloves and eye protection to prevent skin and eye irritation.
  • Avoid Mixing Chemicals: Never mix ammonia with other cleaning agents, especially bleach, as it can create toxic fumes.

Cleaning Your Oven with Ammonia: A Step-by-Step Guide

Materials You’ll Need:

  • Ammonia (clear, unscented)
  • Two heat-safe bowls or containers
  • Rubber gloves
  • Eye protection
  • Cleaning cloths or sponges
  • Baking soda (optional, for stubborn stains)

Step 1: Preparation

  • Safety First: Open windows and doors to ensure proper ventilation. Put on rubber gloves and eye protection.
  • Remove Oven Racks: Take out oven racks and set them aside for separate cleaning.
  • Preheat Oven: Preheat your oven to 150 degrees Fahrenheit (65 degrees Celsius) and then turn it off.

Step 2: Placing Ammonia in the Oven

  • Pour Ammonia into Bowls: Pour one cup of ammonia into a heat-safe bowl and place it on the top rack of your preheated oven.
  • Boiling Water in Second Bowl: Fill the second heat-safe bowl with boiling water and place it on the bottom rack.
  • Close Oven Door: Close the oven door and let the ammonia fumes work their magic for several hours or overnight.

Step 3: Wiping Down the Oven

  • Remove Bowls: After several hours or overnight, carefully remove the bowls from the oven.
  • Wipe Down Surfaces: Use a damp cleaning cloth or sponge to wipe down the interior surfaces of the oven. The softened grime should come off easily.
  • Stubborn Stains: For stubborn stains, create a paste of baking soda and water and apply it to the affected areas. Let it sit for a few minutes before wiping clean.

Step 4: Cleaning Oven Racks

  • Ammonia Soak: In your sink or a large basin, fill enough water to submerge the oven racks. Add one cup of ammonia to the water.
  • Soak Overnight: Allow the oven racks to soak in the ammonia solution overnight.
  • Scrub and Rinse: Use a scrub brush or sponge to remove any remaining residue. Rinse the racks thoroughly with clean water and dry them completely before placing them back in the oven.clean your oven

Additional Tips for Cleaning Your Oven with Ammonia

  • Regular Cleaning: Clean your oven with ammonia every few months to prevent excessive build-up of grease and grime.
  • Spot Cleaning: For minor spills, you can place a small dish of ammonia in the oven for 30 minutes to loosen the residue before wiping it away.
  • Oven Liners: Consider using oven liners to catch spills and make future cleaning easier.

Conclusion

Using ammonia can be a highly effective way to clean your oven, leaving it spotless and free of tough grime. By following the proper safety guidelines and applying the methods outlined in this guide, you can enjoy a clean oven without unnecessary effort. Always remember to handle ammonia with care and ventilate your kitchen thoroughly throughout the cleaning process.