Air Humidifier vs Air Purifier: A Comprehensive Comparison

Air Humidifiers and Air Purifiers

Maintaining indoor air quality is crucial for overall health and comfort. Two common devices used to improve indoor air conditions are air humidifiers and air purifiers. Each has distinct features and serves different purposes. Consequently, understanding the functions, benefits, and difference between air humidifier and air purifier can help you decide which is best suited to your needs. Therefore, this comprehensive guide explores the core functions of air humidifiers and air purifiers, their respective benefits, and how to choose the right device for your home. By delving into these aspects, you can make an informed decision and enhance the air quality in your living environment.

Air Humidifiers and Air Purifiers

Understanding Air Humidifiers

Air humidifiers are designed to add moisture to the air, addressing issues related to dry indoor environments. Understanding their core functions and benefits highlights their importance in maintaining optimal humidity levels. Therefore, exploring the basics of air humidifiers is essential.

Core Functions of Air Humidifiers

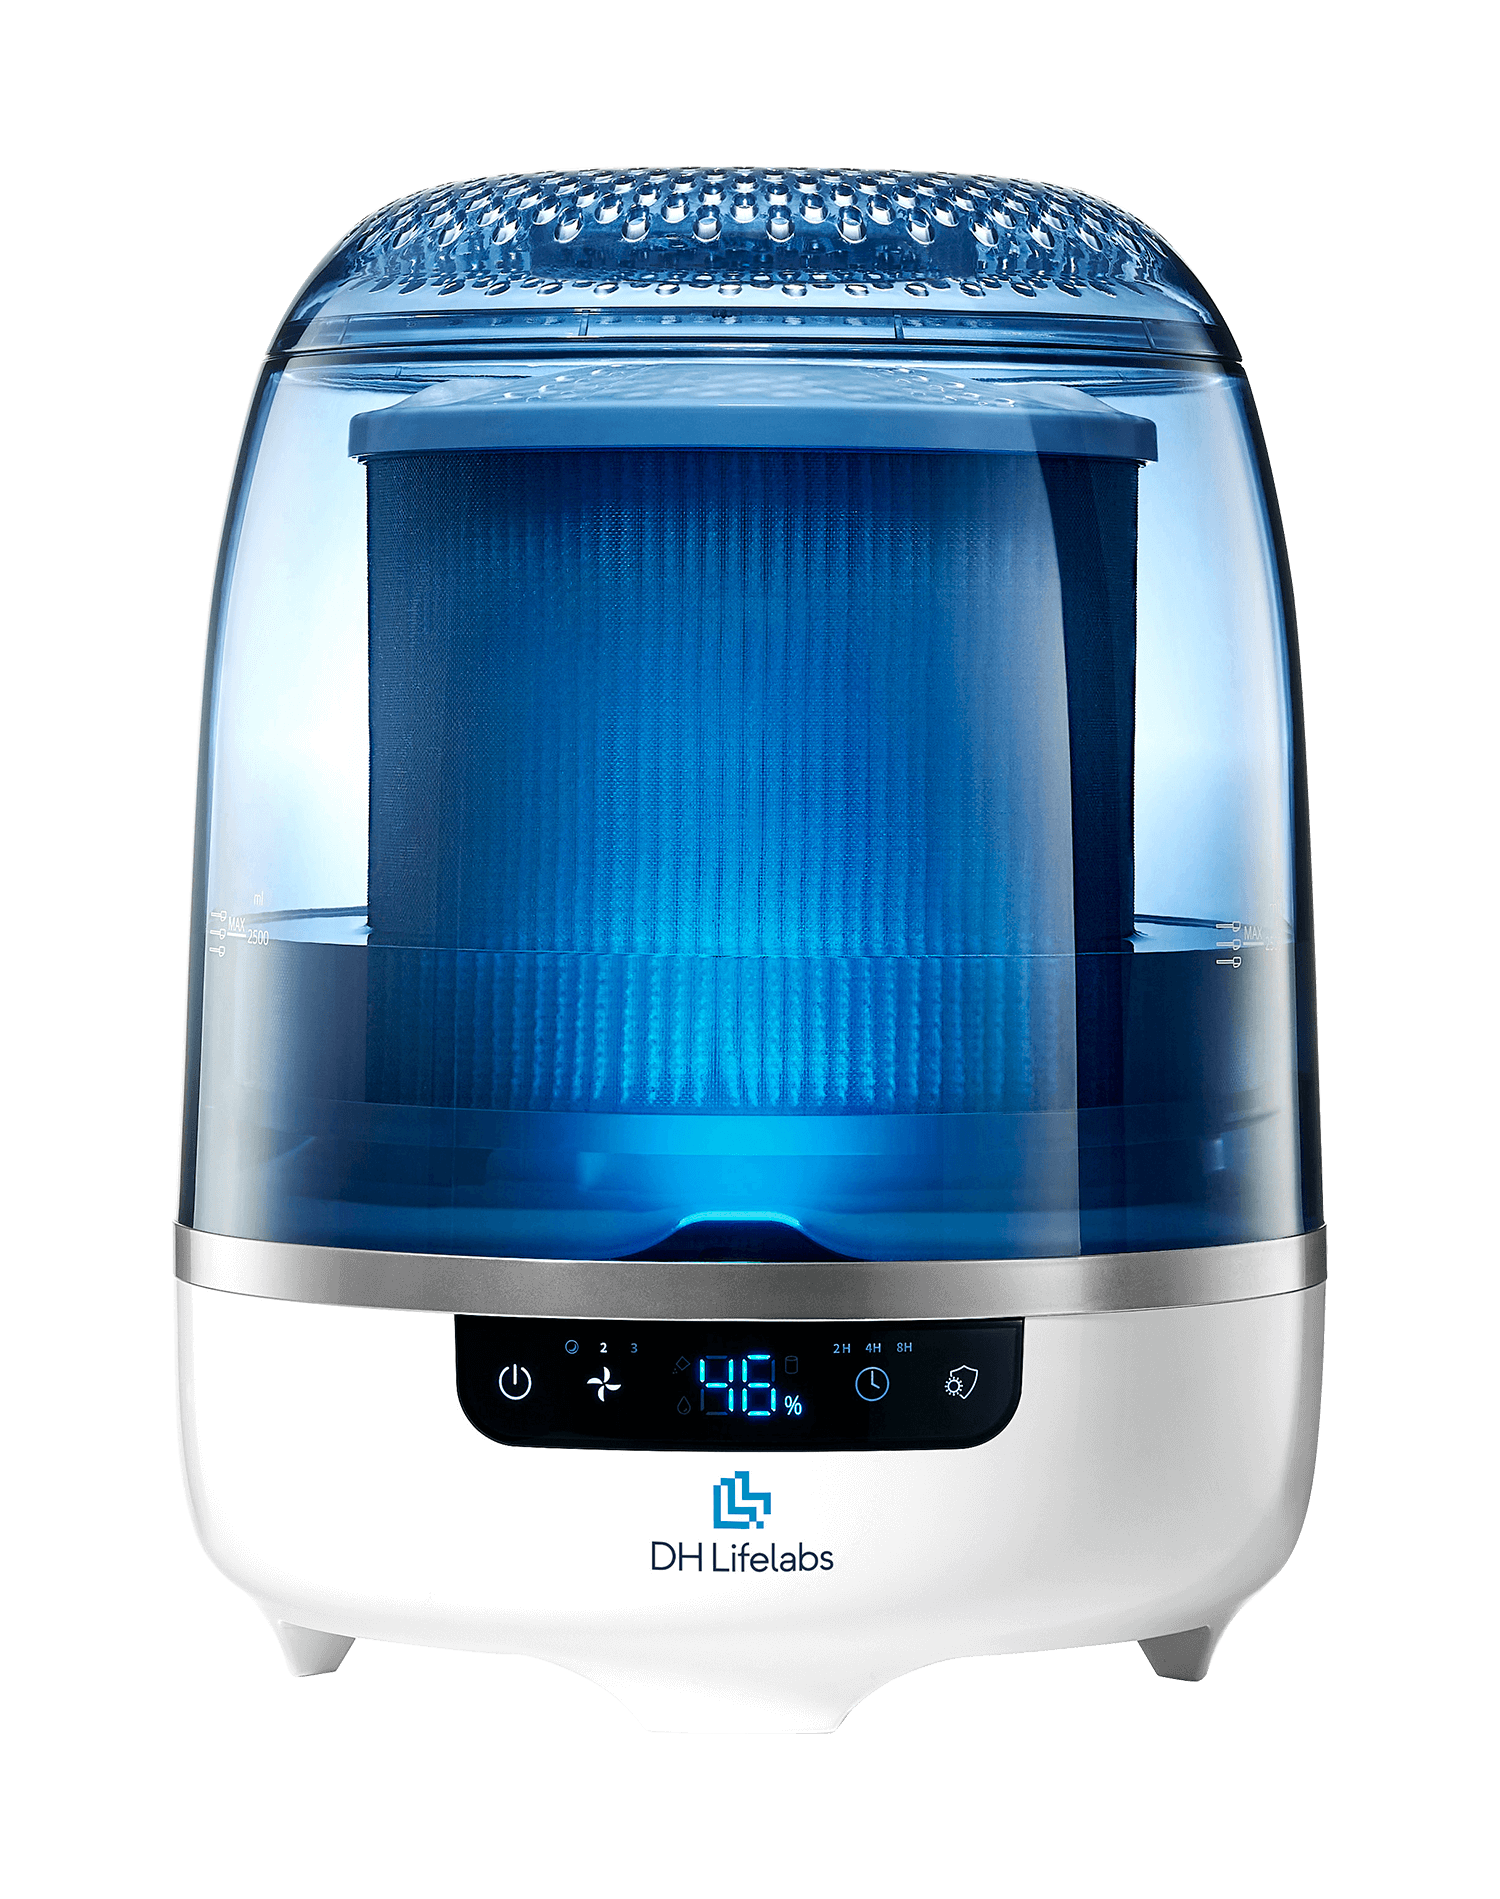
Air humidifiers work by releasing water vapor or steam into the air to increase humidity levels. They come in various types, including ultrasonic, evaporative, and steam vaporizers, each employing different methods to disperse moisture. Appropriate humidity levels, typically between 30% to 50%, are crucial for a comfortable and healthy indoor environment. Low humidity can lead to dry skin, irritated respiratory passages, and increased static electricity. By using an air humidifier, you can maintain an ideal humidity level, alleviating these issues and creating a more comfortable living space. Therefore, understanding the core functions of air humidifiers provides insight into their significance.

Benefits of Using an Air Humidifier

The benefits of using an air humidifier extend beyond mere comfort, impacting health and home maintenance positively. Humidifiers help relieve symptoms of dry skin, chapped lips, and dry throat, particularly during the winter months when indoor heating reduces humidity levels. They can also ease respiratory discomfort caused by colds, allergies, or asthma by keeping mucous membranes moist. Additionally, maintaining proper humidity levels can prolong the life of wooden furniture and musical instruments, preventing cracking and warping. Plants also thrive in environments with adequate humidity. By incorporating an air humidifier into your home, you enhance overall comfort and well-being. Therefore, recognizing the benefits of air humidifiers underscores their value.

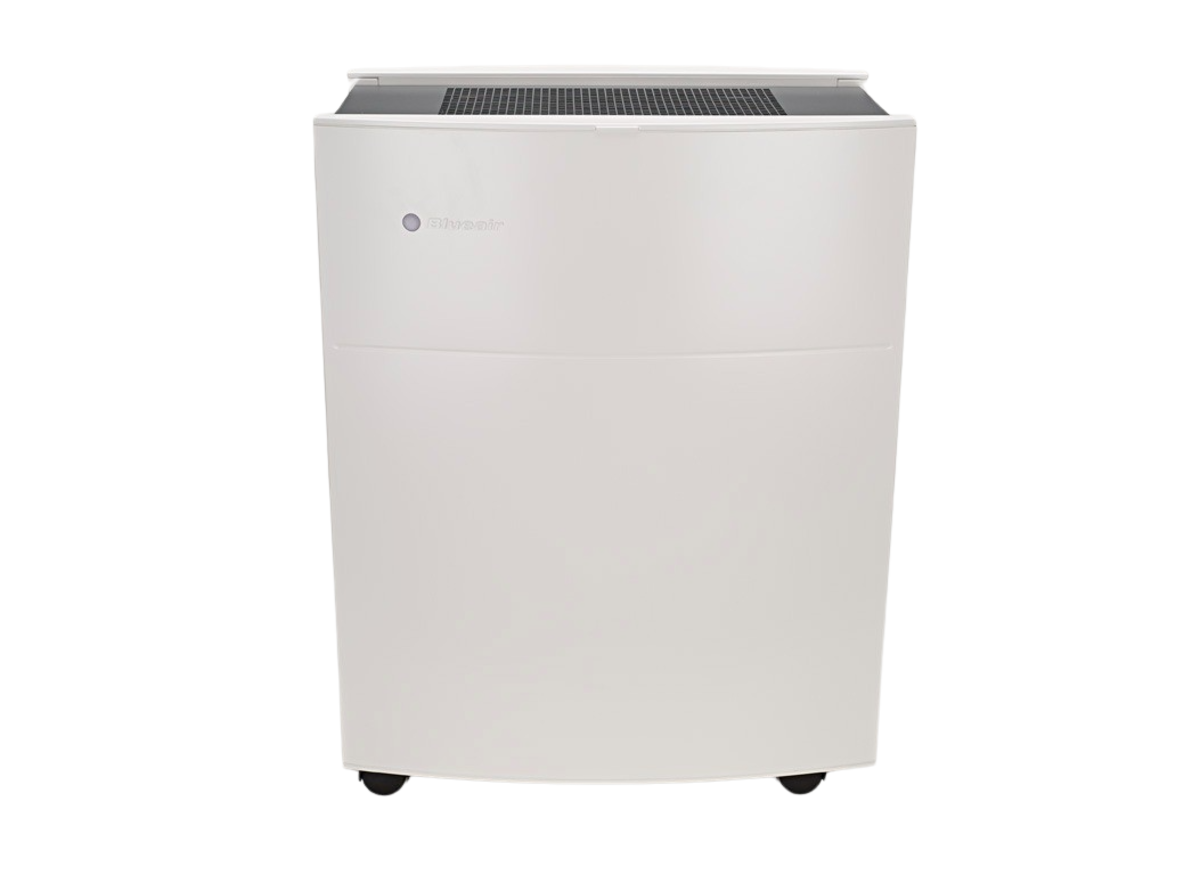
Understanding Air Purifiers

Air purifiers focus on removing airborne pollutants, improving air quality by eliminating particles and allergens. Understanding their core functions and benefits helps in appreciating their role in maintaining clean air. Therefore, exploring the basics of air purifiers is essential.

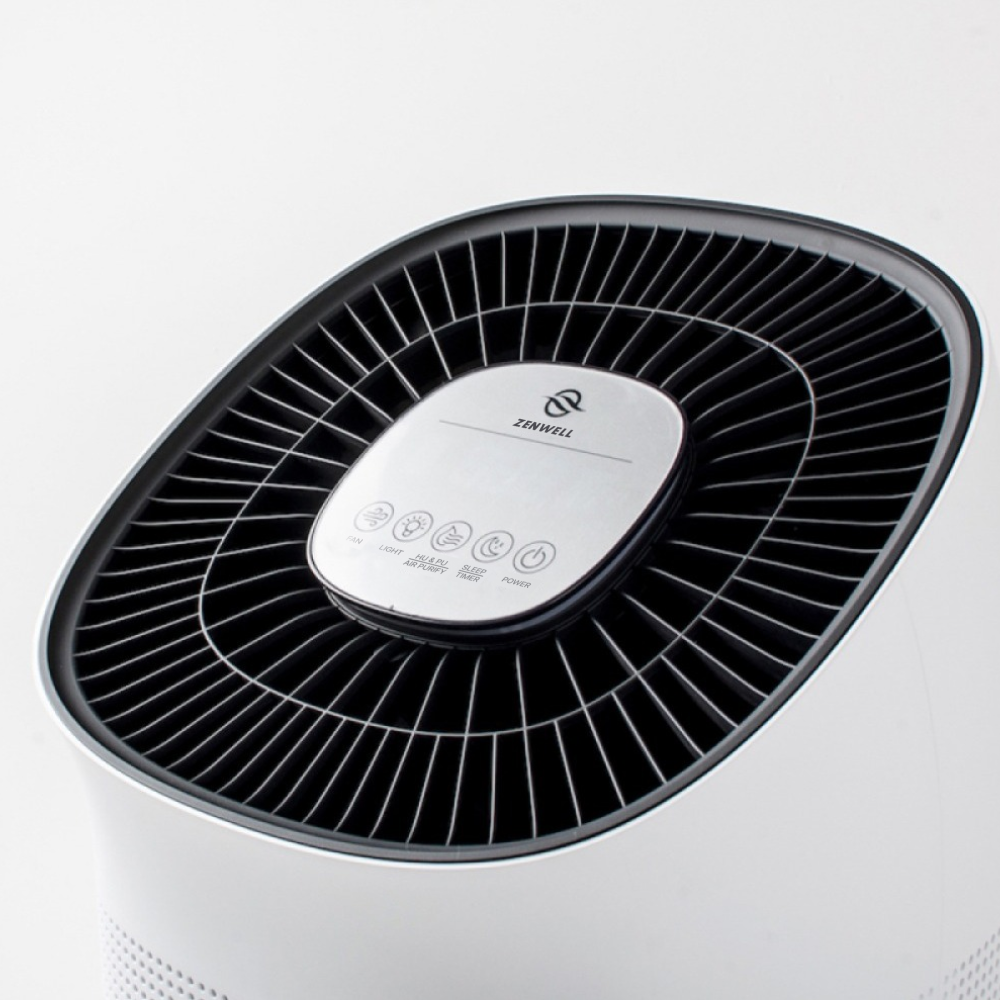
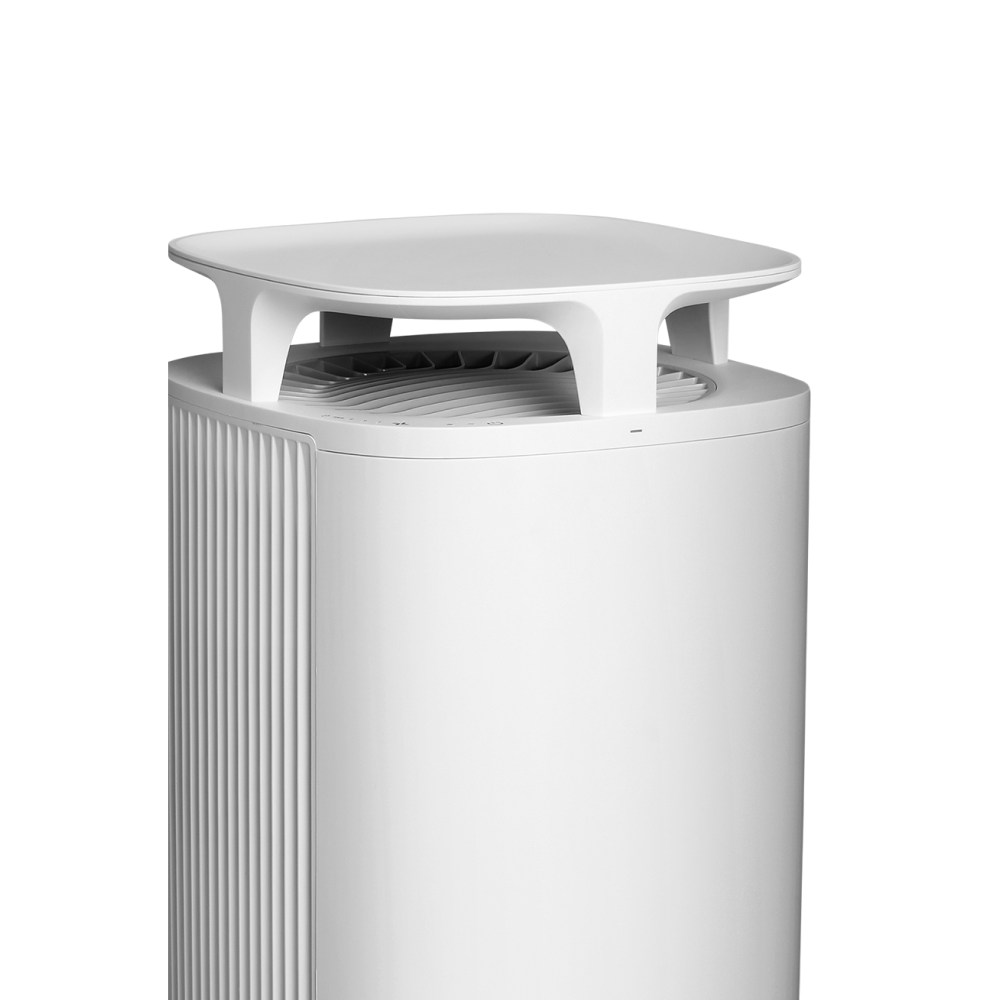
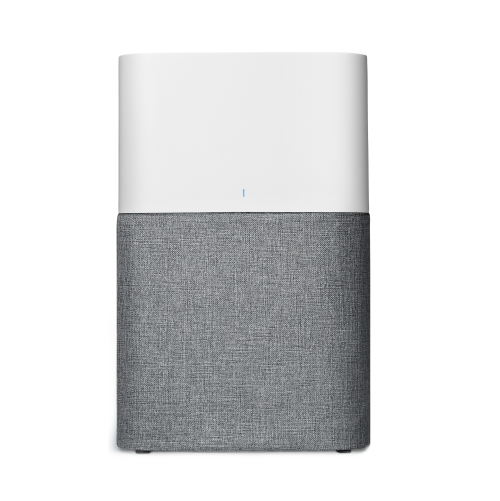
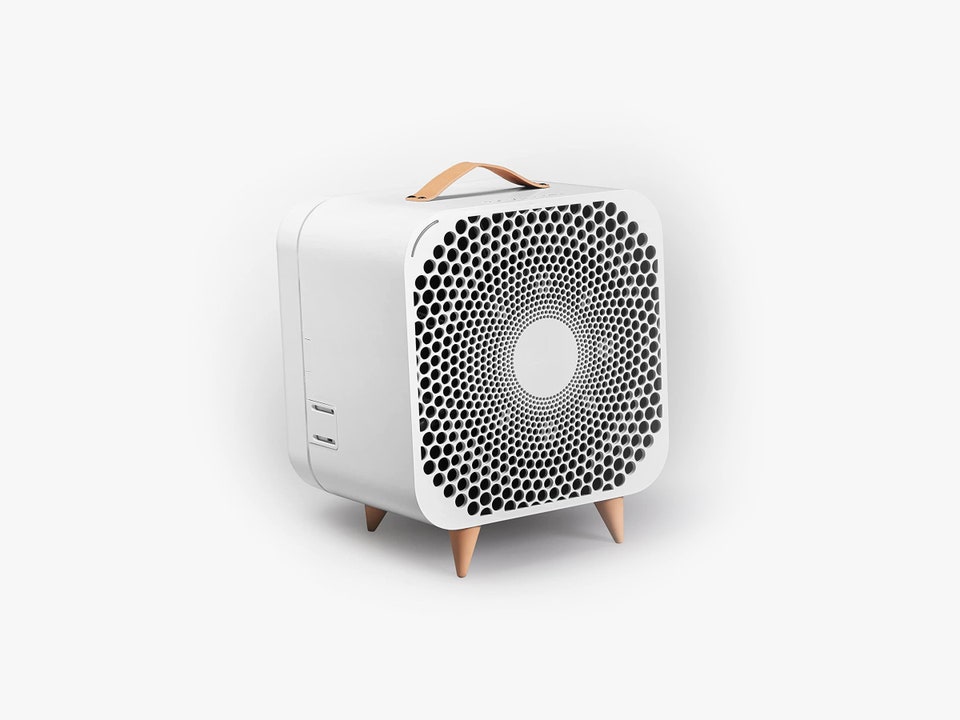
Core Functions of Air Purifiers

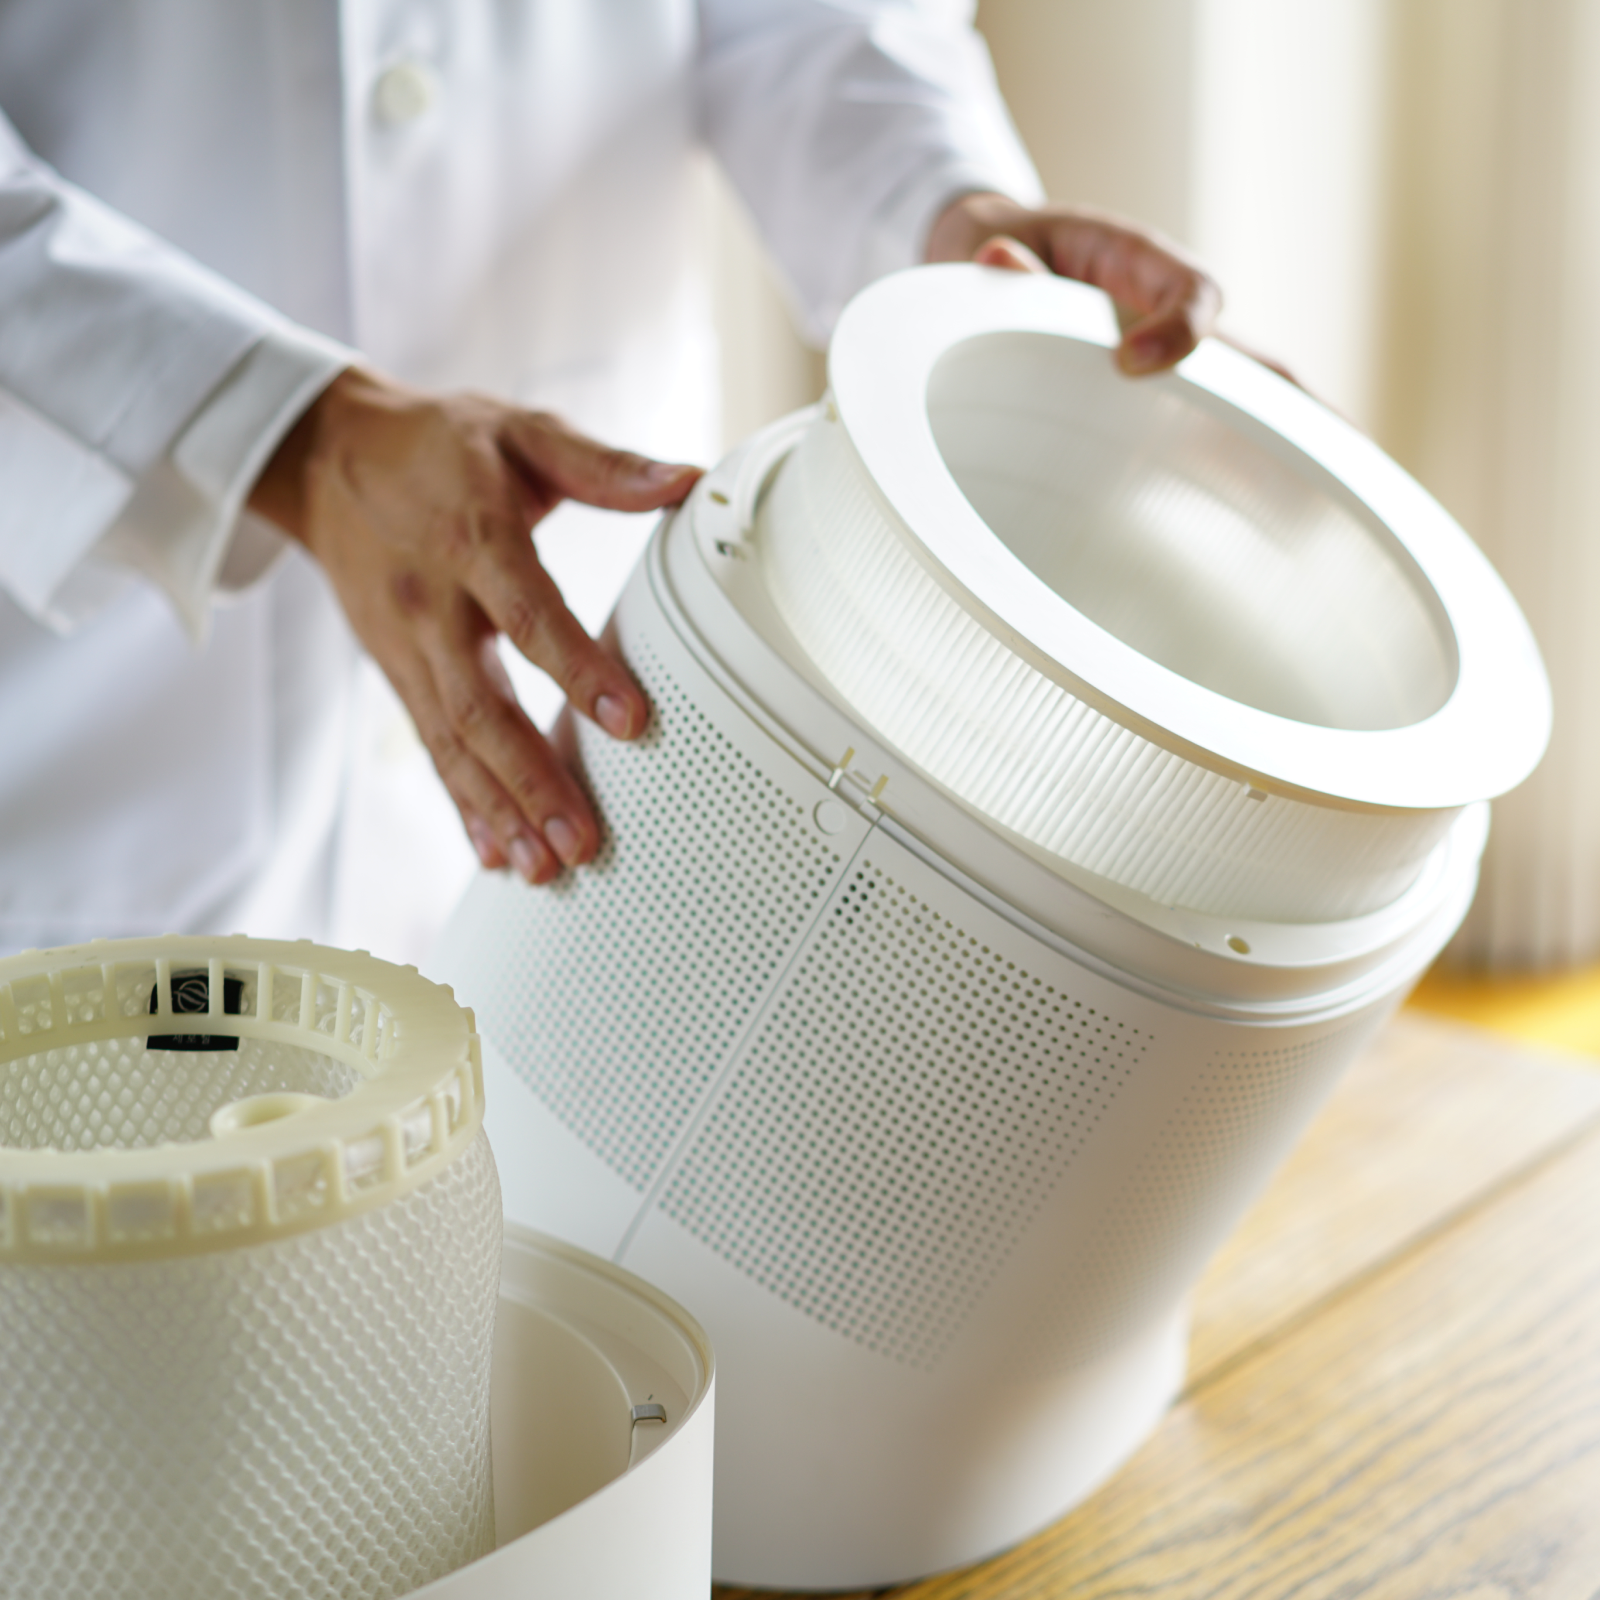
Air purifiers work by drawing in air, passing it through filters to capture pollutants, and then circulating clean air back into the room. They typically use HEPA filters, which can trap particles as small as 0.3 microns, such as dust, pollen, pet dander, and smoke. Some air purifiers also include activated carbon filters to reduce odors and volatile organic compounds (VOCs). By continuously filtering the air, these devices reduce indoor pollutants, providing cleaner and healthier air. Understanding the core functions of air purifiers highlights their importance in maintaining good indoor air quality. Therefore, recognizing their role in pollutant removal is crucial.

Benefits of Using an Air Purifier

The benefits of using an air purifier are significant, particularly for individuals with allergies, asthma, or respiratory issues. Air purifiers help remove allergens and irritants that can trigger symptoms, providing relief and improving overall health. They also reduce the presence of harmful particles like mold spores, bacteria, and viruses, contributing to a healthier indoor environment. Additionally, by eliminating smoke and cooking odors, air purifiers enhance the freshness of your living space. Overall, air purifiers create a cleaner and healthier atmosphere, benefiting both your health and comfort. Therefore, recognizing the benefits of air purifiers underscores their importance for indoor environments.

Comparing Air Humidifiers and Air Purifiers

Understanding the air humidifier and purifier difference comparing their functions, benefits, and potential drawbacks. This comparison helps in determining which device is suitable for your needs. Therefore, exploring the key difference between air purifier and air humidifier is crucial.

Functional Differences

Air humidifiers and air purifiers serve distinct purposes, addressing different aspects of indoor air quality. Air humidifiers are designed to increase humidity levels by adding moisture to the air. They focus on alleviating issues caused by dry air, such as dry skin, respiratory discomfort, and static electricity. Air purifiers, on the other hand, aim to cleanse the air by removing airborne pollutants and allergens. They focus on improving air quality by capturing particles like dust, pollen, and pet dander. These functional differences highlight that each device targets different indoor air quality concerns. Therefore, understanding these distinctions is essential for informed decision-making.

Benefits Comparison

While both air humidifiers and air purifiers offer benefits, they cater to different needs. Air humidifiers provide relief from dry air-related issues, enhancing comfort and supporting respiratory health. They are particularly beneficial in arid climates and during winter months. Air purifiers, however, focus on improving air quality by removing pollutants, which is crucial for individuals with allergies, asthma, or respiratory conditions. They create a cleaner environment by reducing allergens, bacteria, and odors. Comparing these benefits helps you determine which device aligns with your specific health and comfort needs. Therefore, recognizing the different benefits each device offers aids in making the right choice.

Choosing Between an Air Humidifier and an Air Purifier

Selecting between an air purifier vs air humidifier depends on your specific needs and the issues you aim to address. Understanding the factors to consider ensures a well-informed decision. Therefore, exploring guidelines for choosing the right device is essential.

Air Humidifiers and Air Purifiers

Assessing Your Indoor Air Quality Needs

First, assess your indoor air quality needs by identifying the primary concerns in your living space. If you experience discomfort from dry air, such as dry skin, cracked lips, or respiratory irritation, an air humidifier might be the solution. Conversely, if you suffer from allergies, asthma, or notice excessive dust and odors, an air purifier would be more beneficial. Consider the specific symptoms and issues you aim to alleviate, as this assessment guides you toward the appropriate device. By focusing on your primary indoor air concerns, you make an informed decision that enhances your comfort and health. Therefore, assessing your needs is a crucial step in choosing the right device.

Considering Environmental Factors

Environmental factors, such as climate and room conditions, play a significant role in determining which device will be most effective. In dry or arid climates, low humidity levels can exacerbate dry air issues, making an air humidifier essential. On the other hand, urban areas with high pollution levels or households with pets and smokers may benefit more from an air purifier. Additionally, the size of the room and existing ventilation should be considered. Larger rooms may require devices with higher output capacities, while well-ventilated spaces might need less intensive solutions. Considering these environmental factors ensures the chosen device addresses your specific conditions effectively. Therefore, evaluating environmental factors is important for making the right choice.

Integrating Both Devices for Optimal Indoor Air Quality

In some cases, integrating both an air humidifier and an air purifier can provide comprehensive solutions for your indoor air quality needs. Understanding how to use both devices effectively ensures maximum benefits. Therefore, exploring the integration of both devices is essential for optimal indoor air quality.

Air Humidifiers and Air Purifiers

Complementary Roles

Air humidifiers and air purifiers serve complementary roles in maintaining indoor air quality, each addressing different aspects of air health. By combining both devices, you can achieve a balanced environment with adequate humidity levels and reduced pollutants. For instance, using an air purifier to remove airborne particles and an air humidifier to maintain proper humidity levels creates a healthier and more comfortable living space. This combination is particularly beneficial in households with diverse needs, such as those with children, elderly individuals, or pets. Understanding the complementary roles of these devices highlights the advantages of using both. Therefore, integrating both devices can provide comprehensive air quality solutions.

Placement and Usage Tips

To maximize the benefits of using both an air humidifier and an air purifier, consider the following placement and usage tips:

  • Separate Placement: Place the devices in different areas of the room to ensure optimal performance. Avoid placing them too close to each other, as the moisture from the humidifier could affect the air purifier’s filters.
  • Room Size Consideration: Ensure both devices are suitable for the room size. Larger rooms may require multiple units for effective coverage.
  • Maintenance: Regularly maintain both devices by cleaning and replacing filters and water reservoirs as needed. Proper maintenance ensures their continued effectiveness.
  • Usage Timing: Use the air purifier continuously to maintain clean air and the air humidifier during dry periods to maintain optimal humidity levels.

By following these tips, you can effectively integrate both devices into your home, enhancing indoor air quality comprehensively. Therefore, proper placement and usage are crucial for maximizing the benefits of both devices.

Common Misconceptions About Air Humidifiers and Air Purifiers

Addressing common misconceptions about air humidifiers and air purifiers provides clarity and helps in making informed decisions. Dispelling these myths ensures a better understanding of their functions and benefits. Therefore, exploring common misconceptions is important for accurate comprehension.

Misconception: Air Humidifiers Purify Air

A common misconception is that air humidifiers can purify the air. In reality, air humidifiers add moisture to the air but do not remove pollutants or allergens. Their primary function is to alleviate dry air-related issues, not to cleanse the air. To remove pollutants, an air purifier is required. By understanding the distinct functions of these devices, you can choose the appropriate one for your needs. Therefore, recognizing that air humidifiers do not purify air dispels this common myth.

Misconception: Air Purifiers Control Humidity

Another misconception is that air purifiers can control humidity levels. Air purifiers are designed to remove airborne particles and do not add or remove moisture from the air. Their function focuses on improving air quality by capturing pollutants, not regulating humidity. For humidity control, an air humidifier is necessary. By understanding the specific roles of air purifiers, you can address air quality and humidity concerns separately. Therefore, recognizing that air purifiers do not control humidity dispels this misconception.

Conclusion: Choosing the Right Device for Your Air Quality Needs

Air humidifiers and air purifiers each play essential roles in maintaining indoor air quality, addressing distinct aspects of air health. Understanding the core functions and benefits of air humidifiers highlights their importance in maintaining optimal humidity levels.

Exploring the functions and benefits of air purifiers emphasizes their role in removing airborne pollutants and improving air quality. Comparing the difference between air humidifier and purifier helps in determining which one aligns with your specific needs.

Assessing your indoor air quality needs and considering environmental factors guide you toward making an informed decision. Integrating both devices can provide comprehensive solutions, addressing both humidity and air purity for a healthier living environment.

Addressing common misconceptions provides clarity and ensures a better understanding of their distinct functions and benefits. By embracing these aspects, you can make an informed decision, choosing the right device to enhance your indoor air quality.

Therefore, whether you need an air humidifier, an air purifier, or both, understanding their functions and benefits ensures a healthier and more comfortable living space. Enjoy the improved indoor air quality and the health benefits that come with choosing the right device!

Understanding the Red Light on Your Blue Air Purifier

Red Light on Your Blue Air Purifier

Air purifiers are essential for maintaining clean indoor air quality, helping to reduce allergens, pollutants, and odors. The Blue air purifier is a popular choice for many households due to its efficiency and ease of use. One crucial aspect of its operation is the blue air light indicator, which signal different statuses and issues. Consequently, understanding what does red light mean on blue air purifier is essential for maintaining optimal performance. Therefore, this comprehensive guide explores the significance of the blue air purifier red light, common causes, troubleshooting steps, and maintenance tips. By understanding these aspects, you can ensure your Blue air purifier continues to function effectively and keeps your indoor air clean.

Red Light on Your Blue Air Purifier

Significance of the Blue Air Red Ring

The red ring on blue air purifier serves as a crucial alert for various potential issues. Understanding what does red light mean on air purifier helps you respond promptly and appropriately. Therefore, exploring the meaning of the red light on blue air filter is essential for maintaining your air purifier.

Alert for Filter Replacement

One of the primary reasons for the red light on blue air purifier is to signal that the air purifier’s filter needs replacement. Over time, filters accumulate dust, allergens, and other pollutants, reducing their effectiveness. The blueair purifier red light on top serves as a reminder that the filter is saturated and no longer functioning optimally. Ignoring this alert can compromise the air purifier’s performance, leading to poor indoor air quality. By recognizing the blueair purifier red light as a filter replacement alert, you ensure that your air purifier continues to operate efficiently. Therefore, understanding this alert helps maintain optimal air purification.

Indication of Operational Issues

The red light on blueair purifier can also indicate operational issues within the air purifier. These issues may include problems with the fan, motor, or other internal components. When blue air purifier light is red, it suggests that the air purifier requires attention or maintenance beyond just filter replacement. Promptly addressing these operational issues prevents further damage and ensures the air purifier functions correctly. By recognizing the blue air purifier red ring as a signal for operational problems, you can take appropriate action to resolve them. Therefore, understanding this indication helps maintain the air purifier’s longevity and performance.

Why is the blue air filter red? Common Causes

Why is my blue air filter red? Several common causes can trigger the red light on your Blue air purifier. Understanding what does red light on air purifier mean helps in diagnosing and resolving the issue efficiently. Therefore, exploring the common causes of the red light indicator is crucial for effective blueair purifier troubleshooting.

Clogged or Dirty Filter

When air purifier keeps turning red, a clogged or dirty filter is the most common cause of the blueair filter red light. As the filter collects dust, pollen, and other pollutants over time, it becomes saturated and loses efficiency. The blue air purifier red light on top signals that it’s time to replace the filter to restore optimal performance. Regularly checking and replacing the filter ensures that the air purifier continues to work effectively, keeping indoor air clean. By addressing this common cause, you maintain the air purifier’s functionality and effectiveness. Therefore, recognizing clogged or dirty filters is essential for resolving the blue air filter red light issue.

Malfunctioning Fan or Motor

Malfunctions in the fan or motor can also trigger the blue air air purifier red light indicator. These components are crucial for the air purifier’s operation, circulating air through the filter to remove impurities. When the fan or motor encounters issues, the air purifier’s performance drops, and the blue air red lights on top serves as an alert. Diagnosing and repairing or replacing these components promptly can restore normal operation. Regular maintenance checks help prevent such malfunctions and ensure the air purifier remains in good working condition. Therefore, understanding malfunctioning fans or motors is key to addressing the blueair 411 red light indicator.

Troubleshooting Why is My Blueair Filter Red

Why is my blue air purifier light red? Troubleshooting the blue air light red indicator involves a series of steps to diagnose and resolve the underlying issue. Following these steps ensures your air purifier returns to optimal performance. Therefore, exploring troubleshooting tips for the blueair light red indicator is essential for effective resolution.

Step-by-Step Troubleshooting Guide

  1. Check the Filter: First, inspect the air purifier’s filter to see if it’s clogged or dirty. Refer to the user manual for instructions on how to remove and replace the filter. If the filter is visibly dirty or has been in use for an extended period, replace it with a new one.
  2. Blueair filter red light reset: After replacing the filter, it’s essential for blueair red light reset. How to reset red light on blueair filter? Refer to the user manual for specific instructions on resetting the blueair reset red light for your Blue air purifier model. This step about blue air purifier reset light ensures the air purifier accurately tracks the new filter’s usage.
  3. Inspect the Fan and Motor: If the blueair air purifier red light persists after addressing the filter, check the fan and motor for any visible issues. Listen for unusual noises that may indicate a malfunction. If you suspect a problem, consult a professional technician or contact the manufacturer for assistance.
  4. Check for Obstructions: Ensure there are no obstructions blocking the air intake or outlet of the purifier. Clear any objects or debris that may impede airflow and cause operational issues.
  5. Consult the User Manual or Manufacturer: If troubleshooting steps do not resolve the blue air purifier red light after changing filter, consult the user manual for further guidance. Alternatively, contact the manufacturer’s customer support for assistance.

By following this step-by-step guide, you can make blue air purifier red light reset and diagnose and address why is my blue air purifier red. Therefore, adhering to troubleshooting steps ensures effective resolution and restored performance.

Red Light on Your Blue Air Purifier

When to Seek Professional Help

While many issues can be resolved through troubleshooting, some problems may require professional intervention. If you are unable to diagnose or fix the problem, or if the air purifier exhibits unusual behavior, it’s best to seek professional help. Contact the manufacturer’s customer support or a qualified technician for a thorough inspection and repair. Prompt professional assistance prevents further damage and ensures your air purifier functions correctly. Therefore, knowing when to seek professional help is crucial for maintaining your air purifier’s health and performance.

Maintenance Tips for Optimal Performance

Regular maintenance is vital for keeping your Blue air purifier running efficiently and extending its lifespan. Implementing maintenance tips ensures optimal performance and continuous clean air. Therefore, exploring maintenance tips for your air purifier is essential for sustained effectiveness.

Regular Filter Replacement

Replacing the filter regularly is one of the most important maintenance tasks for your air purifier. Depending on usage and environmental conditions, filters should be replaced every three to six months. Refer to the user manual for specific recommendations for your model. Regular replacement ensures the air purifier continues to remove pollutants effectively, maintaining good indoor air quality. Set reminders or mark your calendar to keep track of filter replacement schedules. By prioritizing regular filter replacement, you ensure continuous optimal performance. Therefore, adhering to filter replacement schedules is crucial for effective air purification.

Cleaning the Air Purifier

Cleaning the air purifier periodically prevents dust and debris buildup, enhancing its efficiency and longevity. Follow these cleaning tips:

  • Exterior Cleaning: Wipe the exterior with a damp cloth to remove dust and dirt. Avoid using harsh chemicals or abrasive materials that can damage the surface.
  • Air Intake and Outlet: Dust or vacuum the air intake and outlet grilles to ensure unobstructed airflow. Clear any visible debris to maintain optimal performance.
  • Filter Compartment: Check and clean the filter compartment when replacing the filter. Use a soft brush or cloth to remove any accumulated dust.

By incorporating regular cleaning into your maintenance routine, you keep your air purifier in good condition and ensure efficient operation. Therefore, cleaning the air purifier is essential for maintaining its performance and longevity.

Red Light on Your Blue Air Purifier

Common Misconceptions About Air Purifier Maintenance

Addressing common misconceptions about air purifier maintenance provides clarity and ensures adherence to best practices. Dispelling these myths helps in informed and effective maintenance routines. Therefore, exploring common misconceptions is important for accurate comprehension.

Misconception: Filter Replacement Is Not Important

A common misconception is that filter replacement is not critical for the air purifier’s performance. In reality, regular filter replacement is essential for maintaining optimal air purification. As filters become saturated, their efficiency in capturing pollutants decreases, negatively impacting indoor air quality. Ignoring filter replacement can lead to a buildup of allergens and pollutants, defeating the purpose of using an air purifier. By understanding the importance of regular filter replacement, you ensure the continuous effectiveness of your air purifier. Therefore, recognizing the critical role of filter replacement dispels this misconception.

Misconception: Cleaning Once a Year Is Sufficient

Another misconception is that cleaning the air purifier once a year is sufficient. While annual deep cleaning is beneficial, more frequent maintenance is necessary for optimal performance. Dust, debris, and pollutants can accumulate quickly, affecting the air purifier’s efficiency. Regular cleaning, such as monthly exterior wiping and quarterly filter compartment checks, ensures the air purifier remains in good working condition. By incorporating regular cleaning into your routine, you enhance the air purifier’s effectiveness and longevity. Therefore, understanding the need for frequent cleaning dispels the myth of annual sufficiency.

Conclusion: Maintaining Your Blue Air Purifier for Optimal Performance

The blueair red light on top on your Blue air purifier serves as an essential signal for various issues, from filter replacement to operational problems. Understanding significance of blue filter red light ensures timely and appropriate responses.

Exploring common causes, such as clogged filters or malfunctioning components, aids in diagnosing and resolving issues effectively. Following a step-by-step troubleshooting guide ensures you address and rectify the underlying problems.

Implementing regular maintenance tips, including timely filter replacements and periodic cleaning, enhances the air purifier’s efficiency and extends its lifespan. Addressing common misconceptions about air purifier maintenance provides clarity and promotes adherence to best practices.

By embracing these aspects, you know the blueair air purifier light meaning and can ensure your Blue air purifier functions optimally, maintaining clean and healthy indoor air quality. Therefore, whether you are a new or experienced user, understanding and maintaining your air purifier offers countless benefits for your home environment. Enjoy the continuous freshness and health benefits that a well-maintained Blue air purifier brings!

How to Remove Stains from a Dutch Oven?

Remove Stains from a Dutch Oven

Dutch ovens are versatile and durable cookware essentials in many kitchens, known for their ability to cook evenly and maintain heat. However, with regular use, these beloved pots can develop stubborn stains and residue. Removing stains from a Dutch oven not only improves its appearance but also maintains its functionality and longevity. Consequently, this article delves into various methods for tackling different types of stains, as well as preventive measures to keep your Dutch oven looking pristine. Therefore, by following these strategies, you can ensure your Dutch oven remains a reliable and attractive part of your cooking arsenal.

Remove Stains from a Dutch Oven Understanding the Types of Stains

Different stains require different cleaning approaches. Recognizing the type of stain on your Dutch oven can help you choose the most effective removal method. Therefore, understanding the types of stains is essential for successful cleaning.

Burnt-On Food Residue

Burnt-on food residue is a common issue, especially when cooking at high temperatures or preparing sticky dishes. This type of stain can be particularly challenging to remove because it tends to cling stubbornly to the surface of the Dutch oven. Burnt residue not only affects the appearance of your pot but can also impact its performance. Therefore, identifying burnt-on food residue is the first step in effectively removing it.

Oil and Grease Stains

Oil and grease stains can leave unsightly, sticky marks on your Dutch oven, often resulting from frying or roasting. Over time, these stains can become more difficult to clean, especially if they are not addressed promptly. Grease buildup can also affect the seasoning of cast iron Dutch ovens, altering their non-stick properties. Therefore, recognizing oil and grease stains is crucial for maintaining your Dutch oven’s functionality.

Effective Cleaning Methods

Removing stains from a Dutch oven involves using the right cleaning techniques and products. Different approaches are effective for different types of stains, ensuring thorough cleaning without damaging the pot. Therefore, exploring effective cleaning methods is essential for restoring your Dutch oven.

Baking Soda and Water Paste

One of the most effective and gentle methods for removing stains from a Dutch oven is using a baking soda and water paste. Baking soda is a natural abrasive that safely lifts stains without scratching the surface. To create the paste, mix equal parts baking soda and water until a thick consistency is achieved. Apply the paste to the stained areas, scrubbing gently with a non-abrasive sponge or cloth. For stubborn stains, allow the paste to sit for 15-20 minutes before scrubbing. Rinse thoroughly with warm water and dry. This method is effective for both burnt-on food residue and grease stains, making it a versatile cleaning solution. Therefore, using a baking soda and water paste is an excellent method for stain removal.

Remove Stains from a Dutch Oven

Vinegar Soak

A vinegar soak can effectively remove stubborn stains and deodorize your Dutch oven. Fill the pot with equal parts water and white vinegar, ensuring the stained areas are fully submerged. Bring the mixture to a boil, then reduce the heat and let it simmer for 5-10 minutes. After simmering, turn off the heat and allow the solution to cool. Use a non-abrasive sponge or brush to scrub away the softened stains. Rinse thoroughly with warm water and dry. Vinegar’s natural acidity helps break down grease and burnt residue while neutralizing odors. Therefore, a vinegar soak is an effective method for tackling tough stains.

Hydrogen Peroxide and Baking Soda

For particularly stubborn stains and discoloration, a combination of hydrogen peroxide and baking soda can work wonders. Sprinkle baking soda generously on the stained areas, then pour a small amount of hydrogen peroxide over the baking soda. The mixture will fizz and bubble, helping to lift the stains. Allow the mixture to sit for about 10-15 minutes before scrubbing gently with a non-abrasive sponge or brush. Rinse thoroughly with warm water and dry. This method is especially effective for removing deeply ingrained stains and restoring the Dutch oven’s original appearance. Therefore, using hydrogen peroxide and baking soda is a powerful method for tough stain removal.

Remove Stains from a Dutch Oven

Preventive Measures

Preventing stains in your Dutch oven involves adopting good cooking and cleaning habits. These preventive measures can help maintain your Dutch oven’s appearance and extend its lifespan. Therefore, exploring preventive measures is essential for long-term care.

Proper Seasoning

Proper seasoning is crucial for cast iron Dutch ovens, as it creates a natural non-stick surface and protects against rust and stains. To season your Dutch oven, apply a thin layer of vegetable oil or melted shortening to the interior and exterior surfaces. Place the oven upside down in a preheated oven at 375°F (190°C), with a baking sheet or aluminum foil on the lower rack to catch drips. Bake for one hour, then turn off the oven and allow the Dutch oven to cool inside. Regularly seasoning your Dutch oven helps maintain its protective coating and prevents stains from sticking. Therefore, proper seasoning is a key preventive measure for cast iron Dutch ovens.

Immediate Cleaning

Cleaning your Dutch oven immediately after use can significantly reduce the likelihood of stains developing. Avoid letting food residue and grease sit for extended periods, as this allows stains to set and become more difficult to remove. After cooking, allow the Dutch oven to cool slightly, then rinse with warm water and a mild dish soap. Use a non-abrasive sponge or cloth to clean the surface, avoiding harsh scrubbing. Rinse thoroughly and dry completely to prevent moisture from causing rust or discoloration. By incorporating immediate cleaning into your routine, you can keep your Dutch oven in top condition. Therefore, immediate cleaning is an effective preventive measure against stains.

Common Mistakes to Avoid

Avoiding common mistakes when cleaning and maintaining your Dutch oven can help preserve its quality and appearance. Being aware of these pitfalls ensures that your cleaning efforts are effective and safe. Therefore, exploring common mistakes to avoid is essential for proper care.

Using Harsh Abrasives

Using harsh abrasives, such as steel wool or scouring pads, can damage the surface of your Dutch oven, especially if it has a non-stick or enamel coating. These materials can create scratches that harbor food residue and stains, making future cleaning even more challenging. Instead, opt for non-abrasive sponges or brushes that effectively clean without scratching. If additional scrubbing power is needed, consider using a baking soda paste or gentle cleaning agents. Therefore, avoiding harsh abrasives is crucial for protecting your Dutch oven’s surface.

Ignoring the Manufacturer’s Instructions

Each Dutch oven may come with specific care and cleaning instructions from the manufacturer. Ignoring these guidelines can lead to unintentional damage or reduced performance. Always read and follow the manufacturer’s recommendations for cleaning, seasoning, and maintenance. Additionally, be cautious with using certain cleaning agents or methods that may void warranties or damage the coating. By adhering to the manufacturer’s instructions, you ensure that your Dutch oven remains in optimal condition and retains its quality. Therefore, following the manufacturer’s instructions is essential for proper care.

Conclusion: Maintaining a Pristine Dutch Oven

Maintaining a pristine Dutch oven requires understanding the types of stains, using effective cleaning methods, and adopting preventive measures. From using a baking soda paste to performing a vinegar soak, various techniques can effectively remove different types of stains.

Regular seasoning and immediate cleaning help prevent stains from developing, ensuring that your Dutch oven remains both functional and visually appealing. Avoiding common mistakes, such as using harsh abrasives or ignoring manufacturer’s instructions, further enhances the longevity and performance of your Dutch oven.

Therefore, by following these comprehensive steps and guidelines, you can keep your Dutch oven in top condition, ready to assist in creating delicious meals. Embrace the care and maintenance of your Dutch oven and enjoy its benefits for years to come. Happy cooking!

The Art of Mix and Match Appliances: Curating Kitchen

Mixing and Matching Appliances

In the ever-evolving world of interior design, the concept of mix and match appliances has gained increasing popularity, challenging the traditional notion of a uniformly coordinated kitchen. This approach offers homeowners the freedom to curate a truly personalized and visually captivating culinary space, blending various styles, colors, and functionalities to create a unique and inspiring environment.

Mixing and Matching Appliances

The Rise of Eclectic Kitchen Design

The shift towards eclectic kitchen design has been driven by a growing desire for individuality and self-expression, as homeowners seek to move away from the one-size-fits-all approach to kitchen décor.

The Allure of Personalization

Mixing and matching appliances allows homeowners to tailor their kitchen to their specific needs, preferences, and aesthetic sensibilities, creating a space that truly reflects their unique style and personality.

Embracing Personal Flair

By breaking free from the constraints of matched sets, homeowners can incorporate a diverse range of appliances that cater to their culinary passions, cooking habits, and design aspirations.

Rejecting Conformity

The eclectic approach to kitchen design challenges the traditional notion of uniformity, empowering homeowners to express their individuality and challenge the status quo.

The Versatility of Mixed Appliances

The ability to mix and match appliances opens up a world of design possibilities, enabling homeowners to create visually stunning and functionally efficient kitchens.

Combining Complementary Styles

Skillfully blending appliances with different styles, from vintage-inspired to sleek and modern, can result in a harmonious and visually captivating kitchen environment.

Optimizing Functionality

By carefully selecting a mix of specialized and multi-purpose appliances, homeowners can curate a kitchen that caters to their unique cooking needs and preferences.

The Benefits of Mix and Match Appliances

Embracing the art of mix and match appliances offers a wealth of benefits that extend beyond the aesthetic appeal of the kitchen.

Enhanced Functionality

The strategic selection and integration of diverse appliances can significantly improve the overall functionality and efficiency of the kitchen.

Tailored to Culinary Needs

By choosing a mix of specialized and versatile appliances, homeowners can create a kitchen that is optimized for their specific cooking habits and culinary preferences.

Improved Workflow

The strategic placement and pairing of complementary appliances can enhance the kitchen’s workflow, streamlining cooking and meal preparation processes.

Mixing and Matching Appliances

Cost-Effective Upgrades

Mixing and matching appliances can provide a more cost-effective approach to kitchen renovations and upgrades.

Gradual Investments

Rather than investing in an entirely new matching set of appliances, homeowners can choose to upgrade or replace individual appliances over time, spreading out the financial burden.

Avoiding Unnecessary Replacements

When a single appliance fails or becomes outdated, the eclectic approach allows homeowners to replace only the affected component, rather than the entire suite of kitchen appliances.

Adaptability and Flexibility

The ability to mix and match appliances grants homeowners a level of adaptability and flexibility that is often lacking in traditional, coordinated kitchen designs.

Accommodating Changing Needs

As the homeowners’ cooking needs or design preferences evolve, the flexibility of mixed appliances enables them to easily adapt and update their kitchen without the need for a complete overhaul.

Incorporating Unique Pieces

The eclectic approach opens up the opportunity to incorporate unique, vintage, or one-of-a-kind appliances into the kitchen, adding a touch of character and personality to the space.

Achieving Harmony in Mixed Appliances

While the concept of mixing and matching appliances offers numerous benefits. It is essential to strike a careful balance to ensure a cohesive and visually appealing kitchen design.

Establishing a Unifying Aesthetic

To create a harmonious and visually cohesive kitchen,  so homeowners should strive to establish a unifying aesthetic that ties the diverse appliances together.

Coordinating Finishes and Materials

Selecting appliances with complementary finishes, materials, and design elements can help to create a cohesive visual flow throughout the kitchen.

Incorporating Consistent Design Themes

Adopting a consistent design theme, such as a particular color palette or architectural style, can help to unify the mixed appliances and create a sense of visual harmony.

Balancing Functionality and Aesthetics

When mixing and matching appliances, it is crucial to strike a balance between functional needs and aesthetic considerations.

Mixing and Matching Appliances

Prioritizing Practical Requirements

While the visual appeal of the kitchen is important. So homeowners should ensure that the selected appliances meet their practical cooking and storage requirements.

Achieving Visual Harmony

By thoughtfully arranging and integrating the mixed appliances. Homeowners can create a visually harmonious kitchen that seamlessly blends form and function.

Conclusion: Embracing the Artistry of Mixed Appliances

The art of mixing and matching appliances in the kitchen represents a bold and innovative approach to interior design. Empowering homeowners to create truly personalized and inspired culinary spaces. By embracing this eclectic approach, homeowners can unlock a world of design possibilities. Curating a kitchen that reflects their unique style, personality, and functional needs.

Through careful curation, strategic placement, and a keen eye for visual harmony. Homeowners can transform their kitchens into captivating showcases of their individual flair and culinary passions. Whether it’s the incorporation of a vintage-inspired oven. A sleek and modern refrigerator, or a uniquely designed range hood. The mixed appliance approach allows for the seamless integration of diverse elements. Creating a kitchen that is both aesthetically pleasing and highly functional.

As the demand for personalized and adaptable kitchen designs continues to grow. The art of mixing and matching appliances stands as a testament to the homeowner’s desire for self-expression and the pursuit of a truly customized living space. By embracing this dynamic approach, homeowners can unlock a new era of kitchen design. Where the boundaries of tradition are challenged, and the possibilities for creativity and individuality are limitless.

Pacemakers and Microwaves: Understanding Safety Concerns

Pacemakers and Microwaves

Interactions between pacemakers and microwaves have been a topic of concern for individuals with this life-saving medical device. A pacemaker helps regulate heartbeats by sending electrical impulses to the heart, making it essential for those with arrhythmias or other heart-related issues. Microwaves, commonly found in households, use electromagnetic radiation to heat food quickly. Over the years, advancements in technology have significantly reduced interference issues, yet understanding the potential risks remains crucial. Consequently, this article delves into the history, safety measures, and current guidelines regarding the use of microwaves for pacemaker users. Therefore, gaining a thorough understanding of these concerns will help enhance safety and peace of mind for pacemaker users.

Pacemakers and Microwaves

Understanding Pacemakers and Electromagnetic Interference

Pacemakers and other medical devices can be affected by electromagnetic interference (EMI). Understanding how EMI impacts pacemakers is crucial for ensuring their proper functioning. Therefore, exploring the nature of electromagnetic interference and pacemakers provides valuable insights into their interaction.

How Pacemakers Work

Pacemakers are small, battery-operated devices implanted under the skin, typically near the chest. These devices monitor the heart’s electrical activity and deliver electrical impulses to stimulate a normal heart rhythm when necessary. A pacemaker consists of two main components: the pulse generator and the leads. The pulse generator contains the battery and electronic circuitry, while the leads are insulated wires that deliver electrical pulses to the heart. Pacemakers can be programmed to suit individual needs, ensuring they provide the right level of support. Therefore, understanding the basic functioning of pacemakers is essential before delving into their interaction with microwaves.

The Concept of Electromagnetic Interference

Electromagnetic interference (EMI) occurs when an external source of electromagnetic radiation affects the performance of an electronic device. Pacemakers can be sensitive to EMI, which can cause temporary malfunction or improper functioning of the device. Common sources of electromagnetic radiation include radio waves, cell phones, and household appliances like microwaves. While modern pacemakers are designed to withstand everyday levels of EMI, prolonged exposure or close proximity to strong sources can still pose a risk. Therefore, understanding the concept of electromagnetic interference is fundamental in evaluating pacemaker safety in various environments.

Historical Concerns and Advancements

Historical concerns regarding pacemaker and microwave interactions have prompted significant advancements in technology. Understanding these developments helps to contextualize the current state of pacemaker safety. Therefore, exploring the historical concerns and technological advancements provides a comprehensive view of the issue.

Early Microwave Interference Issues

In the past, pacemakers were more vulnerable to electromagnetic interference from household appliances, including microwaves. Early models of pacemakers lacked the shielding technologies that are commonplace today. Consequently, patients were often advised to avoid using microwaves or maintain a safe distance while the appliance was in operation. Reports of pacemakers malfunctioning in the presence of microwaves raised concerns and highlighted the need for improved device designs. These early issues prompted further research and development to enhance the safety and reliability of pacemakers. Therefore, historical concerns regarding microwave interference played a crucial role in driving technological advancements.

Technological Improvements

Over the years, significant technological improvements have enhanced the safety and reliability of pacemakers. Modern pacemakers are equipped with sophisticated shielding mechanisms and are rigorously tested for EMI resistance. These advancements have dramatically reduced the risk of interference from everyday household appliances, including microwaves. Additionally, better programming and diagnostic capabilities enable physicians to monitor and adjust pacemaker settings more effectively. Consequently, the risk associated with pacemaker and microwave interactions has been greatly minimized. Therefore, understanding these technological improvements helps reassure pacemaker users regarding the safety of using microwaves.

Pacemakers and Microwaves

Current Safety Guidelines for Pacemaker Users

Current safety guidelines for pacemaker users provide valuable information on minimizing risks while using household appliances like microwaves. Following these guidelines ensures the proper functioning of pacemakers and enhances safety. Therefore, exploring the current safety guidelines helps pacemaker users navigate their daily routines with confidence.

Recommendations from Medical Professionals

Medical professionals offer specific recommendations for pacemaker users regarding the safe use of microwaves and other household appliances. Patients are generally advised to maintain a certain distance from the microwave while it is operating, typically around six inches to one foot. This precaution minimizes potential interference from electromagnetic radiation. Additionally, it is essential to follow the manufacturer’s instructions and consult with healthcare providers to address any concerns. Regular check-ups and monitoring by the physician ensure that the pacemaker is functioning correctly and safely. Therefore, adhering to recommendations from medical professionals helps mitigate risks and ensures safe microwave use for pacemaker users.

Use of Modern Microwaves

Modern microwaves are designed with safety features that reduce the risk of electromagnetic interference. These appliances are equipped with better shielding and lower emission levels, making them safer for use around pacemakers. However, it is still advisable to follow general safety precautions and avoid prolonged exposure to the microwave while it is in use. If a pacemaker user experiences any unusual symptoms, such as dizziness or palpitations, they should move away from the microwave and consult their healthcare provider. Therefore, modern microwaves, combined with cautious use, offer a safer option for pacemaker users.

Myths and Misconceptions

Common Misunderstandings

There are several myths regarding pacemakers and microwaves. Some believe that all microwaves are dangerous for pacemaker patients. In reality, modern microwaves are safe to use. Awareness can dispel unnecessary fears.

Additionally, many patients may think that they need to avoid microwaves entirely. Yet, this is not entirely true. There are precautions one can take to ensure safety. It is essential to differentiate between fact and fiction.

Importance of Patience Education

Educating patients about these issues is critical. Healthcare providers should communicate these facts. Offering clear guidelines can help overcome misconceptions. Patients deserve accurate information to make informed decisions.

Moreover, education can enhance confidence among patients. Understanding potential risks enables individuals to take action. This knowledge ultimately leads to better health management.

Impact on Daily Life

Food Preparation and Patience

Pacemaker patients often face challenges with food preparation. They may feel limited in their cooking options due to safety concerns. However, education can enhance their living experience.

Learning to use microwaves safely can make a difference. Patients can continue enjoying convenience. Informed choices lead to better meal planning. Hence, finding a balance between safety and convenience is essential.

Lifestyle Recommendations

Overall, lifestyle recommendations play a vital role. Patients should maintain a healthy lifestyle while using modern appliances. Incorporating fresh ingredients in meals can enhance health.

Consulting with dietitians may help tailor meal plans. Additionally, exercise programs can also support heart health. Striking a balance between safety and a fulfilling life is crucial.

Practical Tips for Pacemaker Users

While technological advancements have significantly mitigated risks, practical tips can further enhance safety for pacemaker users. These recommendations promote a cautious approach to daily activities involving household appliances. Therefore, exploring practical tips provides additional layers of safety and peace of mind.

Maintaining Safe Distances

One practical tip for pacemaker users is to maintain safe distances from household appliances that may emit electromagnetic radiation. This includes microwaves, induction cooktops, and high-powered electronic devices. Keeping a distance of about six inches to one foot from these appliances while they are in operation can reduce the risk of interference. Moreover, avoid leaning directly over the microwave while it is in use. By establishing and adhering to safe distances, pacemaker users can minimize potential risks. Therefore, maintaining safe distances is an effective strategy for enhancing pacemaker safety.

Regular Medical Check-Ups

Regular medical check-ups are crucial for pacemaker users to ensure the device is functioning correctly. During these appointments, healthcare providers can perform diagnostic tests to detect any potential issues and adjust pacemaker settings as needed. Patients should also discuss any concerns they have about using household appliances during these visits. Staying informed and proactive about one’s health can prevent complications and promote overall well-being. Therefore, regular medical check-ups play a vital role in managing pacemaker safety and functionality.

Pacemakers and Microwaves

Conclusion: Enhancing Safety and Peace of Mind

The interaction between pacemakers and microwaves has been a topic of concern for many years. Historical issues prompted significant advancements in pacemaker technology, leading to improved shielding and better resistance to electromagnetic interference. Modern pacemakers are designed to withstand everyday levels of EMI, making the use of household appliances like microwaves much safer.

Current safety guidelines and medical recommendations provide essential information to minimize risks. Adhering to these guidelines, such as maintaining safe distances and consulting healthcare providers, ensures a safe and worry-free experience for pacemaker users.

Additionally, practical tips, including regular medical check-ups and cautious use of electronic devices, contribute to enhanced safety. By staying informed and proactive, pacemaker users can confidently navigate their daily routines while enjoying the conveniences of modern appliances.

Therefore, understanding the relationship between pacemakers and microwaves, along with following the recommended safety measures, helps enhance safety and peace of mind for individuals with pacemakers. Embrace these guidelines and continue to live a healthy, active life with the assurance of safety and well-being.

The Ultimate Guide to Cleaning Oven Racks with Ammonia

cleaning oven racks

Oven racks tend to accumulate a considerable amount of grease, food residue, and grime over time. These stubborn stains can affect the performance and efficiency of your oven, not to mention its overall cleanliness. Amidst various cleaning methods, using ammonia has proven to be particularly effective and efficient for tackling this challenging task. This comprehensive guide delves into the complete process of cleaning oven racks with ammonia, outlining its benefits, preparatory steps, and the actual cleaning procedure. Consequently, this guide aims to help you achieve sparkling clean oven racks with minimal effort.

Why Choose Ammonia for Cleaning?

Using ammonia to clean oven racks is both effective and budget-friendly. This substance is widely known for its powerful cleaning properties. When combined with water, it can cut through tough stains, making cleaning a breeze. Many commercial cleaning products contain ammonia as a key ingredient for a reason. In essence, it’s a reliable solution.

Ammonia’s Cleaning Power

Ammonia works by breaking down grime and grease. Its strong chemical properties allow it to penetrate dirt, making removal easier. This reaction occurs quickly, saving you time and effort. In addition, ammonia evaporates after use, leaving surfaces clean and fresh. Consequently, it acts not only as a cleaner but also as a deodorizer.

Safety Considerations

While ammonia is effective, it’s important to handle it with care. Always work in a well-ventilated area to avoid inhaling fumes. Moreover, protective gloves can prevent skin irritation, which is crucial for safety. Additionally, avoid mixing ammonia with bleach, as this creates toxic fumes. By following these precautions, you can clean safely and efficiently.

The Benefits of Using Ammonia for Cleaning

Ammonia is a powerful cleaning agent known for its ability to dissolve stubborn stains and grease. When it comes to cleaning oven racks, ammonia offers several benefits that make it an attractive choice for homeowners seeking an efficient method. Therefore, understanding these benefits can help you appreciate why ammonia is a favored option for this particular task.

Effectiveness

One of the primary benefits of using ammonia is its unparalleled effectiveness. Ammonia has strong grease-cutting properties that can break down the toughest residues on your oven racks. This powerful cleaning agent can dissolve caked-on grease, burnt food particles, and other stubborn stains, making it easier to wipe them away. Unlike some other cleaning methods that require vigorous scrubbing, ammonia simplifies the task considerably. Therefore, using ammonia ensures a more effective and thorough cleaning of your oven racks.

Cost-Effectiveness

Another significant advantage of using ammonia for cleaning oven racks is its cost-effectiveness. A bottle of ammonia is relatively inexpensive compared to specialized oven cleaners. Given that only a small amount of ammonia is needed for this cleaning method, a single bottle can last through multiple cleanings. In addition to saving money, ammonia is also widely available at most grocery and home improvement stores. Therefore, choosing ammonia not only provides an efficient cleaning solution but also offers a budget-friendly option.

cleaning oven racks

Preparatory Steps for Cleaning with Ammonia

Before you commence the cleaning process, proper preparation is crucial. Taking the time to set up correctly ensures a smooth and effective cleaning experience. Therefore, understanding and following these preparatory steps will enhance your oven rack cleaning process considerably.

Gathering Supplies

The first step in preparation involves gathering all necessary supplies. Alongside ammonia, you will need gallon-size zip-top bags or garbage bags, rubber gloves, and a well-ventilated area. Additional supplies include a sponge or cloth, dish soap, and a sink or tub for rinsing. Having everything ready and within reach will streamline the cleaning process. Moreover, using the right supplies ensures both safety and efficiency. Therefore, gathering all required items beforehand sets the stage for an effective cleaning session.

Safety Precautions

Safety should always be a top priority, especially when handling chemicals like ammonia. Start by ensuring the area is well-ventilated. Open windows and, if possible, run a ventilation fan to disperse any fumes. Wear rubber gloves to protect your hands from irritation and ensure you do not accidentally inhale ammonia fumes. Read and follow the safety instructions on the ammonia bottle. Also, keep children and pets away from the cleaning area to ensure their safety. Therefore, adhering to these safety precautions helps create a secure environment for cleaning your oven racks.

cleaning oven racks

Step-by-Step Cleaning Procedure

With all preparations complete, you can now focus on the actual cleaning process. This step-by-step guide will take you through the entire procedure to ensure your oven racks are thoroughly cleaned. Therefore, following these detailed instructions will help you achieve sparkling clean results.

Soaking the Oven Racks

Begin by removing the oven racks from the oven and placing them in zip-top bags or garbage bags. If you are using garbage bags, tie the bag securely after placing the racks inside. Pour approximately half a cup of ammonia into each bag, ensuring the ammonia comes into contact with the racks. Seal the bags tightly to contain the fumes and allow the racks to soak for several hours or overnight. The ammonia vapor within the sealed bags will work to break down grease and grime. Therefore, soaking the oven racks in ammonia is a crucial step for loosening stubborn stains.

cleaning oven racks

Cleaning and Rinsing

After soaking the racks, the next step entails cleaning and rinsing them. Carefully open the bags in a well-ventilated area, being mindful of the fumes. Remove the oven racks and place them in a sink or tub. Using a sponge or cloth and some dish soap, scrub away the loosened grease and grime. Most of the residue should come off easily due to the ammonia’s effectiveness. Rinse the racks thoroughly with warm water to remove any remaining ammonia and soap. Make sure the racks are completely clean and free of any residues before placing them back in the oven. Therefore, diligent cleaning and thorough rinsing are essential for a pristine result.

Additional Tips for Efficient Cleaning

While the step-by-step procedure outlined above is effective, incorporating additional tips can further optimize your cleaning process. These recommendations can help you achieve even better results and ensure the longevity of your oven racks. Therefore, considering these tips can enhance your overall cleaning experience.

Regular Maintenance

One way to reduce the buildup of grime and grease is through regular maintenance. Cleaning your oven and its racks periodically can prevent residues from hardening and becoming difficult to remove. Use a damp cloth to wipe down the racks after each use, and consider performing a more thorough cleaning once every few months. Regular maintenance minimizes the effort required during deep cleaning sessions. Therefore, establishing a routine for regular oven rack maintenance can save you time and effort in the long run.cleaning oven racks

Alternative Cleaning Methods

While ammonia is highly effective, exploring alternative cleaning methods can be beneficial, especially for those sensitive to fumes. Baking soda and vinegar make an excellent natural cleaning solution that can also tackle greasy oven racks. Create a paste using baking soda and water, apply it to the racks, and spray with vinegar. Let the mixture sit for a few hours before scrubbing and rinsing. While this method might require more elbow grease compared to ammonia, it is a safer alternative for those seeking chemical-free options. Therefore, considering alternative methods provides flexibility and caters to different preferences and sensitivities.

Common Mistakes to Avoid

Even with the best intentions, it’s easy to make mistakes while cleaning. Being aware of common pitfalls can help you achieve better results.

Overlooking Protective Measures

Never underestimate the importance of wearing gloves and goggles. Ammonia can be harsh on the skin and eyes. Always prioritize your safety. By keeping protective gear in mind, you can clean without worry.

Ignoring Ventilation

Failing to ventilate your space adequately can lead to harmful exposure to fumes. Always open windows or doors when using ammonia. If cleaning indoors, turn on a fan or air purifier. These measures are vital for maintaining a safe environment.

Enhancing Your Cleaning Routine

To make cleaning a breeze, consider enhancing your routine. These practices will improve your cleaning sessions and keep your kitchen in great shape.

Create a Cleaning Schedule

By creating a cleaning schedule, you hold yourself accountable. Plan regular cleaning sessions for your oven and racks. Stick to this schedule to avoid overwhelming messes. A consistent routine is the secret to maintaining cleanliness.

Involve Family Members

Cleaning can feel less daunting with help. If you live with family members, involve them in the process. Cleaning together can turn an overwhelming task into a fun group effort. Plus, it promotes teamwork and shared responsibility.

Conclusion: Enjoy Sparkling Clean Oven Racks

Cleaning oven racks with ammonia is an efficient and cost-effective method for achieving excellent results. By understanding the benefits, preparing properly, and following a detailed step-by-step procedure, you can transform your greasy, grimy racks into sparkling clean ones. Incorporating additional tips and exploring alternative methods ensures a comprehensive approach to oven rack maintenance. Therefore, with careful preparation and execution, you can enjoy the benefits of a clean oven and enhanced cooking experiences. Happy cleaning!

Effective Methods to Remove Iron Stains from White Clothes

Remove Iron Stains from White Clothes

Iron stains on the white clothes can be incredibly frustrating and difficult to remove. They are often caused by high iron content in water, rust in washing machines, or contact with metal objects. These stains can leave unsightly yellow, red, or brown marks on your pristine white garments. Despite the challenge, several methods can successfully remove iron stains and restore your clothes to their former glory. Thus, understanding the causes and solutions is essential for maintaining white clothes in excellent condition. Therefore, this article delves into effective methods of how to remove iron stain from white clothes.

Identifying the Cause of Iron Stains

Before attempting to remove iron stains, it is vital to identify their cause. Understanding the source can help you prevent future stains and choose the most effective removal method. Iron stains can arise from various sources, including high iron content in the water supply, rust in washing machines, or accidental contact with metal objects. Consequently, pinpointing the cause will aid in selecting the best approach to treat and prevent iron stain clothes. Therefore, recognizing the origins of these stains is a crucial first step in addressing the issue.

High Iron Content in Water

One common cause of iron stains is high iron content in the water supply. When washing clothes with iron-rich water, particles can bind to the fabric, particularly white clothes, leaving rust-colored marks. Installing a water softener or iron filter can help reduce iron levels in the water. Regular maintenance of these systems is essential for their effectiveness. Additionally, using distilled water for washing particularly susceptible items can be a temporary solution. Therefore, addressing high iron content in the water prevents new stains and aids in treating existing ones.

Remove Iron Stains from White Clothes

Rust in Washing Machines

Rust in washing machines is another frequent cause of iron stain on clothes. Rust can form on internal components or within the drum, leading to stains during the washing cycle. Regularly inspecting and maintaining your washing machine can help prevent rust formation. If rust is already present, running an empty cycle with a commercial appliance cleaner or a mixture of vinegar and baking soda can help remove it. Ensuring that the washing machine is in good condition can effectively reduce the risk of iron stains. Therefore, maintaining your washing machine is vital for preventing rust-related stains.

Commercial Products for Iron Stain Removal

How to remove iron stain from clothes? For those who prefer store-bought solutions, many commercial products are effective at removing iron stains from white clothes. These products often contain powerful agents specifically designed to combat various types of stains. However, it’s crucial to read labels and follow instructions for the best outcomes.

Oxygen Bleach

Oxygen bleach is a popular choice for removing tough stains, including iron marks. Unlike chlorine bleach, this product is gentler and safer for a variety of fabrics. Oxygen bleach works by releasing oxygen when mixed with water, breaking down stains effectively.

To use oxygen bleach, first refer to the product label for specifics. In general, for laundry, you’ll want to dissolve the appropriate amount in warm water. Next, soak the stained garment in the mixture for the required time, usually about 30 minutes or longer for stubborn stains. After soaking, launder the garment as normal.

It’s important to note that oxygen bleach is safe for colored fabrics as well, making it versatile for families. Always check the care label of your clothing to ensure compatibility. This option is practical for extensive cleaning loads, like sheets or tablecloths.

Stain Removers

Another option for treating iron stains is specialized stain removers. These products are specifically formulated to address particular types of stains, including rust and iron deposits. Many stain removers are effective on various fabrics, but always conduct a patch test before large applications.

To use a stain remover, apply the product directly to the stained area. Follow the manufacturer’s directions for how long to leave it on. In most cases, 5 to 10 minutes will suffice. Afterward, launder the garment according to the care instructions on the label.

It’s advisable to use these products in well-ventilated spaces. Many stain removers contain chemicals that could irritate the skin or respiratory system. Although effective, take care to handle these products with caution.

Pre-Treating Iron Stains

How to remove iron stains from white clothes? Pre-treating iron stains before washing is crucial for successful stain removal. Several methods can effectively break down and lift iron stains from fabric. These pre-treatments often involve household items that are readily available. By applying these solutions directly to the stained area, you can increase the likelihood of completely removing the stain during the washing process. Therefore, pre-treating is a vital step in removing iron stains from white clothes.

Remove Iron Stains from White Clothes

Using Lemon Juice and Salt

Lemon juice and salt create an effective natural stain remover. The acid in lemon juice breaks down iron particles, while salt acts as an abrasive, helping to lift the stain. To use this method, sprinkle salt directly onto the stain and then apply freshly squeezed lemon juice. Rub the fabric gently to work the mixture into the stain. Allow it to sit for at least 30 minutes before rinsing with cold water. This method is particularly effective for smaller stains and fresh marks. Therefore, using lemon juice and salt provides a simple and natural pre-treatment option.

Applying White Vinegar

White vinegar is another powerful natural remedy for iron stains. Its acidic nature helps dissolve iron particles and lift the stain from the fabric. To use this method, mix equal parts white vinegar and water in a bowl. Soak the stained area in the solution for 30 minutes. For more stubborn stains, apply undiluted vinegar directly to the stain. After soaking, rinse the fabric with cold water. This method can be repeated for particularly persistent stains. Therefore, using white vinegar offers an effective and eco-friendly pre-treatment for iron stains.

Remove Iron Stains from White Clothes

Washing and Stain Removal Techniques

How to get rid of iron stains on clothes? Once the clothes have been pre-treated, washing them using specific techniques can further aid in stain removal. Proper washing practices are essential to ensure the complete removal of iron stains. Additionally, using certain products or additives during the wash can enhance stain removal effectiveness. Therefore, following these washing and stain removal techniques will help restore your white clothes to their original state.

Washing with Baking Soda

Baking soda is a versatile and effective additive for removing iron stains during washing. It helps neutralize odors, soften fabrics, and lift stains. To use baking soda, add half a cup to your regular laundry detergent in the washing machine. For heavily stained items, mixing baking soda with water to form a paste and applying it directly to the stain before washing can increase effectiveness. The gentle abrasive nature of baking soda helps to dislodge iron particles from the fabric. Therefore, using baking soda during the washing process enhances stain removal.

Utilizing Commercial Stain Removers

Commercial stain removers specifically designed for iron and rust stains can be highly effective. These products contain powerful ingredients that break down and lift iron particles from fabric. When using a commercial stain remover, follow the manufacturer’s instructions carefully. Apply the product directly to the stain and allow it to sit for the recommended time before washing. Many commercial rust removers are available, making it easy to find one that suits your needs. Therefore, utilizing commercial stain removers provides a reliable solution for stubborn iron stains.

Remove Iron Stains from White Clothes

Preventing Future Iron Stains

Once you’ve successfully removed iron stains from your white clothes, focus on prevention for the future. Taking a few preliminary measures can significantly reduce the likelihood of encountering this issue again. Prevention is always more manageable than remediation.

Regular Maintenance of Appliances

The first step in preventing iron stains involves the regular maintenance of household appliances. This includes your washing machine and iron. Make sure to clean these appliances periodically to remove any rust or mineral buildup. Rusty appliances can easily transfer stains onto your clothing.

Inspect your washing machine for any visible rust or corrosion. If you see any, consider using a cleaner or scrubber made for this purpose. Additionally, periodically run an empty load with a mixture of vinegar and baking soda. This can help in eliminating built-up rust and debris within the machine.

When it comes to your iron, always check the plate for rust or discoloration. If rust is present, consider replacing the item. Alternatively, you can use a specialized cleaner designed for iron plates. Making these routines a habit can save you a lot of trouble later on.

Investing in Quality Fabrics

In addition to maintaining your appliances, investing in high-quality fabrics can also help in preventing iron stains. Cheap materials are often more prone to absorb stains and may react negatively with various treatments. Opt for fabrics that are both durable and resistant to stains for a long-lasting wardrobe.

While it might be tempting to choose lower-cost items, low-quality fabrics can lead to unwanted issues down the line. Instead, consider spending a bit more on clothing made from high-quality materials. In the long run, this investment will be worth it, as these fabrics tend to perform better.

Furthermore, consider using protective garment bags for your clothes. When not in use, store your garments in breathable bags that can reduce the chance of contamination. This will help keep your clothes pristine and free from potential stains.