The Versatile Power of Ammonia to Clean Oven

Cleaning Power of Ammonia

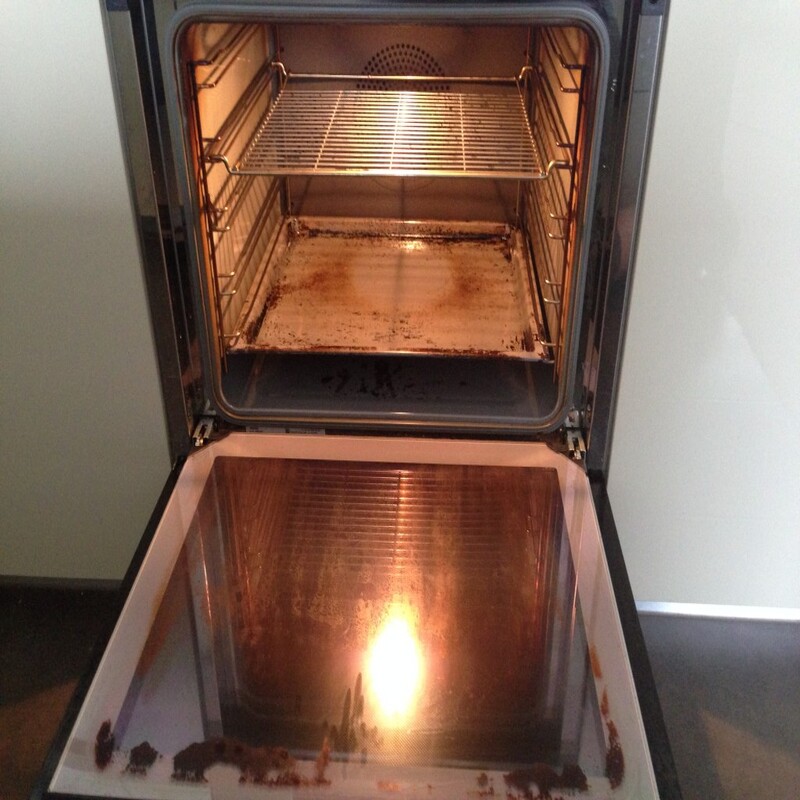
Cleaning your oven can feel insurmountable, especially after prolonged use. Grime and stains build up quickly, making the task daunting. However, ammonia emerges as an effective solution for oven cleaning. Furthermore, it is easy to use and cost-effective, making it accessible for everyone. This article will explore how ammonia to clean oven step-by-step instructions for its use. By employing ammonia, you can restore your oven to its original luster and maintain a welcoming kitchen environment.

Understanding Ammonia and Its Cleaning Properties

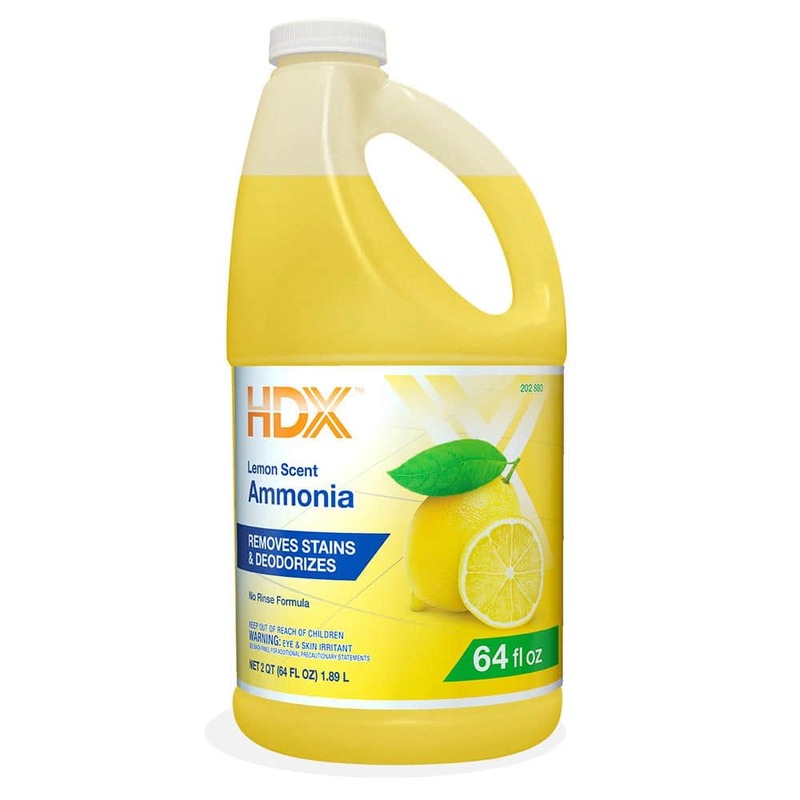
Ammonia, a colorless gas typically found in cleaning products, holds great power in removing stubborn stains. It penetrates greasy surfaces and breaks down tough residues efficiently. Additionally, its strong odor acts as a natural disinfectant, eliminating bacteria as it cleans. Due to its effectiveness, many industries utilize ammonia  to clean oven, particularly in kitchens.

Why Choose Ammonia to Clean Oven?

Choosing ammonia to clean oven offers numerous benefits. First, it’s non-toxic when used correctly, making it safer than some chemical alternatives. Furthermore, ammonia acts quickly on tough stains, saving you time and effort. The formula works well to cut through grease, leaving surfaces spotless.

Moreover, using ammonia requires minimal scrubbing. Instead, much of the work is done by the solution itself. You can apply it, let it sit, and witness the extraordinary results. This method eases physical strain, especially for individuals with limited mobility.

How Ammonia Differs from Other Cleaners

Comparison with other cleaners reveals ammonia’s unique effectiveness. While some products may mask odors, ammonia neutralizes them. It also serves as a powerful stain remover, breaking down residues more effectively. Many store-bought cleaners can irritate the skin, but ammonia, if used correctly, poses fewer risks in that regard.

In addition, ammonia is often less expensive than commercial oven cleaners. Consumers appreciate this financial benefit as it allows for a clean oven without breaking the bank. The readily available nature of ammonia makes it a convenient choice.

Cleaning Power of Ammonia

Preparing for the Cleaning Process

Preparation before cleaning your oven is crucial for achieving the best results. Begin by gathering essential supplies. Besides ammonia, you’ll need water, an old sponge, a spray bottle, and gloves. Ensure you have a well-ventilated space to allow fumes to dissipate.

Safety First: Using Ammonia Properly

Proper handling ensures a safe cleaning experience. Always wear protective gloves while using ammonia, as it can irritate skin. In addition to gloves, consider wearing a mask to avoid inhaling fumes. Open windows for ventilation, as fresh air will aid in dispersing the ammonia odor.

Ensure that you do not mix ammonia with any bleach-based products. This combination releases toxic gases that can be harmful to inhale. By safeguarding your health, you create an efficient cleaning atmosphere.

Setting Up Your Cleaning Environment

Once you gather your supplies, prepare your oven for cleaning. Remove any oven racks and accessories to make access easier. Wipe down loose debris without immersing the surfaces in water. Leaving the oven dry enhances ammonia’s effectiveness as it can penetrate stains without dilution.

Next, ensure that your working area is clear. This creates a safer and more efficient workspace. You want complete focus while cleaning your oven to achieve the desired results.

Cleaning Power of Ammonia

Step-by-Step Guide of Ammonia to Clean Oven

To utilize ammonia effectively, follow a step-by-step approach. You can prepare a cleaning solution that simplifies the task. With the right tools, your oven can shine like new.

Mixing Ammonia for Maximum Effectiveness

Begin by mixing ammonia with water. You can fill a spray bottle with equal parts ammonia and water. This solution will be manageable to apply and highly efficient for oven cleaning. Shake the bottle gently to blend the contents without creating unnecessary fumes.

After creating your mixture, prepare to apply it. Make sure to work in small sections for maximum efficiency. Ammonia’s potent formula will help dissolve tough stains and grime.

Applying Ammonia to Clean Oven

Once your solution is ready, it’s time to apply it to the oven. Use the spray bottle to coat the interior surfaces generously. Focus on areas that show significant residue accumulation. Allow the ammonia solution to sit for at least 30 minutes to penetrate deeper into the dirt.

During this waiting period, you can tackle other kitchen cleaning tasks. Use this time wisely to clean countertops or floors. By multitasking, you can streamline your overall cleaning efforts.

ammonia to clean oven

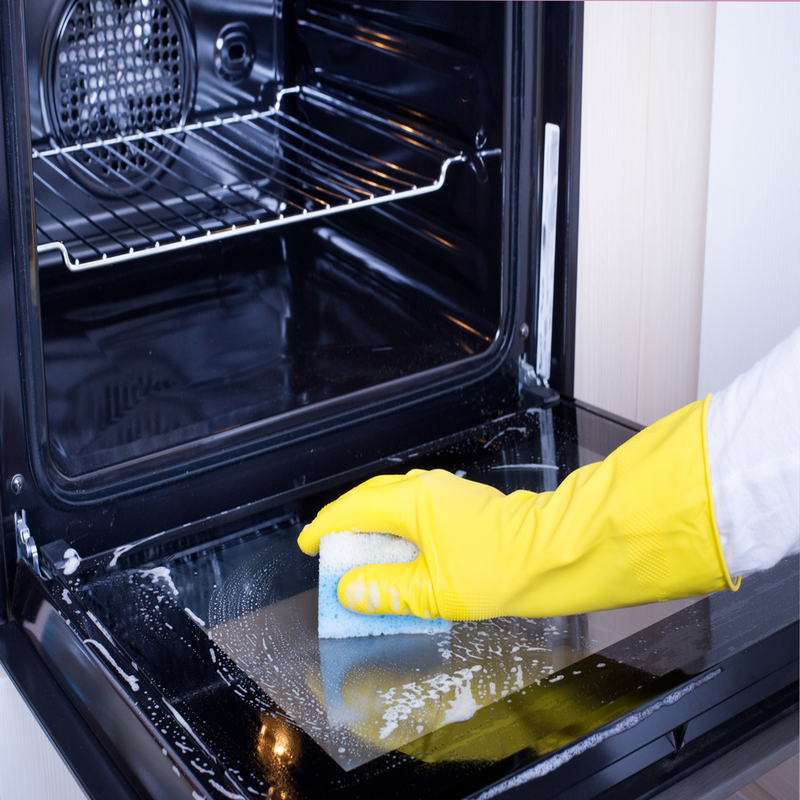
Scrubbing Away Stains and Grime

Once the ammonia solution has sat, it’s time to scrub. The ammonia should have loosened most stains by this point. Use an old sponge or soft cloth for scrubbing. Be gentle to avoid damaging any surfaces.

Wiping Down Surfaces

While scrubbing, continually wipe away loosened grime. As you do this, remember to change your sponge frequently. This prevents redepositing dirt onto clean surfaces. Additionally, a clean sponge ensures that you’re applying the most effective cleaning techniques.

Always aim for a circular motion while wiping. This method will promote even cleaning and prevent streaks. Keep an eye out for stubborn stains, and if necessary, reapply ammonia to those areas.

Final Touches to Complete the Process

After scrubbing, give the oven a thorough rinse with water. Using a damp cloth, wipe down all the surfaces you’ve cleaned. This helps remove any residual ammonia and dirt. Remember to dry surfaces completely to prevent streaks and encourage a sparkling finish.

You can replace oven racks at this point. Ensure they are also clean before reinserting them. By focusing on all components, you’ll enjoy a thoroughly clean oven.

ammonia to clean oven

Post-Cleaning Care and Maintenance

Once your oven is clean, implementing care practices is vital. Regular maintenance will keep grime at bay and simplify future cleaning. Consider adopting a cleaning schedule to stay proactive.

Creating a Regular Cleaning Schedule

Choose a day weekly or monthly to maintain your oven’s cleanliness. This will help prevent excessive build-up, making the process more manageable. Set reminders on your phone for your cleaning days. By organizing your time effectively, you will stay on track.

Creating a routine will minimize the need for deep cleaning sessions. You can avoid buildup by dedicating a small amount of time consistently. This method preserves your appliance and keeps your kitchen looking fresh.

Additional Tips for Oven Maintenance

Apart from a cleaning schedule, pay attention to spills. Always clean up spills immediately to prevent baked-on messes. Use dish soap and warm water for light tasks before they become complicated.

Additionally, consider using parchment paper to cover your baking sheets. This will catch drips and promote easier cleanup. These simple practices extend the time between deep cleanings, saving effort and money.

Troubleshooting Common Issues When Using Ammonia to Clean Oven

Even with a solid plan, some challenges may arise during the cleaning process. Addressing these issues promptly will ensure a smooth experience. Awareness empowers you to tackle any situation effectively.

Stubborn Stains Not Responding to Ammonia

Occasionally, you may encounter stains resistant to ammonia. In these cases, consider letting the ammonia solution sit longer. Extended exposure can help penetrate deeper layers of grime.

Another approach is to try a baking soda and water paste. Apply this mixture to stubborn areas and let it sit overnight. The combination of these methods can help free those pesky stains from your oven.

Odor Issues Persisting After Cleaning

If unpleasant odors linger after using ammonia, don’t be alarmed. Ventilation is key; keep your kitchen well-ventilated post-cleaning. Open windows and doors, allowing fresh air to circulate.

Furthermore, placing a bowl of vinegar inside the oven can neutralize lingering scents. The vinegar absorbs odors effectively to keep your kitchen fresh. Employing various methods helps you achieve the desired environment in your cooking space.

ammonia to clean oven

When to Seek Professional Help

There are instances where professional assistance may be necessary. If your oven is heavily soiled or damaged, don’t hesitate to consult a professional service.

Signs Indicating Professional Cleaning is Needed

Look for signs of wear and tear, including discoloration or peeling. These mark serious damage that requires expert evaluation. Additionally, if you lack the time or energy to clean properly, professionals are worth considering.

Moreover, if cleaning proves hazardous, it’s wise to involve experts. They hold the knowledge and equipment to handle delicate situations safely. Trusting specialists ensures your appliance remains functional and safe.

Finding Reliable Oven Cleaning Services

When seeking reliable oven cleaning services, research is crucial. Look for local companies with strong customer reviews. Personal recommendations can be invaluable, increasing your chances of quality service.

Once you find potential options, ask about their cleaning techniques. Ensure they employ safe and effective methods. Reliable services should also offer satisfaction guarantees to ensure peace of mind.

Conclusion: Embracing Ammonia to Clean Oven

Ammonia, when used correctly, is a powerful tool for cleaning. Its ability to handle stubborn grime makes it a favorite among many. With thorough preparation and proper techniques, you can achieve excellent results.

By establishing a cleaning routine and being proactive, you maintain a sanitary kitchen space. Remember to handle ammonia safely while reaping its benefits. Enjoy your fresh, clean oven, knowing you made an informed choice for your cleaning needs.

Ultimately, the right approach to cleaning your oven with ammonia leads to sparkling results. Embrace this cleaning method as a reliable ally in a tidy kitchen. You can take pride in your hard work as you prepare meals in your beautifully maintained space.

Watch out for what is the most common problems with lg refrigerators?

common problems with lg refrigerators

Troubleshooting LG Refrigerator Cooling Problems

LG refrigerators are well-known for their efficiency and innovative features. However, like any other appliance, they can encounter cooling issues that can be frustrating. To keep your food fresh and your appliance in top condition, it’s important to know how to troubleshoot common problems of lg refrigerators.

Identifying Issues with the Linear Compressor

Linear compressors in LG refrigerators are designed for energy efficiency and quiet operation. Yet, they can face problems due to several factors. If your refrigerator is running but not cooling, it might be an issue with the compressor. You may notice a lack of the running/humming noise that signifies a working compressor. If you suspect a problem, a technician may need to inspect the compressor’s seals and functionality. Remember, opening the compressor unit yourself is not advisable; instead, seek professional help.

Dealing with Defective Condenser Motors

The condenser motor plays a critical role in your LG refrigerator’s cooling process. If it’s defective, you might hear strange sounds or your fridge may overheat. Check the condenser coils for dirt or obstruction that could affect the fan blades. Should the motor not work properly after removing debris, consult with a professional for potential replacement.

Testing for Start Relay Faults

Start relay faults can prevent your LG refrigerator’s compressor from kicking in. To test the relay, remove the fridge’s rear panel and use a multimeter to check the relay’s continuity. If there’s no continuity, the relay may need replacement. It’s a straightforward task, but if you’re unsure, it’s best to call an expert.

Checking the Evaporator Fan Motor

The evaporator fan is key in circulating cool air within your LG refrigerator. If you’re facing cooling problems, check for any ice buildup or clogs that might be hindering the fan. Clear any debris and ensure the motor runs smoothly. If the motor has issues, a repair or replacement might be on the cards. Look for professional help if the problem persists post-cleaning.

common problems with lg refrigerators

Managing LG Refrigerator Temperature Irregularities

Ensuring your LG refrigerator maintains the right temperature is essential for food safety and energy efficiency. Yet, temperature irregularities can occur. Here’s how to manage them.

Adjusting Temperature Settings and Controls

The control panel is your first stop for temperature fixes. Check the settings. They may be too high or too low for optimal preservation. Adjust them to the right level, normally between 37°F and 40°F for the fridge, and 0°F for the freezer.

Handling Temperature-Related Ice Maker Problems

Ice makers depend on accurate temperature control. If yours isn’t working, ensure the freezer isn’t too warm. Common Problems with LG refrigerators commonly show up as ice makers producing little to no ice when temperatures rise.

Addressing Freezer Defrosting Complications

In LG freezers, defrosting issues often tie back to faulty components, like a defective defrost control board or a broken defrost heater. These parts are crucial for the auto-defrost function which maintains the freezer’s temperature by melting away excess ice. If too much ice builds up, it can insulate the freezer and prevent proper cooling. If you notice excess frost, it may indicate that these components are not working correctly.

common problems with lg refrigerators

Solutions for LG Refrigerator Noise Disturbances

Having a noisy LG refrigerator can be quite bothersome. Thankfully, identifying and fixing the source of these sounds can bring back the peace and quiet you’re used to. Here are some common problems related to LG refrigerators noise and solutions to resolve them.

Fixing Problems with Fan Blades and Motors

Fan issues often cause noise in LG refrigerators. If you hear rattling or buzzing sounds, check the fan blades for obstructions. You may need to remove debris or replace damaged blades. Additionally, listen to the fan motors. A failing motor can create a whirring noise. If so, the motor might need replacing. Remember to unplug the refrigerator before attempting any repairs.

Diagnosing Compressor Noises

The compressor is the heart of your fridge’s cooling system. Noises like banging or humming can signal a problem. If your LG refrigerator’s compressor makes loud or strange noises, it may indicate it’s wearing out. Often, this requires a technician’s expertise. If your refrigerator is still under warranty, contacting LG for a compressor assessment and repair is recommended.

Resolving Issues with the Water Inlet Valve

Noises from the water inlet valve may show during ice making or water dispensing. If you hear hammering or buzzing when your fridge dispenses water, the water inlet valve may be at fault. It’s responsible for controlling water flow and can become noisy if damaged or if water pressure is too high. Inspect the valve for mineral deposits and check water pressure. If the valve is faulty or if adjustments don’t help, replacing the valve might be needed.

lg refrigerator

Resolving LG Refrigerator Water and Ice Dispenser Issues

Frequent usage of the water and ice dispenser in LG refrigerators can lead to operational challenges. If you’re facing issues, there are troubleshooting steps you can take to resolve them efficiently.

Clearing Blockages from the Water Tube

Blockages in the water tube are common and can hinder water flow. Disconnect the tube, blow through it to check for obstructions, and clear it using warm water. Regularly inspect for freezing or debris to maintain a smooth water dispenser function.

Repairing Faulty Dispensing Mechanisms

Dispenser issues might be due to worn out parts. Check the dispenser’s control board, switch, auger motor, actuator, door motor, or solenoid. Use a multimeter to test for continuity and replace any faulty parts to restore proper dispenser operations.

Maintaining Ice Maker Efficiency

To keep the ice maker working well, regular maintenance is key. Replace the filter every six months, check temperature settings in the freezer, and ensure the ice maker and bin are clean. If the ice taste is off or production is low, it could signal the need to service or replace the ice maker components. Professional assistance might be needed if at-home fixes don’t resolve the issue.

Preventing and Repairing LG Refrigerator Leaks

Water leaking from your LG refrigerator can be a sign of various issues. Here’s how to tackle and prevent these leaks.

Cleaning the Drain Line to Stop Water Leaks

A clogged drain line often causes water leaks inside your fridge. To fix this, locate the drain hole inside your fridge or freezer. Use warm water to clear away ice or debris that may block it. This simple step can stop leaks and prevent water from pooling.

Inspecting and Replacing Tank Assemblies

Leaky tank assemblies can also cause water inside your fridge to pool. Look for signs of damage or cracks on the tank. If you find any, you may need to replace the tank to prevent leaks. Ensure connections are secure, and there’s no damage to the lines.

Prioritizing Door Seal Integrity

A faulty door seal might let warm air into your fridge. This can lead to condensation and leaks. Check the rubber seals on your fridge doors for wear or looseness. If seals are damaged, replace them to maintain a tight closure. Keeping seals clean can also help prevent leaks. Wipe down the seals with a damp cloth regularly to remove dirt and residue.

lg refrigerator

Expert Tips for LG Refrigerator Maintenance and Care

Maintaining your LG refrigerator is key to its longevity and performance. Follow these expert tips to keep your appliance running smoothly and efficiently.

Regular Cleaning of Condenser Coils

Dirt and dust can make your LG refrigerator work harder, leading to issues.

  • How to Clean: Turn off the fridge and unplug it. Find the coils, usually at the back or bottom. Use a coil brush or vacuum to clean them. Do this every six months.
  • Benefits: Clean coils help your fridge cool more effectively and save energy.

Avoiding Door Sealing Problems

A tight seal keeps the cold in and saves energy.

  • Check the Seals: Inspect door seals for food particles or damage regularly.
  • Clean Regularly: Wipe seals with a damp cloth to remove dirt and ensure a good seal.
  • Replace if Needed: If seals are worn out, replace them to prevent air leaks.

Ensuring Proper Appliance Leveling

A level refrigerator closes and seals properly, and runs as it should.

  • How to Level: Use a level tool on top of the fridge. Adjust the legs at the bottom until it’s even.
  • Check Annually: Make leveling part of your yearly maintenance checklist.

By following these tips, you can address some of the most common problems with LG refrigerators and keep your appliance in peak condition for years to come.

lg refrigerator

How to Correctly Reset Your LG Refrigerator

Sometimes, solving common problems with LG refrigerators is as simple as resetting the system. This can refresh the appliance’s main control board, resolve minor errors, and restore functionality without the need for a technician’s visit.

Steps to Reset and When It’s Necessary

To reset your LG refrigerator:

  1. Locate the Power Button: Look for the power button on the control panel.
  2. Unplug the Fridge: Disconnect the fridge from its power source for about 30 seconds.
  3. Reconnect Power: Plug the refrigerator back in.
  4. Press and Hold: Simultaneously hold the ‘Refrigerator’ and ‘Ice Plus’ buttons for 5 seconds.
  5. Wait for Reset: Your display panel should blink, indicating a reset.

When to reset:

  • After a power outage.
  • If there are error codes on the display.
  • When the fridge seems unresponsive.

Signs That Indicate a Reset Is Needed

Look for these signs to decide if a reset might help:

  • Error Codes: If your fridge shows an error code, try a reset first.
  • Unusual Operation: When functions become irregular without explanation.
  • After Repair: Reset your fridge after any major repair work.

If these steps don’t clear up your fridge’s issues, then it might be time to consult a professional. Keep an eye out for error codes and odd behaviors from your fridge, and remember that a simple reset is often the first and easiest step to troubleshoot your appliance.

The Rise of Smart Beds with TV: A Comprehensive Overview

Smart Beds with Integrated TV

In today’s fast-paced world, technology integrates seamlessly into every aspect of our lives, including how we sleep and relax. Smart beds have evolved beyond mere furniture items to multifunctional units that greatly enhance our overall living experience. With an increasing focus on comfort and convenience, the introduction of integrated televisions elevates the traditional bed into a state-of-the-art entertainment hub. This transformation doesn’t merely add luxury but also aims to cater to our modern lifestyles, where relaxation and leisure time are paramount. As we delve into the numerous aspects of smart beds with TV, we’ll explore the various benefits, technological advancements, and potential downsides these innovative sleeping solutions offer.

Smart Beds with Integrated TV

Understanding Smart Beds and Their Features

Smart beds are designed to adapt to individual preferences and enhance sleep quality. One of the primary features of these beds is their adjustable settings. Through digital interfaces, individuals can customize firmness levels and even monitor sleep patterns. This adaptability contributes significantly to better-rested mornings. Moreover, smart beds often incorporate health monitoring functionalities, such as heart rate and snoring detection. By gathering such data, these beds aim to create a more tailored sleeping environment.

The Technology Behind Smart Beds

At the heart of these advanced sleeping solutions lies impressive technology. Many smart beds utilize sensors and AI algorithms to analyze users’ sleeping habits. For instance, they adjust firmness or incline based on detected movements throughout the night. Consequently, individuals can enjoy more restful sleep cycles. Additionally, these beds often connect to mobile apps via Wi-Fi or Bluetooth. Users can manage settings from their smartphones without getting out of bed. This seamless interaction streamlines the bedtime routine while maintaining comfort levels.

Health Benefits of Smart Beds

Smart beds can significantly impact overall health. The ability to monitor vital signs can help identify sleep issues early. Furthermore, people suffering from sleep apnea can benefit from these beds’ adjustability, reducing snoring during the night. Enhanced sleep quality directly correlates with improved mental and physical health. Better sleep boosts mood and cognitive function, leading to a more productive day. Consequently, investing in a smart bed becomes not just a purchase but a commitment to a healthier lifestyle.

smart beds with tv

The Allure of Integrated TVs

The combination of smart beds with integrated TVs brings an entirely new dimension to leisure time. Nowadays, binge-watching favorite series or movies has become a common way to unwind. Why not make this experience even better by having a TV built right into one’s bed? This feature transforms the bedroom into an entertainment zone. Users are no longer confined to living rooms or home theaters for immersive viewing experiences. Instead, they can cozy up under the covers while enjoying their favorite content.

The Convenience Factor

Having an integrated TV eliminates the need for additional devices, such as stands or mounts. Thus, homeowners can save space, making the bedroom less cluttered. The convenience extends to enhanced audio capabilities as well. Many smart beds incorporate built-in speakers, providing a surround-sound experience. Whether watching a movie or listening to music, this feature amplifies enjoyment significantly. Consequently, relaxation becomes an effortless endeavor.

Distraction vs. Relaxation

However, the allure of integrated TVs does raise questions related to distractions. Watching TV in bed can sometimes hinder quality sleep. Studies have shown that screen time before sleep can affect melatonin production. While going to bed earlier may provide some benefits, the glowing screen could keep users awake longer. Hence, it becomes crucial for users to strike a balance. Opting for shows or movies that promote relaxation might help mitigate any adverse effects.

Smart Beds with Integrated TV

Customization Options

One of the most appealing aspects of smart beds with TV is their high level of customization. Consumers can choose how they want their experience to look and feel. From adjustable frames to personal lighting, every aspect can be tailored. Some beds even allow users to select the arrangement of the TV screen, enabling optimal viewing angles. This level of customization ensures that every user has a unique experience tailored to their preferences.

Material Choices

When selecting a smart bed, material quality cannot be overlooked. High-quality materials not only enhance aesthetics but also contribute to durability. Options range from premium fabrics to luxurious leather. Moreover, materials can impact comfort levels significantly, affecting the overall sleeping experience. Many manufacturers offer mattress selections in varying thicknesses and materials. Thus, customers can find something that genuinely resonates with them.

Tech Features

In addition to a built-in TV, many smart beds come with various tech features. Some models support voice commands, allowing for hands-free adjustments. Others may include USB ports for charging devices. Thus, individuals can easily stay connected while relaxing. Furthermore, smart home integration allows users to connect their beds with various other devices. This interconnectedness elevates the smart bedroom experience to new heights.

smart beds with tv

The Price Factor

Admittedly, smart beds with integrated TVs are not the most budget-friendly options on the market. The advanced technology and high-quality materials usually come with a hefty price tag. However, consumers must weigh costs against benefits. A good night’s sleep positively influences overall well-being. Meanwhile, a built-in TV saves space in the bedroom. Considering these factors may justify the initial investment. Nevertheless, shoppers should conduct thorough research before making a purchase.

Comparing Brands

Many brands offer smart beds, each with unique features and pricing. As such, consumers should compare options to find the best fit for their needs. Some companies focus on luxury, while others aim for affordability. Reading customer reviews and expert opinions helps paint an accurate picture. This research can guide buyers toward making informed decisions that align with their preferences and budget.

Long-Term Investment

Thinking long-term is crucial when considering a smart bed. Quality products can last for many years, providing daily comfort. Additionally, superior sleep quality translates to productivity and well-being. For many, the investment is undoubtedly worthwhile. Over time, improved health can lead to reduced medical expenses. Therefore, individuals should give thoughtful consideration to this purchase.

smart beds with tv

Potential Downsides

While smart beds with integrated TVs offer numerous advantages, they aren’t without downsides. For some individuals, the technology might become too complicated. Navigating through several features can lead to frustration, especially for those who aren’t tech-savvy. Additionally, the integration of electronics into a sleeping area may not suit everyone. For example, people seeking minimalistic environments may find these beds distracting.

Maintenance Concerns

Moreover, smart beds require ongoing maintenance. Software updates, battery replacements, and general servicing can add to the burden. This upkeep can deter some potential buyers, leading them to favor simpler bed options instead. While sleeping is generally a low-maintenance activity, the technological aspects may deviate from that norm.

Sleep Disruption

Finally, the presence of a TV in the bedroom can disrupt sleep for some users. As mentioned earlier, the blue light emitted by screens can hinder melatonin production. People who struggle with sleep issues might need to consider alternatives. Creating a dedicated media space in the home could be beneficial. This separation could promote better quality and productivity during bedtime.


Care Tips for Your Smart Bed with Built-In TV Features

Owning a smart bed with a built-in TV means taking care of both the bed and tech features. Here’s how to maintain your investment for years of comfort and entertainment.

Keep It Clean

Clean your bed regularly to prevent dust buildup. Use a soft cloth for the frame and screen. A gentle cleaner is best for the TV to avoid damage.

Update Software

Just like with other smart devices, keep your bed’s software up to date. This ensures smooth performance and the latest features.

Check Connections

Inspect cables and connections often. This avoids loose wires and ensures the TV and other features work well.

Manage Power Use

Use power-saving modes if available. This conserves energy and prolongs the life of your TV and bed components.

Monitor Mechanisms

For beds with adjustable features, test the mechanisms monthly. Look out for any signs of wear or slow response times.

Follow Weight Limits

Stick to the recommended weight limits. Overloading can harm the structure and the TV’s lifting or swiveling mechanics.

Handle with Care

Operate the TV and bed settings gently. Rough handling can lead to breakdowns and costly repairs.

Seek Professional Help

For any technical issues, call a professional. Trying to fix it yourself can void the warranty or cause more damage.

By taking these steps, you keep your smart beds with TV in top shape. Regular care ensures lasting comfort and uninterrupted entertainment.

Conclusion: The Future of Smart Sleeping Solutions

The introduction of smart beds with TV marks an exciting development in home technology. As we advance further into a technology-driven future, it’s likely we’ll witness even more innovations in this sector. These beds challenge traditional concepts of sleeping and leisure. They pave the way for a more comfortable and convenient way to manage our sleeping environments.

In the end, the decision to invest in a smart bed with a TV will depend on individual needs and preferences. For those who value luxury, convenience, and technology, this option might be ideal. Likewise, understanding the potential downsides is crucial for making informed choices. As smart beds continue to evolve, they will reshape our perceptions of rest and relaxation altogether. The future of sleep is undeniably bright, paving the way for improved quality of life.

Dyson Air Purifier Filter Reset: A Comprehensive Guide

Dyson Air Purifier Filter

The importance of maintaining a clean indoor environment cannot be overstated. With increasing air pollution and various allergens, many people turn to air purifiers for relief. Among these devices, Dyson air purifiers stand out due to their advanced technology and sleek design. However, even the best devices require maintenance. One of the key aspects of upkeep is knowing when and how to reset the air purifier filter. This article will guide you through the process, ensuring your device operates at peak efficiency.

Understanding the Dyson Air Purifier Filter

What is the Air Filter?

To appreciate the importance of resetting the filter, it’s crucial to understand its function. The air filter in a Dyson purifier captures pollutants, allergens, and particles. This feature greatly improves indoor air quality. Typically, the air filter consists of multiple layers, including a HEPA filter. HEPA (High-Efficiency Particulate Air) filters trap small particles. These include dust, pollen, pet dander, and even bacteria.

Every time air passes through the purifier, these filters work tirelessly to cleanse it. However, as with all things, the filter gets dirty over time. This decreases its effectiveness. Therefore, recognizing when to maintain or reset the filter is essential for ongoing performance. Furthermore, understanding your particular Dyson model will aid in successful maintenance. Each model may have its specific requirements regarding filter replacements and reset procedures.

Importance of Replacing the Filter

Replacing the filter regularly provides numerous health benefits. For instance, clean air reduces allergy symptoms. It also minimizes respiratory issues and provides a more comfortable living environment. Additionally, a well-maintained air purifier works more efficiently. This cut down energy consumption, ultimately saving money.

When the filter becomes too clogged, the purifier struggles to perform its job. Not only can this lead to poor air quality, but it may also strain the device. Prolonged strain can lead to malfunctions. Therefore, resetting the air filter is crucial after replacement. A reset ensures that the device calculates usage and alerts you for future replacements.

Dyson Air Purifier Filter

When to Reset the Dyson Air Purifier Filter

Signs Your Filter Needs Resetting

To effectively manage your Dyson air purifier, recognizing signs of a dirty filter is essential. Usually, the purifier indicates when the filter requires maintenance through a warning light. This light often turns red or orange. In some cases, the device may even display a message on its digital screen. This feature helps users stay informed about the filter’s condition.

Additionally, if you notice changes in air quality, it could signal filter issues. For example, an increase in dust or allergy symptoms suggests that the filter is not functioning effectively. Moreover, unusual noises from the device may indicate operational problems. Thus, resetting the filter promptly after identification of these signs is essential.

Recommended Maintenance Schedule

For optimal performance, establishing a maintenance schedule is advisable. Generally, the Dyson air purifier filter should be checked every six months. However, this may vary based on usage. For example, families with pets or allergy sufferers may need to check more frequently. Keep in mind that regions with high pollution levels may also necessitate more regular checks.

By adhering to a maintenance schedule, users can avoid unexpected issues. This proactive approach not only enhances air quality but also prolongs the device’s lifespan. Therefore, integrative maintenance strategies, including timely filter replacements and resets, are crucial for efficiency.

How to Reset the Dyson Air Purifier Filter

Step-by-Step Instructions

Resetting the air filter on your Dyson purifier may seem daunting, but it’s quite simple. To start, ensure that the device is turned on. Next, locate the “Reset” button. Depending on your specific model, the location may vary. In many cases, the button is situated on the back or bottom of the unit.

Press and hold the “Reset” button for a few seconds. After releasing it, the indicator light will flash. If your model has a digital screen, it will display a message confirming the reset. This indicates that the filter has been successfully reset, and the device is ready to operate efficiently.

Troubleshooting Common Issues

Sometimes users may encounter issues during the reset process. For instance, the reset button may not respond as expected. If that happens, ensure that the device is plugged in and turned on. If necessary, you may need to turn off the air purifier briefly and then try again.

In cases where the device continues to display a warning, it may indicate other underlying issues. Consider consulting the user manual for specific guidance tailored to your model. Furthermore, frequent issues may point to it being time for a new filter. Addressing these concerns promptly allows for continued effective air purification.

Dyson Air Purifier Filter

Maintaining Optimal Performance

Regular Cleaning and Maintenance Tips

In addition to resetting the filter, regular maintenance is essential. Make it a habit to clean the exterior of your air purifier. Dust and debris can accumulate over time, affecting performance. Wipe down the surface with a damp cloth for cleanliness.

Moreover, inspect the intake and output vents to ensure proper airflow. Any obstructions can negatively impact the unit’s efficiency. If you notice buildup, give it a thorough cleaning. Doing this regularly can go a long way in maintaining performance.

Monitoring Indoor Air Quality

Keeping tabs on indoor air quality is essential for using an air purifier effectively. Various smartphone apps can help you monitor levels of pollutants. This data can inform when you should increase fan speed or utilize a specific mode. By staying proactive, you can ensure better air quality at all times.

Additionally, consider introducing other air-purifying plants into your environment. Some plants can help improve air quality naturally. When combined with your Dyson air purifier, these plants can create a healthier home.

Frequently Asked Questions

How often should I replace the filter?

Replacing the filter typically occurs every six months. However, this can vary based on usage and environmental factors. If you notice any signs of diminished air quality or an indicator light, consider checking sooner. Frequent evaluations ensure your air purifier performs optimally.

Can I clean the filter instead of replacing it?

Dyson air purifier filters are not meant to be cleaned. Attempting to clean the filter can damage it. This damage may result in reduced efficacy and compromised air quality. Always replace filters according to the manufacturer’s guidelines to maintain optimal performance.

Is it necessary to reset the filter each time I replace it?

Yes, resetting the filter each time is essential. This step allows the device to recalibrate and maintain accurate usage data. It also helps in predicting future replacement needs. Skipping this reset may lead to confusion about the filter’s condition.

Dyson Air Purifier Filter

Conclusion

Maintaining the Dyson air purifier is vital for effective performance. By understanding when and how to reset the air filter, users can enjoy cleaner air. Recognizing signs that the filter requires attention is equally important. A consistent maintenance schedule further enhances the device’s longevity and effectiveness.

Moreover, if complications arise during the reset process, troubleshooting steps are readily available. Utilizing these resources allows you to address issues quickly. Remember, investing time in proper maintenance will yield healthier indoor air quality. Consequently, your home environment will become more breathable and comfortable for everyone. Therefore, blend these practices for a seamless air purification experience.

By effectively managing the Dyson air purifier and its filters, you not only improve air quality but also create a higher standard of living. Clear, clean air promotes overall well-being. Being proactive ensures your device continues functioning correctly. Ultimately, optimizing these factors will lead to a better life in many aspects. Stay informed, and enjoy the benefits of a well-maintained air purifier.

Should i leave my air purifier on all the time?

Keeping Your Air Purifier On

Air purifiers have become essential appliances in many homes. They combat indoor air pollution effectively. This leads to improved health and comfort. However, a common question arises: should you leave your air purifier on all the time? This question merits careful consideration. Understanding the benefits and guidelines for continuous use is vital for making an informed decision.

Advantages of Leaving Your Air Purifier On Continuously

Improved Air Quality

One significant advantage of keeping your air purifier on is the constant improvement of air quality. Airborne pollutants can fluctuate throughout the day. This includes dust, allergens, and even harmful chemicals. When air purifiers operate continuously, they effectively reduce these pollutants. This results in cleaner air for you and your family.

Moreover, many air purifiers come equipped with high-efficiency particulate air (HEPA) filters. These filters trap particles as small as 0.3 microns. This means they can capture almost all dust and allergens present in the air. The continuous function allows for a more comprehensive filtration system in your living space. As a result, your overall health benefits greatly from better air quality, particularly if you have allergies or respiratory concerns.

Reduction of Allergens and Irritants

Another key benefit of continuous air purification is the reduction of allergens. Pollens, pet dander, and dust mites are common irritants. They can significantly affect your comfort at home. Running your air purifier consistently minimizes these elements. Consequently, your home environment becomes more comfortable for everyone, especially for allergy sufferers.

Additionally, continuous use helps capture volatile organic compounds (VOCs). These are dangerous pollutants emitted from household products. When air purifiers run continuously, they can effectively reduce these harmful compounds. This creates a safer atmosphere in your home. Overall, merely leaving your air purifier on can lead to a noticeable improvement in indoor air quality.

Keeping Your Air Purifier On

Active Odor Control

Persistent odors are another concern in many households. Cooking, pets, and even cleaning supplies contribute to unpleasant smells. A continuous air purifier helps neutralize these odors, promoting a fresher environment. Running your air purifier full-time allows it to effectively circulate and filter the air.

Furthermore, certain purifiers are designed with specific filters for odor control. These can absorb various odors, enhancing the overall ambiance of your space. This is particularly beneficial if you engage in cooking often or keep pets. Therefore, having an air purifier continuously operating assists in maintaining a pleasant atmosphere in your home.

Considerations Before Leaving Your Air Purifier On

Energy Consumption

While the benefits of keeping an air purifier running continuously are substantial, energy consumption is a valid concern. Most air purifiers consume electricity, and that can add up over time. It’s essential to evaluate the energy efficiency of your device.

Modern models are often designed with energy-saving features. They have low power consumption rates, particularly if they are Energy Star certified. Do take into account the long-term savings associated with your health. Fewer allergens can lead to reduced healthcare costs. Nevertheless, energy consumption should still be a consideration when deciding how often to run your purifier.

Noise Levels

Noise is another factor you might want to evaluate. Some air purifiers operate quite quietly, while others produce noticeable sound. This can impact your comfort at home. If you’re concerned about noise, looking for quieter models may be a good idea. Many brands offer options with night modes, which reduce noise levels during sleeping hours.

Another consideration involves where you place the air purifier. Devices positioned in small or enclosed spaces may make more noise. You can also consider placing your purifier in shared living areas, where multiple members can benefit from cleaner air. Therefore, evaluating noise levels in line with your daily routines is essential.

Keeping Your Air Purifier On

Best Practices for Continuous Use of Air Purifiers

Regular Maintenance and Filter Replacement

To maximize the efficiency of your air purifier, regular maintenance is crucial. This involves cleaning or replacing filters as instructed by the manufacturer. A clogged filter may hamper the air purifier’s effectiveness significantly. Regular maintenance leads to optimum performance.

Additionally, dirty filters can release pollutants back into the air. This negates the entire purpose of using an air purifier. Therefore, staying vigilant about filter conditions is imperative. Schedule reminders to check and replace filters periodically. Doing so ensures you are getting the most out of your investment.

Optimal Placement

The placement of your air purifier plays a critical role in its performance. For best results, position the air purifier in high-traffic areas. The living room or a central space often works well. Avoid placing it near walls or furniture that could obstruct airflow.

Furthermore, consider the size of the room. Ensure that the air purifier’s capacity matches the size of the area it serves. Each purifier has a specific Clean Air Delivery Rate (CADR), indicating its efficiency. Matching the purifier to the room size will lead to better purification performance and efficiency.

Specific Use-Cases for Continuous Operation

Allergies and Asthma

In households with individuals suffering from allergies or asthma, leaving the air purifier on is a smart choice. Pollutants can exacerbate symptoms and lead to discomfort. For asthma sufferers, clean air can significantly reduce the occurrence of attacks.

Running the air purifier constantly helps maintain a consistent level of air quality. This is particularly essential during high pollen seasons. Continuously filtering allergens significantly improves air quality, resulting in fewer allergic reactions.

Pet Owners

If you have pets, a continuous air purifier is especially beneficial. Pet dander is a common allergen and can contribute to poor air quality. Moreover, pets can bring outdoor allergens indoors.

Keeping your air purifier running helps mitigate these concerns. The continuous filtration significantly reduces pet-related allergens and odors. This allows you and your pets to enjoy a more comfortable living environment.

Keeping Your Air Purifier On

When You Might Not Need Continuous Operation

Small Spaces

In small rooms, it may not be necessary to run the air purifier all the time. Often, these spaces may not accumulate allergens and pollutants as rapidly. Depending on the efficiency of the air purifier, running it intermittently can be adequate.

In this scenario, you can run the purifier during peak pollution hours or after cleaning. However, ensure that you take into account any specific sensitivities to allergens. Knowing your environment is crucial for optimizing air quality.

Seasonal Changes

Seasonal fluctuations can also influence whether you should leave your air purifier on continuously. During winter, for example, windows are often closed, reducing drafts. This effectively minimizes outdoor pollutants entering your home.

However, this also means indoor pollutants, like dust, can accumulate. Therefore, adjusting the operation of your air purifier according to these seasonal needs is important. By doing so, you can save energy while still maintaining decent air quality.

Conclusion: Should You Leave Your Air Purifier On?

So, should you leave your air purifier on all the time? The answer largely depends on your specific circumstances. Factors like household size, individual sensitivities, and energy concerns all play crucial roles.

In general, continuous operation offers numerous benefits, especially for individuals with allergies or respiratory problems. With advancements in technology, many air purifiers today are designed for efficiency. Still, evaluating your personal needs will lead to the best result. Ultimately, maintaining high indoor air quality is key to living comfortably and healthily.

In summary, the decision should be made based on your unique situation. Regular maintenance and optimal placement further enhance the experience. Thanks to this understanding, you’ll be able to enjoy cleaner air and improved well-being in your home.

How Long Does It Take for an Air Purifier to Work?

Time for Air Purifiers to Work

Air purifiers have gained immense popularity in recent years. Many people are unaware of their effectiveness and how quickly they can clean indoor air. As air quality continues to decline in many urban environments, the demand for effective air purification solutions has surged. Knowing how quickly an air purifier work can help you decide whether to invest in one. In this article, we will explore the factors influencing an air purifier’s performance and the typical time frames for air cleaning.

Understanding Air Purifiers

Air purifiers are devices designed to remove contaminants from the air. Many types of air purifiers use various technologies. Common methods include HEPA filtration, activated carbon filters, and UV-C light technology, among others. Each technology has its own strengths and weaknesses. Understanding how these systems work helps in assessing their effectiveness in improving indoor air quality.

Types of Air Purifiers

To comprehend how long it takes for an air purifier to work, consider the types available. HEPA filters capture allergens like dust, pollen, and pet dander. This technology often boasts near-complete effectiveness. On the other hand, activated carbon filters are more effective at removing odors and chemical pollutants. Both types play a crucial role in enhancing air quality. Some air purifiers even combine multiple technologies for maximum efficacy.

How Air Purifiers Work

Air purifiers generally function by drawing in air and filtering it. The first step involves capturing large particles, such as hair and dust. Subsequently, smaller particles are removed through different filtration methods. Some purifiers include a fan that helps circulate air, speeding up this process. However, the time it takes to see significant improvements can vary. You may notice differences in air quality sooner than expected, depending on several factors.

Time for Air Purifiers to Work

Factors Influencing Air Purifier Efficiency

Multiple factors affect how quickly an air purifier works. Understanding these can optimize your experience. One key factor is room size. Another is the type of air purifier you choose. Additionally, the starting air quality plays a significant role. Each of these factors affects the overall effectiveness and speed of an air purifier.

Room Size Matters

The size of the room significantly impacts how long it takes to notice improvements. Generally, larger rooms require more time and effort for effective purification. Most air purifiers are designed for specific room sizes. If you place a smaller unit in a large room, expect longer purification times. Conversely, using a more powerful air purifier in small, enclosed spaces can yield noticeable results quickly.

Type of Air Purifier

The technology behind the air purifier also dictates its efficiency. HEPA filters tend to be more effective against airborne particles compared to less advanced models. Advanced models may incorporate additional features. For example, some air purifiers utilize UV-C light to kill bacteria and viruses. This hybrid approach can expedite the purification process, leading to faster results.

Duration for Air Purifiers to Work Effectively

Timing can vary widely based on the factors discussed. Typically, many air purifiers take at least 15 to 30 minutes to start showing results. However, for complete purification, the time frame generally extends considerably longer. In most cases, you will begin to notice visible improvements within hours, yet full air purification could take several hours or even longer.

Initial Improvements

Most users will notice an initial improvement in air quality within just 30 minutes. This is particularly true if you use a high-quality air purifier in a small to medium-sized room. Our senses can often detect differences in smell and clarity. For example, odors from cooking or pets may dissipate quickly. The effectiveness of this initial change establishes a positive outlook on the device’s capacity.

Full Purification Timeline

While initial improvements are encouraging, full purification takes more time. The typical range for complete air purification is around 2 to 8 hours. Larger spaces or heavily polluted areas will require the upper end of this range. This longer timeline allows the air purifier to cycle through the room multiple times. Continual circulation is essential for achieving optimal indoor air quality.

Time for Air Purifiers to Work

Maintenance and Its Impact on Effectiveness

Regular maintenance of air purifiers is crucial for maintaining performance. Issues can arise without proper care. Many users overlook the importance of regular filter changes. When filters become clogged, airflow decreases, hampering purification efficiency. Therefore, keeping up with maintenance can have significant benefits for both the device and your health.

Filter Replacement Schedule

Most manufacturers recommend changing filters roughly every 6 months to 1 year. Some high-use situations may necessitate more frequent changes. It’s essential to follow the guidelines specific to your model. For example, pet owners may need to change filters sooner than those without pets. Regular inspections and timely filter replacements can drastically improve air-purifying times.

Additional Care Tips

In addition to replacing filters, consider the cleanliness of the air purifier itself. Dust and grime can accumulate on the exterior, affecting overall efficiency. Regularly wiping down the unit can improve airflow and performance. Additionally, keeping your space tidy minimizes the amount of dust and allergens in the air.

Real-World Experiences

Understanding the timeline for air purifiers can be enlightening, but personal experiences provide valuable insight. Many users report immediate satisfaction upon using their air purifiers. However, some face challenges based on unique circumstances. Whether dealing with allergies, pet dander, or smoke, specifics can influence results.

Positive Testimonials

Countless users rave about their air purifiers. Many individuals with allergies find relief within hours. They notice decreased symptoms like sneezing and congestion. Others are particularly impressed by how effectively odors dissipate. Overall, the positive feedback significantly contributes to the air purifier’s appeal.

Areas for Improvement

Despite positive experiences, some users report challenges. For instance, those living in urban areas may face ongoing pollution issues. As a result, they might feel that air quality improvement is minimal. Others may struggle with finding the right unit for their specific needs. Unfortunately, this can lead to frustration when the anticipated improvements do not materialize.

Time for Air Purifiers to Work

How Long to Expect Air Quality Improvement

As you begin using an air purifier, you may wonder how long it truly takes for air quality to improve. Various timelines exist depending on specific factors outlined.

Immediate Effects vs. Long-term Benefits

Many users may notice immediate relief from strong odors. In contrast, long-term benefits become evident after weeks or months of use. For instance, allergy symptoms may lessen, and overall air freshness may improve.

A Week for Substantial Changes

After about a week of continuous use, people generally notice considerable air quality improvement. This timeframe allows for the purification of pollutants accumulated over time.

Long-term Monitoring of Indoor Air Quality

Monitoring indoor air quality over time provides valuable insights. You might consider using an air quality monitor for accuracy. It can help you gauge how well the air purifier performs.

Conclusion

Ultimately, the time it takes for an air purifier to work effectively is multi-faceted. Users typically see initial improvements in around 30 minutes. However, achieving full air purification usually requires several hours. Factors such as room size, purifier type, and specific air quality all play significant roles. For optimal results, following maintenance guidelines is essential. Regularly changing filters further ensures efficiency.

In light of this information, investing in a high-quality air purifier can significantly enhance indoor air quality. Understanding its capabilities, limitations, and maintenance needs allows for an informed purchase. Whether you’re looking to alleviate allergy symptoms or simply improve air freshness, air purifiers can be a worthwhile addition to your home.

As you consider your options, remember to evaluate your unique needs. Understanding how long it takes for an air purifier to work can make a substantial difference in your experience. With careful selection and diligent maintenance, you can enjoy the benefits of cleaner air in your living space.

Understanding the Pionair Air Purifier: A Comprehensive Guide

Pionair Air Purifier

Air purifiers have become vital in maintaining indoor air quality. They serve an essential role, especially for those who suffer from allergies or respiratory issues. Among various options available, the Pionair Air Purifier stands out. Its unique design and capabilities make it a popular choice among consumers. This article will provide an overview of the Pionair Air Purifier, detailing its features, benefits, and user experience.

Key Features of the Pionair Air Purifier

Advanced Filtration Technology

The Pionair Air Purifier employs advanced filtration methods. It uses a multi-layer filtration system designed to capture various airborne contaminants. This includes dust, pollen, pet dander, and smoke particles. As a result, it effectively reduces allergens in indoor spaces. Many users have reported significant improvements in their air quality shortly after use.

Consequently, the purifier reduces the number of pollutants circulating in homes. This is particularly beneficial for allergy sufferers. Moreover, it incorporates a HEPA filter known for its efficiency. HEPA filters can trap particles as small as 0.3 microns with 99.97% efficiency. Thus, the Pionair is not just another air purifier; it’s a device engineered to enhance your living environment dramatically.

User-Friendly Operation

In addition to its cleaning capabilities, the Pionair Air Purifier is user-friendly. It comes with an intuitive control panel that makes operation simple. Users can quickly adjust settings for different room sizes and air quality needs. This feature provides versatility, allowing households to customize their air purification experience.

Furthermore, the air purifier operates quietly, ensuring that it won’t disturb daily activities. Many users appreciate this feature, especially during the night. The ability to run silently while improving air quality enhances overall user satisfaction. This feature also allows for uninterrupted sleep, which many individuals find crucial for well-being.

Pionair Air Purifier

Benefits of Using the Pionair Air Purifier

Enhanced Indoor Air Quality

Improving indoor air quality is among the primary benefits of the Pionair Air Purifier. Poor air quality can lead to various health issues over time. For example, respiratory problems may worsen in environments filled with allergens. By effectively removing these contaminants, the Pionair addresses this concern.

Moreover, cleaner air contributes to a healthier living environment. Families can enjoy peace of mind knowing their home is a sanctuary of clean air. Furthermore, the purifier’s real-time monitoring system also alerts users about air quality changes. This functionality provides an added layer of reassurance for families, allowing proactive care for their health.

Energy Efficiency

Another significant advantage of the Pionair Air Purifier is its energy efficiency. It has been designed to consume minimal power, which is essential for long-term use. This feature means users can run the purifier continuously without worrying about energy bills soaring.

Additionally, the air purifier often features an automatic shut-off function when air quality is optimal. Consequently, this saves both energy and reduces wear on the machine. Companies that focus on sustainable practices aim for energy-efficient technologies. The Pionair aligns well with these values while providing excellent air purification capabilities.

Understanding the User Experience

Customer Reviews and Feedback

When discussing any product, customer reviews offer valuable insights. Users of the Pionair Air Purifier have shared diverse experiences. Many report noticeable improvements in air quality almost immediately. Some users actively mention reduced allergy symptoms after using the device consistently.

In addition, the overall design and aesthetics of the product receive positive remarks. Customers appreciate that it blends seamlessly into their home decor. With multiple color choices, the Pionair can match any interior design style. Thus, it fulfills both functional and aesthetic needs.

Longevity and Maintenance Considerations

Longevity is a significant factor when investing in an air purifier. Luckily, the Pionair Air Purifier is known for its durability. Many customers indicate that they rarely face issues over the years of use. Its robust construction contributes to this impressive longevity.

However, maintenance is essential for any air purifier. Users should replace filters regularly to ensure maximum efficiency. The Pionair provides straightforward instructions for filter replacement, simplifying the process. Regular maintenance promotes cleaner air and extends the life of the machine.

Pionair Air Purifier

Cost and Value Assessment

Initial Investment vs. Long-Term Savings

When considering the Pionair Air Purifier, potential buyers often weigh upfront costs against long-term savings. The initial investment can vary based on the model selected. Nevertheless, many users find value in the features it offers.

Moreover, the energy efficiency of the device translates into lower electricity bills over time. Reduced allergy symptoms can also lead to decreased medication costs. When viewed holistically, the Pionair Purifier can result in savings that outweigh the initial cost. It represents a proactive approach to health, meaning it pays for itself over time.

Comparisons with Competitor Products

The air purifier market is saturated with different brands. Competitors like Dyson and Coway also offer advanced models. Comparing features, effectiveness, and user experience can help potential buyers decide.

The Pionair’s unique filtration system often gives it an edge over competitors. Additionally, its customer service reputation remains commendable. Some users cite consistent support when they encounter issues, which enhances overall experiences. Customers generally feel secure making significant investments when supported effectively.

Tips for Maximizing Your Pionair Air Purifier Experience

Optimal Placement Tips

To achieve the best results with your Pionair Air Purifier, placement is crucial. Users are encouraged to position the device in high-traffic areas. This ensures that it actively cleans the air that circulates throughout the room.

Moreover, avoid placing the air purifier near walls or behind furniture. Such placements can block airflow, reducing effectiveness. Instead, a central location tends to yield better results. This consideration allows the Pionair to work at its full capacity, ensuring optimal air quality.

Regular Maintenance Routines

As indicated earlier, maintenance plays a vital role in the air purifying process. Users should regularly check filter status. Some models feature indicator lights that signal when a filter replacement is necessary.

Furthermore, regular cleaning of the outer casing can prolong the life of the unit. Dust and dirt should be wiped away to prevent buildup during use. These routines promote prolonged efficiency, ensuring the device functions flawlessly over time.

Pionair Air Purifier

The Role of Technology in Pionair Air Purifiers

Technology continues to influence the development of air purification devices. The Pionair integrates innovative features to enhance user experience. This section delves into how technology plays a pivotal role in its design.

Smart Features

Many modern air purifiers, including the Pionair, now feature smart capabilities. Wi-Fi connectivity allows users to monitor air quality remotely. Smartphone applications enable control over settings and scheduling.

These features create user convenience, making air purification easier than ever. You can adjust settings based on real-time air quality readings. Consequently, this smart technology enhances your overall experience with the device.

Energy Efficiency

Energy efficiency is another critical technology feature. Ensuring minimal energy consumption is essential for cost-effectiveness. The Pionair boasts designs that lower energy use without compromising performance.

Using energy-efficient technology not only saves money but also benefits the environment. Therefore, opting for an energy-efficient air purifier is a responsible choice. You can enjoy cleaner air while minimizing your carbon footprint.

Conclusion: Embracing Clean Air with Pionair

The Pionair Air Purifier is more than just a device; it’s an investment in health. It effectively combats indoor air pollutants, creating a healthier living environment. Families can breathe easier knowing that allergens are minimized.

Moreover, its energy-efficient design showcases a commitment to sustainability. Users can enjoy cleaner air without incurring hefty energy bills. Customer feedback highlights satisfaction, further solidifying the Pionair’s reputation.

In summary, air quality matters in every home. Therefore, the Pionair Air Purifier serves as an essential tool for improving wellbeing. As awareness grows about indoor air quality, devices like Pionair will continue to be important in homes everywhere.

How to Clean an Air Purifier Filter

Air Purifier Filter

Maintaining the air quality in your home is crucial. One effective way to enhance air quality is through an air purifier. However, many people overlook one important aspect: cleaning the air purifier filter. Regular cleaning is essential for optimal performance. A clean filter ensures that your air purifier operates efficiently and effectively. In this article, we will explore the best practices for cleaning air purifier filters, keeping your air clean and safe.

Understanding Your Air Purifier Filter

Cleaning your air purifier filter begins with understanding its type. Different types of filters serve different functions. Common types include HEPA, activated carbon, and pre-filters. Each filter type requires specific care. Thus, knowing what type of filter you have can save you time and effort.

HEPA Filters: Importance and Care

HEPA filters are perhaps the most efficient option. They can capture 99.97% of airborne particles. Such particles include dust, pollen, and pet dander. These filters are particularly beneficial for allergy sufferers. Consequently, it is important to understand how to clean them properly.

Cleaning HEPA filters can be simple. However, it is also crucial to follow the manufacturer’s guidelines. Most HEPA filters are not washable. Therefore, you may need to replace them instead. If the guidelines allow for cleaning, use a vacuum with a soft brush attachment. This soft touch prevents damage while removing dust.

Activated Carbon Filters: Their Role in Air Purification

Activated carbon filters play a critical role in air purification. They help eliminate odors and harmful gases. These filters absorb volatile organic compounds (VOCs) from the air. Therefore, if you notice lingering smells in your home, consider cleaning this type of filter.

Cleaning activated carbon filters can be tricky. Unlike HEPA filters, they can’t usually be washed. Instead, they are best replaced regularly. However, you can extend their life by vacuuming them gently. When doing this, ensure you are using a low suction setting. This will prevent any disturbance to the carbon structure.

Air Purifier Filter

The Importance of Regular Filter Maintenance

Regular maintenance of your air purifier filter is essential. It not only enhances the air quality but also improves your device’s lifespan. Neglecting filter maintenance can lead to reduced efficiency. This can cause your air purifier to consume more energy.

Signs You Need to Clean or Replace Your Filter

Recognizing the signs that indicate a filter needs attention is crucial. Some common indicators include persistent odors or increased noise levels. If you observe that the air quality seems poor, check your filter immediately.

Another sign is reduced airflow from your unit. When a filter is clogged, airflow decreases. If you feel less airflow when standing near the purifier, it’s time to act. Regularly inspecting your filters can save you from these problems. A quick visual check can often reveal the need for cleaning or replacement.

Frequency of Cleaning and Replacement

Understanding how often to clean your filter can be confusing. Ideally, it depends on the type of filter and usage levels. For instance, HEPA filters may need replacement every six months to a year. In contrast, activated carbon filters should be checked more frequently.

If you live in a high-pollution area or have pets, inspect them often. Monthly check-ups can ensure optimal performance. Cleaning or replacing filters on schedule will maintain air quality and improve your air purifier’s efficiency.

Step-by-Step Guide to Cleaning Different Filters

Now that we understand the importance of filter care, let’s explore how to clean them properly. Each type of filter requires a different cleaning approach. Here, we will provide a detailed guide for cleaning various common filter types.

Cleaning HEPA Filters

For HEPA filters, cleaning can be simple. However, many HEPA filters are not washable. Start by checking the manufacturer’s instructions first. If cleaning is allowed, follow these steps.

First, turn off your air purifier and unplug it. This ensures safety while you handle the filter. Next, remove the filter from the unit. Use a vacuum with a brush attachment to gently clean it. Make sure to remove dust and debris without damaging the filter.

After vacuuming, visually inspect the filter. If it looks worn or torn, it may be best to replace it. Once you’re done, reinsert the filter according to the manufacturer’s instructions. Finally, remember to safely dispose of any worn filters following local regulations.

Cleaning Activated Carbon Filters

Cleaning activated carbon filters can be quite different. As mentioned earlier, washing is generally not an option. Instead, the most effective method is vacuum cleaning.

Like before, start by turning off the air purifier and unplugging it. Then, carefully remove the activated carbon filter. Use a vacuum with a low setting to remove trapped dust and particles. This gentle cleaning method prolongs the filter’s life and ensures it works efficiently.

After vacuuming, check if the filter is overly saturated with odors. Unfortunately, if it retains strong smells, it likely needs replacing. If not, reinstall it according to the manufacturer’s directions. Reputable brands will indicate how often you should replace these filters based on use.

Air Purifier Filter

Additional Tips to Maintain Your Air Purifier

Taking care of the filter is just one part of air purifier maintenance. There are additional steps that can help preserve its longevity and performance. Understanding these can enhance the quality of the air in your home even further.

Regular Inspection and Cleaning of the Purifier’s Exterior

Don’t forget that the exterior of the air purifier needs attention too. Dust and grime can build up over time. This can hinder airflow and decrease performance. Regularly wiping down the exterior can help prevent these issues.

Use a soft damp cloth to clean the surfaces. Avoid using harsh chemicals; they can damage finishes or affect performance. Ensure you are gentle while cleaning to avoid scratching the surface.

Placement Matters: Optimize Airflow Around the Purifier

Another critical maintenance aspect is the placement of your air purifier. Positioning it properly can significantly enhance its efficiency. Avoid placing it in corners or behind furniture, which restricts airflow.

Instead, place it in an open area, at least a few feet away from walls. Keeping furniture, curtains, and other objects cleared from around it allows for optimal performance. This strategic placement helps the purifier circulate air more effectively.

Air Purifier Filter

Troubleshooting Common Problems

Even after proper maintenance, air purifiers may still face issues. Identifying and troubleshooting these problems is essential for effective operation. Let’s look at some common problems and their solutions.

Inconsistent Airflow

One common issue with air purifiers is inconsistent airflow. If you notice that air isn’t circulating well, check your filters first. Clogged filters can lead to reduced airflow. In such cases, cleaning or replacing the filter usually solves the problem.

If airflow does not improve after filter maintenance, check the unit for any obstructions. Ensure that no debris is blocking the intake or exhaust vents. If everything looks clear and airflow is still poor, you may need to consult the manufacturer.

Unusual Noise Levels

Another issue that may arise is unusual noise levels. If your air purifier begins to make sounds that seem out of the ordinary, it may indicate a problem. Often, unusual sounds arise from loose or damaged components.

First, turn off the device and unplug it. Next, check for any loose parts or debris that may be causing the sound. If you find any, secure or remove the offending item. Afterward, plug the unit back in and test it again. If the noise persists, you may want to contact customer support.

Conclusion

In conclusion, keeping your air purifier filters clean can enhance air quality and prolong the device’s life. Understanding your filter type is crucial for effective maintenance. Whether you have HEPA or activated carbon filters, cleaning and replacing them on schedule is vital.

Regular inspections, attention to airflow, and placement play significant roles in performance effectiveness. Finally, don’t hesitate to troubleshoot any concerns. Following these comprehensive steps can ensure your air purifier functions at its best. A clean air purifier means cleaner air and a healthier home for you and your family.

Understanding Levoit Air Purifier Light Meanings

Levoit Air Purifier Light

Air purifiers have become essential in many households, especially for those plagued with allergies. One popular brand is Levoit, known for its efficacy and streamlined design. However, their user interface can be somewhat confusing for new buyers. The lights on your Levoit air purifier play a significant role. They indicate various functions and statuses that you must grasp. This article aims to dive deep into the levoit air purifier light meanings, offering clarity and aiding in optimal air purification.

Overview of Levoit Air Purifier Lights

Understanding the different lights on your Levoit air purifier enhances its usability. Each light communicates significant information about the device’s current operation. The primary indicators include the power light, filter replacement light, and air quality indicator light. Moreover, you must know what specific colors mean. For instance, when the air quality indicator light changes from green to red, something needs attention. By familiarizing yourself with these signals, you can take timely actions to improve indoor air quality.

Power Light: Functionality and Status

The power light icon is perhaps the most straightforward. It signifies whether the purifier is on or off. Generally, the light will glow blue when the device is operational. In contrast, a red light indicates that the system is off. Understanding this simple feature helps in everyday use. Moreover, it allows users to check easily if the purifier is functioning without intense scrutiny.

Also, the power light sometimes changes color based on the mode selected. Some Levoit models come with multiple fan speeds. These modes may invoke different colors within the power light. Therefore, users can quickly identify what mode they are using without consulting the manual. This feature adds convenience and enhances the user experience.

Filter Replacement Light: Importance of Timely Changes

Another crucial aspect of the Levoit air purifier is its filter replacement light. The filter is vital for maintaining air quality. Over time, it accumulates dust, allergens, and other particles. Hence, keeping an eye on the filter replacement indicator is essential. Most Levoit models alert users when it’s time to change the filter.

When the filter replacement light turns red, it signals that the filter is clogged. If ignored, a dirty filter can significantly reduce the purifier’s efficiency. This is because airflow becomes restricted, forcing the machine to work harder. Consequently, you may experience subpar air quality. Therefore, once you see that red light, make filter replacement a priority.

Additionally, regularly changing the filter promotes optimal performance. It also extends the lifespan of the device, making it a cost-effective choice in the long run. Users often undervalue this indicator, but it serves as a reminder for necessary maintenance.

Levoit Air Purifier Light

Air Quality Indicator Light: Decoding Colors

The air quality indicator light proceeds to be one of the most informative features of Levoit air purifiers. It provides real-time data about indoor air quality, facilitating informed decisions. Users should note the colors that the light displays. Typically, it uses a color coding system to represent air quality levels. Green usually indicates good air quality, yellow suggests moderate quality, and red signifies poor quality.

Understanding Color Codes

The color codes are intuitive and easy to remember. When the light is green, it means the air is relatively free from pollutants. This indicates that your air purifier is effectively cleaning the air. While the air quality remains good, you might be tempted to turn off the purifier. However, it’s prudent to keep it running to maintain that quality.

If you notice a yellow light, be aware that your air quality has dipped to an acceptable but not optimal level. At this point, you may consider increasing the fan speed. This can enhance filtration and return the air quality to green. Often, this color change occurs when new pollutants enter your space. Thus, it requires immediate attention.

When you see a red light, it indicates that the air quality is unsatisfactory. At this point, you should take action immediately. Increasing the fan speed or checking for potential sources of pollution can be beneficial. In some cases, red lights can across daily activities like cooking or cleaning. Consequently, being proactive after noticing the red light can improve indoor air quality quickly.

Regular Monitoring for Better Results

Regularly monitoring the air quality indicator light is crucial for maintaining a healthy indoor environment. Awareness of air quality levels can motivate users to make lifestyle adjustments. For instance, if you often see yellow or red lights, adding houseplants might help. Houseplants can naturally filter harmful toxins.

Additionally, using other methods to purify the air can augment the effectiveness of your Levoit air purifier. You may choose to minimize the use of harsh cleaning agents. Also, ensuring adequate ventilation can assist in reducing indoor pollutants. These actions combined with regular monitoring enhance overall effectiveness.

Levoit Air Purifier Light

Child Lock and Sleep Mode Lights

Levoit air purifiers often come with features designed for convenience. Two noteworthy features are the child lock and sleep mode settings. Both have specific lights that notify users when they are activated. These features enhance functionality while ensuring safety in a household.

Child Lock Indicator: Ensuring Safety

The child lock feature serves an essential purpose in households with toddlers. When activated, the purifier locks all buttons. This prevents accidental changes in settings. The child lock indicator light usually glows to denote its status.

Activating this feature is straightforward. In most cases, users can activate it with a simple button press. Once the feature is engaged, the light will appear, letting users know it’s secure. This feature is invaluable for parents, as it minimizes the risk of unintended alterations during operation.

Moments when children are curious may lead to fingers pressing buttons. Hence, keeping the child lock on when necessary creates peace of mind. With the indicator light clearly showing the lock status, parents can feel comfortable leaving the room. It’s an excellent feature for busy households.

Sleep Mode Indicator: Quiet and Calm Operation

The sleep mode feature is another excellent addition to the Levoit air purifier lineup. When activated, this mode usually runs the purifier at a lower fan speed. Consequently, it operates quietly, ensuring minimal disturbances as you sleep. The sleep mode indicator light typically dims during this operation.

Users often appreciate this mode because it creates a peaceful environment. A well-rested atmosphere enhances sleeping quality, making it a popular feature. The light dimming also indicates that the machine is still working while allowing a darkened room.

Additionally, the sleep mode helps conserve energy. Operating efficiently decreases energy consumption and costs. Therefore, using this feature can be a smart choice for budget-conscious consumers. Keeping the sleep mode activated during nighttime fosters a healthier living environment for everyone in the household.

Troubleshooting Common Issues

Despite being efficient, users may still face challenges with their Levoit air purifier. Many of these challenges can be traced back to the indicator lights. Learning how to troubleshoot common issues can enhance your overall experience. Fortunately, many resolutions stem from understanding those lights’ meanings.

Identifying Problems through Light Changes

When the indicator lights on your Levoit air purifier change unexpectedly, it’s essential to investigate further. Each light can signify one or more issues, providing clues for resolution. Understanding these clues helps in effectively addressing problems. For example, if your air quality light abruptly shifts to red, check surrounding areas for new pollution sources.

Sometimes, humidity levels can impact performance as well. Dust accumulation over time may lead to strange light behaviors. A regularly cleaned unit can prevent frustrating surprises. So, maintaining a clean air purifier is crucial for its overall performance.

Moreover, tracking any changes in your home environment can provide context for the light changes. Significant changes, like renovations, can introduce dust and allergens. This may explain a sudden color shift in air quality readings. Documenting these transitions can make troubleshooting easier.

Resetting Your Air Purifier

In some cases, resetting your air purifier may be necessary. Users can often accomplish a reset by holding specific buttons. The reset process varies by model; therefore, consult the user manual for exact steps. After pressing the appropriate buttons, wait for the lights to indicate a successful reset.

Additionally, once reset, check all indicator lights to ensure everything functions correctly. This can help identify lingering issues that may need immediate attention. If problems persist, contacting customer support is advisable. Understanding the indicators can often save users time and effort in seeking solutions.

Levoit Air Purifier Light

Maintenance Tips for Optimal Performance

To achieve long-lasting performance from your Levoit air purifier, regular maintenance is non-negotiable. Proper upkeep will make sure all the indicator lights function as intended. This includes observing their meanings and responding accordingly.

Cleaning and Maintaining the Filters

The most crucial maintenance task involves the device’s filters. Depending on usage and environment, users should change filters approximately every 6 to 12 months. Regularly replacing filters ensures optimal air quality. The filter replacement light plays a crucial role, reminding you when it’s time for action.

Additionally, cleaning pre-filters helps prolong the life of your HEPA filters. When visible dust collects in pre-filters, vacuum them gently to maintain airflow. This can allow your air purifier to work more efficiently by reducing the burden on the main HEPA filter.

Further, always remove and clean the filters following the manufacturer’s recommendations. This oft-underestimated task will keep your air quality indicator light operable as well. A clean unit is an effective one, and that’s key to maintaining optimal air quality.

General Care Instructions

Aside from filter maintenance, users should keep the purifier physically clean. Dust can accumulate on the exterior, especially on vents. So, periodically wiping down the unit helps maintain airflow and serves safety. Utilize a soft cloth to clean surfaces without damaging the appliance.

Moreover, ensure that air intakes are unobstructed. If placed in a corner, rearranging could enhance performance. Ensure no furniture or decor obstructs airflow as well. This small adjustment can facilitate optimal air purification.

Furthermore, you should never place the purifier on damp surfaces. Exposure to moisture can damage internal components. Likewise, ensure the device stays in a temperature-controlled environment for optimal performance. With the right care, you can enjoy your Levoit air purifier’s advantages for many years.

Conclusion: Maximizing Your Levoit Air Purifier Experience

Understanding the various lights on your Levoit air purifier unlocks its full potential. By familiarizing yourself with these indicators, you can respond proactively. Whether it’s the power light, air quality indicator, or filter replacement alert, each serves a critical function.

Regular monitoring and maintenance empower you to maintain excellent indoor air quality. You can significantly enhance your living environment by taking action as soon as indications arise. Moreover, utilizing features like child lock and sleep mode contributes to a user-friendly experience.

Ultimately, your Levoit air purifier aims to create a healthier home environment. By ensuring understanding and regular upkeep, you maximize its benefits in your daily life. Embracing these insights will lead to improved air quality, making your home a sanctuary for all.