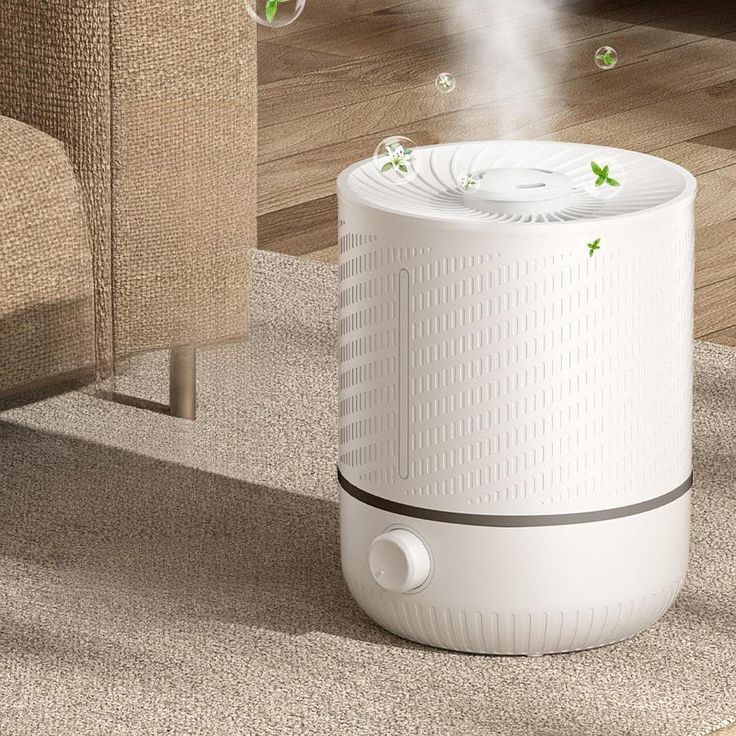
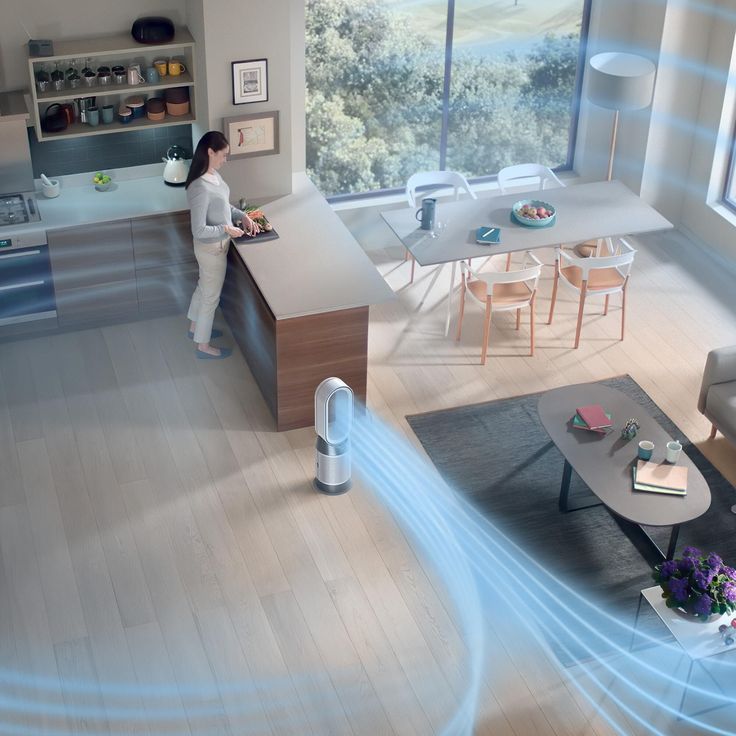
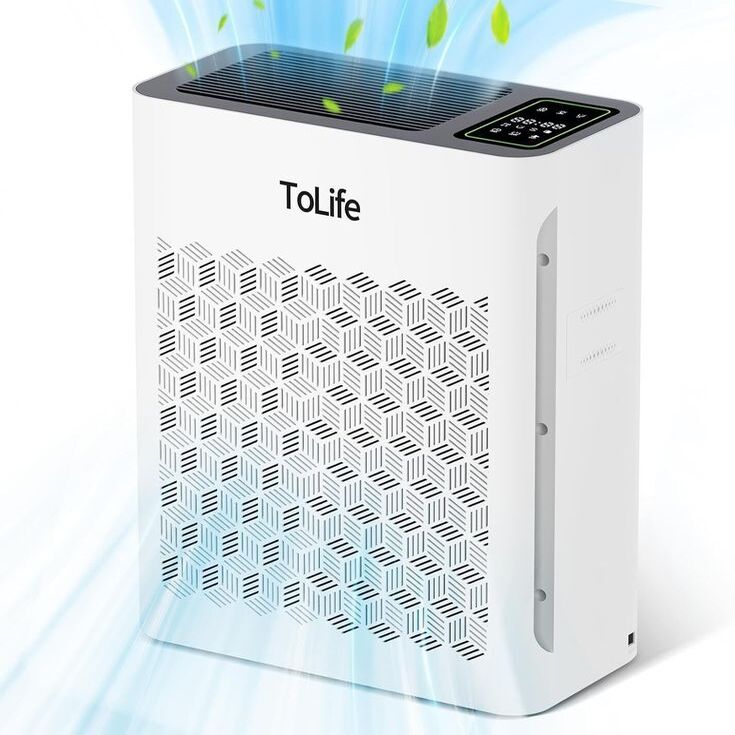
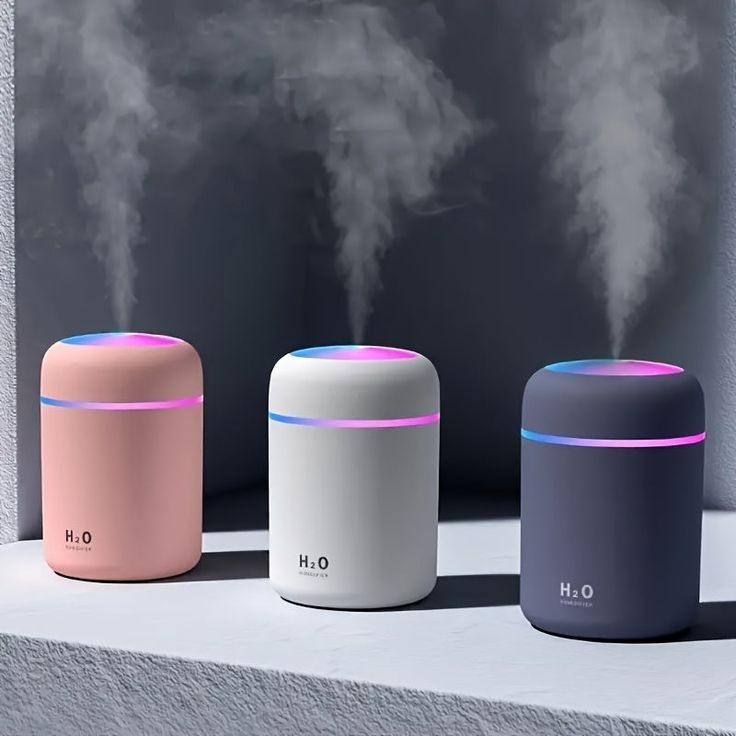
How to Clean a Humidifier with Vinegar: Step-by-Step Guide

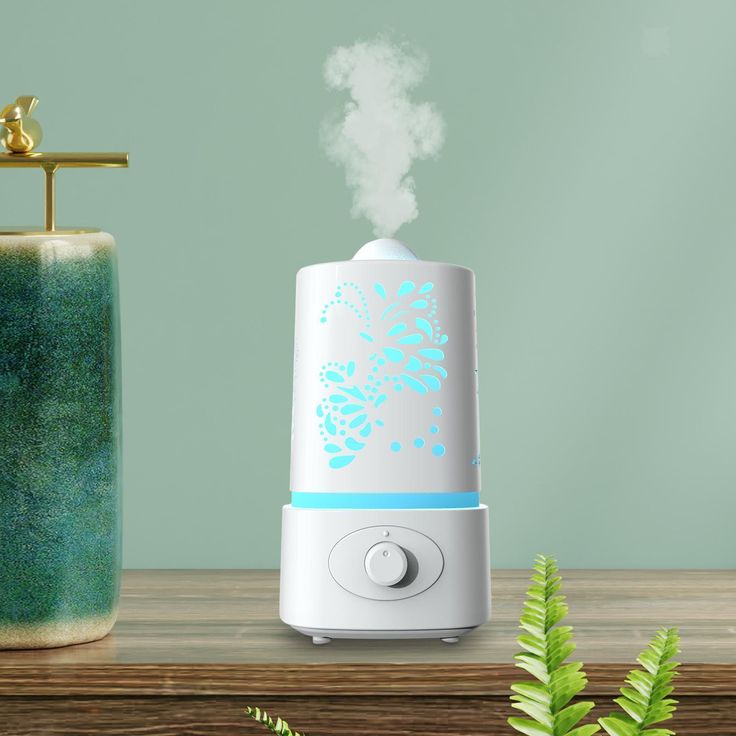
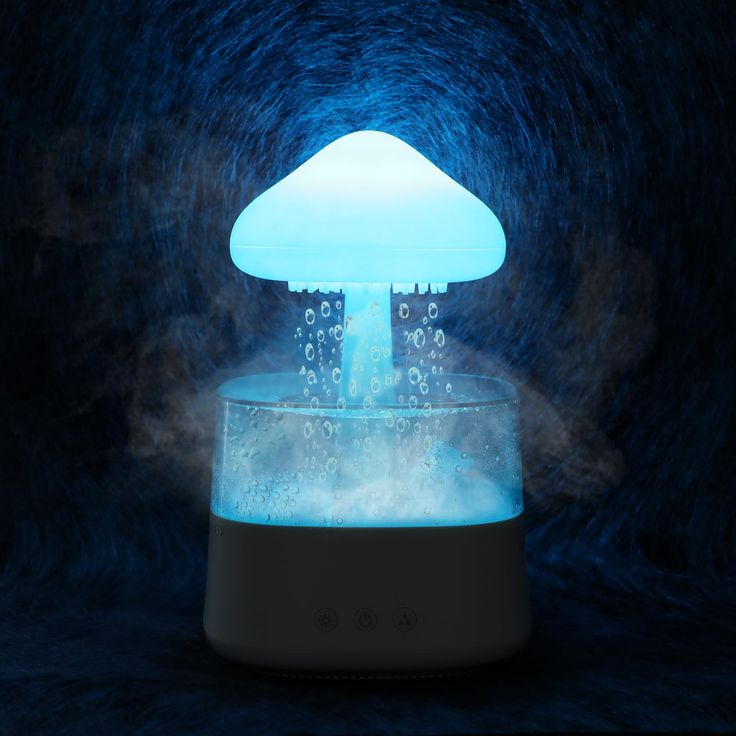
humidifier

Why Vinegar is Effective for Cleaning Humidifiers

Vinegar is a popular choice for cleaning many household items, and humidifiers are no exception. The acidic nature of vinegar makes it highly effective at dissolving mineral deposits and mold, which commonly accumulate in humidifiers. When water sits in the humidifier, it can lead to the build-up of these unwanted substances. Vinegar, particularly white distilled vinegar, penetrates and breaks down these residues without the need for harsh chemicals. How to clean a humidifier with vinegar?

Moreover, vinegar contains natural antibacterial and antifungal properties. This is crucial for maintaining a clean humidifier. As you may know, a humidifier functions by adding moisture into the air, and an unclean humidifier can actually disperse harmful microorganisms into your environment. Regular cleaning with vinegar helps inhibit the growth of these microorganisms, ensuring that your machine not only operates more efficiently but also supports a healthier indoor air quality.

When learning how to clean a humidifier with vinegar, you ensure that you’re using a non-toxic, accessible, and inexpensive option. Vinegar is safe to handle and does not leave harmful residues, making it an environmentally friendly choice for your regular cleaning routines. It’s a simple yet effective way to maintain your device, ensuring that it continues to function properly and contribute to your home’s comfort.
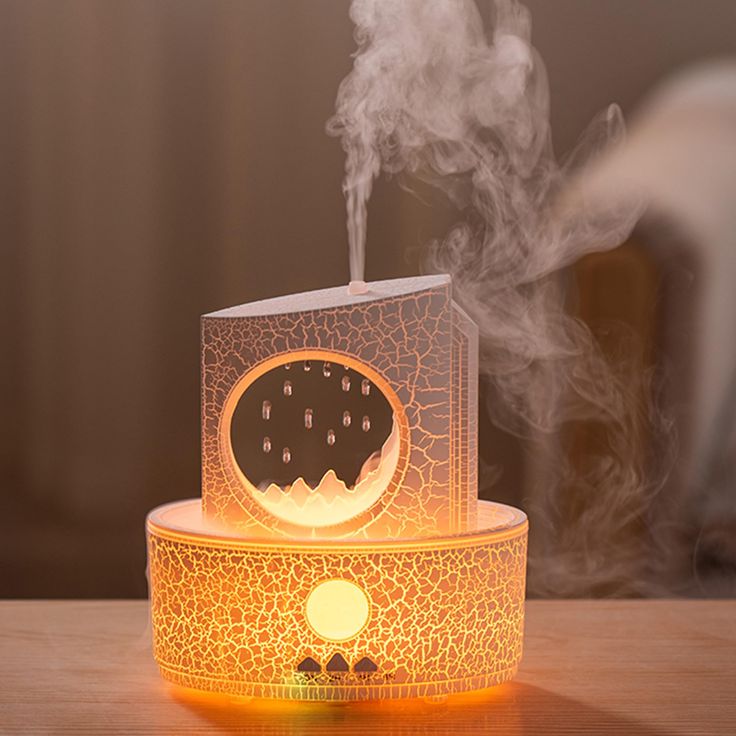
how to clean a humidifier with vinegar

Signs Your Humidifier Needs Cleaning

It’s important to recognize when your humidifier needs a thorough cleaning. Without regular maintenance, it can become a source of air contamination. Here are some signs that suggest it’s time to clean your device with vinegar:

  • Unusual Smells: If you notice a musty or sour smell coming from your humidifier, it’s a clear indication that mold or bacteria may be growing inside.
  • Visible Mold or Mildew: Check for any visible signs of mold or mildew, especially in areas where water tends to collect.
  • Reduced Mist Output: When the mist output decreases, it may signal that mineral deposits are clogging the machine’s components.
  • Discolored Water Tank: A change in the color of the water tank can mean algae or mold growth. This discoloration often appears as slimy residue or spots on the tank’s interior.
  • Noisy Operation: Listen for any changes in the sound of your humidifier. Increased noise levels can be due to internal blockages or the need for lubrication.
  • Frequent Water Tank Refills: Needing to refill the water tank more often than usual is a sign that the humidifier is not operating efficiently.

Promptly addressing these signs by learning how to clean a humidifier with vinegar will help maintain the device’s effectiveness and ensure the air you breathe is clean.

humidifier

Preparing to Clean Your Humidifier

Before you start the cleaning process, it’s important to gather all the necessary items and prepare your workspace. First, ensure your humidifier is unplugged and placed on a flat, waterproof surface. Clear the area around your humidifier to avoid any accidents or spillage during cleaning.

Next, gather all the cleaning supplies you’ll need for the task. You’ll need white distilled vinegar, a soft brush or sponge, clean cloths, and a large basin or sink for soaking parts. Having gloves may also be useful to protect your skin from the vinegar’s acidity during prolonged contact.

If your humidifier contains a filter, remove it. Check the manufacturer’s instructions to see if it may be cleaned or if it needs replacing. Remember, not all filters are washable, and some might disintegrate when coming into contact with vinegar.

Ensure you have all the tools on hand to disassemble your humidifier. Some humidifiers require a screwdriver or other tools to open them. Read through the user manual to understand how to properly take your humidifier apart without causing damage.

Lastly, make sure you have enough time to complete the cleaning process without rushing. Taking shortcuts could lead to improper cleaning and reassembly, which might cause issues with the operation of your humidifier.

With everything prepared, you’re now ready to begin the actual cleaning process.
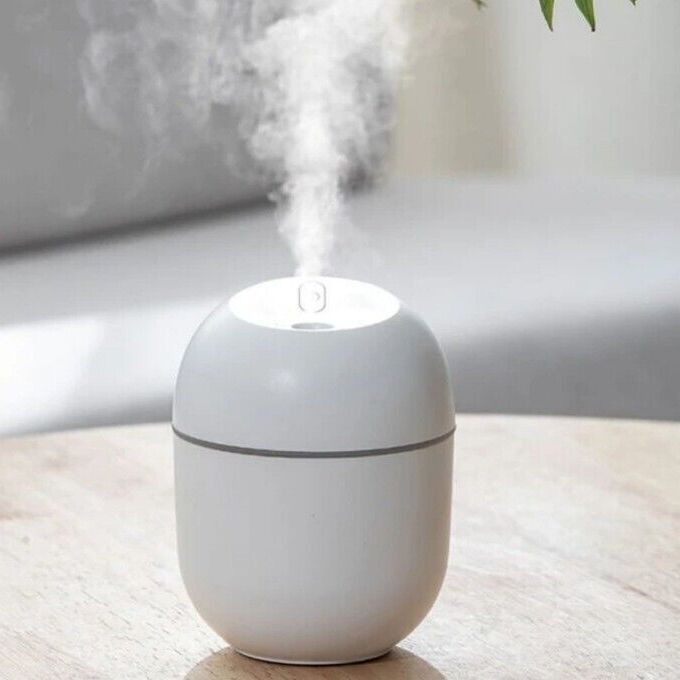
clean humidifier

Safety Tips Before You Start Cleaning

Before delving into how to clean a humidifier with vinegar, it’s vital to prioritize safety. Here are some key safety tips to ensure that your cleaning process is not only effective but safe:

  • Unplug the Device: Always unplug your humidifier before you start cleaning. This prevents any risk of electric shock.
  • Wear Protective Gear: Consider wearing gloves to protect your hands from the acidity of the vinegar. If you have sensitive skin or allergies, also think about wearing a mask.
  • Use the Right Materials: Ensure you’re using non-abrasive tools for cleaning. A soft brush, sponge, or cloth will do the job without scratching your humidifier.
  • Ventilate the Area: While vinegar is not toxic, its smell can be strong. Work in a well-ventilated area to avoid breathing in the fumes for too long.
  • Keep Materials Away from Children and Pets: Store your vinegar and cleaning materials out of reach to prevent accidental ingestion or contact.
  • Avoid Mixing Chemicals: Never mix vinegar with bleach or other chemicals. This can create toxic gases that are harmful to inhale.
  • Handle Electronics with Care: If your humidifier has electronic parts, avoid exposing them to liquids. Consult the manual to understand the best way to clean these components.

By following these safety tips, you’ll ensure a risk-free cleaning experience when using vinegar to clean your humidifier.

Step-by-Step Cleaning Process

Embarking on the cleaning journey, it’s essential to follow a meticulous sequence to ensure thoroughness and safety. Below, a detailed guide awaits to simplify the task of how to clean a humidifier with vinegar.

Gather Your Cleaning Materials

Commence by collecting all necessary cleaning supplies. You will need white distilled vinegar, a soft-bristled brush or sponge, several clean cloths, and a sizeable basin or tub for soaking. Donning gloves is a smart choice to shield your skin from the acidic nature of the vinegar.

Disassemble Your Humidifier

Carefully take apart your humidifier. Remove any detachable components such as the water tank, the mist nozzle, and any removable filters or screens. Check your manual for guidance on disassembling these parts properly, avoiding damage.

The Vinegar Soaking Method

Fill your basin or tub with a mix of one part white distilled vinegar to one part water. Submerge the main parts of your humidifier in the solution. Let them soak for at least 30 minutes to loosen mineral deposits.

Cleaning the Small Parts

For tinier parts and hard-to-reach crevices, dampen your brush or sponge with vinegar. Gently scrub these areas until clean. This step ensures that no spot is left untreated.

Rinsing and Reassembling

After the soak and scrub, rinse all parts thoroughly with clean water. It’s crucial to remove all traces of vinegar to prevent any odor when the humidifier is back in use. Reassemble the clean components, ensuring everything is secure and fits as intended.

With these steps, your humidifier will not only be clean but also in prime condition to enhance your home’s air quality safely.

Frequency of Cleaning Your Humidifier

Knowing how often to clean your humidifier is key to its upkeep and efficiency. Regular cleaning prevents the build-up of harmful organisms and keeps the unit running smoothly. Here’s how frequently you should engage in cleaning your humidifier with vinegar:

  • General Guideline: Aim to clean your humidifier at least once a week. This routine maintenance ensures it remains free of mold and bacteria.
  • Under Heavy Use: If you use your humidifier daily or live in an area with hard water, consider cleaning it twice a week. Increased usage or mineral-rich water can hasten residue accumulation.
  • During Flu Season: Heighten your cleaning frequency during flu season or when household allergy symptoms increase. Keeping your humidifier clean may reduce the spread of germs and allergens.
  • After Extended Storage: Always clean your humidifier thoroughly after it has been stored for a long period. This wash removes any stagnant water or mildew that may have formed.

Performing regular maintenance by cleaning your humidifier with vinegar not only extends its life but also supports healthier indoor air quality.

Maintaining Your Humidifier Post-Cleaning

After learning how to clean a humidifier with vinegar, it’s just as crucial to maintain your device for lasting use. Here are steps to keep your humidifier in top shape after cleaning:

  • Dry All Parts Completely: Before reassembling, make sure all components are fully dry. This prevents mold growth.
  • Check Seals and Filters Now: This is a good time to check if seals are tight and filters need replacing. Doing so ensures efficient operation.
  • Avoid Hard Water: Use distilled water to fill your humidifier. It has fewer minerals that can build up in your device.
  • Regularly Empty the Tank: Don’t let water sit in the tank for too long. Replace it daily to keep it fresh and clean.
  • Monitor for Signs of Wear: Look out for wear and tear. Replace worn-out parts to avoid malfunctions.
  • Store Properly: If not in use, empty the tank and dry the humidifier. Store it in a cool, dry place.

Following these maintenance tips after you clean a humidifier with vinegar will help prolong its lifespan. Regular upkeep ensures that your humidifier stays clean and efficient, contributing to better indoor air quality.

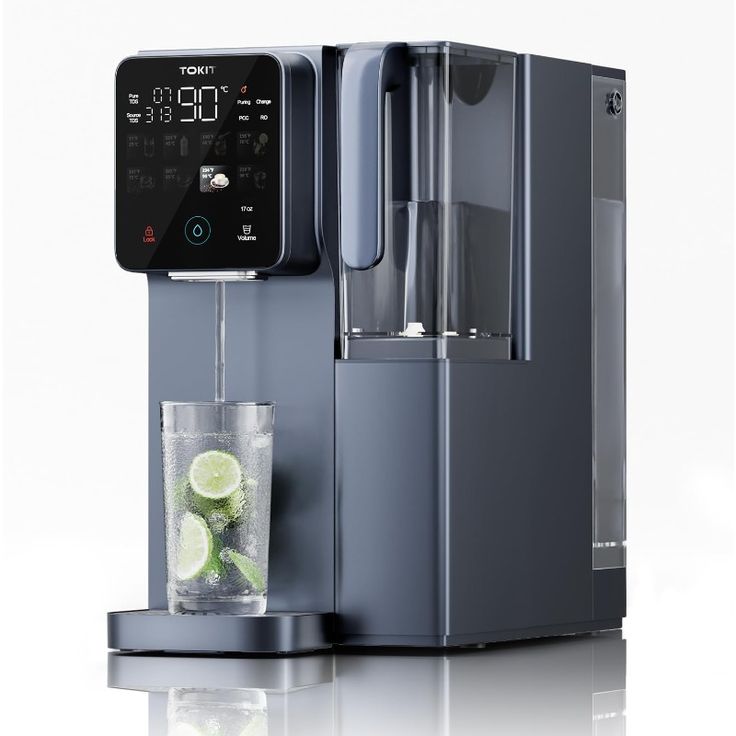
Water Dispenser Health Risks: What You Need to Know Today

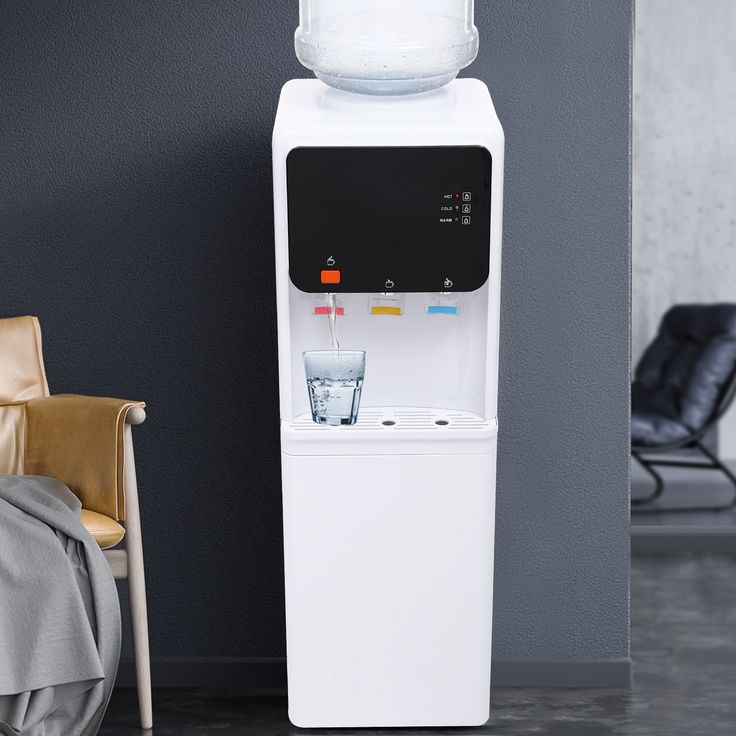
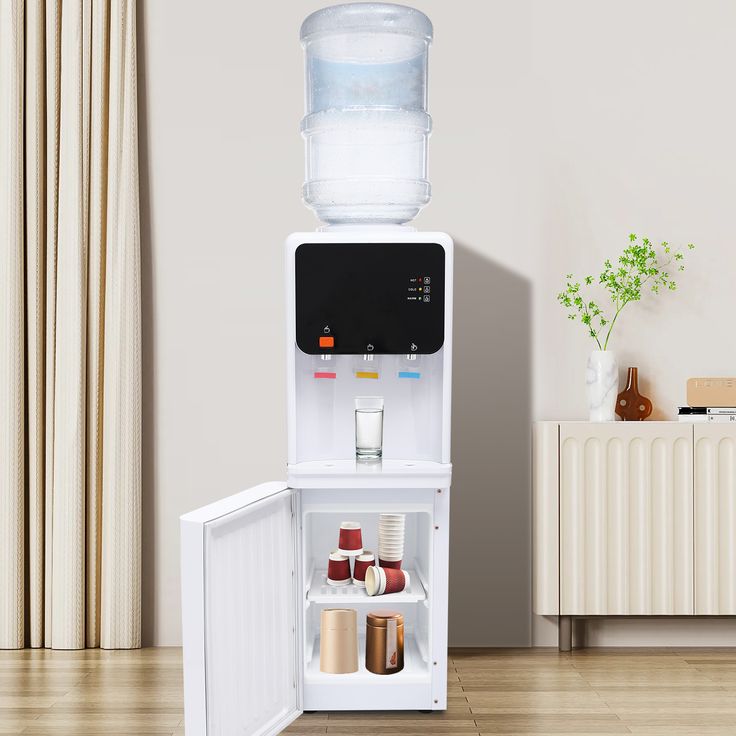
Water cooler

Potential Contamination from Water Coolers

Water coolers offer convenience in offices and homes. However, they could harbor harmful pathogens. Regularly, people raise concerns about illness from water dispenser use. So, it’s vital to understand the water dispenser health risks.

water dispenser health risks

Bacteria and Mold in Water Dispensers

Bacteria like E.coli and molds can thrive in unclean dispensers. Water sitting stagnant in coolers becomes a breeding ground for microorganisms. Illnesses, like diarrhea and fever, may result from using contaminated dispensers. Hence, it’s crucial to maintain cleanliness.

Precautionary Measures for Safe Usage

Taking precautionary steps can safeguard health. First, always follow the manufacturer’s cleaning guidelines. Use sanitizers that tackle a broad range of microbes. Moreover, inspect for mold and smells. They indicate the need for cleaning. Also, if left unused, drain the water cooler to prevent microbe growth.

Ensure electrical safety around the dispenser. Keep it away from outlets to prevent accidents. Moreover, be cautious with hot water to avoid burns. Implement a regular cleaning schedule and use protective gear when necessary. Clean drip trays and water taps consistently to prevent bacteria build-up. Doing these things can help mitigate water dispenser health risks.

Risks of Using Hot Water from Taps

Using hot water from taps for drinking or cooking might pose health risks. Hot water systems can harbor sediments, rust, and contaminants. These compounds can negatively impact water quality over time. Bacteria, such as Legionella, often grow in hot water tanks due to the warmth. This presents a real health hazard when water isn’t used regularly.

Contaminants in Hot Water Systems

Pipes leading to your tap may leach metals, like lead. These can seep into your hot water and may cause health issues with long-term consumption. Chemicals used to treat hot water can also be harmful for drinking. This introduces a risk of consuming unwanted substances through your hot water tap.

Alternatives to Hot Water Taps

Hot water dispensers are safer than hot taps for getting clean, hot water. They provide water on demand, so it doesn’t sit long enough to allow bacteria to grow. These dispensers have filters that remove impurities, making sure the water is pure. They are also designed to heat water instantly, minimizing the presence of harmful contaminants. Switching to a hot water dispenser can ensure the safety of your water. It can also improve the taste and smell, making drinks and food more enjoyable.

Water cooler

Regular Maintenance and Cleaning

Keeping a water dispenser clean is crucial for health and safety reasons. Proper maintenance not only ensures that the water is safe for consumption but also extends the lifespan of the dispenser.

Cleaning Schedule for Water Dispensers

  1. Establish a Routine: To effectively manage cleanliness, it’s essential to set a regular cleaning schedule. Aim for weekly cleanings using a suitable disinfectant to eradicate germs.
  2. Focus on Key Areas: During each cleaning session, pay special attention to the taps, drip trays, and all external surfaces. These areas are prime spots for bacteria and contamination.
  3. Prevent Microbial Growth: Consistent cleaning prevents the growth of harmful microbes, guaranteeing safe drinking water for everyone.
  4. Assign Responsibilities: To ensure consistency, designate specific individuals for cleaning duties or use digital reminders. This helps maintain organization and accountability within a workplace or home setting.

Importance of Disinfecting Water Dispensers

  1. Choose Effective Sanitizers: Using a broad-spectrum sanitizer is essential for disinfecting a water dispenser. This practice effectively eliminates various types of bacteria, molds, and pathogens that can lead to illnesses.
  2. Follow Manufacturer Guidelines: Always refer to the dispenser’s user manual for appropriate cleaning agents and procedures. This ensures you are using safe and effective products.
  3. Health Benefits: Regular disinfection not only keeps the water clean and drinkable but also protects the overall health of all users. Maintaining a clean water dispenser is a simple yet vital step to promote wellness in any environment.

Proper Usage to Prevent Bacterial Spread

Proper use of water dispensers is key in avoiding bacterial spread. Simple habits can make a big difference in maintaining health and safety.

Tips for Using Cups and Bottles

When using a water dispenser, it’s important to keep hygiene in mind. Here are some concise tips:

  • Always use clean cups or bottles. This prevents germ transfer.
  • Refrain from sharing drinkware. It lowers the risk of cross-contamination.
  • Bring personal reusable containers. This is eco-friendly and safe.
  • If using disposable cups, store them properly. Keep them dry and away from the dispenser area.

Following these tips can significantly reduce the chances of bacteria entering your body through drinking water.

Importance of Not Touching the Dispenser Nozzle

The nozzle is often overlooked but it’s a hotspot for germs. Take note:

  • Handle the dispenser lever with a paper towel if possible. This minimizes direct contact with the nozzle.
  • Teach others to avoid touching the nozzle. Spread awareness for community health.
  • Look for dispensers with no-touch features. These come with sensors for more hygienic use.

By prioritizing these simple actions, we help maintain the purity of our drinking water. Ensuring the nozzle remains untouched by hands protects us all against bacteria and viruses.

water dispenser

Water Dispenser Design and Features for Safety

Water dispensers are designed with features that boost safety and health.

Automatic Sterilization Functions

Modern water dispensers include automatic sterilization features for enhanced safety. They use UV light or heat to kill germs and prevent bacterial growth. This feature ensures that every drop of water is safe for consumption, without manual intervention.

Filtration Systems in Dispensers

Water dispensers often have built-in filtration systems. These systems remove contaminants like chlorine, lead, and microbes. Ensuring the water is not just clean, but also tastes and smells better. Regular filter replacement is essential to maintain the effectiveness of the system.

Best Practices for Ensuring Water Quality

Maintaining top-notch water quality from dispensers is crucial.

Keeping the Dispenser Area Clean

A clean dispenser area helps prevent contamination. Here are some steps to achieve it:

  • Wipe the dispenser daily with a disinfectant. This removes spills and stains.
  • Dry the drip tray often to stop mold growth. Humidity breeds bacteria.
  • Keep cups and bottles tidy, arranged, and covered. This reduces dust and debris.
  • Encourage users to clean the area after use. A collective effort keeps it sanitary.

These actions hinder bacteria and mold from affecting water quality.

Replacing Water Filters Regularly

Changing filters is vital for pure water. It stops contaminants from seeping in. Remember:

  • Follow the manufacturer’s schedule for filter changes. Timely replacements are key.
  • Check for signs of filter wear, like odd tastes or reduced flow. Don’t ignore them.
  • Use the right filters for your dispenser. Compatibility ensures effectiveness.
  • Document each replacement date. Tracking helps maintain a routine.

Regular filter updates keep water safe and tasting fresh.

Conclusion and Recommendations

In wrapping up, water dispensers pose health risks if not used or maintained properly. To avoid illnesses, regular cleaning is crucial. Follow the manufacturer’s guidelines to disinfect and remove germs. Do not touch the nozzle directly; use clean cups and do not share them. Replace water filters as advised

to keep the quality of water high.

Summary of Health Risks and Prevention Tips

Bacteria and mold can grow in water dispensers and make you sick. Clean often, using the right sanitizers and proper methods. Watch for mold and stale smells; they signal a need for cleaning.

Always handle the dispenser carefully, especially if it dispenses hot water, to prevent burns.

Advantages of Water Dispensers with Health Safeguards

Modern water dispensers come with features that protect your health. They have filtration systems to clean the water and automatic sterilization to kill bacteria. These features ensure you get safer and tastier drinking water.

Choose dispensers with these advantages for the wellbeing of all who use them.

Is a Humidifier Good for a Cough? Understanding Its Effects!

air humidifier

Benefits of Using Humidifiers for Coughs

Is a humidifier good for a cough? Humidifiers can be essential in managing cough symptoms. They help by adding moisture to the air, which can soothe irritated respiratory tracts, ease dry throats, and make breathing easier. Here is how they specifically address different types of coughs:

is a humidifier good for a cough

How Humidifiers Can Ease Dry Coughs

Dry coughs, often triggered by dry air, can cause significant discomfort. Humidifiers add necessary moisture back into the air. This moisture can lubricate the respiratory tract. This can help ease the irritation that causes the cough. For those suffering from persistent dry coughs, a humidifier can be a game changer, especially during the dry winter months.

Impact of Cool-Mist Humidifiers on Wet Coughs

Wet coughs are characterized by the production of mucus. Cool-mist humidifiers can help by moisturizing the air. This helps to loosen mucus in the airways. By making the mucus less thick, it becomes easier to expel. This can significantly relieve coughing and aid in faster recovery from respiratory infections.

Choosing Between Cool-Mist and Warm-Mist Humidifiers

When selecting an air humidifier for cough relief, the choice between cool-mist and warm-mist types is crucial. Both serve the same purpose to humidify the air, yet they operate differently. Warm-mist humidifiers release heated vapor, which can feel soothing in cold weather. In contrast, cool-mist humidifiers emit a cooler vapor that is safer around children and can be more comfortable during warmer conditions.

Why Pediatricians Recommend Cool-Mist for Children

For families with young children, pediatricians often advise using a cool-mist humidifier. These humidifiers do not heat water, reducing the risk of burns if a child gets too close. Furthermore, the cool vapor emitted can ease children’s coughs and congestion effectively without the hazards associated with hot steam.

Safety Considerations for Warm-Mist Humidifiers

If opting for a warm-mist humidifier, safety must be a top priority. These units boil water to create steam, posing a burn risk in the event of accidental contact or spills. It is essential to place warm-mist humidifiers out of children’s reach and ensure they have safety features to prevent overheating. Despite their benefits, like potentially helping to kill germs with heat, warm-mist humidifiers require careful handling to avoid accidents.

air humidifier

Proper Maintenance of Humidifiers

Proper maintenance of your humidifier is essential for ensuring its effectiveness and safety. Neglecting this crucial aspect can lead to the spread of bacteria and mold into the air, which can have adverse health effects. Therefore, following a regular cleaning routine is vital for maintaining optimal performance while avoiding potential health hazards.

Daily Cleaning and Maintenance Tips

  1. Empty the Water Tank Daily: Always start your daily routine by emptying the water tank. This prevents mineral buildup and keeps the humidifier operating efficiently.
  2. Wipe Surfaces: After emptying the tank, take a moment to wipe down all surfaces to ensure they are dry. This helps minimize the chances of mold growth.
  3. Use a Clean Cloth: Utilize a clean cloth for wiping both the interior and exterior surfaces of the humidifier. This ensures that no contaminants are left behind.
  4. Check Manufacturer’s Guide: Always refer to the manufacturer’s guide for specific instructions on disassembling and cleaning filters or any other parts. Each humidifier model may have unique requirements.
  5. Air Dry Components: Allow all components to air dry completely before reassembling. This ensures that moisture does not get trapped inside, an environment conducive to mold and bacteria growth.

Importance of Using Distilled or Purified Water

Using distilled or purified water in your humidifier is highly beneficial.

  1. Minimization of Minerals: Distilled water contains fewer minerals, significantly reducing mineral deposits buildup inside the unit.
  2. Reduction of White Dust: By minimizing mineral buildup, there is a lower risk of white dust emissions, which can settle on surfaces in your home.
  3. Lower Bacteria Risk: Distilled water also reduces the risk of bacteria, leading to cleaner air quality when you use your humidifier.
  4. Improved Air Quality: Utilizing distilled water enhances the overall air quality, making your living environment healthier and more comfortable.

By adhering to these maintenance tips and utilizing distilled water, you can ensure your humidifier operates effectively and safely.

Health Considerations When Using Humidifiers

While humidifiers benefit many, they also pose some risks. Knowing how to use them safely is important for health.

Potential Risks of Improper Humidifier Use

If not maintained properly, humidifiers can promote the growth of mold and bacteria. This can lead to respiratory issues and aggravate allergies and asthma. It is crucial to clean humidifiers regularly and use distilled or purified water to minimize these risks. Remember, humidifiers should be kept clean and dry when not in use to prevent microbial growth.

How Humidifiers Can Help with Respiratory Conditions

Humidifiers increase air moisture, which can help ease symptoms of respiratory conditions like colds, flu, and bronchitis. They moisturize the airways, reduce the thickness of mucus, and make breathing easier. This is especially helpful in dry climates or during winter when indoor air can become particularly parched. However, it’s wise to consult a healthcare provider to ensure the use of a humidifier is appropriate for your specific health needs.

humidifier

Humidity Control in Your Home

Managing the humidity in your home is key to creating a comfortable environment. It has a direct impact on health, especially for those with coughs or other respiratory issues. Let’s explore the ideal levels of humidity for maintaining good health and the tools you can use to monitor and adjust it effectively.

Ideal Humidity Levels for Health

Aim for an indoor humidity level of 30-50 percent. This range helps reduce the problems caused by air that is too dry or too moist. It’s just right for easing coughs and not encouraging mold growth. Keeping humidity in this zone can improve your breathing and comfort.

Tools to Monitor and Adjust Indoor Humidity

Hygrometers measure the moisture in the air. They are simple devices you can place in different rooms to keep track of humidity levels. To manage these levels, a humidifier or dehumidifier can be handy. Use a humidifier to raise the moisture if the air is dry. Conversely, a dehumidifier can help if it’s too damp. These tools work best when used correctly, following the maintenance tips as discussed earlier in this blog.

When Not to Use a Humidifier

While humidifiers offer relief for many cough symptoms, there are times when they are not recommended. Knowing when to avoid their use is as important as knowing how to use them correctly.

Recognizing Situations Where Humidifiers May Worsen Symptoms

Some conditions can be aggravated by increased humidity. For instance, if someone has asthma triggered by dust mites or mold, a humidifier might worsen their symptoms. Too much moisture can encourage the growth of these allergens. Similarly, if you notice condensation on windows or a musty smell, the air may be too moist, and a humidifier could contribute to mold growth.

People with allergies should be cautious. The added moisture can be a breeding ground for dust mites that thrive in high humidity. If a cough or respiratory condition does not improve with the use of a humidifier, or symptoms worsen, it’s time to stop using the device. Consider consulting a healthcare provider to find out if a humidifier is suitable for your specific conditions.

Alternatives to Humidifiers for Managing Coughs

If a humidifier isn’t fitting, other methods can help manage cough symptoms. Staying hydrated by drinking plenty of fluids can thin mucus and make it easier to cough up. Over-the-counter medications like cough suppressants or expectorants may also be helpful. Always read the label and follow the directions. Breathing in steam from a hot shower or a bowl of hot water can provide short-term relief. Keeping the head elevated while sleeping can help reduce coughing at night. If symptoms persist, consult a healthcare provider for more personalized treatment suggestions.

Air Humidifier vs Air Purifier: What’s Ideal for Your Home?

air humidifier vs air purifier

Introduction to Air Quality Solutions

Choosing the right air quality solution can enhance your comfort and health at home. Air purifiers and humidifiers serve different purposes and offer distinct benefits. Air humidifier vs air purifier: An air purifier cleans your indoor air, removing harmful particles and allergens. In contrast, a humidifier adds moisture to the air, preventing dryness and improving respiratory comfort.

The use of air purifiers is critical for removing pollutants like dust, smoke, and pet dander. This cleaning effect is vital for people with allergies or asthma. Humidifiers are essential in areas with dry climate conditions, helping to alleviate issues like dry skin, throat irritation, and static electricity.

Understanding the differences between these devices, their benefits, and how they work will help you decide which is best for your home environment. So, let’s explore air purifiers and humidifiers to make an informed choice for optimal indoor air quality.

air purifier

Understanding Air Purifiers

Air purifiers help clean your indoor air efficiently. They are essential devices for enhancing home environments, particularly for those suffering from allergies or respiratory issues.

How Air Purifiers Work

Air purifiers pull air into their systems and pass it through filters. These filters trap particles like dust, pollen, and pet dander. The cleaned air then circulates back into the room. Continuous air cycling helps maintain a cleaner indoor atmosphere.

Benefits of Using Air Purifiers

  1. Allergy Relief: Air purifiers reduce airborne allergens, minimizing allergy symptoms.
  2. Eliminates Odors: They can remove odors, creating a fresher living area.
  3. Traps Smoke: Effective in capturing smoke particles, protecting lungs from smoke irritation.
  4. Reduces Disease Transmission: They can lower the spread of airborne diseases by trapping virus-laden particles.

Using air purifiers can make your home a healthier space by significantly improving the air quality.

Exploring Humidifiers

Functionality of Humidifiers

Humidifiers add moisture to the air. This process elevates indoor humidity. They can emit cool mist, warm steam, or ultrasonic vapor. Each type involves adding water to the device. It then releases vapor into your space, increasing the air’s moisture content. Distilled water is often recommended to prevent mineral buildup.

Advantages of Adding Humidity

Humidifiers provide several benefits. They prevent dryness that can irritate various parts of your body. The increased moisture helps relieve dry skin, chapped lips, and dry eyes. It can also ease common cold symptoms. Higher humidity levels can make your room feel warmer. This helps reduce heating costs in winter. Proper humidity provides comfort and improves sleep quality.

air humidifier

Differences Between Humidifiers and Purifiers

Understanding how humidifiers and purifiers function is key to choosing the right device for your home.

Operational Differences

Humidifiers and air purifiers serve different roles in your home. Humidifiers add moisture to dry air. They do this by releasing steam or water vapor. This can make your home feel more comfortable. Air purifiers remove unwanted particles from the air. They use filters to clean the air you breathe. This includes dust, pollen, and smoke.

An easy way to remember this is: purifiers clean, humidifiers moisten. Both have their own way of improving air quality. But they do not work the same way.

Health Impacts and Benefits

Both devices can have positive impacts on your health. Air purifiers can greatly benefit allergy and asthma sufferers. They remove triggers from indoor air. This can make breathing easier and reduce health issues. Humidifiers can relieve discomfort from dry skin and throat. They can also help with nasal congestion and dry eyes.

If the air is too dry, a humidifier can bring relief. An air purifier is a must if air quality is poor. It can lower the chance of disease spread. To sum up, purifiers improve air quality, humidifiers balance moisture levels.

Combining Humidifiers and Purifiers

Understanding when and how to use both air purifiers and humidifiers can optimize your indoor air quality.
When to Use Both

Sometimes, using an air purifier alongside a humidifier is beneficial. This is especially true in homes with HVAC systems. HVAC systems can dry out the air, which necessitates a humidifier. At the same time, during extreme temperatures, more indoor air recycling happens. Air purifiers step in to remove accumulated pollutants such as dust, allergens, and pathogens. For those in urban areas with high pollution levels or households susceptible to allergies, combining these devices provides a dual approach to improving air quality and comfort. Essentially, purifiers improve air quality by removing allergens and pollutants, while humidifiers balance the indoor humidity level, adding moisture to the air, which alleviates dryness.

Placement and Maintenance Tips

Proper placement and maintenance are crucial for the effective functioning of air purifiers and humidifiers. Keep them in different locations within a room to prevent moisture from the humidifier from clogging the air purifier’s filters. It’s vital to regularly change the filters in your air purifier according to the manufacturer’s recommendations. Likewise, it’s important to regularly clean your humidifier and ensure it’s free from mold and bacteria buildup by using distilled water and proper cleaning techniques. Consult your devices’ user manuals for specific maintenance guidelines to ensure both units operate efficiently and safely.

air humidifier vs air purifier

Factors to Consider When Choosing

When you’re deciding between an air purifier and a humidifier, consider several factors. Your home’s environment and your specific needs are key. For example, if you suffer from allergies, an air purifier might be essential. But a humidifier is better if you deal with dry skin or sinus issues. Look at your living space too. Homes with high dust levels or pet dander need purifiers. Conversely, homes in dry areas benefit from humidifiers.

Home Environment and Personal Needs

Evaluate your home’s air. Is it dusty or smoky? Does it feel dry or cause you discomfort? Answering these questions will guide you. People with chronic conditions like asthma or eczema have unique needs. They require cleaner or more humid air. Consider these personal health aspects. Think about your family as well. Babies and the elderly may need more humidity. They are prone to respiratory issues in dry air. Lastly, look at your home’s air flow. Poor circulation can make air issues worse.

Seasonal Considerations

Don’t ignore the seasons. They can affect indoor air. Winters often dry out the air inside homes. This makes a humidifier useful. But during spring, pollen counts soar. An air purifier is then a must-have. Summer brings heat and sometimes more pollutants. These can make us keep windows closed, letting pollutants build up. Again, purifiers help. In fall, we might start heating our homes, lowering humidity. Adding a humidifier can compensate for this change. Remember, managing air quality is a year-round effort.

Conclusion

In conclusion, understanding the distinct functions of air purifiers and humidifiers is essential for enhancing indoor air quality. Air purifiers excel at removing pollutants and allergens, which is key for individuals with allergies or respiratory conditions. They ensure the air you breathe is clean and free from harmful particles. Humidifiers, on the other hand, are great at adding necessary moisture to the air, providing relief from dryness that affects skin, throats, and nasal passages.
Summary of Benefits

  • Air Purifiers: Clean the air, reduce allergens and odors, protect against smoke, and can lower airborne disease transmission.
  • Humidifiers: Increase air moisture, prevent irritation caused by dry air, and can improve comfort and reduce heating costs in winter.

Both devices can contribute positively to your health and comfort, addressing different issues that may arise in your home setting.

Recommendations for Optimal Home Air Quality

To achieve the best air quality in your home:

  1. Assess your personal and environmental needs to decide whether you need an air purifier, a humidifier, or both.
  2. Place purifiers and humidifiers strategically in different locations to prevent interference.
  3. Perform regular maintenance as per the manufacturer’s instructions to ensure the devices operate effectively.
  4. Take into account seasonal changes and adjust the use of your devices as necessary.

By following these steps and considering your unique home environment and health requirements, you can maintain a healthier and more pleasant living space year-round.

Discover the Benefits of Air Purifier in Bedroom Air Quality

air purifier

Introduction to Air Purifiers in the Bedroom

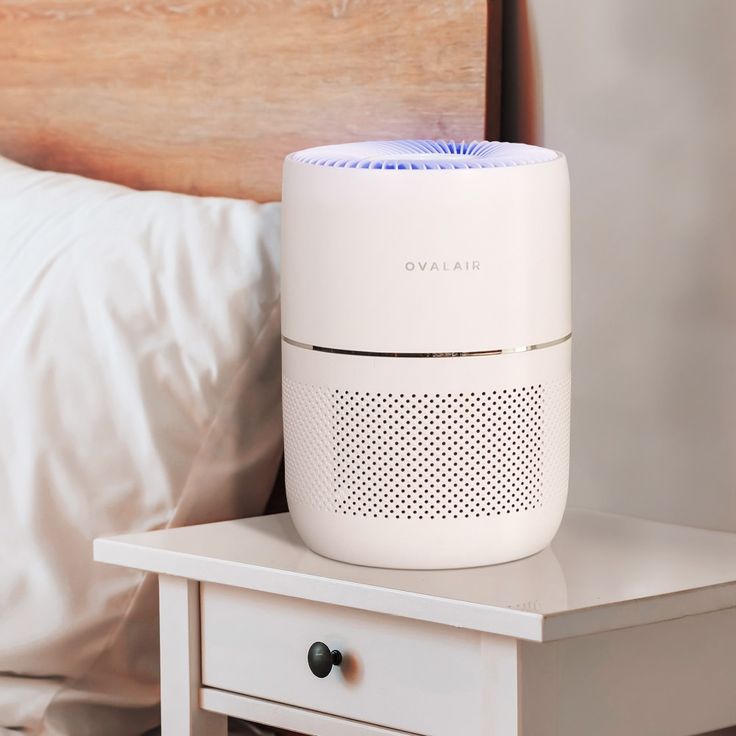
Bringing an air purifier into your bedroom can transform your sleep space. Clean air is essential for good health, and air purifiers serve as a guardian against pollutants that silently invade our homes. When you consider the benefits of air purifiers in bedrooms, think fresh air without allergens, dust, and harmful particles.

Air purifiers work by trapping these unwanted elements. They circulate indoor air through filters, capturing particles and returning cleaner air. Bedrooms especially benefit from this. We spend about a third of our lives sleeping, making it crucial to have clean air during these restful hours.

Installing a purifier can lead to a better night’s sleep. It can also lead to improved overall health by reducing harmful exposures. This is especially true for those with respiratory issues or allergies.

In the following sections, we’ll dive deep into how air purifiers can enhance sleep quality by filtering out allergens and reducing noise. We will also discuss the various health benefits that come with having cleaner air in your bedroom. Lastly, we’ll go over the best practices for maintaining an air purifier to ensure it runs efficiently for years to come.

benefits of air purifier in bedroom

How Air Purifiers Improve Sleep Quality

Air purifiers significantly enhance your sleep quality by creating a cleaner and quieter environment.

Filtering Out Allergens and Pollutants

One of the major benefits of air purifiers in the bedroom is their ability to filter out allergens and pollutants. These devices circulate air through layers of filters that trap dust, pollen, pet dander, and other airborne irritants. With fewer allergens in the air, your respiratory system can rest easy at night, leading to uninterrupted sleep and reduced chances of waking up feeling stuffy or congested.

Reducing Noise for Better Sleep

Many air purifiers are designed with noise reduction technology. This feature ensures that the purifier operates quietly, adding minimal sound to your bedroom environment. The soft hum of a running air purifier can even be soothing for some, helping to drown out other disruptive noises that might disturb your sleep. By maintaining a low noise level and improving air quality, an air purifier creates ideal sleeping conditions, fostering a night of deeper and more restful sleep.

Key Benefits of Having an Air Purifier in Your Bedroom

Installing an air purifier in your bedroom offers many health advantages. Beyond providing clean air, they address specific health concerns efficiently.

Removal of Airborne Bacteria and Viruses

Air purifiers equipped with HEPA filters are excellent at capturing small particles. These include harmful bacteria and viruses. By trapping these pathogens, air purifiers reduce the risk of infections. This is particularly beneficial during flu season or in areas with poor outdoor air quality.

Control of Asthma and Allergy Symptoms

Air purifiers significantly help control symptoms for those with asthma or allergies. They remove common triggers from the air, like pollen, pet dander, and dust mites. This leads to fewer asthma episodes and allergic reactions. For asthma and allergy sufferers, an air purifier could be a game changer in managing symptoms and improving life quality.

air purifier

Different Types of Air Purifiers and Their Features

When shopping for an air purifier, you’ll encounter various types, each with unique features.

HEPA Filters

HEPA filters are a standard in air purification. They can trap particles as small as 0.3 microns. This includes most allergens, many bacteria, and some viruses. Such filters are highly effective and recommended for those with allergies or asthma. The high efficiency of HEPA filters makes them a popular choice in bedrooms.

Activated Carbon Filters

Activated carbon filters excel in removing odors and gases. These filters use a bed of activated carbon to adsorb volatile organic compounds (VOCs) and odors. They are ideal for bedrooms if you’re sensitive to smells or chemicals. However, they do not trap particles as small as HEPA filters. Instead, these are often used alongside HEPA filters for comprehensive air purification.

Maintenance Tips for Bedroom Air Purifiers

To keep your air purifier running at its best, regular upkeep is essential.

Regular Filter Replacement

One key aspect of maintenance is the filter replacement. Most air purifiers come with instructions on how often to change filters. Follow these guidelines to ensure your air purifier efficiently traps pollutants. Some signs that you need to replace a filter include increased noise or a noticeable decrease in air quality. Remember, a clean filter equals clean air.

Cleaning and Care Best Practices

In addition to replacing filters, you should also regularly clean the exterior and vents of your air purifier. Use a soft cloth to wipe down the outside. For the inside, use a vacuum with a brush attachment to gently remove dust from vents and filters. Be sure to unplug the unit before cleaning. By taking good care of your air purifier, you’ll extend its lifetime and enjoy fresher air in your bedroom.

purifier

The Ideal Placement for Maximum Efficiency

Choosing the right place for an air purifier in your bedroom can greatly affect its efficiency. The following points should be considered for maximum benefits:

  • Near the Bed: Placing the air purifier close to your bed optimizes its effectiveness. This position ensures that the air around where you breathe is cleanest.
  • Away from Obstructions: Ensure the air purifier is not blocked by furniture or curtains. This can obstruct the flow of air into the unit, reducing its effectiveness.
  • Height Considerations: Some air purifiers work best when placed on a table or a higher platform. It can improve the distribution of clean air if it’s not just on the floor.
  • Near the Door or Window: If possible, place it near a source of outside air. This helps in directly purifying the air as it enters your room.

Remember, each room’s layout is different, so you might need to experiment with placements. The goal is to find a spot where the air purifier can operate most efficiently without disruptions.

Conclusion: Making the Decision to Use an Air Purifier

Choosing to use an air purifier in your bedroom is a wise move. The benefits of air purifier in bedroom contribute greatly to better health and sleep. Cleaner air means fewer allergens, which reduces disruptions to your sleep. It means a quiet sleep environment, free from pollutants that could affect your respiratory system. By installing an air purifier, you are making a proactive decision towards ensuring quality air around you, particularly during the many hours spent in your bedroom.

Additionally, air purifiers are a strong defense against harmful airborne bacteria and viruses. This can be vital in keeping illnesses at bay, giving you peace of mind. For those who suffer from asthma or allergies, air purifiers can control symptoms, making a considerable difference in daily life.

When evaluating the benefits of an air purifier, consider the maintenance tips we’ve provided. Regular filter changes and cleanings are essential for your purifier to operate effectively. Don’t forget the importance of its placement in your bedroom for maximum efficiency.

The decision to add an air purifier to your bedroom can contribute to a healthier, more comfortable living space. Its benefits, ranging from pollutant control to noise reduction, are substantial. Reflect on the points discussed in this blog, and you may find that an air purifier is a key addition to your bedroom sanctuary.

Does Goodwill Take Vacuums? Your Donation Guide

vacuum

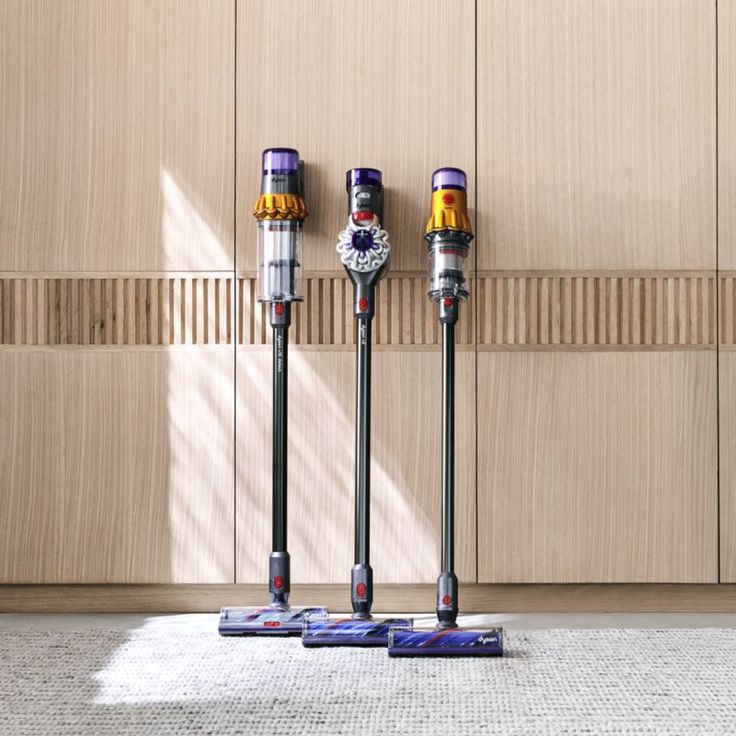
When it comes to decluttering your home or getting rid of your old appliances, you might wonder, “Does Goodwill take vacuums?” Goodwill is a well-known organization that accepts various donated items, but there are specific guidelines to follow. In this article, we will address everything you need to know about donating vacuums to Goodwill, including the types of vacuums they accept, donation tips, and other useful information for potential donors.

does goodwill take vacuums

Understanding Goodwill’s Donation Policies

Does Goodwill take vacuums? The short answer is yes, but there are certain conditions involved. Goodwill has a mission to provide job training and employment opportunities for those in need, and this mission extends to the donations they receive. They generally accept working appliances, and vacuums can fall into this category provided they meet specific standards.

  • Working Condition: When considering donating your vacuum to Goodwill, it is essential to ensure that the appliance is in good, working condition. Goodwill has a strict policy and will not accept vacuums that are broken or malfunctioning, as these can create additional disposal challenges.
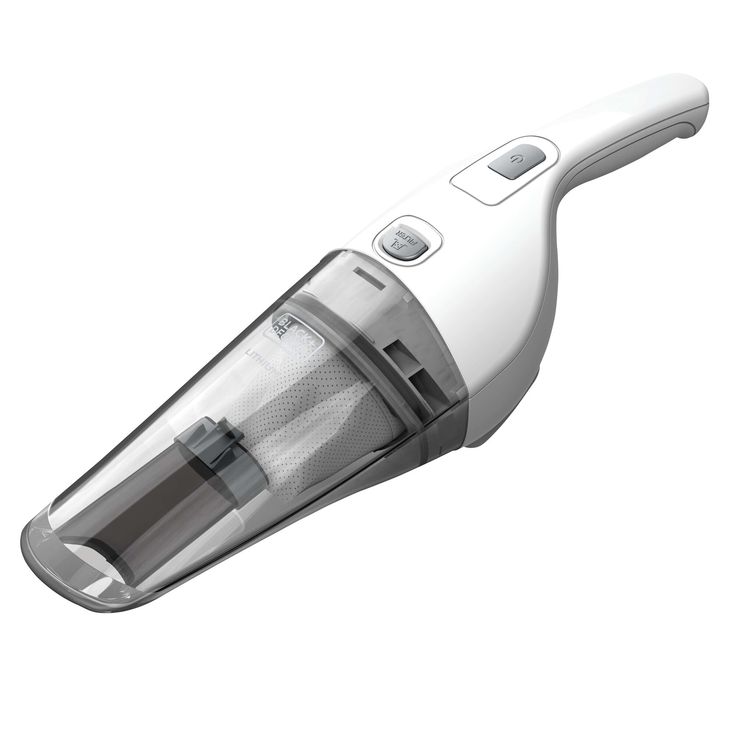
  • Type of Vacuum: Goodwill typically accepts a variety of vacuum cleaner types including upright, canister, and handheld models. The key requirement is that these vacuums must be fully operational and not excessively worn or damaged. This variety allows donors to contribute different models that may benefit others.
  • Safety Inspection: Donors should check that cords and other electrical components are intact, as damaged items pose safety hazards and may be rejected.

Before you head to your local Goodwill store, consider calling to confirm if they accept vacuums at that specific location, as policies can vary.

How to Prepare Your Vacuum for Donation

If you’re ready to part ways with your vacuum cleaner, you may be asking yourself, “Does Goodwill take vacuums?” To facilitate the donation process, it’s essential to prepare your vacuum properly. Here’s how to ensure a smooth donation experience:

  • Cleaning: Make sure to clean the exterior of the vacuum and empty the dust bin (if applicable). This enhances presentation and reduces the risk of dirt transfer during transport.
  • Check for Accessories: If your vacuum came with attachments or filters, consider including them in the donation. This raises the value and usability of your donation.
  • Remove Personal Items: Ensure there are no personal items or debris left inside; this can reflect poorly on the quality of your donation.

Taking the time to prepare your vacuum properly not only helps Goodwill but can also improve the organization’s ability to sell the item, ultimately benefiting those in need.

vacuum

What Happens to Your Donated Vacuum?

You may still wonder, “Does Goodwill take vacuums?” Yes, and once your donation is accepted, it goes through a series of processes. Here’s what typically happens:

  • Sorting and Inspection: When your vacuum arrives at Goodwill, it undergoes sorting and inspection. Items are checked for quality and any necessary repairs.
  • Repair and Refurbishing: If your vacuum has minor issues, Goodwill may repair and refurbish it. This allows them to resell the item at a reasonable price.
  • Sales Process: After sorting, vacuums that meet their quality standards are placed on the sales floor in the home goods section. Profits from the sale support Goodwill’s charitable programs, helping individuals find jobs and training.

Knowing that your old vacuum can help someone in need may encourage you to donate rather than discard it. Each vacuum has the potential to support a positive change in someone’s life.

Other Items You Can Donate to Goodwill

Now that we’ve clarified that “does Goodwill take vacuums?”, it’s essential to know what other items you can comfortably donate to support this charitable organization. Goodwill is appreciative of a wide range of donations, which can positively impact those in need. Here are some categories of items to consider:

  1. Household Goods:
    • Donate dishes, glasses, and cutlery that you no longer use.
    • Small kitchen appliances, such as toasters, blenders, and coffee makers, can also find new homes.
    • Linens, including towels, sheets, and tablecloths, are always welcomed.
  2. Clothing:
    • Gently used apparel for men, women, and children is constantly in demand.
    • This includes everyday wear, professional attire, and seasonal clothing.
  3. Furniture:
    • Consider donating furniture items like chairs, tables, and bookcases that are in good condition.
    • Larger items like couches and dressers are also accepted, provided they are clean and functional.

By decluttering your home and donating these various items, you not only help Goodwill but also give your unused belongings a chance to benefit others in the community. Every little bit helps, and your contributions can make a significant difference!

vacuum cleaner

Benefits of Donating to Goodwill

If you’re still contemplating your decision, here’s a critical question: “Does Goodwill take vacuums?” Donating is beneficial not just for the organization but also for you. The advantages of donating include:

  • Tax Deduction: Monetary contributions to Goodwill and non-cash donations may be tax deductible when you itemize your taxes.
  • Environmental Responsibility: Donating reduces waste and promotes recycling, keeping items out of the landfill and contributing to a more sustainable environment.
  • Community Support: Your donation helps fund vocational programs, job training, and community services. This reinforces your commitment to positive change.

By donating your vacuum and other household items, you participate in a cycle of giving that benefits both individuals and the community as a whole.

Making the Donation Process Easy

You might often find yourself wondering, “Does Goodwill take vacuums?” particularly after hearing about the benefits of donating. If you are eager to contribute, here are some helpful tips to streamline the donation process:

  1. Find Your Nearest Location: Start by visiting the Goodwill website. It has a user-friendly interface that allows you to easily locate the nearest donation center or retail store. Enter your zip code or city name to find the closest option.
  2. Check Donation Hours: Before heading out, it’s wise to check the donation hours of your local Goodwill. Each location might have different hours for accepting donations, so planning your visit accordingly will ensure you don’t arrive when they’re closed.
  3. Consider Scheduling a Pickup: If you have larger items, such as furniture or appliances, some Goodwill branches offer convenient pick-up services. This can save you time and effort, as you won’t need to transport heavy items yourself. Just schedule a pickup through the website or by calling your local branch.

By breaking down these steps, you can simplify the donation process, making your contribution more manageable and much less stressful. Donating to Goodwill is a fantastic way to give back to the community and declutter your space!

Conclusion: Making a Positive Impact with Your Vacuum Donation

In conclusion, if you’ve been wondering, “Does Goodwill take vacuums?” you can be assured that they do, as long as certain conditions are met. Donating your vacuum not only helps declutter your home and make space for new things. But it also plays a vital role in supporting meaningful programs that assist individuals and families in need.

By adhering to the guidelines in this guide and understanding Goodwill’s specific policies. You can truly make a difference in your community while ensuring that quality items reach those who require them. If you have an unused vacuum lying around, take a moment to consider donating it to Goodwill. You may be pleasantly surprised by the positive impact such a seemingly simple act can create in someone’s life!

How to Unwrinkle Clothes Fast: Effective Methods You Need

dryer

Introduction to Wrinkle-Free Clothing

Wrinkles can spoil the look of even the most stylish outfit. Understanding how to unwrinkle clothes fast is vital for anyone who values a crisp appearance but lacks the time or inclination for ironing. Today, a variety of alternatives exist that can achieve a wrinkle-free look without the traditional ironing board and hot iron.

These methods are not just time-savers; they can also preserve the quality of your garments. Frequent ironing can sometimes lead to fabric damage over time. On the other hand, some of the techniques we’ll explore are gentler on clothes and can even extend their lifespans. Moreover, mastering quick de-wrinkling skills can be especially useful for those with busy lifestyles, or when an unexpected meeting or event comes up.

In the upcoming sections, we’ll dive into innovative and practical techniques such as using a dryer, ice cubes, DIY solutions, and more. These methods will help you remove wrinkles effectively, leaving your clothes looking freshly pressed. Whether you’re at home or on the go, these tips will ensure you’re always looking your best with minimal effort.

steamer

Utilizing the Dryer for Fast De-Wrinkling

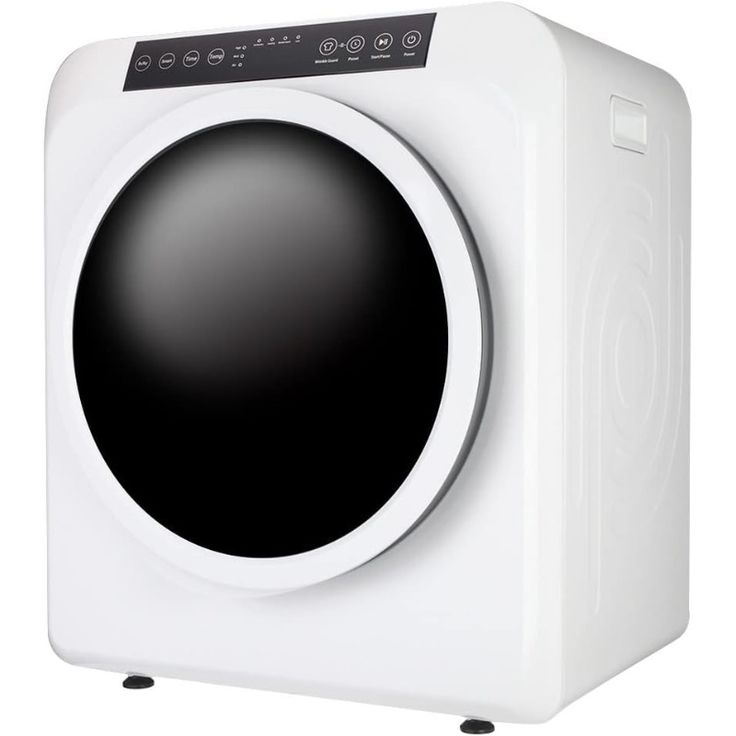
Do you need to unwrinkle clothes quickly? Your dryer can come to the rescue. Start by tossing your wrinkled garment in the dryer along with a few damp towels. This creates a steamy environment that relaxes fabric wrinkles. Set the dryer on high heat for a short cycle of about 5 to 10 minutes. Once the cycle is done, take out the clothes immediately and hang them or lay them flat. This prevents new wrinkles from forming.

For extra effectiveness, throw a dryer sheet in with the clothes. Dryer sheets help reduce static cling, which can cause clothes to wrinkle. They also leave your garments smelling fresh. Remember, the key is promptness. Remove clothes from the dryer as soon as it buzzes.

Using the dryer isn’t just for when you’re in a rush. Regularly using this method can save time and also reduce wear on your clothes from ironing. Every moment counts in a busy schedule. That’s why knowing how to unwrinkle clothes fast with appliances you already own is so practical.

Ice Cube Trick: A Magical De-Wrinkling Hack

Ever heard of the ice cube trick? It’s a simple yet astonishingly effective way to unwrinkle clothes fast. This clever hack uses items you already have at home and taps into the power of steam to smooth out those stubborn creases. Here’s how to do it:

  1. Place a couple of ice cubes into your dryer.
  2. Add in the wrinkled garments.
  3. Run the dryer on a high heat setting for about 5 minutes.
  4. The ice melts, turns to steam, and relaxes the fabric wrinkles.
  5. Immediately hang the clothes once the cycle is done to keep them wrinkle-free.

It’s important not to overfill the dryer. Crowding can prevent clothes from coming into contact with the steam, leaving some areas still wrinkled. For best results, limit the load to a few items at a time.

This method is not only a time-saver but also spares your clothes from potential heat damage caused by ironing. It’s perfect for those mornings when you’re in a hurry or for a quick touch-up before heading out. The ice cube trick is a go-to for a wrinkle-free wardrobe without the hassle of an iron.

dryer

DIY Wrinkle Releaser Solutions

When ironing isn’t an option, DIY wrinkle releaser solutions are a lifesaver. Simple to make and highly effective, these homemade mixes can unwrinkle clothes fast. All you need are a few common household ingredients. Here’s a quick recipe to help you smooth out those creases:

  1. Combine one part water with one part white vinegar in a spray bottle.
  2. Add a teaspoon of hair conditioner for extra softness.
  3. Shake well to mix the ingredients.
  4. Lightly spray it onto the wrinkled areas of your clothes.
  5. Stretch and smooth the fabric by hand.
  6. Hang the garment to dry completely before wearing.

This DIY wrinkle releaser not only straightens wrinkles but also leaves your clothes with a pleasant, fresh scent. The acidity of the vinegar helps to soften fabrics and release wrinkles, while the conditioner prevents your clothing from smelling like vinegar. You’ll be amazed at how well this solution mimics the effects of steam from an iron.

Always test the solution on a small, inconspicuous area of the fabric first to ensure it doesn’t affect the color or texture. With this quick and easy method, you’re equipped to look your best without spending time on traditional ironing.

Clothing Care Tips to Prevent Wrinkles

To avoid wrinkles, it’s essential to care for your clothes properly. Here are some tips to keep your garments looking smooth with minimal effort:

  • Wash Smart: Over-stuffing the washer can cause clothes to wrinkle. Wash smaller loads and remove clothes promptly when done.
  • Shake it Out: Give clothing a good shake after washing. This will loosen any creases that started to form during the cycle.
  • Dry Right: Don’t over-dry clothes. Remove them while slightly damp to reduce the chance of wrinkles setting in.
  • Smooth and Fold: Once dry, quickly smooth out any wrinkles by hand and fold or hang the clothes immediately.
  • Hang Wisely: Use hanger clips for pants and skirts. For shirts and blouses, button them up on hangers to maintain shape.
  • Roll, Don’t Fold: For storage or packing, roll clothes instead of folding. It cuts down on creases.
  • Keep It Cool: Extreme heat from water or drying can damage fibers and cause wrinkles. Opt for cooler settings.

By integrating these simple habits into your routine, you can significantly reduce wrinkles and keep your clothes looking fresh. These steps can help you save time and avoid reaching for the iron too often. Remember, the best way to unwrinkle clothes fast starts with prevention. Care for your clothes, and they will keep you looking your best.

how to unwrinkle clothes fast

The Role of Fabric Softeners in Reducing Wrinkles

Fabric softeners play a crucial part in how to unwrinkle clothes fast. They are not just for adding fragrance or softness to your laundry. These softeners can also make a big difference in the fight against wrinkles. Here’s why they’re useful:

  • Reduces Static: Static cling can tangle clothes and form wrinkles. Fabric softener minimizes static, helping clothes come out smoother.
  • Softens Fibers: The softening agents relax fabric fibers. Relaxed fibers are less prone to wrinkling.
  • Easier to Handle: Softened clothes are easier to fold and handle without creating new wrinkles.
  • Saves Time: Using fabric softener can cut down on post-laundry ironing needs.

For those who aim to unwrinkle clothes fast, adding fabric softener during the wash cycle is a helpful step. When clothes are free from the grip of static and softened by these products, they come out looking neater from the dryer. Remember to follow the instructions on the fabric softener’s label. Overuse can leave residues that may reduce fabric absorbency or cause skin irritations.

In combination with the tips provided earlier, such as the dryer and ice cube tricks, fabric softeners reinforce the ease of maintaining a wrinkle-free wardrobe. The right care and products can have you looking sharp with minimal effort. So next time you do laundry, consider reaching for that bottle of fabric softener to keep wrinkles away.

Using Steam to Smooth Out Wrinkles

Steam is a powerful ally in the quest to unwrinkle clothes fast. It’s easy, fast, and gentle on fabrics. If you don’t have a steamer, don’t worry. You can still use steam with items you have at home. Here’s what to do:

  • Use Your Shower: Hang your clothes in the bathroom while you shower. The steam from the hot water will smooth out the wrinkles. Just make sure the clothes don’t get wet.
  • Boil Water: Boil a pot of water and hold your wrinkled garment above the steam. Use a protective glove to avoid burns.
  • Kettle Trick: If you have an electric kettle, turn it on and hold the clothes near the steam spout. Again, be cautious of the hot steam.

Always be mindful of the fabric type when using steam. Delicate materials like silk may need a gentler approach. For tough wrinkles, you might need to steam the garment a few times. Keep the garment on a hanger for a while after steaming to ensure it dries without new creases forming.

Steam is not only an effective de-wrinkler but also a time saver. It lets you look polished without all the effort of ironing. Add this technique to your wrinkle-reducing arsenal and enjoy smooth, crisp clothes anytime.

Alternative Tools and Gadgets for De-Wrinkling

In the hunt for wrinkle-free clothing, sometimes you need tools that can take on the job without the hassle of ironing. Here’s a rundown of some alternative tools and gadgets that can help unwrinkle clothes fast:

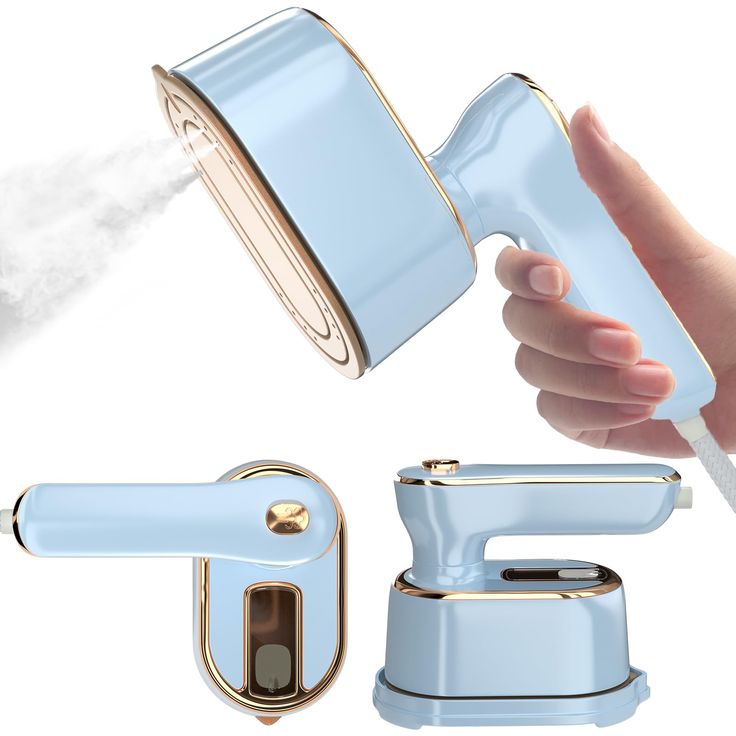
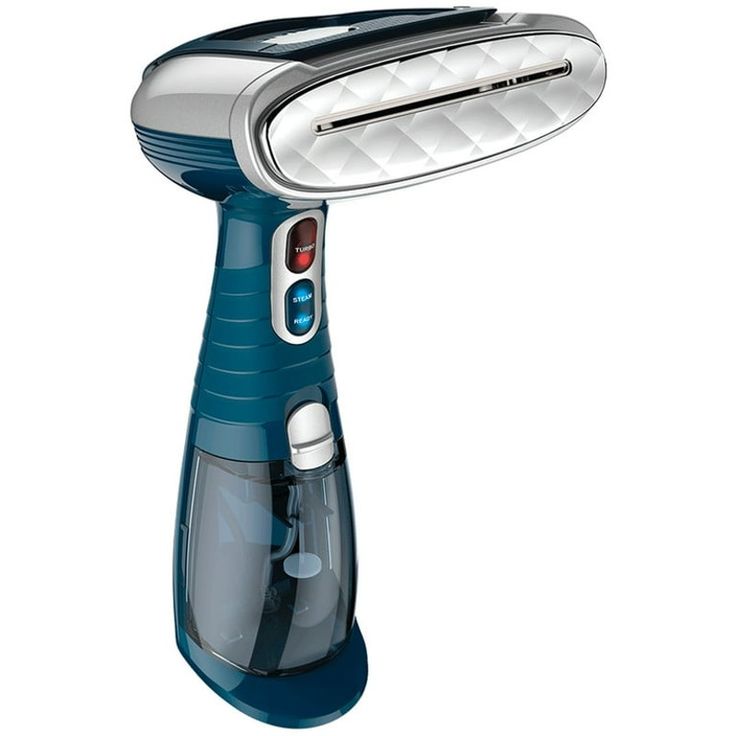
  • Handheld Steamers: Compact and easy to use, handheld steamers can remove wrinkles quickly. Fill with water, turn on, and smooth over clothes.
  • Wrinkle-Release Sprays: Commercial wrinkle-release sprays are handy. Simply spray on, tug the fabric, and watch the wrinkles fall away.
  • Hair Dryers: Yes, your hair dryer can help! Use it on a warm setting to lightly blast wrinkles out of clothes.
  • Clothes Wrinkle Smoothers: These are electronic devices designed to relax fabric with gentle heat.
  • Shower Steamers: Much like the shower trick, shower steamers create steam in your closet to clear out creases.

These gadgets not only maximize convenience but are also perfect for last-minute touch-ups. When selecting a tool, consider your needs and the types of fabric you wear most often. With these innovative solutions, you can keep your attire looking sharp, with minimal time and effort. Combine these gadgets with the clothing care tips we discussed, and you’ll master the art of maintaining a wrinkle-free wardrobe with ease.

Wall Mounted AC: Common Maintenance Tips for Longevity

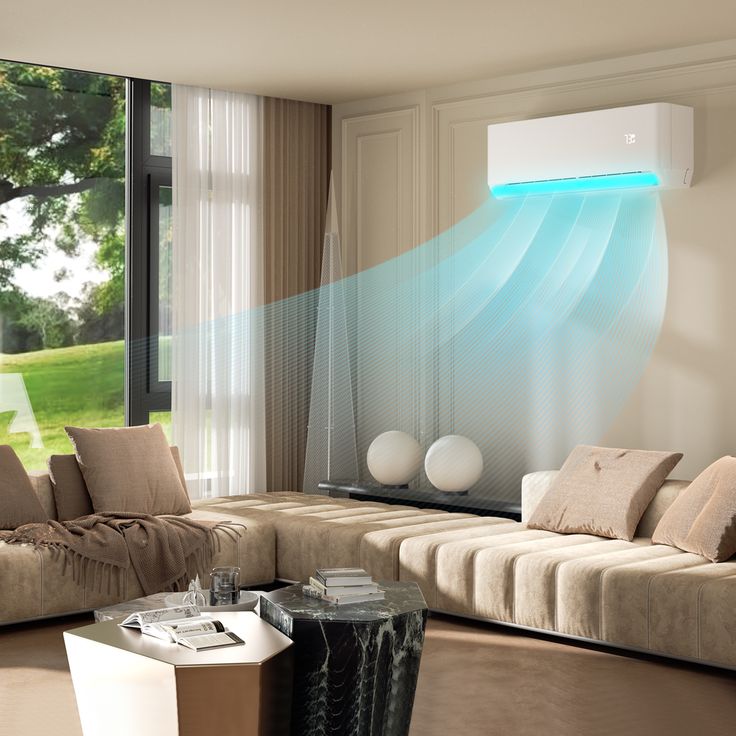
Wall-mounted air conditioner

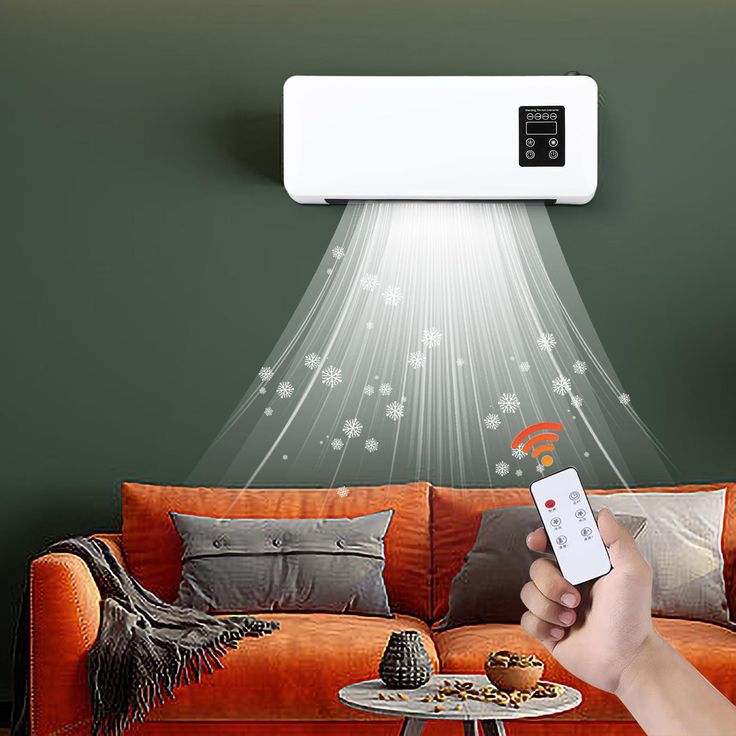
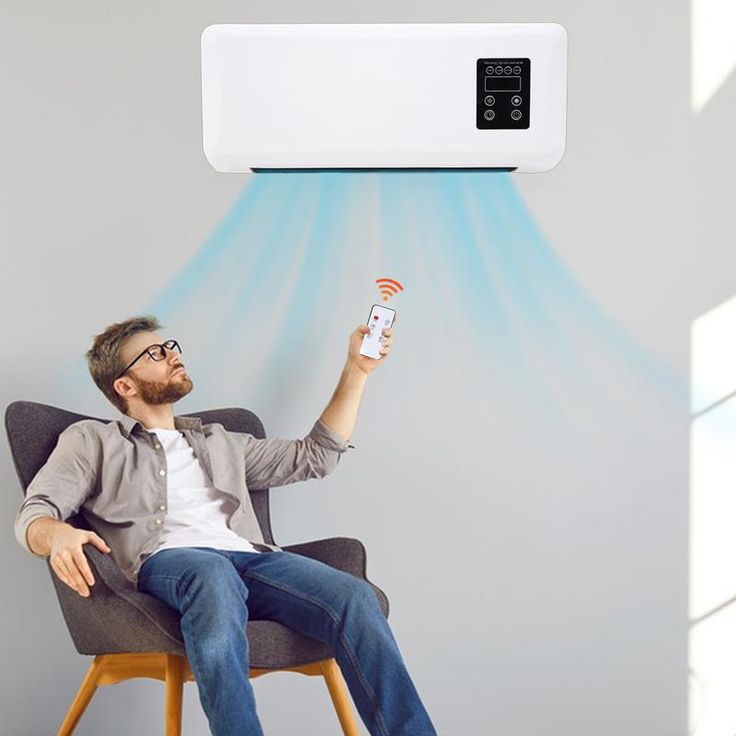
Wall mounted air conditioners are an essential appliance in many homes and offices, providing comfort during those hot summer days. However, to ensure their efficiency and longevity, regular maintenance is crucial. In this article, we will explore essential maintenance tips that can help you prolong the lifespan of your wall mounted AC unit and keep it running efficiently.

wall mounted ac

Regular Cleaning of the Filters

One of the most critical maintenance tasks for your wall mounted AC is to clean the air filters regularly. Clogged filters restrict airflow, making your AC work harder and consume more energy. To avoid this, the filters should be cleaned at least once a month during peak usage seasons. Here’s how to do it effectively:

  • Turn off the Power: Before beginning any maintenance work on the AC unit, it is crucial to prioritize safety above all else. Make sure to turn off the power to the unit completely, preventing any risk of electric shock or injury during the process.
  • Remove the Filters: Carefully detach the filters from the unit. Most wall mounted ACs have easily accessible filters that can be pulled out smoothly.
  • Clean the Filters: Use a vacuum cleaner or wash the filters with lukewarm water and mild detergent. Ensure they are dried completely before reinstallation.
  • Check for Damage: While cleaning, inspect the filters for any signs of damage. If you notice tears or significant wear, replacing them to maintain efficiency is advisable.

This simple yet effective task can significantly enhance your wall mounted AC’s performance and ensure its longevity.

Inspect the Outdoor Unit

While focusing on the indoor unit, it’s easy to overlook the importance of the outdoor component of your wall mounted AC. The outdoor unit plays a critical role in the overall efficiency of the system and should be inspected regularly. Here are key points to consider:

  • Clear Debris: Ensure that the outdoor unit is free from leaves, branches, and other debris that can obstruct airflow. Regularly cleaning the area around the outdoor unit can improve its efficiency.
  • Check for Corrosion: Examine the exterior of the unit for any signs of rust or corrosion. If identified, it’s wise to address these issues promptly to prevent long-term damage.
  • Verify Fan Operation: Ensure the fan in the outdoor unit is functioning properly. If it seems stuck or makes unusual noises, it may require professional servicing.
  • Maintain Proper Drainage: Regularly inspect and confirm that water can drain freely from the unit, as any clogs in the drainage system can result in serious water damage and encourage mold growth.

Taking the time to inspect your wall mounted AC’s outdoor unit ensures that it remains in optimal condition and extends its lifespan.

Wall-mounted air conditioner

Maintain Optimal Temperature Settings

Setting the right temperature on your wall mounted AC can greatly affect its efficiency and longevity. Extreme temperature settings not only increase energy consumption but can also put unnecessary strain on the unit. Consider the following tips:

  • Set Reasonable Temperatures: During summer, set the thermostat to a comfortable level (typically between 75°F and 78°F). Avoid extremely low temperatures which can put excess strain on the compressor.
  • Use Timer Functions: Most modern wall mounted ACs come equipped with timers. Utilize these features to maintain a comfortable environment while saving energy.
  • Avoid Frequent Adjustments: Constantly changing the temperature setting can cause the AC to work harder than necessary, leading to potential wear and tear. Establish a comfortable baseline setting and stick to it.
  • Consider Fan Settings: When the AC is running, experiment with fan speeds. Sometimes, lower fan speeds can provide adequate cooling and reduced energy costs.

By maintaining optimal temperature settings, you not only enhance the performance of your wall mounted AC but also ensure it lasts longer.

Schedule Professional Servicing

Even with regular maintenance, it’s essential to schedule professional servicing for your wall mounted AC. A certified technician can conduct thorough inspections and perform necessary repairs. Here’s what to expect during a professional service:

  • Comprehensive Cleaning: Professionals have access to specialized equipment to clean internal components, including coils and drain lines that homeowners may not be able to reach.
  • System Checks: A professional will assess the refrigerant levels, check for leaks, and inspect the electrical components of your wall mounted AC, ensuring everything operates safely and efficiently.
  • Adjustments and Repairs: Any required adjustments or repairs can be promptly addressed, preventing minor issues from escalating into major problems.
  • Expert Recommendations: Technicians can provide you with valuable advice on how to enhance your unit’s efficiency based on its condition and your usage patterns.

Investing in professional servicing for your wall mounted AC will help identify underlying issues early, ultimately prolonging the unit’s lifespan.

air conditioner

Monitor Temperature and Humidity Levels

Monitoring the internal temperature and humidity levels within your space can significantly impact the performance of your wall mounted AC. High indoor humidity can force your AC to work harder than necessary. Here are some tips for monitoring these levels:

  • Use Hygrometers: Invest in a hygrometer to measure indoor humidity levels. Ideally, indoor humidity should be between 30% and 50% for optimal comfort and efficient AC operation.
  • Utilize Dehumidifiers: If you live in an area with high humidity, consider using a standalone dehumidifier alongside your wall mounted AC to relieve some of the moisture from the air.
  • Close Doors and Windows: To maintain adequate indoor humidity and temperature levels, ensure that windows and doors are sealed properly while the AC is running.
  • Ventilation Practices: Implement proper ventilation practices to avoid excess humidity buildup. This may include using exhaust fans in bathrooms and kitchens.

By paying attention to temperature and humidity levels, you can enhance the performance and lifespan of your wall mounted AC system.

air conditioner

Ensure Proper Insulation and Sealing

Proper insulation and sealing around your wall mounted AC unit can drastically improve its efficiency. If the unit is not well-sealed or the surrounding area lacks insulation, cool air can escape, and warm air can infiltrate. Here’s what you should focus on:

  • Check Seals: Inspect the seals around the wall-mounted AC to ensure they are tight and free from gaps. Replacing or resealing any damaged areas will help maintain optimal efficiency.
  • Insulate Surrounding Areas: Pay attention to the area surrounding the AC unit. If there are walls or ceilings adjacent to the unit, ensure they are adequately insulated to prevent heat transfer.
  • Inspect Windows and Doors: Ensure that adjacent windows and doors are properly sealed to help maintain indoor temperatures and reduce the workload on your wall mounted AC.
  • Regularly Check for Drafts: Conduct a draft test by checking for air leaks near your AC unit. If you detect any drafts, they should be sealed promptly.

By ensuring proper insulation and sealing around your wall mounted AC, you help improve efficiency, which in turn extends the unit’s lifespan.

Portable air conditioner

Keep an Eye on Performance Changes

Monitoring any changes in the performance of your wall mounted AC is key to maintaining its longevity. If you notice any of the following changes, it might be time to take action:

  • Unusual Noises: Sounds like rattling, buzzing, or grinding signals potential issues within the unit that may require professional attention.
  • Inconsistent Cooling: If the temperature fluctuates or doesn’t reach your set temperature, it may indicate low refrigerant levels or other issues that require servicing.
  • Increased Energy Bills: A sudden spike in electricity bills without a change in usage patterns often means your AC is working harder due to inefficiency and may need maintenance.
  • Frequent Cycling: If your wall mounted AC frequently turns on and off, it can indicate problems with the thermostat or other internal components that need attention.

By keeping an eye on your wall mounted AC’s performance, you can proactively address issues before they escalate, ensuring a longer life for your unit.

Conclusion

Maintaining your wall-mounted air conditioning unit doesn’t have to be a daunting or overwhelming task. By committing to regular care and attention, you can significantly enhance both the efficiency and longevity of your cooling system. Simple actions like cleaning or replacing filters, checking for any obstructions, and ensuring the exterior unit remains clear can go a long way in keeping your AC running smoothly. Additionally, scheduling professional maintenance services at least once a year can help identify potential issues before they become significant problems. Every action you take counts in extending the lifespan of your wall-mounted AC unit. By implementing these straightforward maintenance strategies, you can enjoy a comfortable and pleasant environment in your home or office for many years to come, ensuring optimal comfort regardless of the weather outside!

Best Place to Put an Air Purifier for Maximum Effectiveness

air purifier

Key Factors Influencing Air Purifier Placement

Choosing the best place to put an air purifier can greatly affect its performance. Below are key factors that every user should consider to maximize their air purifier‘s efficiency:

best place to put an air purifier

  • Proximity to Pollutants: Place the air purifier close to the primary source of pollutants for improved air quality. These sources might include pet areas, kitchens, or any space with high dust accumulation.
  • Air Flow: Air circulation is crucial for purifiers. Avoid corners with little air movement. Place the unit in a location with good air exchange like near doorways or hallways.
  • Room Traffic: Busy areas might introduce more contaminants. Putting the purifier in high-traffic rooms ensures more air particles pass through the device.
  • Distance from Walls: Keep the air purifier away from walls or heavy furniture. It needs space to adequately circulate air.
  • Height from Ground: Many models work best when placed about 3-5 feet above the floor, but always follow the manufacturer’s guidelines.
  • Avoid Heat Sources: High temperatures can affect purifier functioning. Position them away from heat sources like radiators or sunlight.
  • Distance from Electronics: To prevent electromagnetic interference, place the air purifier at least 2 meters away from TVs, radios, and other appliances.
  • Ease of Access: For cleaning and maintenance, the air purifier should be easily accessible.

These factors ensure that the air purifier works at its peak capacity, ultimately leading to cleaner air and a healthier environment in your home or office.

Optimal Room Locations for Air Purifiers

Finding the best room to place your air purifier is crucial for optimal performance. Here are some key points to consider when determining the most effective locations for your air purifying device:

  • Living Rooms: Often the largest room in the house, the living room can benefit greatly from air purification due to frequent use and high foot traffic.
  • Bedrooms: For those with allergies or respiratory issues, positioning an air purifier in the bedroom helps improve air quality for better sleep.
  • Kitchens: Cooking can produce odors and airborne grease particles. Placing an air purifier here can keep the air fresh and cleaner.
  • Near Entryways: These areas can introduce pollutants from outside. An air purifier placed here works to filter out these incoming impurities right away.
  • High-Dust Areas: Rooms with heavy textiles, such as curtains and carpets, accumulate dust easily. They are preferable locations for air purifiers to combat dust accumulation.
  • Pet Areas: If you have pets, nearby their common areas can capture pet dander and hair effectively.

In addition to these locations, ensure the air purifier is not obstructed by furniture and has room to circulate air effectively. Avoid corners where air flow is minimal. These practices will significantly bolster the efficiency of your air purifiers, maintaining cleaner air throughout the home or office.

air purifier

Addressing Different Room Shapes and Sizes

Different room shapes and sizes require specific placement strategies for air purifiers to work effectively. Here are tips to help you position your air purifier optimally, depending on your room configuration:

  • Square or Rectangular Rooms: Place the air purifier centrally to allow for even air flow. Avoid corners and ensure it’s not too close to walls.
  • Small Rooms: Even though space is limited, avoid placing the purifier directly on the floor or tucked into tight spots like shelves. Central placement on a stable platform works best.
  • Large Rooms: You might need more than one air purifier for ample coverage. Position them strategically at different spots to maximize air flow throughout the room.
  • L-Shaped Rooms: Place the air purifier at the intersection of the two legs of the L if possible. This can help in more uniform air circulation.
  • Rooms with High Ceilings: The purifier should ideally be at a higher position, closer to the breathing level. Elevated platforms can help in these scenarios.

Every room’s characteristics affect air purifier efficiency. Consider the room’s layout, size, and typical air flow patterns when choosing a spot for your air purifier. Avoid positions near heavy furniture that could block air intake or outflow. This approach ensures your space receives consistent and effective air purification.

The Impact of Furniture and Walls on Airflow

Furniture and walls significantly affect how air moves in a room. They can block or hinder the airflow needed for air purifiers to work effectively. Here are insights into how your room’s setup can impact your air purifier’s efficiency:

  • Furniture Placement: Avoid placing air purifiers too close to sofas, cabinets, or beds. These can obstruct the air intake and limit the unit’s effectiveness.
  • Wall Proximity: Positioning air purifiers too close to walls can also restrict airflow. It’s best to keep them at least a few feet away to allow for optimal air intake and exhaust.
  • Room Layout: Open spaces generally allow for better air circulation. Try to arrange your room in a way that maximizes open air paths.
  • Avoid Corners: Never place air purifiers in corners. Corners can trap air and reduce the purifier’s ability to pull in dirty air and push out clean air.

By considering these factors, you can greatly increase the effectiveness of your air purifier, ensuring cleaner air and improved health benefits. Adjust your room’s layout to support your air purifier, placing it in positions where airflow is least obstructed.

purifier

Common Air Purifier Placement Mistakes

When positioning your air purifier, it’s easy to overlook some common errors. Here are pitfalls to avoid for optimal air quality:

  • Hiding the Unit: Don’t place air purifiers out of sight. Behind furniture or in corners hampers their function.
  • Ignoring Airflow: Avoid spots with poor air movement like tight niches or alcoves that restrict circulation.
  • Blocking Intake or Outlet: Furniture or objects too close to the purifier can obstruct air paths.
  • Close to Electronics: Keeping purifiers near electronics may cause interference and hinder performance.
  • Underestimating Ceiling Height: In rooms with high ceilings, placing purifiers higher can improve air distribution.
  • Not Considering Room Traffic: The busiest rooms often need purifiers the most, but placing them in low activity areas fails to address this.
  • Poor Maintenance Accessibility: If it’s hard to reach, you’ll clean it less, reducing its efficiency.
  • Choosing the Wrong Room: Focus on rooms with the most pollutants, not empty or unused spaces.

Remember, avoiding these mistakes can boost your air purifier’s efficiency. Place it where clean air is most needed and where it has ample space to work effectively.

Placement Tips for Maximum Air Quality

To ensure maximum air quality, follow these placement tips.

  • Central Position: For uniform air circulation, place the air purifier in the room’s center.
  • Away from Obstructions: Keep it at a distance from furniture that could block airflow.
  • Elevated Surface: If possible, position the air purifier on a raised platform.
  • Near Pollutants: Place it close to the pollutant source for effective filtration.
  • Not in Corners: Corners trap air, reducing the air purifier’s reach and efficiency.
  • Away from Electronics: To avoid interference, keep the unit away from gadgets.
  • Consider Room Traffic: Choose a spot in a room that gets used often.
  • Accessible for Maintenance: Ensure the purifier is easy to reach for cleaning.

By observing these tips, you can enhance the effectiveness of your air purifier and breathe easier in a cleaner environment.

Additional Considerations and Tips

When positioning your air purifier, mull over these extra tips to ensure peak performance:

  • Check Filter Status: Regularly inspect and change the air purifier’s filter to maintain efficiency.
  • Seasonal Adjustments: Consider seasonal changes; you may need different placement or settings during allergy seasons or winter months.
  • Periodic Evaluation: Re-evaluate your air purifier’s position periodically to optimize its performance as room layouts and conditions change.
  • Noise Consideration: Place your air purifier where the noise does not disturb your daily activities, especially in sleeping areas.
  • Avoid Water Sources: Keep air purifiers away from humidifiers or open windows during rain to prevent moisture from affecting the unit.

By following these additional tips, you can help ensure that your air purifier operates effectively, contributing to a healthier indoor environment.

Should I Get an Air Purifier? Exploring Your Health Options

purifier

Air quality is a growing concern for many individuals, especially considering the increasing levels of pollution and allergens in urban environments. As we spend a significant amount of time indoors, the quality of the air we breathe in our homes and workplaces may have a direct impact on our health. This leads many to ask, “Should I get an air purifier?” In this article, we will delve into the reasons why investing in an air purifier may be beneficial for your health and well-being.

should i get an air purifier

Understanding Indoor Air Quality: Should I Get an Air Purifier?

Indoor air quality can often be poorer than outdoor air quality, with pollutants such as dust, pet dander, mold spores, and volatile organic compounds (VOCs) being prevalent. This can trigger allergies, asthma attacks, and other respiratory issues.

  • Types of airborne pollutants: Common pollutants include smoke, allergens, and VOCs from products we use daily.
  • Health implications: Poor air quality is linked to a range of health issues, from minor irritations to severe respiratory diseases.
  • Evidence and statistics: Research shows that indoor air can contain levels of pollutants that are significantly higher than those found outdoors.

Considering these fctors leads many to the question, “Should I get an air purifier?” The answer often leans towards yes, especially for sensitive individuals or those living in high-pollution areas.

How Air Purifiers Work: Should I Get an Air Purifier?

To assess whether investing in an air purifier is beneficial, it’s crucial to comprehend the operational mechanisms of these devices.

  • Mechanism of Action:
    Air purifiers are designed to effectively eliminate indoor air pollutants. They utilize various filters and advanced technologies to capture, neutralize, and eliminate harmful substances from the air we breathe. By removing allergens, dust, and other particulates, these devices can significantly enhance indoor air quality.
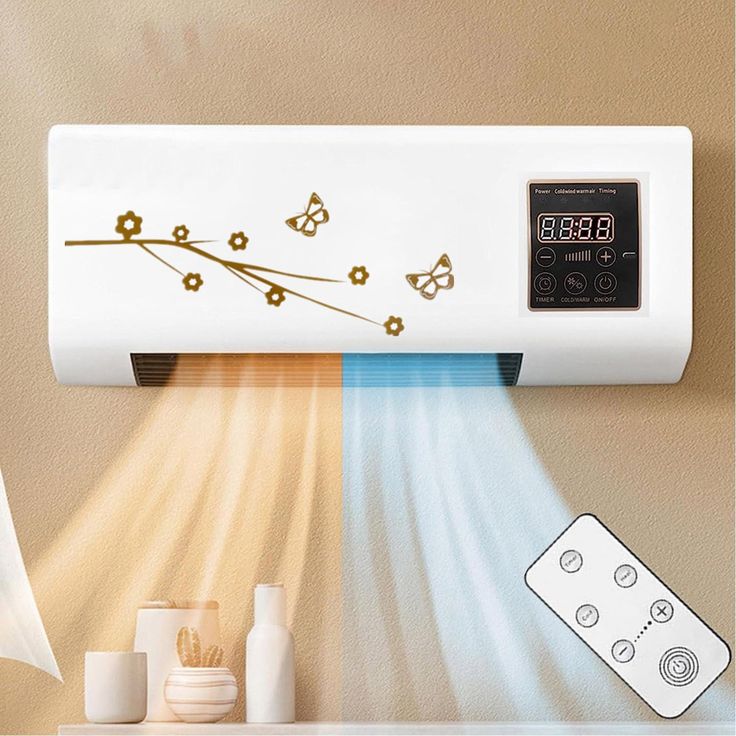
  • Types of Filters:
    One of the primary components of air purifiers is the filter system. HEPA (High-Efficiency Particulate Air) filters are widely regarded as the gold standard in air purification. These filters can capture an impressive 99.97% of particles as small as 0.3 microns, including pet dander, pollen, and even some bacteria. This high level of filtration makes HEPA filters highly effective for allergy and asthma sufferers.
  • Additional Technologies:
    In addition to HEPA filters, many air purifiers incorporate supplementary technologies to enhance their purifying capabilities. For instance, some models employ UV light to kill germs and bacteria, while others use activated carbon to absorb odors and volatile organic compounds (VOCs). Ionization technology may also be utilized to attract and trap airborne particles, providing even cleaner air.

In conclusion, considering these points might lead to the question: “Should I get an air purifier?” If the technology aligns with your health needs, living conditions, and lifestyle, investing in an air purifier could be a significant step toward improving your indoor air quality and promoting a healthier living environment.

The Benefits of Air Purifiers for Allergies: Should I Get an Air Purifier?

For individuals suffering from allergies, clean air is crucial.

  • Alleviating allergy symptoms: Air purifiers can significantly reduce allergens like pollen, mold spores, and pet dander in your home.
  • Improving quality of life: Many users report improved sleep and overall comfort when using air purifiers.
  • Medical recommendations: Many healthcare professionals recommend air purifiers as part of managing allergy symptoms.

Thus, if you’re grappling with allergies, the question “Should I get an air purifier?” tends to have a favorable response.

air purifier

Air Purifiers for Asthma Relief: Should I Get an Air Purifier?

Asthma sufferers can benefit tremendously from cleaner air.

  • Environmental triggers: Many asthma sufferers are sensitive to various environmental pollutants. Common triggers include dust mites, smoke, mold spores, pollen, and pet dander. Air purifiers are designed to filter out these harmful particles from the air, creating a cleaner indoor environment. By reducing the presence of these irritants, air purifiers can alleviate symptoms, leading to fewer asthma attacks and improved breathing.
  • Studies on impact: Research shows a significant correlation between the use of air purifiers and a decrease in asthma symptoms. In controlled studies, participants using air purifiers reported fewer attacks and easier breathing, particularly in environments where pollutants are prevalent. Such evidence suggests that investing in a quality air purifier can have a real, positive impact on asthma management.
  • Overall health management: Incorporating an air purifier into your living space not only addresses immediate asthma symptoms but also contributes to holistic health management. While air purifiers should complement prescribed medications, their use can help stabilize overall respiratory health. Cleaner air can enhance the effectiveness of asthma medications, allowing for a more manageable approach to tackling this chronic condition.

Therefore, for asthma management, the question “Should I get an air purifier?” often leads to a resounding yes.

Protecting Your Family’s Health: Should I Get an Air Purifier?

Maintaining a healthy home environment is vital for the well-being of your family.

  • Children and vulnerable populations: Young children, the elderly, and those with pre-existing conditions are more susceptible to poor air quality.
  • Creating a safe environment: Investing in an air purifier can significantly reduce health risks associated with indoor toxins.
  • Long-term health considerations: Regular use of air purifiers may contribute to long-term health improvements for all family members.

In conclusion, for those concerned about family health, the query, “Should I get an air purifier?” is worth serious consideration.

purifier

The Environmental Impact of Air Purifiers: Should I Get an Air Purifier?

When considering the purchase of an air purifier, it’s essential to evaluate the environmental implications alongside the health benefits. Here are some key points to consider:

  • Energy consumption: Different air purifiers have varying energy consumption rates. Some models may use significantly more electricity, which can lead to higher utility bills and a larger carbon footprint. It’s advisable to look for energy-efficient models, like those with an Energy Star certification, to minimize environmental impact while maintaining indoor air quality.
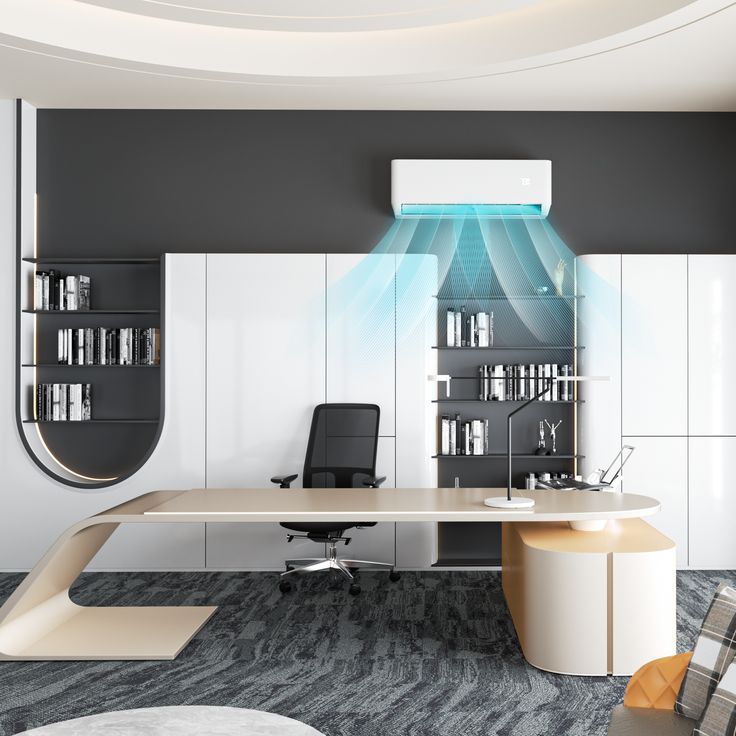
  • Sustainability of filters: Many air purifiers utilize HEPA filters that need to be replaced regularly, contributing to waste accumulation. A significant number of filters are made from materials that are not biodegradable and can end up in landfills. To address this concern, consider brands that offer reusable or recyclable filters, which minimize waste and promote a more sustainable approach to cleaner air.
  • Balancing effectiveness and eco-consciousness: While the primary goal of an air purifier is to improve indoor air quality, it’s crucial to balance this benefit with environmental considerations. Look for purifiers that effectively filter pollutants without requiring excessive energy or producing unnecessary waste.

As you reflect on whether to invest in an air purifier, keep in mind these environmental factors. They may lead you toward options that align with both your health needs and a commitment to sustainability.

Making the Right Choice: Should I Get an Purifier?

When considering the purchase of an air purifier, it’s essential to evaluate your specific needs and circumstances.

  • Identify pollutants: Understand what pollutants you aim to eliminate and select an air purifier suited for those needs.
  • Size and capacity: Ensure the air purifier is appropriate for the size of your space for maximum efficiency.
  • Budget considerations: Compare prices and features to find an air purifier that meets your financial constraints without sacrificing quality.

In light of all this information, if you find yourself continually asking, “Should I get an air purifier?”, it’s likely a sign that the answer is yes.

Conclusion

In conclusion, air purifiers can significantly enhance your indoor air quality, leading to improved health and well-being, especially for those suffering from allergies or asthma. With increasing awareness of the dangers of indoor air pollution, the question “Should I get an air purifier?” merits serious consideration. By weighing the benefits, understanding how they operate, and recognizing one’s health needs, purchasing an air purifier can be a proactive step toward a healthier home environment. As awareness continues to grow, so does the importance of clean air in maintaining our overall health, making the investment in an air purifier a compelling option for many.