Addressing Iron Stains on Clothes: Causes and Removal

Understanding Iron Stains

What Are Iron Stains?

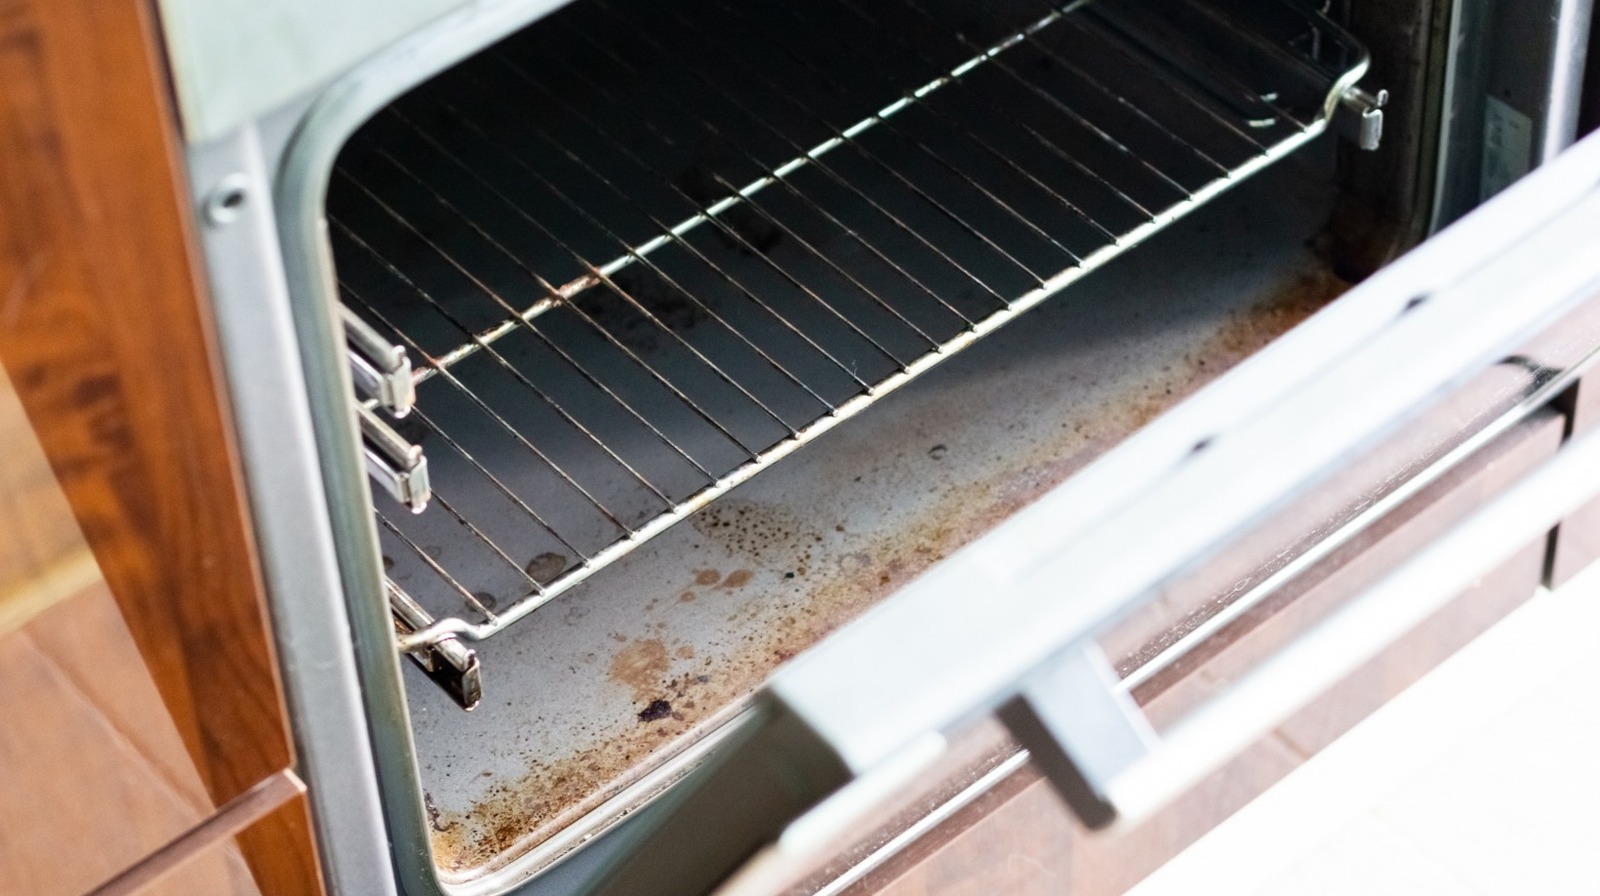
Iron stains on clothes can be one of the most frustrating laundry challenges. These unsightly marks usually appear as brown or rust-colored spots on fabrics. Understanding what iron stains are and why they occur is crucial for effective prevention and treatment. Iron stains primarily occur when fabrics come into contact with iron particles or rust. These particles often oxidize upon exposure to air and water, leading to stubborn stains. Several factors contribute to the formation of iron stains, including hard water, rusty pipes, and even certain detergents.

Hard water, which contains high concentrations of dissolved minerals like iron, is a common culprit. When clothes are washed in hard water, iron particles can settle into the fabric, especially when heated during ironing. Rusty ironing boards and irons can also transfer iron particles to clothing. Even seemingly clean water sources can have iron contaminants due to corrosion in metal pipes. Additionally, some laundry detergents may contain bleaching agents and other chemicals that can react with iron particles, causing them to oxidize and form stains.

Understanding the mechanisms behind iron stains allows for a more targeted approach to both prevention and removal. Knowing the root causes helps in identifying potential sources of contamination and addressing them effectively. Furthermore, understanding the oxidation process can aid in selecting appropriate cleaning agents that can neutralize iron particles before they form permanent stains.Iron Stains on Clothes

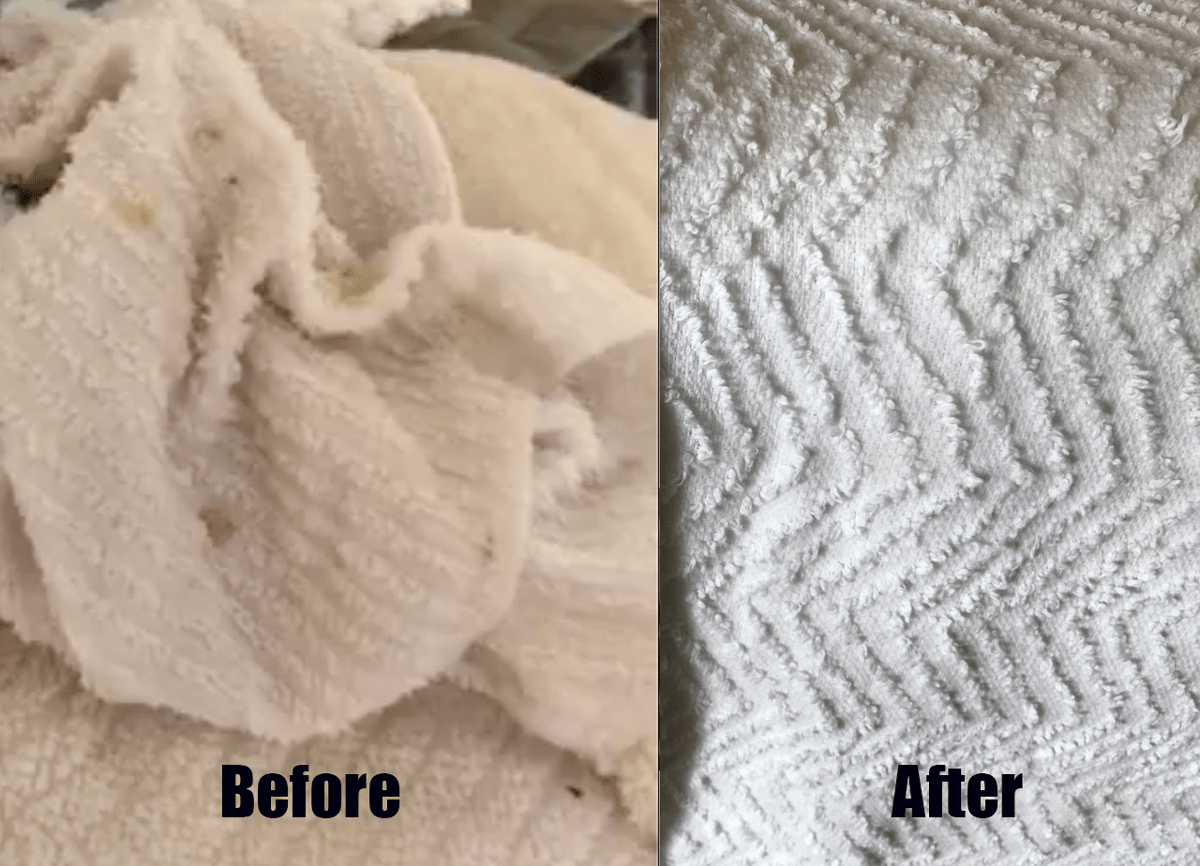
Types of Iron Stains

Different types of iron stains require varied approaches for effective treatment. Recognizing the specific type of stain helps tailor a more targeted cleaning strategy. Generally, iron stains fall into three categories: rust spots, iron marks, and overall yellowing of fabrics.

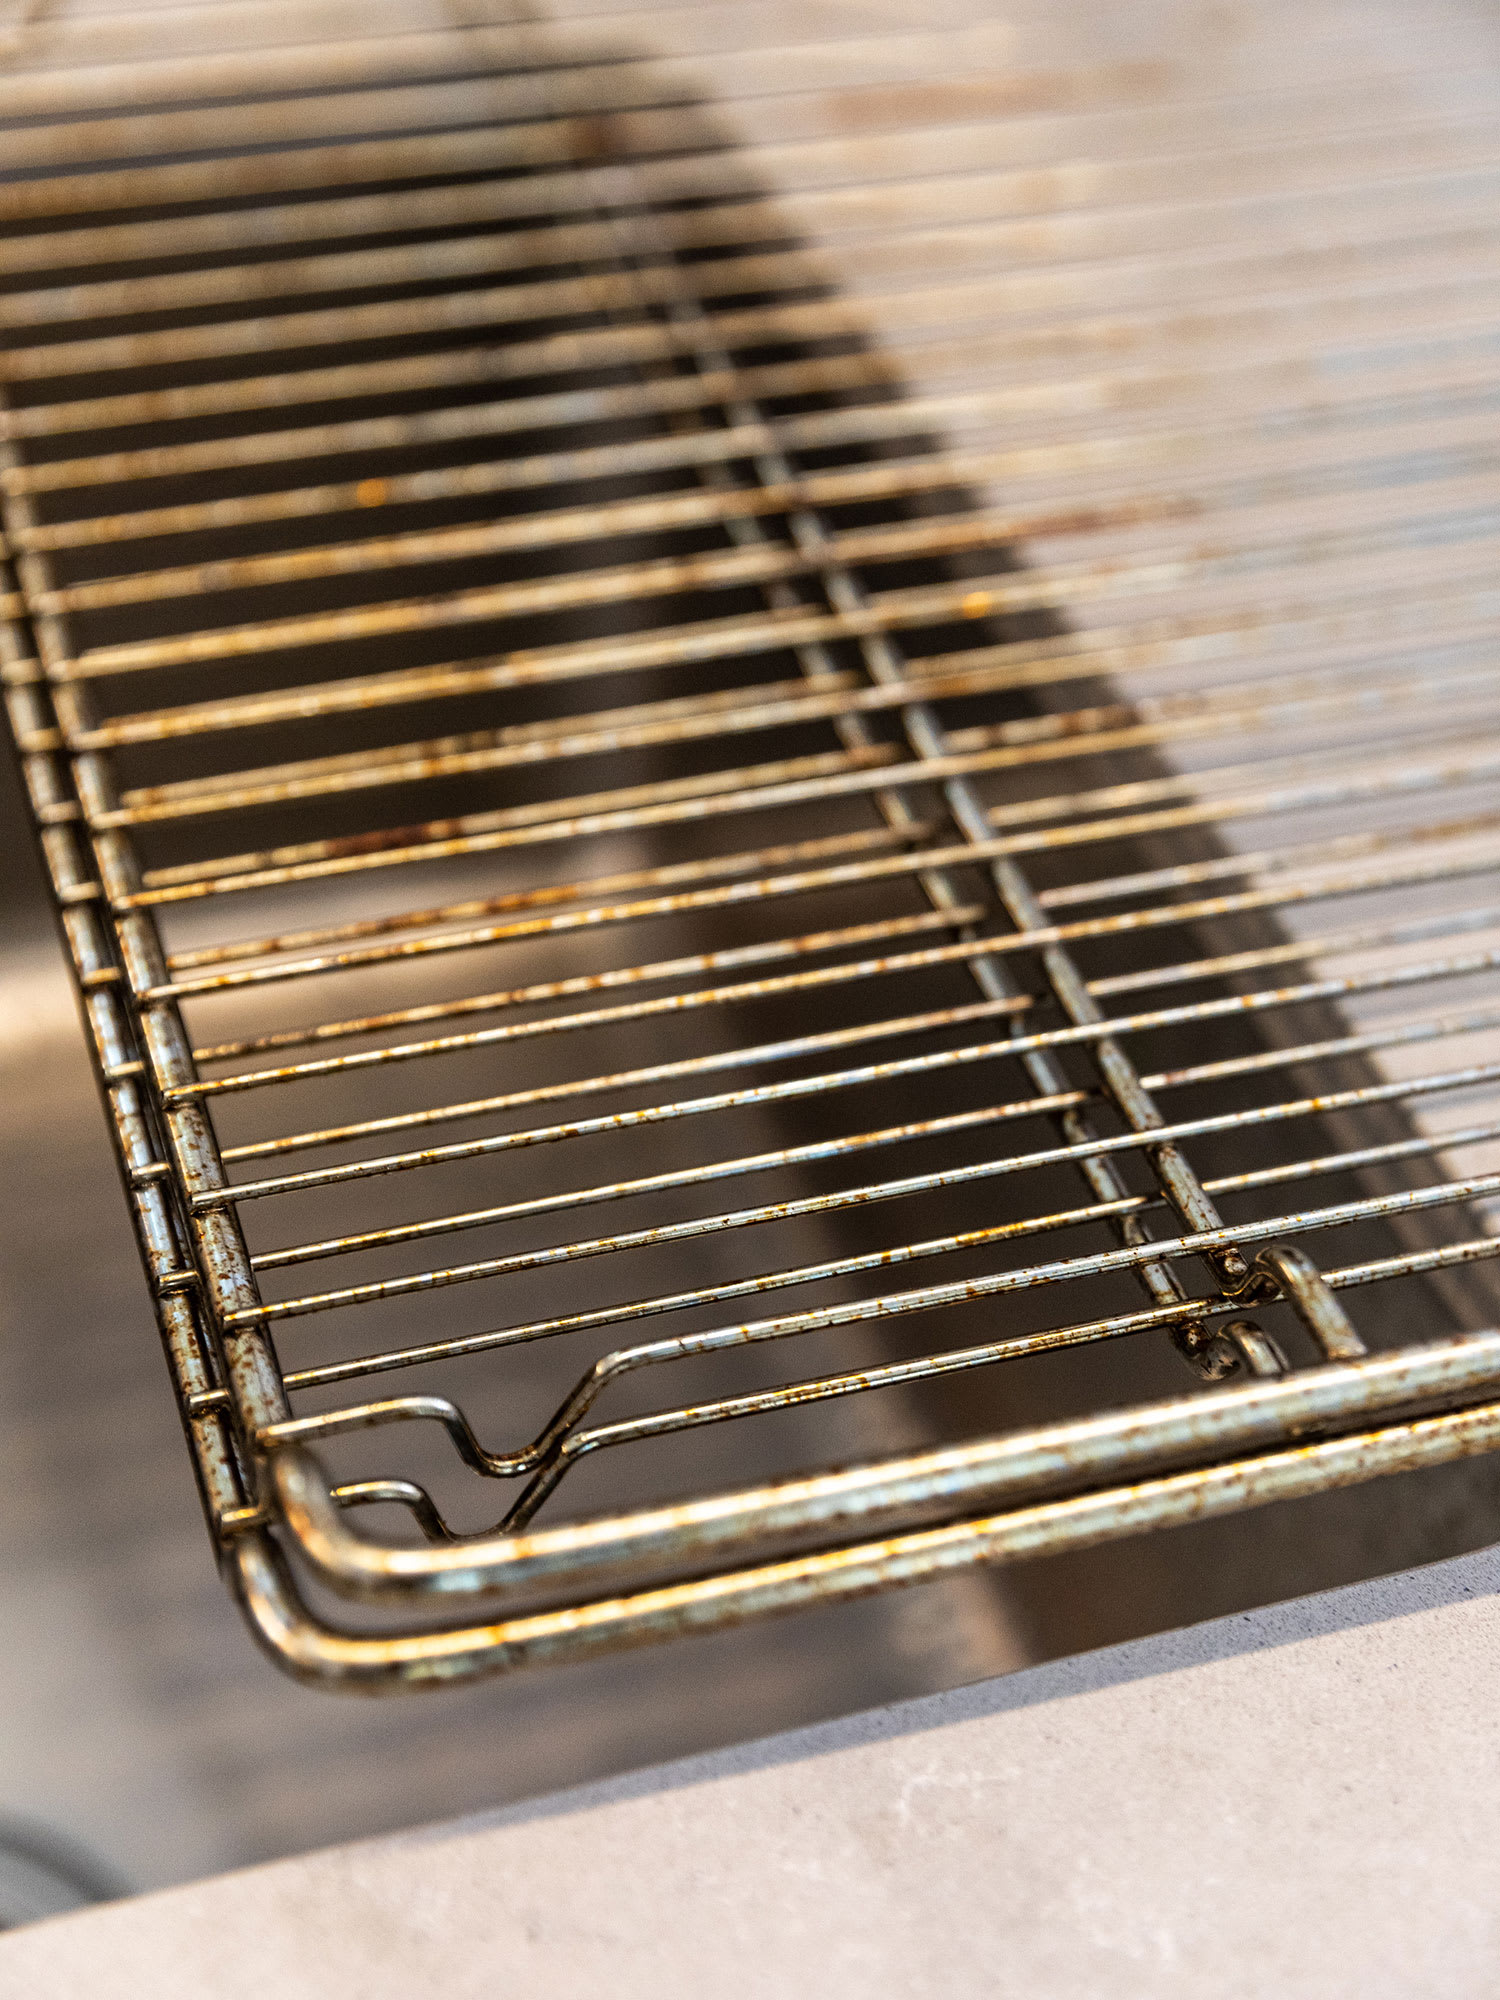
Rust spots are small brown or reddish stains, typically appearing as dots or specks on the fabric. These spots are usually the result of direct contact with rusted metal objects or surfaces. Iron marks, on the other hand, are larger, more pronounced stains that often follow the shape of an iron. These marks can occur when a rusty iron is used on the fabric, transferring rust particles in the process. Lastly, yellowing is a more diffuse form of staining that affects the entire fabric or large sections of it. This yellowing can result from prolonged exposure to iron in the water supply, causing a gradual accumulation of iron particles in the fabric.

Knowing these types also helps in selecting the right cleaning agents. For instance, rust spots might be most effectively treated with acidic solutions like lemon juice or vinegar, which can help dissolve rust particles. Iron marks might require a more abrasive approach, such as a paste made from baking soda and water. Yellowing might call for a more holistic treatment like soaking in a specialized iron-removing solution to lift the iron particles embedded in the fabric.

Understanding the types of iron stains present can significantly impact the effectiveness of the cleaning process. It allows for a more nuanced approach to removing stains and preventing future occurrences.

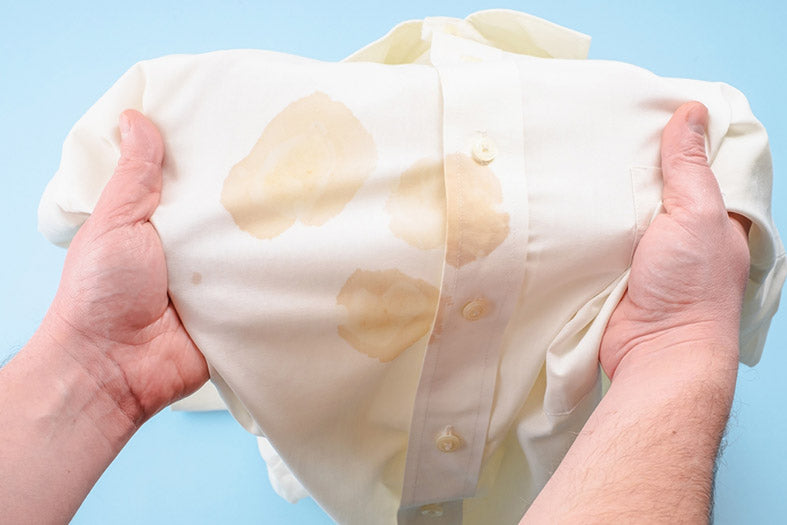
Preventing Iron Stains

Proper Maintenance of Irons

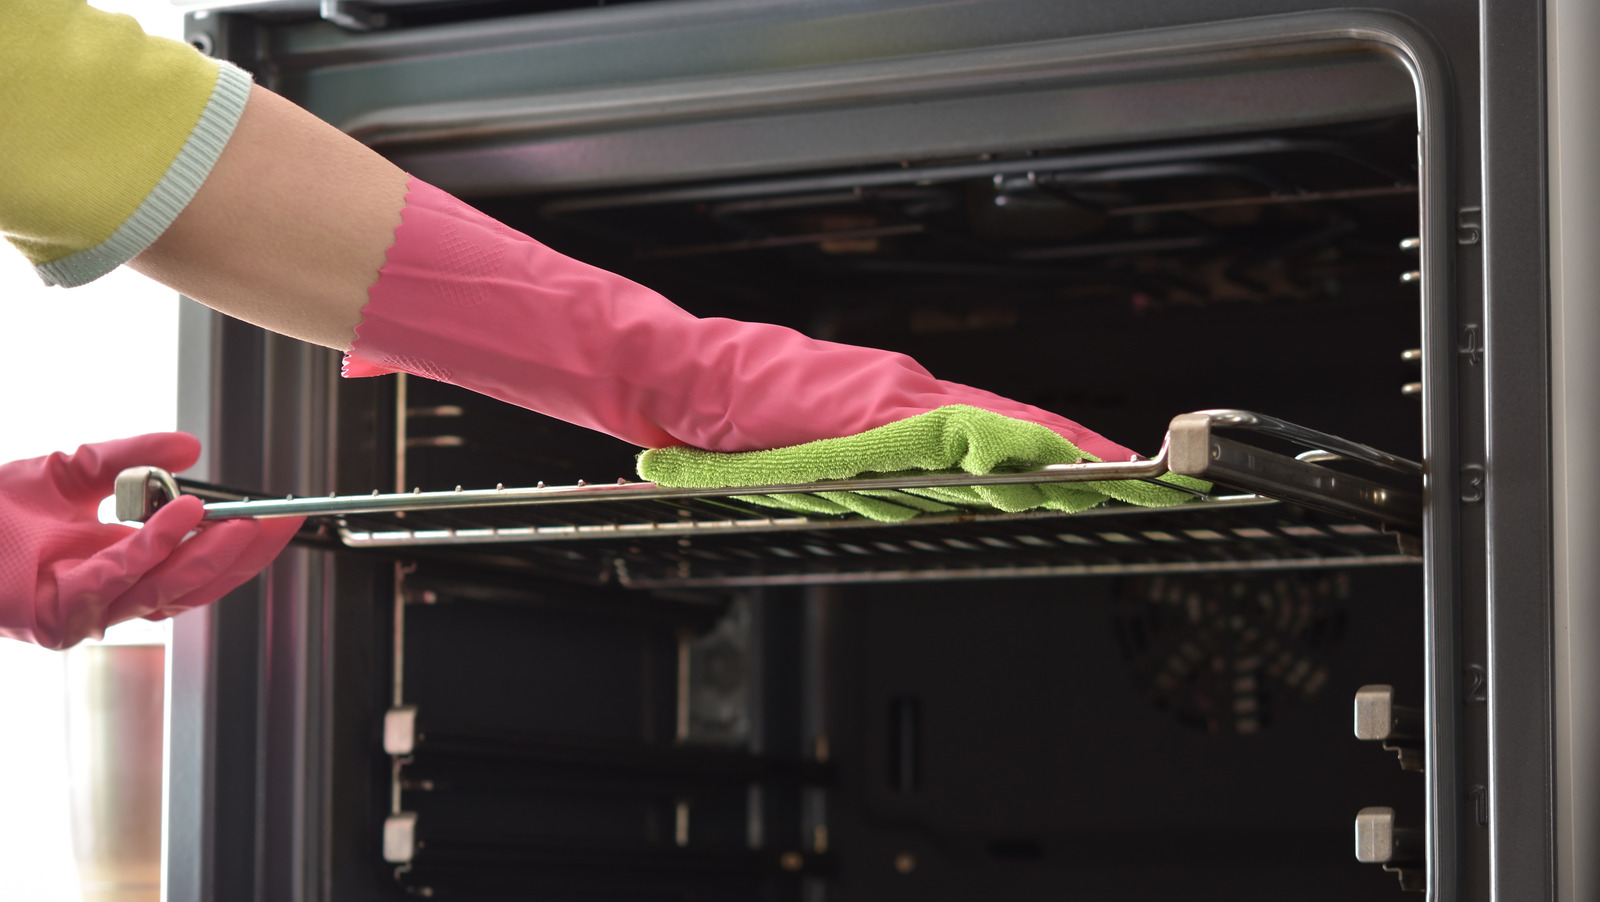
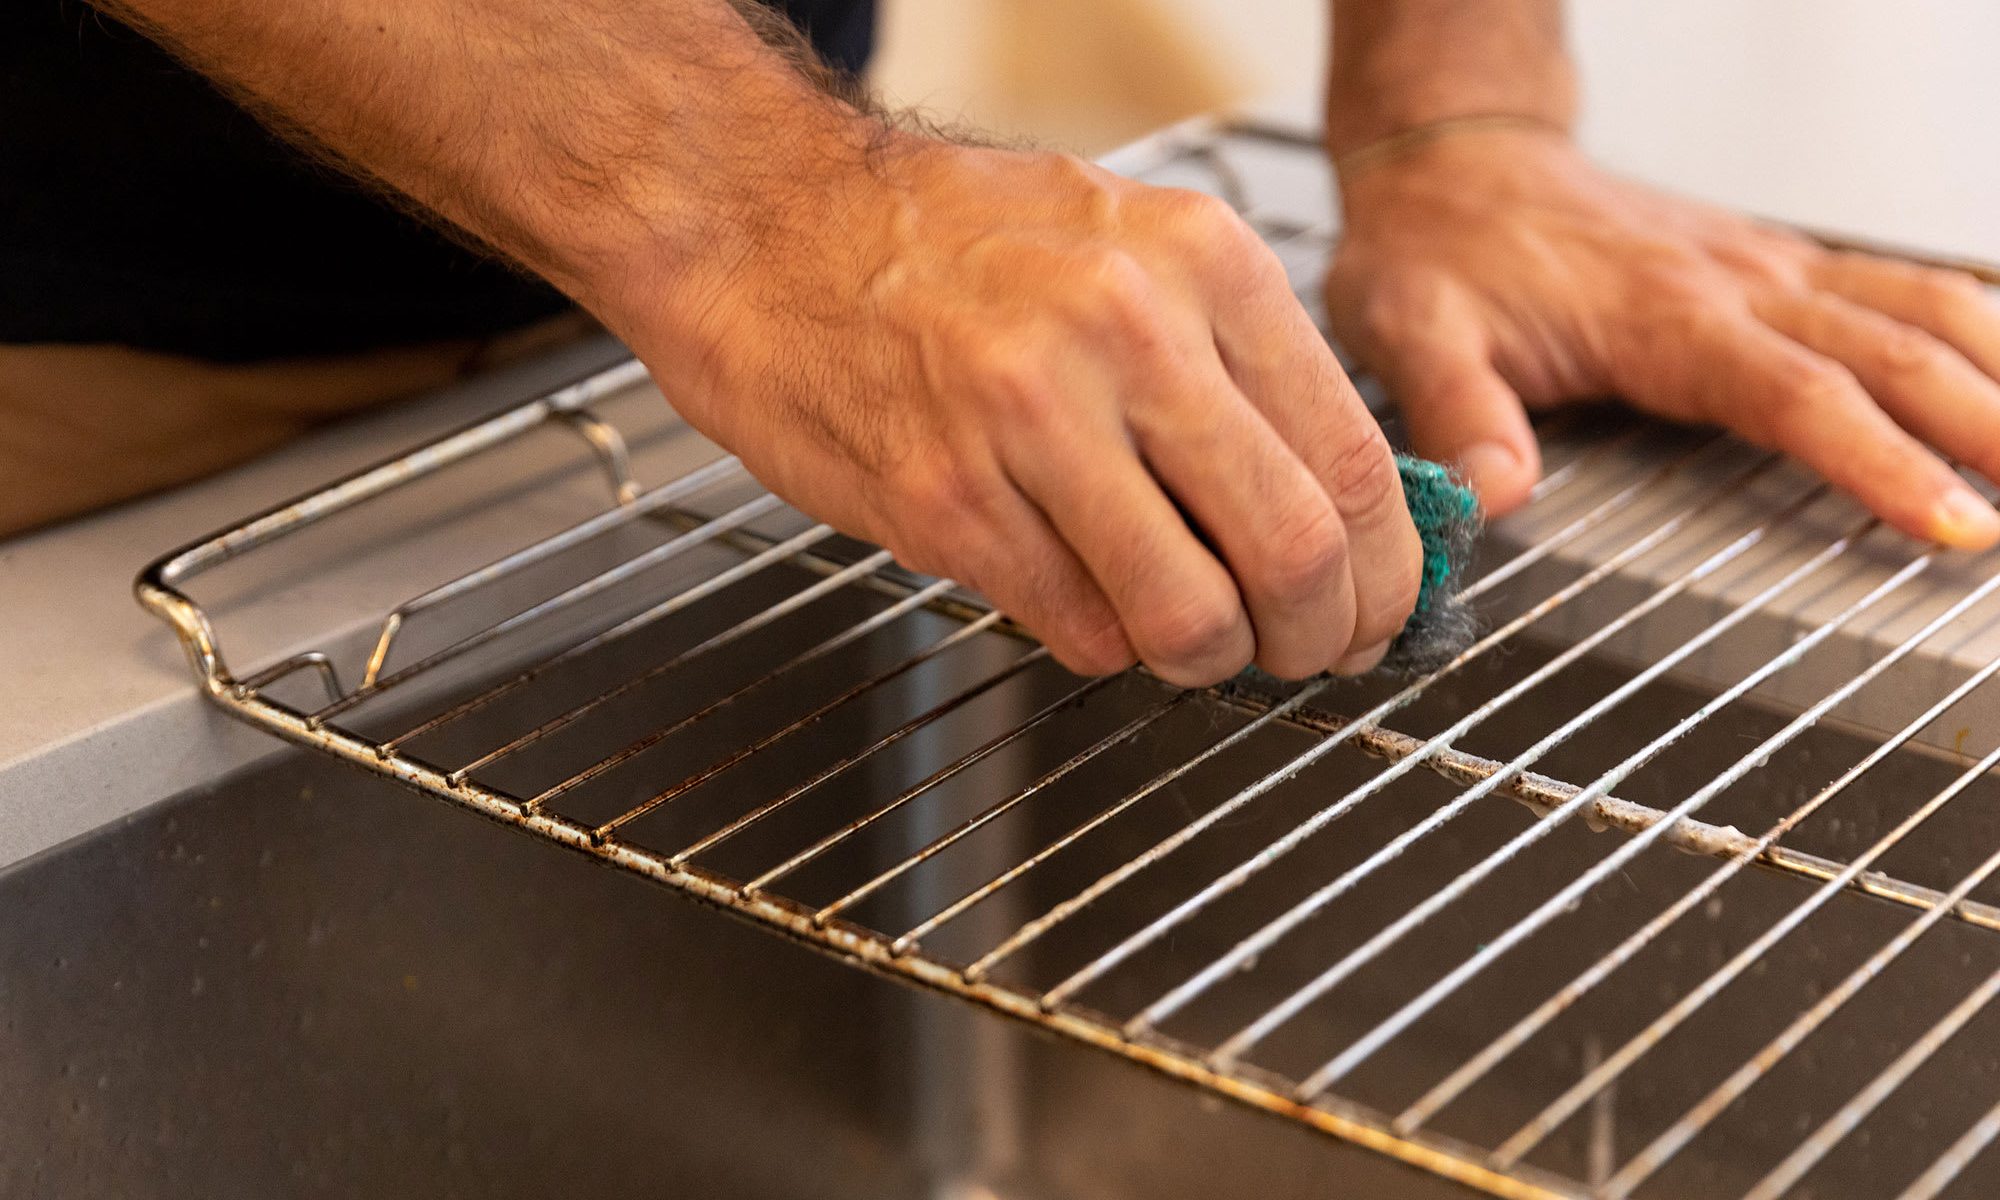
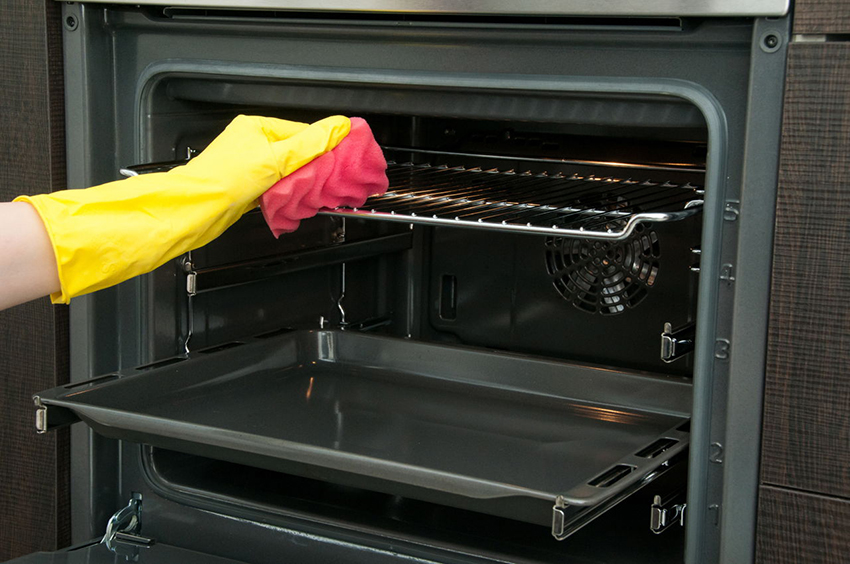
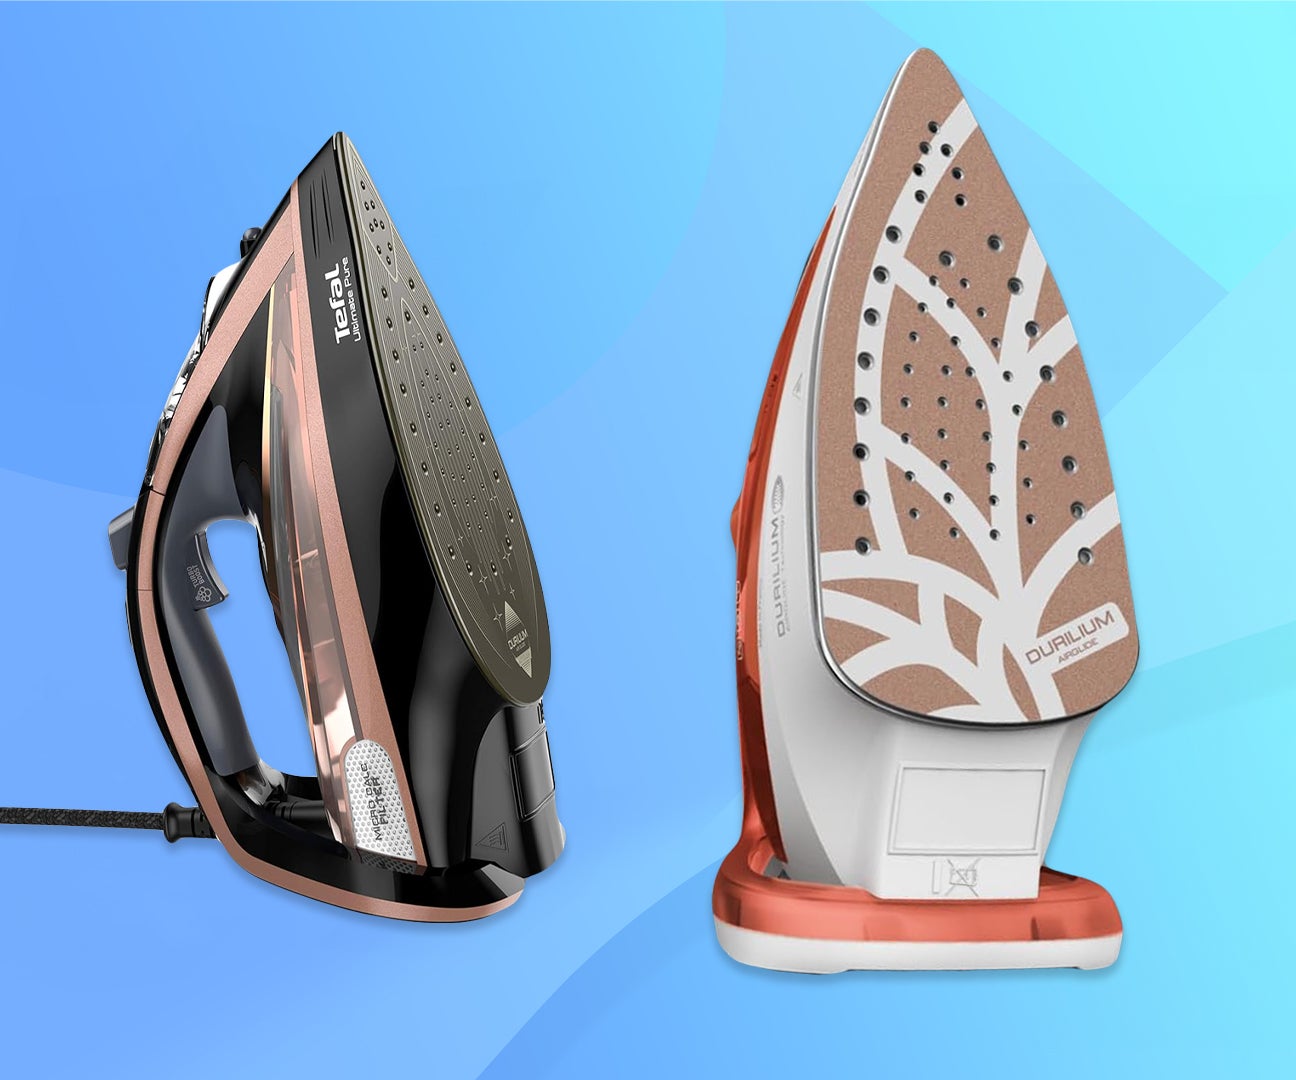
Good maintenance habits can go a long way toward preventing iron stains on clothes. Regular care and cleaning of irons are essential to avoid rusty marks and other related stains. Firstly, always make sure the iron’s soleplate is clean and free from rust. You can do this by wiping it down with a damp cloth and a bit of mild detergent. If you notice rust spots on the soleplate, use a mixture of baking soda and water to gently scrub them away.

Secondly, never leave water in the iron’s reservoir if it’s not in use. Standing water can lead to mineral buildup and eventually rust, which can transfer onto clothes during ironing. It’s advisable to use distilled water instead of tap water, as distilled water contains fewer minerals that could contribute to rust formation. Make it a point to empty the reservoir and allow the iron to dry thoroughly after each use.

Additionally, check the ironing board cover for signs of rust or wear and tear. A rusty ironing board can easily transfer particles onto clothes, leading to stains. Replace the ironing board cover if you notice any signs of rust or significant wear. Proper storage of the iron is also crucial; keep it in a dry, cool place to avoid rust formation due to moisture.

By adhering to these preventive measures, you can significantly reduce the risk of iron stains on clothes. Regular maintenance not only helps in preventing stains but also extends the lifespan of your iron, making it a worthwhile investment in the long run.

Selecting Iron-Free Detergents

Choosing the right detergent can make a significant difference in preventing iron stains on clothes. Not all detergents are created equal, and some can contribute to the problem. Detergents containing iron compounds or bleaching agents can react with iron particles in hard water, causing them to oxidize and form stains. Therefore, it’s essential to opt for iron-free detergents designed to work well with hard water.

Iron-free detergents are formulated to minimize the risk of iron stains. These detergents often contain water-softening agents that counteract the effects of hard water, preventing iron particles from settling into the fabric. They also avoid using chemicals that can react with iron, reducing the likelihood of stain formation. Look for detergents specifically labeled as “iron-free” or those designed for use in hard water conditions.

Moreover, using a water conditioner can further help. Adding a water conditioner to your laundry routine neutralizes the minerals in hard water, making detergents more effective and preventing iron particles from causing stains. Some water conditioners come as standalone products, while others are additives that can be mixed with your regular detergent.

Lastly, consider using a fabric softener that is compatible with iron-free detergents. Fabric softeners can add an extra layer of protection against iron stains by helping to reduce mineral buildup in the fabric. Always read the labels to ensure that the softener and detergent can be used together without causing adverse reactions.

By selecting the right iron-free detergents and incorporating water conditioners and compatible fabric softeners, you can effectively prevent iron stains on clothes. This proactive approach ensures that your laundry routine is both efficient and protective.Iron Stains on Clothes

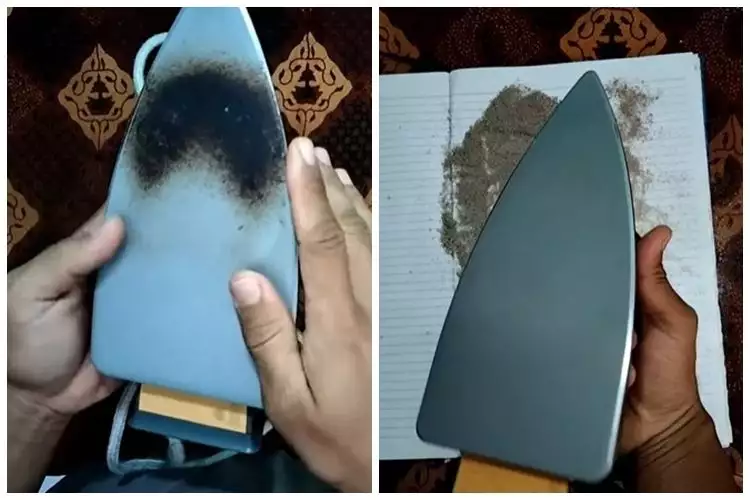
Removing Iron Stains

Home Remedies

When it comes to removing iron stains, several home remedies can be highly effective. These readily available solutions can tackle various types of stains, restoring your clothes to their original condition. One of the most popular remedies is lemon juice and salt. Simply squeeze fresh lemon juice onto the stain and sprinkle salt over it. Let it sit for about 30 minutes, then gently scrub the area before rinsing with cold water. This method leverages the acidic nature of lemon juice and the abrasiveness of salt to break down rust particles.

Another effective home remedy is a paste made from baking soda and water. Apply the paste to the stained area and gently scrub with a soft brush or cloth. Allow it to sit for 15-20 minutes before rinsing thoroughly with cold water. Baking soda’s mild abrasiveness helps lift iron particles from the fabric. For more stubborn stains, consider using white vinegar. Soak a clean cloth in white vinegar and dab it onto the stain, letting it sit for 10-15 minutes before rinsing. Vinegar’s acidic properties can dissolve rust particles, making them easier to remove.

Hydrogen peroxide combined with cream of tartar can also work wonders. Create a paste using these two ingredients and apply it to the stain. Let it sit for about 30 minutes, then rinse thoroughly. Hydrogen peroxide’s bleaching properties, combined with the mild abrasiveness of cream of tartar, help break down and lift stubborn stains.

These home remedies provide practical solutions for removing iron stains without the need for specialized cleaning agents. By utilizing readily available household items, you can effectively tackle iron stains and restore the appearance of your clothes.Iron Stains on Clothes

Commercial Solutions

While home remedies are often effective for many iron stains, some situations may require commercial solutions. Professional cleaning products are designed to tackle tougher stains, offering a more specialized approach. For instance, there are commercial rust removers specifically formulated for fabrics. These products contain powerful ingredients that break down and lift iron particles from the fabric. When using such products, always follow the manufacturer’s instructions to avoid damaging the fabric.

Another commercial solution is the use of fabric-safe rust removers. These products are gentle on fabrics but tough on rust stains. They work by penetrating the fabric and targeting the iron particles, effectively breaking them down. Fabric-safe rust removers are an excellent choice for delicate fabrics that cannot withstand the abrasiveness of home remedies.

Dry cleaning is another viable option for removing iron stains, especially from delicate or heavily stained garments. Professional dry cleaners use specialized solvents and techniques that are highly effective at removing stubborn stains without damaging the fabric. If you’re dealing with a particularly stubborn stain or a valuable garment, dry cleaning can be a worthwhile investment.

Additionally, some laundry services offer professional stain removal treatments. These services are equipped with advanced tools and cleaning agents that target specific types of stains, including iron. Professional stain removal services provide a convenient and effective solution for tackling tough stains that resist other treatments.

By considering commercial solutions, you can effectively address even the most stubborn iron stains. These products and services offer specialized approaches that ensure your garments are restored to their original condition, making them a valuable addition to your stain-removal toolkit.

Conclusion

Iron stains on clothes can be a frustrating and persistent issue, but understanding their causes, prevention methods, and removal techniques offers practical solutions. By recognizing the different types of iron stains and the factors that contribute to their formation, individuals can take proactive measures to prevent and treat these marks. Proper maintenance of irons, selecting iron-free detergents, and incorporating water conditioners into the laundry routine are effective strategies for preventing iron stains.

When stains do occur, readily available home remedies such as lemon juice and salt, baking soda paste, and vinegar can be highly effective. For more stubborn stains, commercial solutions like fabric-safe rust removers and professional cleaning services provide targeted approaches that ensure the best results. By combining prevention and effective treatment methods, individuals can maintain stain-free clothes and ensure their garments remain in pristine condition.

Understanding and addressing iron stains on clothes leads to a more effective and efficient laundry routine. Employing both preventive measures and appropriate treatment techniques ensures that clothes are not only clean but also free from unsightly stains. By taking a proactive approach, individuals can confidently tackle iron stains and enjoy the peace of mind that comes with well-maintained garments.

How to clean oven racks with ammonia?

clean oven racks with ammonia

Introduction:

Cleaning oven racks can be a laborious and challenging task, with burnt-on grease and grime often proving difficult to remove. Fortunately, there is a simple and effective solution – ammonia. In this article, we will explore how to clean oven racks with ammonia, utilizing its powerful cleaning properties to tackle even the toughest baked-on residue. From preparing the racks to the step-by-step cleaning process, join us as we discover an efficient and hassle-free method for restoring the shine and cleanliness of your oven racks.clean oven racks with ammonia

Preparing the Area: Gathering Supplies and Ensuring Safety

Before diving into the process of cleaning oven racks with ammonia, it is crucial to gather the necessary supplies and take safety precautions.

Essential Supplies: Gathering the Tools You’ll Need:

To clean your oven racks with ammonia, you’ll need the following supplies:

  • Ammonia (household-grade)
  • Large garbage bags or plastic bin
  • Rubber gloves
  • Old towels or rags
  • Scrub brush or sponge
  • Mild dish soap
  • Warm water

Having these supplies on hand ensures a smooth and efficient cleaning process.clean oven racks with ammonia

Promoting Safety: Protecting Yourself and Your Environment:

When working with ammonia, it is essential to prioritize safety. Ensure proper ventilation in the area by opening windows and using fans. Avoid inhaling the fumes by wearing a mask if necessary. Additionally, protect your hands by wearing rubber gloves throughout the entire cleaning process. By taking these safety measures, you can ensure a safe and comfortable cleaning experience.

Soak and Clean: Step-by-Step Process with Ammonia

Cleaning oven racks with ammonia involves a straightforward step-by-step process, beginning with soaking and followed by a thorough cleaning.

Soaking the Oven Racks: Preparing the Ammonia Solution:

  1. Place the oven racks in a large garbage bag or a plastic bin suitable for soaking.
  2. Pour about 1/2 cup of ammonia directly onto each oven rack.
  3. Seal the garbage bag or cover the bin with a lid to avoid leakage.
  4. Leave the racks to soak for at least 6-8 hours or overnight to allow the ammonia to break down the baked-on residue.

Scrubbing Away Grime: Cleaning the Oven Racks:

  1. After the soaking period, carefully remove the oven racks from the bag or bin.
  2. Rinse the racks thoroughly under running water to wash away loose debris and excess ammonia.
  3. Mix warm water with mild dish soap in a sink or basin.
  4. Using a scrub brush or sponge, gently scrub the racks to remove any remaining grime or residue.
  5. Rinse the racks once more under clean water to ensure all soap and grime are removed.
  6. Remove excess water by patting the racks with old towels or rags.
  7. Allow the racks to air dry completely before reinserting them into the oven.clean oven racks with ammonia

Aftercare: Maintaining Clean Oven Racks

Once you’ve successfully cleaned your oven racks with ammonia, it’s essential to maintain their cleanliness through regular maintenance and preventive measures.

Regular Maintenance: Incorporating Easy Cleaning Habits:

To keep your oven racks clean and reduce the need for heavy-duty cleaning in the future, consider incorporating the following habits:

  • Wipe down racks regularly with a damp cloth after each use.
  • Use a baking soda paste to tackle minor stains or residue.
  • Apply a layer of aluminum foil to the racks before using the oven, preventing direct contact with spills or drips.

Prevention Measures: Using Oven Racks Safely:

To prevent excessive buildup and make future cleaning easier, consider the following measures:

  • Use baking sheets or aluminum foil when cooking to prevent spills and drips on the racks.
  • Avoid placing oven racks in the dishwasher, as high temperatures and harsh detergent can damage them.
  • Follow the manufacturer’s instructions for cleaning and care of your specific oven model.clean oven racks with ammonia

Exploring the Benefits of Ammonia for Oven Rack Cleaning

Ammonia offers several notable benefits when it comes to cleaning oven racks, making it an ideal choice for tackling grease and grime.

Effective Grease and Grime Removal:

Grease and grime are common culprits that accumulate on oven racks over time. Ammonia’s powerful properties help break down and dissolve these stubborn substances, making them easier to remove. The alkaline nature of ammonia allows it to efficiently cut through grease, ensuring that your oven racks are thoroughly cleaned and restored to their optimal condition.

Cost-Effective and Readily Available Solution:

Ammonia is a cost-effective cleaning solution that is readily available at most grocery stores or pharmacies. It offers an affordable alternative to specialized oven rack cleaners or professional cleaning services. With just a small amount of ammonia, you can effectively clean multiple oven racks, making it a budget-friendly choice for maintaining the cleanliness of your oven and its accessories.

Safety Precautions and Proper Handling of Ammonia

While ammonia is an excellent cleaning agent, it is important to take proper safety precautions when handling it.

Proper Ventilation: Reducing Fumes and Inhalation Risks: Ammonia emits strong fumes that can be irritating and potentially harmful when inhaled in large quantities. To minimize the risk, always ensure proper ventilation in the area where you are using ammonia. Open windows, use fans, or choose a well-ventilated space to allow for the dissipation of fumes. If you experience any discomfort or respiratory issues while using ammonia, discontinue use immediately and seek fresh air.

Safe Disposal: Handling Ammonia Spent Solution:

After soaking the oven racks in ammonia, it is important to handle and dispose of the spent solution properly. Avoid pouring it down the sink or drain, as it can harm the environment and potentially damage plumbing systems. Instead, follow local guidelines for hazardous waste disposal, or contact your municipal waste management facility for specific instructions on how to dispose of ammonia properly and responsibly.

H2: Alternative Cleaning Methods:

Exploring Non-Ammonia Options H3: Baking Soda and Vinegar: Natural Cleaning Powerhouses H3: Specialty Oven Cleaners: Targeted Solutions for Stubborn Stains

While ammonia is an effective cleaning agent, there are alternative methods for cleaning oven racks that do not involve its use.

Conclusion: Cleaning oven racks can be a daunting task, but with the power of ammonia and the right approach, it no longer needs to be a chore. By preparing the area, soaking the oven racks with an ammonia solution, and utilizing the scrubbing technique, you can restore your racks to their former clean and shiny state. Remember to prioritize safety and perform the cleaning process in a well-ventilated environment, using proper protective gear. Lastly, maintaining clean oven racks through regular maintenance and prevention measures will help keep them in pristine condition for years to come. Say goodbye to tough stains and hello to gleaming oven racks with the efficient and straightforward process of cleaning with ammonia.

Comprehensive Guide to Cleaning Your Water Dispenser

Cleaning Your Water Dispenser

In our fast-paced, technology-driven world, the humble water dispenser has become an indispensable fixture in homes, offices, and various public spaces. These convenient appliances provide a reliable and readily available source of clean, refreshing water, catering to our daily hydration needs. However, as with any frequently used equipment, water dispensers require regular maintenance and cleaning to ensure their optimal performance and to safeguard the purity of the water they provide.

Cleaning Your Water Dispenser

The Importance of Cleaning Your Water Dispenser

Water dispensers, whether they are freestanding units or integrated into larger appliances, can become breeding grounds for various contaminants, including bacteria, mold, and mineral buildup, if not properly maintained. Neglecting the cleaning and sanitization of these devices can not only compromise the taste and quality of the water but also pose potential health risks to those who consume it.

Preserving Water Quality and Purity

One of the primary reasons for regularly cleaning your water dispenser is to maintain the integrity of the water it provides. As water circulates through the dispenser’s internal components, it can pick up impurities, leading to a shift in taste, odor, and potentially the introduction of harmful microorganisms.

Removing Mineral Deposits and Buildup

Over time, the water flowing through the dispenser can leave behind mineral deposits and scale buildup, which can not only impair the device’s functionality but also alter the taste and quality of the water.

Eliminating Bacterial Contamination

Stagnant water and moist environments within the dispenser can create an ideal breeding ground for bacteria, potentially introducing harmful pathogens into the water supply.

Ensuring Optimal Appliance Performance

Proper cleaning and maintenance of your water dispenser can also contribute to the longevity and efficient operation of the appliance itself.

Preventing Malfunctions and Breakdowns

Neglecting the regular cleaning of the dispenser’s internal components can lead to mechanical issues, such as clogged pipes, faulty pumps, or even complete system failures, ultimately reducing the lifespan of the appliance.

Improving Energy Efficiency

A well-maintained water dispenser, free from mineral buildup and contaminants, can operate more efficiently, potentially reducing energy consumption and contributing to cost savings over time.

Promoting a Healthier and More Hygienic Environment

Beyond the benefits to the water quality and appliance performance, regular cleaning of your water dispenser can also have a positive impact on the overall health and hygiene of your living or work environment.

Minimizing the Spread of Illnesses

By eliminating potential sources of bacterial growth and contamination, a properly cleaned water dispenser can help reduce the risk of waterborne illnesses and the spread of infectious diseases within your household or workplace.

Enhancing the Overall Aesthetic Appeal

A clean, well-maintained water dispenser can also contribute to a more visually appealing and inviting environment, creating a sense of cleanliness and attention to detail that can be appreciated by all who use the appliance.

Developing a Comprehensive Cleaning Routine

Establishing a comprehensive cleaning routine for your water dispenser is crucial to ensure its continued performance and the purity of the water it provides. This routine should encompass both regular maintenance tasks and periodic deep-cleaning procedures to address more stubborn issues effectively.Cleaning Your Water Dispenser

Establishing a Regular Maintenance Schedule

Implementing a consistent, routine cleaning schedule is the foundation of maintaining a well-functioning and hygienic water dispenser.

Determining the Appropriate Cleaning Frequency

The frequency of cleaning will largely depend on the usage and environmental factors surrounding your water dispenser. As a general guideline, most experts recommend cleaning the dispenser at least once a month, with more frequent cleanings for high-traffic or heavily used units.

Incorporating Routine Cleaning Tasks

Regular maintenance should include simple tasks such as wiping down the exterior surfaces, flushing the water lines, and replacing any removable components, such as drip trays or water filters, according to the manufacturer’s recommendations.

Performing Periodic Deep Cleanings

In addition to the regular maintenance tasks, it’s essential to conduct more thorough, in-depth cleanings of your water dispenser at regular intervals to address more complex issues and ensure a comprehensive level of sanitization.

Disassembling the Dispenser for a Thorough Clean

Periodic deep cleanings may involve the complete disassembly of the water dispenser, allowing access to all internal components for a more rigorous and targeted cleaning process.

Utilizing Specialized Cleaning Solutions and Techniques

Depending on the specific make and model of your water dispenser, you may need to employ specialized cleaning solutions, such as vinegar-based or sanitizer-based formulas, along with specialized tools or techniques to effectively remove stubborn mineral deposits, mold, or other contaminants.

Addressing Specific Cleaning Challenges

While a consistent cleaning routine can help prevent many issues, water dispensers may occasionally encounter more complex problems that require targeted troubleshooting and remediation.Cleaning Your Water Dispenser

Dealing with Persistent Mineral Buildup

For water dispensers located in areas with high mineral content in the water supply, the accumulation of scale and deposits may require more frequent and aggressive cleaning measures to maintain optimal performance.

Managing Mold and Bacterial Growth

In the event of mold or bacterial contamination within the water dispenser, it’s crucial to address the issue promptly and thoroughly, utilizing appropriate disinfecting agents and techniques to eliminate the problem and prevent its recurrence.

Selecting the Right Cleaning Products and Techniques

Effectively cleaning and maintaining your water dispenser requires the use of appropriate cleaning products and techniques that are safe, effective, and tailored to the specific needs of your appliance.

Choosing the Appropriate Cleaning Solutions

The selection of cleaning solutions for your water dispenser should be made with care, considering factors such as the material composition of the appliance, the nature of the contaminants, and the potential impact on the water quality.

Utilizing Approved Cleaning Agents

Opt for cleaning solutions that are specifically designed and approved for use with water dispensers, as these products have been formulated to be effective while also being safe for use with potable water systems.

Exploring Natural Cleaning Alternatives

For a more eco-friendly and potentially gentler approach, consider using natural cleaning agents, such as white vinegar or baking soda, which can be effective in addressing various cleaning challenges while minimizing the risk of introducing harmful chemicals into the water supply.

Employing Proper Cleaning Techniques

The manner in which you clean your water dispenser can significantly impact the effectiveness of the process and the overall outcome.

Adhering to Manufacturer’s Instructions

Always refer to the manufacturer’s recommendations for the specific cleaning procedures and techniques recommended for your water dispenser model, as these guidelines are tailored to the design and construction of the appliance.

Incorporating Thorough Rinsing and Drying

Ensuring that all cleaning solutions are thoroughly rinsed from the water dispenser’s internal components and that the appliance is completely dry before reassembly is crucial to prevent any lingering chemical or moisture-related issues.

Maintaining Proper Hygiene and Safety Practices

When cleaning your water dispenser, it’s essential to prioritize personal and environmental safety to minimize the risk of exposure to potential contaminants or hazardous substances.

Using Appropriate Protective Equipment

Wear gloves, eye protection, and other personal protective equipment (PPE) as recommended to safeguard yourself during the cleaning process and to prevent the spread of any identified contaminants.

Disposing of Waste Responsibly

Properly dispose of any used cleaning solutions, filters, or other waste generated during the cleaning process in accordance with local environmental regulations to minimize the impact on the surrounding ecosystem.

Conclusion: Embracing the Importance of Water Dispenser Cleaning

Maintaining a clean and well-functioning water dispenser is not only crucial for ensuring the purity and quality of the water it provides but also plays a vital role in the overall health and hygiene of your living or work environment. By establishing a comprehensive cleaning routine, selecting the appropriate cleaning products and techniques, and prioritizing safety and environmental considerations, you can take proactive steps to safeguard the integrity of your water dispenser and contribute to the well-being of those who rely on its refreshing offerings.

As you embark on your journey of water dispenser maintenance, remember that the time and effort invested in this task will pay dividends in the long run. Not only will you enjoy the benefits of clean, great-tasting water, but you’ll also be contributing to the longevity and efficiency of your appliance, potentially saving on costly repairs or replacements down the line.

Embrace the importance of water dispenser cleaning and make it an integral part of your regular household or workplace routines. By doing so, you’ll not only be promoting a healthier and more hygienic environment but also demonstrating your commitment to providing your family, colleagues, or customers with the refreshing, pure water they deserve. So, let the act of cleaning your water dispenser be a testament to your dedication to maintaining the highest standards of quality and care in your surroundings.

Are Smart Beds Worth the Investment?

smart beds

In the ever-evolving landscape of home technology, the concept of the “smart bed” has emerged as a tantalizing solution for those seeking to optimize their sleep and overall well-being. These advanced mattresses, equipped with a myriad of cutting-edge features, promise to transform the way we experience rest and recovery. But are smart beds truly worth the investment, or are they merely a passing fad in the world of home automation?

In this comprehensive guide, we will delve into the world of smart beds, exploring their key features, the potential benefits they offer, and the critical factors to consider when deciding whether a smart bed is the right choice for your home. Whether you’re a tech-savvy individual in search of the latest sleep innovations or a skeptical consumer seeking a practical and well-informed perspective, this article will provide you with the insights and guidance to make an informed decision about the value of smart beds.

Prepare to unlock the secrets of the smart bed revolution and determine if these cutting-edge sleep solutions are worth the investment.

smart beds

Understanding the Smart Bed Landscape

Before diving into the specific features and benefits of smart beds, it’s essential to gain a broad understanding of the smart bed landscape and the technologies that define this emerging category of home furnishings.smart beds

The Evolution of Smart Bed Technology

The smart bed concept has undergone a remarkable transformation, with advancements in sensors, connectivity, and data analytics driving the development of increasingly sophisticated sleep solutions.

Tracking and Monitoring Capabilities

Smart beds often incorporate advanced sensors that can track various sleep metrics, such as heart rate, respiratory patterns, and movement, to provide comprehensive data on sleep quality.

Customizable Comfort and Support

Many smart beds offer the ability to adjust firmness, temperature, and even massage functions to provide a personalized and optimal sleep experience.

The Competitive Landscape of Smart Beds

As the demand for smart home solutions continues to grow, the smart bed market has become increasingly competitive, with a diverse array of manufacturers and brands vying for consumer attention.smart beds

Established Players and Newcomers

The smart bed landscape features both well-known mattress brands and emerging tech-focused companies, each offering their unique take on the smart bed concept.

Varying Price Points and Feature Sets

Smart beds can range in price from relatively affordable options to high-end, feature-rich models, catering to a wide range of consumer budgets and preferences.

Key Features and Potential Benefits of Smart Beds

Delving deeper into the world of smart beds, let’s explore the key features that define these innovative sleep solutions and the potential benefits they can offer to consumers.

Sleep Tracking and Analytics

One of the cornerstone features of smart beds is their ability to track and analyze various sleep metrics, providing users with valuable insights into their sleep patterns and quality.

Comprehensive Sleep Monitoring

Smart beds can monitor a wide range of sleep-related data, including sleep stages, restlessness, and respiratory patterns, to provide a detailed overview of sleep quality.

Personalized Sleep Recommendations

Leveraging the collected data, smart beds can offer personalized recommendations to help users improve their sleep habits and overall sleep hygiene.smart beds

Customizable Comfort and Adjustability

Smart beds empower users to fine-tune their sleeping environment, offering a level of personalization and adaptability that traditional mattresses cannot match.

Adjustable Firmness and Support

Many smart beds feature adjustable firmness levels, allowing users to find the perfect balance of comfort and support for their individual needs.

Temperature and Heating/Cooling Controls

Smart beds often incorporate temperature regulation features, enabling users to create their ideal sleep environment by adjusting heating or cooling settings.

Integration with Smart Home Ecosystems

The true power of smart beds lies in their ability to seamlessly integrate with broader smart home ecosystems, enabling users to control and optimize their sleep experience through a centralized platform.

Connectivity with Smart Devices

Smart beds can connect with a variety of smart home devices, such as voice assistants, mobile apps, and home automation systems, providing a more holistic and streamlined sleep experience.

Synergistic Integrations

By integrating with other smart home devices, smart beds can coordinate with lighting, climate control, and even home security systems to create a truly personalized and optimized sleep environment.

Evaluating the Value of Smart Beds

With a deeper understanding of the key features and potential benefits of smart beds, it’s time to critically analyze whether these high-tech sleep solutions are truly worth the investment for consumers.

Assessing the Potential Health and Wellness Benefits

One of the primary selling points of smart beds is their ability to improve sleep quality and overall wellness, but it’s essential to evaluate the real-world impact of these claims.

Improved Sleep Quality and Recovery

While the data tracking and personalized recommendations of smart beds can potentially lead to better sleep, it’s crucial to consider the individual’s specific sleep needs and challenges.

Enhanced Wellness and Productivity

The improved sleep quality and customizable comfort offered by smart beds may translate to increased energy, focus, and overall well-being, but the extent of these benefits can vary.smart beds

Considering the Long-Term Cost-Effectiveness

Smart beds often come with a premium price tag, so it’s important to weigh the upfront cost against the potential long-term benefits and cost savings.

Increased Durability and Longevity

Some smart bed manufacturers claim their products offer enhanced durability and longer lifespans, which could justify the higher initial investment.

Energy Efficiency and Utility Savings

The temperature regulation and smart home integrations of smart beds may lead to energy and utility savings, but the actual impact will depend on individual usage and environmental factors.

Evaluating the Technological Advancements and Ongoing Support

As with any high-tech product, it’s essential to consider the pace of technological advancement and the level of ongoing support provided by the manufacturer.

Staying Ahead of the Curve

Smart beds, by their very nature, are subject to rapid technological evolution, so evaluating the manufacturer’s commitment to product updates and feature enhancements is crucial.

Availability of Technical Support and Troubleshooting

Ensuring that the manufacturer offers reliable technical support and seamless troubleshooting can help mitigate any potential issues that may arise with the smart bed’s complex technology.

Conclusion: Determining if a Smart Bed is Right for You

The smart bed revolution has undoubtedly ushered in a new era of sleep technology, offering a range of features and potential benefits that cater to the needs of tech-savvy consumers. However, as with any significant investment, it’s essential to carefully weigh the pros and cons and determine whether a smart bed is truly worth the investment for your unique sleep and wellness requirements.

Through this comprehensive guide, you have gained a deeper understanding of the smart bed landscape, including the key features, potential benefits, and critical factors to consider when evaluating these high-tech sleep solutions. By assessing the real-world impact on sleep quality, health, and long-term cost-effectiveness, as well as the technological advancements and ongoing support, you can make an informed decision that aligns with your personal needs and preferences.

As you continue to explore the world of smart beds, remember to approach the decision-making process with a discerning eye and a focus on your specific sleep and wellness goals. While smart beds may offer a compelling array of features and promises, it’s crucial to carefully evaluate whether the investment aligns with your individual requirements and delivers a tangible, long-term value proposition.

Determine if a smart bed is right for you and unlock the secrets to a more personalized, data-driven, and integrated sleep experience that can truly transform your overall well-being and quality of life.

Maximizing the Lifespan of Your Refrigerator

Lifespan of Your Refrigerator

Refrigerators are an essential household appliance, serving as the backbone of our food storage and preservation. However, like any other mechanical device, refrigerators have a finite lifespan, and their performance can diminish over time if not properly maintained. Understanding the factors that contribute to a refrigerator’s longevity and taking proactive steps to care for it can help ensure your investment lasts for years to come.

In this comprehensive guide, we will delve into the intricacies of refrigerator lifespan, exploring the key components that influence its durability, the common causes of premature wear and tear, and the effective maintenance strategies that can extend its useful life. Whether you’re a new homeowner or have had the same refrigerator for decades, this article will equip you with the knowledge and practical tips to maximize the lifespan of your refrigerator and keep it running efficiently for years to come.

Lifespan of Your Refrigerator

Prepare to unlock the secrets to a long-lasting and well-performing refrigerator that will serve your household needs for years to come.

Understanding Refrigerator Lifespan

Before we dive into the strategies for extending your refrigerator’s lifespan, it’s essential to understand the factors that contribute to its overall longevity.

The Average Refrigerator Lifespan

Refrigerators, on average, have a lifespan of 10 to 15 years, though this can vary depending on a variety of factors.

Factors Affecting Refrigerator Lifespan

The age, usage, and maintenance of your refrigerator can all impact its lifespan, so it’s crucial to consider these elements when planning for its replacement.

Differences in Lifespan by Refrigerator Type

The type of refrigerator you own, such as a traditional top-freezer or a more advanced French-door model, can also influence its expected lifespan.

Common Causes of Refrigerator Failure

Knowing the leading causes of refrigerator failure can help you take proactive steps to prevent premature breakdowns and extend its useful life.

Compressor and Condenser Issues

The compressor and condenser are vital components that are susceptible to wear and tear, leading to common refrigerator problems.

Electrical and Mechanical Failures

Electrical and mechanical issues, such as faulty wiring or broken parts, can also contribute to a refrigerator’s premature demise.Lifespan of Your Refrigerator

Effective Refrigerator Maintenance Strategies

Regular maintenance and care are crucial for maximizing the lifespan of your refrigerator. By adopting a proactive approach to maintenance, you can keep your appliance running efficiently and minimize the risk of costly repairs or premature replacement.

Cleaning and Maintaining the Refrigerator Interior

Maintaining the cleanliness and organization of your refrigerator’s interior can have a significant impact on its performance and longevity.

Routine Cleaning and Defrosting

Regularly cleaning the interior and defrosting the freezer compartment can prevent the buildup of ice and debris that can impair the refrigerator’s efficiency.

Organizing and Managing Contents

Keeping your refrigerator organized and minimizing the frequency of door openings can help reduce the strain on the cooling system.

Caring for the Refrigerator Exterior

The exterior of your refrigerator is just as important as the interior when it comes to maintaining its overall condition and functionality.Lifespan of Your Refrigerator

Cleaning the Coils and Vents

Regularly cleaning the condenser coils and vents located at the back or underneath the refrigerator can improve airflow and heat dissipation.

Checking and Replacing Gaskets

Ensuring the door gaskets are in good condition and properly sealed can prevent air leaks that can compromise the refrigerator’s efficiency.

Monitoring and Adjusting Temperature Settings

Maintaining the appropriate temperature settings within your refrigerator is crucial for preserving food quality and extending the lifespan of the appliance.

Monitoring Temperature Consistency

Regularly checking the temperature in different areas of your refrigerator and making adjustments as needed can help ensure consistent cooling.

Adjusting Settings for Efficient Operation

Optimizing the temperature settings based on the refrigerator’s specific characteristics and your household’s needs can improve its energy efficiency and longevity.

Extending Refrigerator Lifespan with Proactive Care

By taking a proactive approach to refrigerator maintenance and care. You can significantly extend the lifespan of your appliance and enjoy its optimal performance for years to come.

Implementing a Preventive Maintenance Schedule

Developing and adhering to a consistent preventive maintenance schedule can help you stay ahead of potential issues and ensure your refrigerator continues to function at its best.

Establishing a Cleaning and Inspection Routine

Create a regular cleaning and inspection routine to keep your refrigerator’s internal components and exterior in top condition.

Scheduling Professional Maintenance and Tune-ups

Consider having your refrigerator professionally serviced and tuned-up at recommended intervals to identify and address any potential problems.

Addressing Issues Promptly

When problems do arise, it’s crucial to address them promptly to prevent further damage and extend the overall lifespan of your refrigerator.

Recognizing Early Warning Signs

Familiarize yourself with the common signs of refrigerator issues, such as unusual noises, temperature fluctuations, or excessive energy consumption.

Seeking Professional Repair Services

If you encounter any issues with your refrigerator. Don’t hesitate to contact a qualified repair technician to diagnose and resolve the problem.

Considering Timely Replacements

While proper maintenance can significantly extend the lifespan of your refrigerator. There may come a time when replacement is the best course of action.

Evaluating the Cost of Repairs

Carefully weigh the cost of necessary repairs against the age and expected remaining lifespan of your refrigerator to determine if replacement is the more prudent choice.Lifespan of Your Refrigerator

Selecting an Energy-Efficient Replacement

When the time comes to replace your refrigerator. Opt for an energy-efficient model that aligns with your household’s needs and can provide long-lasting performance.

Conclusion: Unlock the Secrets to a Long-Lasting Refrigerator

The refrigerator is a vital household appliance that plays a crucial role in our daily lives. Preserving the freshness and quality of our food. By understanding the factors that contribute to a refrigerator’s lifespan and implementing effective maintenance strategies. You can unlock the secrets to maximizing the longevity of your appliance and enjoying its reliable performance for years to come.

As you embark on your journey of refrigerator care and longevity. Remember to approach the process with a consistent and diligent approach. Develop and adhere to a maintenance schedule. Stay vigilant for early warning signs, and be willing to invest in professional services when necessary. By doing so, you’ll not only extend the lifespan of your refrigerator but also enjoy the peace of mind that comes with a well-functioning and reliable appliance.

Unlock the secrets to a long-lasting refrigerator and reap the benefits of a well-maintained. Energy-efficient, and durable appliance that will serve your household needs for years to come.

What were microwaves originally used for?

microwave oven

Introduction:

Microwaves have become an essential appliance in modern kitchens worldwide, revolutionizing the way we cook and reheat food. However, the origins of microwave technology lie far beyond the realm of culinary convenience. In this comprehensive article, we will explore the fascinating history of microwaves, tracing their original purpose and their journey into the heart of our homes. From military applications to microwave ovens, we will delve into the various milestones that brought this marvel of modern convenience into our daily lives.

microwave oven

The Radar Roots of Microwaves

To understand the origins of microwaves, we must first explore the world of radar technology and its vital role in laying the foundation for microwave innovation.

Development of Radar Technology:

During the early 20th century, scientists and engineers began experimenting with radar (Radio Detection and Ranging) technology. Radar used radio waves to detect the presence, position, and movement of distant objects.

World War II and the Microwave Connection:

The breakthrough in microwave technology occurred during World War II. Scientists working in the military were tasked with developing radar technology for military purposes. Through their work, they discovered that microwaves had the ability to generate heat. This observation set the stage for the development of the microwave oven.

The Emergence of the Microwave Oven

The transformation of microwaves from military applications to kitchen appliances can be attributed to a few notable individuals and significant technological advancements.

Percy Spencer and the Accidental Discovery:

In the late 1940s, Percy Spencer, an engineer at Raytheon Corporation, made a remarkable discovery. While working with a magnetron, a vacuum tube used in radar systems, he noticed that a candy bar in his pocket had melted. This led him to experiment further, and he realized that microwaves could cook food efficiently.

Early Microwave Ovens and Commercialization:

Spencer’s accidental discovery paved the way for the development of the first microwave oven. In 1947, Raytheon introduced the “Radarange,” the first commercially available microwave oven. Standing over five feet tall and weighing over 700 pounds, it was a far cry from the sleek countertop models we use today. However, it marked the beginning of a culinary revolution.

Advancements in Microwave Technology

In the decades that followed, advancements in microwave technology led to the introduction of smaller and more user-friendly models, with increased functionalities and convenience.

Miniaturization and Countertop Models:

As technology improved, engineers were able to develop more compact microwave ovens. By the 1960s and 1970s, countertop models became increasingly popular, providing a space-saving and accessible option for home cooks.

Microwave Oven Features and Functionality:

With ongoing advancements, microwave ovens evolved to offer a plethora of features and functionalities. From preset cooking programs to sensor technology, modern microwave ovens provide enhanced cooking, reheating, and defrosting capabilities. Additionally, features like turntables and multi-stage programming further enhance the convenience and usability of microwave ovens.microwave oven

Microwaves in the Modern Kitchen

Today, microwave ovens have become an indispensable part of the modern kitchen, offering unparalleled convenience, safety, and culinary creativity.

Convenience and Time-Saving Abilities:

Microwaves have revolutionized the way we cook and reheat food. With their fast heating capabilities, they provide quick meals and eliminate the need for prolonged stove or oven time.

Advancements in Safety and Energy Efficiency:

Modern microwave ovens prioritize safety with features like child safety locks and improved ventilation systems. Additionally, advancements in energy efficiency have made microwave ovens more eco-friendly, reducing their overall impact on the environment.

Culinary Creativity and Healthy Cooking:

Microwaves are no longer limited to reheating leftovers. With the advent of microwave-safe cookware and accessories, home cooks have discovered the creative potential of microwave cooking. From steaming vegetables to baking delectable treats, microwave ovens offer a range of culinary possibilities. Additionally, microwave cooking is known to retain nutrients better than other cooking methods, promoting healthier eating habits.

The Future of Microwave Technology

While microwave ovens have already transformed our kitchens and cooking habits, the future holds even more exciting possibilities for microwave technology.

Smart Microwave Ovens:

As technology continues to advance, smart capabilities are being integrated into everyday appliances, including microwave ovens. Smart microwaves can be controlled remotely via smartphones or voice-enabled devices. They can also have built-in cameras for monitoring and adjusting cooking parameters, as well as smart sensors for measuring food temperature and adjusting cooking times accordingly. These innovative features offer unprecedented convenience and precision in cooking.

Integration with Internet of Things (IoT):

Microwave ovens are poised to become an integral part of the Internet of Things (IoT) ecosystem. They can seamlessly connect with other smart home devices, enabling automation and synchronization. For instance, a smart microwave oven can communicate with a smart refrigerator to suggest recipe ideas based on the ingredients available. IoT integration opens up endless possibilities for personalized and streamlined cooking experiences.

microwave oven

Environmental Considerations:

As our society becomes more focused on sustainability, microwave oven manufacturers are incorporating environmental considerations into their designs. Energy efficiency is continuously enhanced, with microwave ovens consuming less power while maintaining optimal cooking performance. Additionally, manufacturers are exploring alternative materials and manufacturing processes to reduce environmental impact. These efforts aim to create more eco-friendly microwave ovens without compromising functionality.

Conclusion:

From their origins as crucial components of radar technology to their transformation into a kitchen staple, microwaves have come a long way. The accidental discovery by Percy Spencer and subsequent advancements in microwave technology have changed the way we approach cooking and food preparation. With their time-saving abilities, enhanced safety features, and culinary versatility, microwave ovens have found a permanent place in our modern kitchens. As we continue to embrace their convenience, it is worth remembering the fascinating journey that led to the creation of this indispensable culinary tool.

In conclusion, the journey of microwaves from their radar origins to a staple kitchen appliance has been remarkable. The accidental discovery by Percy Spencer paved the way for their entry into our homes, revolutionizing how we cook, reheat, and defrost food. As technology advances, microwave ovens continue to evolve, offering enhanced features, convenience, and precision. Smart capabilities, integration with IoT, and environmental considerations are shaping the future of microwave technology. With these advancements, microwave ovens will continue to play a central role in our kitchens, making cooking more efficient, enjoyable, and environmentally-friendly. As we look ahead, we can anticipate microwave ovens to become even more indispensable, pushing the boundaries of culinary convenience and satisfying our evolving cooking needs.

Decoding the Waterdrop Filter Blue Light Blinking

Waterdrop Filter Blue Light Blinking

The Waterdrop water filter has become a go-to choice for many households seeking to improve the quality and taste of their drinking water. However, when faced with a blinking blue light on the filter, it can be a cause for concern, leaving homeowners puzzled and unsure of how to address the issue. Fear not, for this comprehensive guide will delve into the meaning behind the Waterdrop filter’s blue light blinking and provide you with the necessary troubleshooting steps to restore your filter’s optimal performance.

Waterdrop Filter Blue Light Blinking

In this article, we will explore the various reasons why the Waterdrop filter’s blue light may be blinking, offering detailed explanations and practical solutions to help you regain control of your water filtration system. Whether you’re a seasoned Waterdrop user or a newcomer to the world of home water filtration, this guide will equip you with the knowledge and confidence to tackle the blue light blinking issue and ensure your filter continues to provide you with clean, refreshing water.

Prepare to unlock the secrets behind the Waterdrop filter’s blue light blinking and restore your water filtration system to its full working order.

Understanding the Waterdrop Filter Blue Light blinking

Before delving into the troubleshooting process, it’s essential to have a solid understanding of the Waterdrop filter’s blue light and its role in the overall functioning of the device.

The Purpose of the Blue Light Indicator

The blue light on the Waterdrop filter serves as a visual indicator, providing valuable information about the filter’s status and performance.

Indicating the Filter’s Operational Status

The blue light illuminates when the Waterdrop filter is powered on and functioning correctly.

Providing Filter Replacement Reminders

The blue light’s blinking pattern can signal when it’s time to replace the filter cartridge, ensuring optimal water filtration.

Recognizing the waterdrop filter blue light Blinking Patterns

The Waterdrop filter’s blue light may exhibit different blinking patterns, each indicating a specific operational status or issue.

Steady Blue Light

A steady blue light indicates that the Waterdrop filter is powered on and working correctly.

Slow Blinking Blue Light

A slow blinking blue light typically signifies that the filter cartridge is nearing the end of its useful life and needs to be replaced soon.

Rapid Blinking Blue Light

A rapidly blinking blue light often indicates a problem or issue with the Waterdrop filter that requires troubleshooting.

Troubleshooting the Waterdrop Filter Blue Light Blinking

When faced with a rapidly blinking blue light on your Waterdrop filter, it’s essential to systematically work through a series of troubleshooting steps to identify and address the underlying issue.

Checking for Power Supply Issues

One of the first things to consider when the Waterdrop filter’s blue light is blinking rapidly is the power supply.

Verifying the Power Connection

Ensure that the filter is properly plugged into a functioning power outlet and that the connection is secure.

Inspecting the Power Adapter

Examine the power adapter for any signs of damage, such as frayed cords or loose connections, and replace it if necessary.

Assessing Filter Cartridge Condition

The condition and installation of the filter cartridge can also contribute to the blue light blinking pattern.Waterdrop Filter Blue Light Blinking

Checking the Filter Cartridge

Inspect the filter cartridge for any visible damage, blockages, or signs of wear, and replace it if necessary.

Verifying Proper Filter Installation

Ensure that the filter cartridge is properly installed and securely locked into place, as an improperly installed filter can trigger the blue light to blink.

Investigating Water Flow and Pressure Issues

Problems with water flow or pressure can also cause the Waterdrop filter’s blue light to blink rapidly, indicating a potential issue.

Examining the Water Supply

Check the water supply line for any kinks, clogs, or obstructions that may be restricting the flow of water to the filter.

Addressing Low Water Pressure

If the water pressure entering the filter is too low, it can trigger the blue light to blink, and you may need to investigate the root cause of the low pressure.

Resetting the Waterdrop Filter

In some cases, a simple reset of the Waterdrop filter may resolve the blue light blinking issue.

Performing a Power Cycle Reset

Unplug the filter from the power source, wait a few seconds, and then plug it back in to reset the system.

Initiating a Factory Reset

Consult the Waterdrop filter’s user manual for instructions on how to perform a factory reset, which can help clear any underlying issues.

Preventive Maintenance and Care for the Waterdrop Filter

To ensure the long-term reliability and optimal performance of your Waterdrop filter, it’s essential to adopt a proactive approach to maintenance and care.Waterdrop Filter Blue Light Blinking

Replacing the Filter Cartridge Regularly

One of the most critical preventive maintenance tasks is replacing the Waterdrop filter cartridge at the recommended intervals.

Monitoring the Filter Life Indicator

Pay close attention to the filter life indicator, which will provide you with a visual cue when it’s time to replace the cartridge.

Ensuring Timely Cartridge Replacements

Replace the filter cartridge as soon as the blue light begins to blink slowly, indicating the filter’s impending expiration.

Proper Storage and Handling of Replacement Cartridges

Proper storage and handling of replacement Waterdrop filter cartridges can help maintain their integrity and ensure optimal performance.

Storing Replacement Cartridges Correctly

Keep replacement cartridges in a cool, dry place, away from direct sunlight or heat sources, to prevent premature degradation.

Avoiding Contamination During Cartridge Replacement

Take care to handle replacement cartridges in a clean environment, minimizing the risk of introducing contaminants into the filter system.

Routine Cleaning and Maintenance

Regular cleaning and maintenance of the Waterdrop filter’s external components can help prolong its lifespan and ensure consistent performance.

Wiping Down the Filter’s Exterior

Gently wipe down the filter’s exterior with a clean, damp cloth to remove any dust or dirt buildup.

Checking for Signs of Wear or Damage

Regularly inspect the filter’s housing, connections, and power adapter for any signs of wear, damage, or deterioration.

Conclusion: Mastering the Waterdrop Filter’s Blue Light Blinking

The Waterdrop filter’s blue light blinking can be a perplexing issue, but with the comprehensive troubleshooting guidance and preventive maintenance strategies outlined in this article, you now possess the knowledge and confidence to tackle this challenge head-on.

By understanding the purpose of the blue light indicator, recognizing the various blinking patterns, and methodically working through the troubleshooting steps, you are now equipped to identify and resolve the underlying causes of the blue light blinking on your Waterdrop filter. Whether it’s addressing power supply issues, inspecting the filter cartridge, or resetting the system, you can take control of the situation and restore your water filtration system to its optimal performance.

Beyond troubleshooting, this guide has also emphasized the importance of proactive maintenance and care for the Waterdrop filter. By regularly replacing the filter cartridge, properly storing replacement cartridges, and performing routine cleaning and inspection, you can ensure the longevity and reliability of your water filtration system, minimizing the likelihood of future blue light blinking episodes.

Unlock the secrets behind the Waterdrop filter’s blue light blinking and regain control of your water filtration system. Embrace the knowledge and strategies presented in this article, and let them be the guiding principles that empower you to maintain a consistent, high-quality supply of clean, refreshing water for your home.

Cleaning Oven Racks with Ammonia: A Step-by-Step Guide

ammonia to clean oven racks

Introduction:

Cleaning oven racks can be a challenging and time-consuming task, especially when they accumulate baked-on grease and grime. Fortunately, ammonia is a powerful cleaning agent that can help restore your oven racks to their former glory. In this comprehensive guide, we will walk you through a step-by-step process of using ammonia to clean oven racks effectively. Discover how to remove stubborn dirt, grease, and residue, leaving your oven racks sparkling clean and ready for your next culinary masterpiece.

The Power of Ammonia for Oven Rack Cleaning

Ammonia is a highly effective cleaning agent that can help cut through tough grease and grime on oven racks. Here’s why it’s a great choice for oven rack cleaning:ammonia to clean oven racks

Why Choose Ammonia?

  1. Powerful Degreaser: Ammonia is excellent at breaking down stubborn grease and oil buildup on oven racks, making it easier to remove.
  2. Versatile: Ammonia can be used on a variety of oven rack materials, including stainless steel, cast iron, and enamel. It offers a universal solution for cleaning your racks, regardless of their composition.
  3. Cost-Effective: Ammonia is an affordable cleaning solution that provides excellent results without breaking the bank. It offers a cost-effective alternative to commercial oven cleaning products.

Precautions and Safety Tips:

  1. Proper Ventilation: When working with ammonia, ensure that your cleaning area is well-ventilated to prevent inhaling any fumes. Open windows and turn on fans to maintain a constant flow of fresh air in the room.
  2. Protective Gear: Wear gloves and safety goggles to protect your skin and eyes from any potential contact with ammonia. Additionally, consider wearing a mask to minimize inhalation of fumes.
  3. Keep Away from Children and Pets: Ammonia is a strong chemical and should be stored in a secure place away from children and pets. Never mix ammonia with other cleaning agents, as this can produce toxic fumes.

Step-by-Step Guide: Cleaning Oven Racks with Ammonia

Follow these steps for effective oven rack cleaning using ammonia:

Prepare the Cleaning Area:

  1. Select a Well-Ventilated Area: Choose a well-ventilated space, such as a garage or outdoor area, to perform the cleaning process. Ammonia fumes can be potent, so ensure adequate airflow.
  2. Gather Supplies: Collect the necessary supplies, including a large plastic garbage bag, ammonia, a bucket, a scrub brush or sponge, a garden hose, and a soft cloth or towel.

Soak the Oven Racks:

  1. Place the Racks in a Garbage Bag: Insert the oven racks into a large, sturdy garbage bag, ensuring they fit comfortably without overlapping.
  2. Add Ammonia: Pour enough ammonia into the garbage bag to cover the racks completely. Seal the bag securely, ensuring that it is airtight.
  3. Let the Racks Soak Overnight: Leave the bag undisturbed in a well-ventilated area, allowing the ammonia to work its magic on the racks. Overnight soaking is recommended for optimal results.

Scrub and Rinse the Racks:

  1. Safety Precautions: Put on gloves and safety goggles before handling the ammonia-soaked racks.
  2. Remove the Racks from the Garbage Bag: Carefully remove the racks from the bag, ensuring any excess ammonia is drained back into the bag.
  3. Scrub with a Brush or Sponge: Use a scrub brush or sponge to gently scrub away any remaining dirt or grime on the racks. Pay extra attention to stubborn areas.
  4. Rinse the Racks Thoroughly: Rinse the racks under a strong stream of water, such as from a garden hose, to remove any residual ammonia and loosened debris.ammonia to clean oven racks

Dry and Reinstall the Racks:

  1. Dry the Racks: After rinsing, pat the racks dry using a soft cloth or towel. Ensure they are completely dry before reinserting them into the oven to prevent rusting.
  2. Reinstall the Racks: Carefully place the clean, dry racks back into the oven. Double-check that they are correctly positioned and securely in place.

Additional Maintenance Tips for Oven Racks

To keep your oven racks in pristine condition, consider these additional maintenance tips:

Regular Maintenance:

  1. Wipe Down After Each Use: Take a damp cloth or sponge and wipe the oven racks after each use to prevent grease and food debris from building up.
  2. Use Oven Protectors: Consider placing oven protectors or aluminum foil at the bottom of the oven to catch any spills or drips, reducing the likelihood of dirt accumulating on the racks.

Preventive Measures:

  1. Grease-Free Baking: Avoid placing items directly on the oven racks without a baking sheet or aluminum foil to prevent grease from dripping onto the racks.
  2. Use Non-Stick Oven Liners: Non-stick oven liners can be placed on the racks to help catch drips and spills, making cleanup easier and reducing the need for extensive rack cleaning.ammonia to clean oven racks

Conclusion:

Cleaning oven racks can be a challenging task, but with the power of ammonia and the step-by-step guide provided in this article, you can achieve sparkling results. By properly preparing the cleaning area, soaking the racks, scrubbing, rinsing, and reinstalling them, you can restore your oven racks to their former glory. Just remember to follow safety precautions when working with ammonia and maintain a well-ventilated area throughout the process. With regular maintenance and preventive measures, you can keep your oven racks clean and enjoy a pristine oven for your culinary endeavors. Embrace the effectiveness of ammonia and say goodbye to dirty, grime-covered oven racks.

By incorporating the tips and techniques outlined in this article, you can confidently clean your oven racks using ammonia. Remember to prioritize safety by ensuring proper ventilation and wearing protective gear. Follow the step-by-step guide to soak, scrub, rinse, and dry the racks before reinstalling them in your oven. Additionally, consider implementing regular maintenance and preventive measures to keep your oven racks in top condition. With ammonia as your cleaning ally, your oven racks will regain their shine, making your cooking experiences more enjoyable. Say goodbye to grease and grime, and welcome sparkling oven racks into your kitchen.

Take control of your oven cleaning routine by harnessing the power of ammonia. With the methods outlined in this guide,  so you can effortlessly tackle tough oven rack dirt and grime. Enjoy the satisfaction of cooking in a clean and hygienic oven with sparkling racks. Say goodbye to the hassle and hello to the ease of cleaning oven racks with ammonia.

Water dispenser health risks: What You Need to Know

Safety in Water Dispensing

Water dispensers have become a ubiquitous feature in homes, offices, and public spaces, providing a convenient and accessible way to quench our thirst. However, beneath the surface of this modern convenience, there lurks a potential for health risks that often go unnoticed. As we rely more on these water dispensers for our daily hydration needs, it is crucial to understand the possible concerns and take proactive measures to ensure our well-being. In this comprehensive article, we will delve into the water dispenser health risks, exploring the underlying causes and the steps you can take to mitigate these concerns. From the dangers of bacterial contamination to the potential presence of harmful chemicals, we will equip you with the knowledge to make informed decisions about your water consumption and maintain a healthy, secure water source.

Whether you are a homeowner, an office manager, or simply a conscious consumer, this guide will empower you to navigate the world of water dispensers with a discerning eye, prioritizing your health and the health of those around you. Prepare to uncover the hidden risks and learn how to transform your water dispensing experience into a safe and reliable one.Safety in Water Dispensing

Bacterial Contamination: The Unseen Threat

One of the primary health concerns associated with water dispensers is the risk of bacterial contamination, which can pose serious consequences for your well-being.

The Breeding Ground for Microorganisms

Water dispensers, particularly those with standing water, can create an ideal environment for the proliferation of harmful bacteria, posing a significant health risk.

Stagnant Water and Biofilm Formation

The stagnant water in water dispensers can lead to the development of biofilms, which are colonies of bacteria that adhere to the inner surfaces of the dispenser.

Inadequate Cleaning and Maintenance

Neglecting regular cleaning and maintenance of water dispensers can exacerbate the problem, allowing bacterial growth to thrive unchecked.

The Dangers of Consuming Contaminated Water

Exposure to water contaminated with harmful bacteria can lead to a range of health issues, some of which can be quite severe.

Gastrointestinal Illnesses

Consuming water contaminated with bacteria can result in gastrointestinal problems, such as diarrhea, vomiting, and abdominal cramps.

Increased Risk of Serious Infections

In some cases, the presence of pathogenic bacteria in the water can lead to more serious infections, potentially requiring medical intervention.

Chemical Contaminants: The Hidden Dangers

In addition to the risks of bacterial contamination, water dispensers may also harbor chemical contaminants that can pose a threat to your health.

Leaching of Harmful Substances

The materials used in the construction and components of water dispensers can potentially release chemical substances into the water, compromising its purity.

Plastic Components and Bisphenol A (BPA)

Older water dispensers may contain plastic components that can leach Bisphenol A (BPA), a chemical linked to various health concerns.Safety in Water Dispensing

Lead and Heavy Metal Contamination

Some water dispenser components, such as lead-based solders or brass fittings, can contribute to the presence of heavy metals in the water.

Exposure to Disinfection By-Products

The water used to fill water dispensers may also contain disinfection by-products, which can arise from the water treatment process.

Trihalomethanes and Haloacetic Acids

These chemical compounds, formed during the chlorination of water, have been associated with potential water dispenser health risks.

Potential Long-Term Consequences

Prolonged exposure to chemical contaminants in water dispensers can increase the risk of chronic health issues, such as reproductive problems or cancer.

Mitigating the Risks: Proper Maintenance and Filtration

To address the health concerns associated with water dispensers, it is essential to implement proper maintenance and filtration strategies.

Regular Cleaning and Disinfection

Establishing a robust cleaning regimen is crucial to prevent the accumulation of bacteria and maintain the water dispenser’s integrity.

Thorough Cleaning Procedures

Regularly disassembling and cleaning the water dispenser’s internal components, such as the water tank and tubing, can help eliminate bacterial growth.

Disinfection with Approved Cleaners

Using recommended disinfectants and following the manufacturer’s instructions can effectively eliminate harmful microorganisms.

Implementing Effective Filtration

Incorporating a reliable water filtration system can significantly reduce the presence of both bacterial and chemical contaminants in the water.

Choosing Appropriate Filter Types

Selecting filters certified to remove specific contaminants, such as lead or disinfection by-products, can provide an additional layer of protection.

Regular Filter Replacement

Ensuring that the water dispenser’s filters are replaced at the recommended intervals is crucial to maintain their effectiveness.

Monitoring Water Quality

Regularly testing the water from your water dispenser can help identify any potential issues and guide your maintenance and filtration efforts.

Conducting Water Quality Tests

Seek out professional water testing services or use reliable home testing kits to assess the water’s purity.

Staying Informed about Regulatory Standards

Familiarize yourself with the local water quality standards and guidelines to ensure your water dispenser meets the necessary safety requirements.

Conclusion: Prioritizing Health and Safety in Water Dispensing

The water dispenser health risks are not to be taken lightly. As we have explored in this comprehensive article, the potential for bacterial contamination and chemical contaminants poses a genuine threat to our well-being, underscoring the importance of addressing these concerns proactively.

By understanding the underlying causes and the steps necessary to mitigate these risks, you can take control of your water consumption and prioritize the health and safety of yourself and those around you. Whether you are responsible for maintaining a water dispenser in a professional setting or ensuring the well-being of your family at home, this guide has equipped you with the knowledge to navigate the world of water dispensers with confidence.Safety in Water Dispensing

Embrace the power of proper maintenance, effective filtration, and regular water quality monitoring to transform your water dispensing experience. By implementing these strategies, you can enjoy the convenience of water dispensers while safeguarding your health and the health of your community.

Remember, the health risks associated with water dispensers are not something to be ignored. By staying informed, taking proactive measures, and making informed decisions, you can unlock the full benefits of water dispensers while ensuring a safe and secure water source. Prioritize your well-being, and let this guide be the catalyst for a healthier, more sustainable water dispensing practice.

Vacuum Cleaning Treasures: Goodwill Vacuum Offerings

goodwill vacuum

Navigating the aisles of your local Goodwill store can be a treasure trove of hidden gems, especially when it comes to the world of vacuum cleaners. The Goodwill Goodwill vacuum selection often features an array of high-quality, gently used models that can provide a new lease on life for your home cleaning routine.

Whether you’re in the market for a powerful, state-of-the-art vacuum or simply looking to upgrade your current cleaning equipment, the Goodwill Goodwill vacuum offerings can be a budget-friendly and eco-friendly solution. By exploring the diverse collection of Goodwill vacuum cleaners, you can uncover the perfect match for your needs, all while supporting the mission of this renowned nonprofit organization.

In this comprehensive guide, we’ll delve into the world of Goodwill vacuum cleaners, highlighting the benefits of shopping at Goodwill, the types of models you may encounter, and the steps to ensure you make a savvy purchase. Get ready to embark on a journey of discovery and unlock the cleaning potential of Goodwill’s vacuum treasure trove.

Exploring the Goodwill Vacuum Advantage

Before diving into the specific Goodwill vacuum offerings, it’s essential to understand the advantages of shopping for vacuum cleaners at Goodwill stores.

The Sustainable and Cost-Effective Approach

Goodwill’s mission of providing affordable, gently used goods aligns perfectly with the needs of vacuum cleaner buyers.

Reduced Environmental Impact

By opting for a pre-owned vacuum from Goodwill, you’re effectively reducing waste and contributing to a more sustainable future.

Significant Cost Savings

Goodwill’s prices are typically much lower than those of brand-new vacuum cleaners, making it an attractive option for budget-conscious consumers.

The Diverse Selection of Vacuum Models

Goodwill stores often receive a wide range of vacuum cleaner donations, offering a diverse selection for shoppers.

Variety of Brands and Features

You may stumble upon a variety of well-known vacuum brands, each with its own unique set of features and capabilities.

Condition and Quality Inspection

Goodwill’s team carefully inspects and filters the donated vacuum cleaners to ensure they are in working order before offering them for sale.goodwill vacuum

The Joy of the Treasure Hunt

Searching for the perfect Goodwill vacuum can be a thrilling and rewarding experience, akin to a treasure hunt.

Discovering Hidden Gems

The joy of unearthing a high-quality vacuum cleaner at a fraction of its original cost is part of the Goodwill shopping experience.

The Thrill of the Find

The anticipation and excitement of scouring the Goodwill aisles, not knowing what you might discover, adds to the overall appeal.

Navigating the Goodwill Vacuum Selection

With the benefits of Goodwill vacuum shopping in mind, let’s explore the types of models and features you may encounter during your search.

Upright Vacuum Cleaners

Upright vacuum cleaners are a popular choice among Goodwill shoppers, offering powerful suction and versatile cleaning capabilities.

Standard Upright Models

Look for well-known upright vacuum brands, such as Hoover, Bissell, or Shark, that can handle a variety of floor surfaces.

Specialty Upright Vacuums

Keep an eye out for upright models with additional features, like HEPA filtration or motorized brushes for deep cleaning.

Canister Vacuum Cleaners

Canister vacuum cleaners are another common sight in the Goodwill vacuum selection, appealing to those who prefer a more maneuverable cleaning experience.goodwill vacuum

Compact and Lightweight Canisters

Discover canister models that are easy to move around and can access tight spaces with ease.

Versatile Cleaning Attachments

Ensure the canister vacuum you choose comes with a range of cleaning tools and accessories to tackle various surfaces and needs.

Robotic and Handheld Vacuum Cleaners

While less common, you may occasionally stumble upon more specialized vacuum cleaner types at Goodwill.

Robotic Vacuum Cleaners

If you’re lucky, you might find a pre-owned robotic vacuum cleaner that can automate your cleaning routine.

Handheld Vacuum Cleaners

Compact and lightweight handheld vacuum models can be useful for quick cleanups and hard-to-reach areas.goodwill vacuum

Evaluating and Securing Your Goodwill Vacuum Purchase

Once you’ve identified the Goodwill vacuum that piques your interest, it’s time to thoroughly inspect and assess the item before making a purchase.

Conducting a Thorough Inspection

Carefully examine the vacuum cleaner to ensure it meets your expectations and is in good working condition.

Checking for Visible Damage

Inspect the vacuum’s exterior, cord, and attachments for any signs of wear, cracks, or other visible issues.

Testing the Suction and Functionality

Plug in the vacuum and test its suction power, maneuverability, and overall performance to ensure it meets your cleaning needs.

Considering Maintenance and Replacement Parts

Inquire about the availability of replacement filters, bags, or other essential components to keep the vacuum running smoothly.

Securing Your Goodwill Vacuum Purchase

Once you’re satisfied with the vacuum cleaner, it’s time to complete the purchase and take your new cleaning companion home.

Negotiating the Price

Don’t be afraid to politely negotiate the price, especially if the vacuum is in exceptional condition or comes with valuable accessories.

Properly Transporting the Vacuum

Ensure you have the necessary means to safely transport the vacuum cleaner from the Goodwill store to your home.

Registering the Vacuum and Accessing Support

If possible, register the vacuum with the manufacturer to take advantage of any remaining warranty coverage or support services.

Conclusion: Unlocking the Cleaning Potential of Goodwill Vacuums

Exploring the Goodwill vacuum selection is an adventure in and of itself, offering the opportunity to uncover high-quality cleaning equipment at a fraction of the cost. By embracing the Goodwill vacuum advantage, you not only save money but also contribute to a more sustainable future by giving a second life to pre-owned appliances.

Throughout this comprehensive guide, you’ve learned about the diverse range of vacuum models you may encounter at Goodwill, from powerful upright cleaners to maneuverable canister options. You’ve also discovered the joy of the treasure hunt, where the thrill of the find and the satisfaction of securing a remarkable vacuum deal can elevate your cleaning experience.

As you continue your Goodwill vacuum journey, remember to approach each purchase with a discerning eye, thoroughly inspecting the equipment and ensuring it meets your cleaning needs. With a little patience and a keen eye for hidden gems, you can unlock the true cleaning potential of Goodwill’s vacuum offerings, transforming your home with a high-quality, cost-effective cleaning solution.

Embrace the Goodwill vacuum advantage and let it be the catalyst for a more efficient, eco-friendly, and budget-friendly cleaning routine. Uncover the treasures that await in your local Goodwill store and experience the joy of reviving a gently used vacuum cleaner that can breathe new life into your home.