What is the best temperature to set my lg refrigerator?

refrigeratorIntroduction:

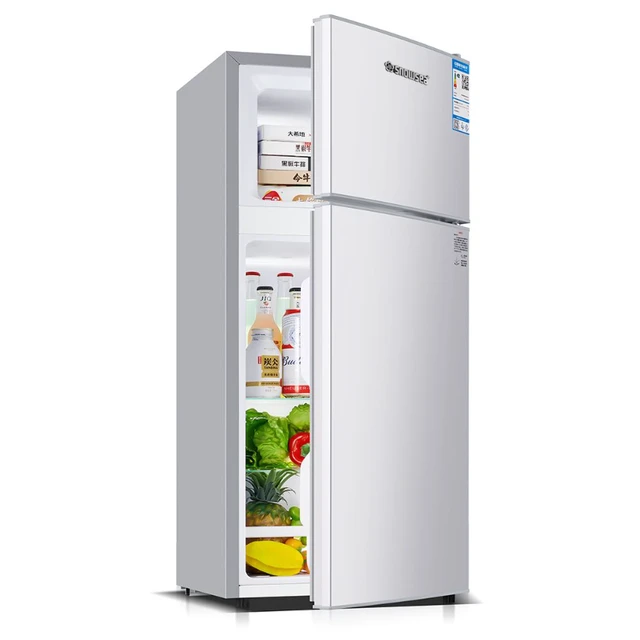
Setting the right temperature for your LG refrigerator is essential for maintaining the freshness and safety of your food. In this article, we will explore the best temperature to set your LG refrigerator. We will discuss the lg refrigerators freezer temperature of 2024, the impact of temperature on food storage, tips for temperature adjustment, and the benefits of keeping your refrigerator at the optimal temperature.


lg refrigerators freezer temperature

refrigeratorUnderstanding the Recommended Temperature Range of lg refrigerators freezer temperature:

The recommended temperature range for LG refrigerators is generally between 35°F and 38°F (1.7°C and 3.3°C). This range ensures optimal food preservation and prevents the growth of bacteria that can cause food spoilage. It is important to note that specific models may have slight variations in temperature settings, so it is advisable to consult your LG refrigerator’s manual for the manufacturer’s recommendations.

Maintaining Food Freshness and Safety:

Setting the temperature within the recommended range is crucial for keeping your food fresh and safe to consume. Temperatures below 35°F (1.7°C) can cause food to freeze, altering the texture and potentially leading to freezer burn. On the other hand, temperatures above 38°F (3.3°C) can accelerate bacterial growth, spoilage, and potentially compromise food safety.

Adjusting Temperature Settings:

To set the temperature for your LG refrigerator, locate the temperature control panel, which is usually located inside the refrigerator compartment. The control panel may be a digital display or a manual dial. Adjust the temperature settings using the controls provided, following the manufacturer’s instructions. Allow the refrigerator to stabilize for a few hours before checking the temperature to ensure accuracy.

Temperature Variation in Different Zones:

Certain LG refrigerator models may have different temperature zones within the appliance. For example, some LG refrigerators feature a separate drawer or compartment with adjustable temperature settings. This allows you to store specific items, such as fruits and vegetables, at slightly different temperatures than the main refrigerator compartment. Refer to your refrigerator’s manual for guidance on utilizing these temperature zones effectively.

key advantages of LG refrigerators:

Energy Efficiency:

LG is known for manufacturing energy-efficient appliances, including refrigerators. Many LG models are Energy Star certified, meaning they meet strict energy efficiency standards. This can result in lower electricity consumption and reduced energy costs over time.

Smart Technology and Features:

LG offers a range of smart refrigerators that are equipped with advanced technology and features. These include Wi-Fi connectivity, touchscreen displays, voice control compatibility, and smart home integration. These features provide convenience, remote monitoring, and innovative ways to manage and interact with the refrigerator.

Spacious and Thoughtful Design:

LG refrigerators are designed to provide ample storage space and convenient organization options. They often feature adjustable shelves, door-in-door compartments, versatile freezer configurations, and dedicated crispers for fruits and vegetables. The thoughtful design allows for efficient use of space and easy access to stored items.

Advanced Cooling Technologies:

LG incorporates advanced cooling technologies in their refrigerators. This includes features like Linear Cooling, Multi-Air Flow, and Smart Cooling systems. These technologies help maintain optimal and consistent temperature levels throughout the refrigerator, ensuring longer food freshness and minimizing temperature fluctuations.

Enhanced Food Preservation:

LG refrigerators often include features that extend the shelf life of perishable foods. These may include humidity-controlled crispers, temperature-controlled drawers, and efficient air circulation systems that help prevent food spoilage and maintain food quality for longer periods.

Quality and Durability:

LG is known for producing high-quality appliances. Their refrigerators are built with robust materials and advanced engineering techniques to ensure durability and longevity.

Stylish Aesthetics:

LG refrigerators are known for their sleek and modern designs. They offer a variety of finishes, including stainless steel, black stainless steel, matte black, and more. These stylish aesthetics allow the refrigerator to seamlessly blend with various kitchen décor styles.

Benefits of Optimal Temperature:

Keeping your LG refrigerator at the recommended temperature range offers several benefits. Firstly, it helps to extend the shelf life of perishable items, ensuring that food remains fresher for longer. Secondly, optimal temperature settings help prevent the growth of harmful bacteria, reducing the risk of foodborne illnesses. Lastly, maintaining the correct temperature can also contribute to energy efficiency, as the refrigerator does not have to work harder to maintain the desired temperature.

refrigeratorTemperature Monitoring and Adjustments:

It is important to periodically monitor and adjust the temperature settings of your LG refrigerator to ensure consistent performance. Use a refrigerator thermometer to check the internal temperature regularly, preferably placing it in the center of the refrigerator compartment. If you find that the temperature is consistently outside the recommended range, adjust the temperature settings accordingly and allow the refrigerator to stabilize before rechecking.

External Factors that Impact Temperature:

Several external factors can impact the temperature inside your LG refrigerator. These include the frequency of door openings, the ambient temperature of the room, and the placement of the refrigerator in proximity to heat sources such as ovens or direct sunlight. Minimizing door openings, maintaining a moderate ambient temperature, and placing the refrigerator away from heat sources can help maintain consistent temperatures.

Additional Tips for Temperature Control:

To optimize temperature control in your LG refrigerator, ensure that the door seals are clean and in good condition. Damaged or dirty seals can allow warm air to enter, affecting the internal temperature. Additionally, avoid overpacking the refrigerator, as overcrowding can restrict proper airflow and temperature distribution.

refrigeratorImportant points to keep in mind:

When setting the temperature on an LG refrigerator, there are a few important points to keep in mind:

Follow Manufacturer’s Guidelines:

LG provides recommended temperature settings for its refrigerators in the user manual. It is essential to refer to these guidelines and set the temperatures accordingly to ensure optimal performance and food safety.

Balance Refrigerator and Freezer Temperatures:

LG refrigerators often have separate temperature controls for the refrigerator and freezer sections. It is important to set and maintain appropriate temperatures for both sections to keep food fresh and prevent spoilage. The recommended refrigerator temperature is typically around 37-40°F (3-4°C), while the freezer should be set between 0-5°F (-17 to -15°C).

Consider Food Safety:

Setting the refrigerator temperature too high can lead to food spoilage, while setting it too low can result in freezing food items that shouldn’t be frozen. Maintaining the recommended temperature range is crucial for food safety and appropriate storage of perishable items.

Allow Adequate Air Circulation:

Proper air circulation within the refrigerator and freezer compartments is essential for maintaining consistent temperatures. Avoid overloading the refrigerator or blocking air vents, as this can hinder proper airflow and temperature control.

Monitor and Adjust:

It’s a good practice to monitor temperatures regularly with a refrigerator thermometer to ensure they remain within the recommended range. If necessary, adjust the temperature settings to maintain optimal cooling performance.

Account for Room Temperature:

The surrounding room temperature can impact the refrigerator’s cooling efficiency. If the room temperature is particularly hot or cold, it may affect the refrigerator’s ability to maintain the desired temperature. Keep the refrigerator away from direct sunlight, heat sources, or drafts to help maintain stable internal temperatures.

By following these guidelines and regularly monitoring and adjusting the temperature settings, you can ensure that your LG refrigerator operates efficiently, keeps food fresh, and maintains optimal conditions for food storage.

Impacts of excessively high or low temperatures of lg refrigerators freezer temperature :

The temperature of an LG refrigerator that is too high or too low can have various effects on food safety, preservation, and energy consumption. Here are the impacts of excessively high or low temperatures:

High Refrigerator Temperature:

Food Spoilage: A refrigerator temperature that is too high can accelerate the growth of bacteria, leading to food spoilage and potential foodborne illnesses. Perishable foods may not remain fresh and safe to consume for extended periods.

Decreased Shelf Life: Foods such as dairy, meats, and produce have shorter shelf lives at higher temperatures, resulting in faster spoilage and potential waste.

Inefficient Cooling: If the refrigerator temperature is too high, the compressor may run longer and work harder to try to cool the interior, leading to increased energy consumption and potential strain on the appliance’s components.

Low Refrigerator Temperature:

Freezing of Foods: A refrigerator temperature that is too low can cause unintended freezing of food items, resulting in a change in texture, loss of quality, and potential damage to the food.

Energy Inefficiency: Operating the refrigerator at unnecessarily low temperatures consumes more energy, leading to increased electricity costs over time.

Potential Damage to Components: Extreme cold temperatures can affect the refrigerator’s components, such as the seals, thermostat, and motor, potentially leading to reduced efficiency or malfunctions.
It is essential to maintain the recommended temperature range in an LG refrigerator to ensure proper food preservation, minimize waste, and optimize energy efficiency. Regularly check and adjust the temperature settings as needed to maintain a safe and suitable storage environment for your perishable items.

refrigeratorConclusion of lg refrigerators freezer temperature:

What is the best temperature to set my lg refrigerator?

Setting the temperature within the recommended range of 35°F to 38°F (1.7°C to 3.3°C) is crucial for maintaining the freshness and safety of your food in an LG refrigerator. By following the manufacturer’s recommendations, monitoring the temperature regularly, and making necessary adjustments, you can ensure that your LG refrigerator operates optimally. Keeping your refrigerator at the right temperature not only extends the shelf life of your food but also contributes to overall food safety and energy efficiency.

Does goodwill take broken vacuum cleaners?

Vacuum-Cleaners

Introduction:

Does goodwill take broken vacuum cleaners of 2024

Goodwill is a well-known nonprofit organization that accepts various items as donations, including appliances, electronics, and household goods. When it comes to broken vacuum cleaners, whether or not Goodwill accepts them depends on their specific policies, the condition of the vacuum, and their ability to repair or resell the item. In this article, we will explore the factors that determine whether Goodwill accepts broken vacuum cleaners, including their donation guidelines, the condition of the vacuum, and alternative options for disposing of or recycling broken vacuums. By understanding these factors, individuals can better determine the best course of action for donating their broken vacuum cleaner.

Vacuum-Cleaners

Does goodwill take broken vacuum cleaners?

Does goodwill take vacuums?

Goodwill’s Donation Guidelines:

Goodwill has specific donation guidelines that outline the types of items they accept. While these guidelines may vary slightly between different Goodwill locations, they generally focus on accepting items that are in good, usable condition. Some key factors to consider include:

a. Working Condition: Goodwill typically accepts items that are in working condition. While they may be willing to repair minor issues, they generally prefer items that can be resold or provided to those in need without significant repairs.

b. Safety and Hygiene: Goodwill places importance on safety and hygiene. They may not accept items that pose a safety hazard or are unclean, as they want to provide their customers with quality goods.

c. Local Policies: Goodwill locations may have specific policies regarding the acceptance of broken items. It is essential to check with your local Goodwill branch to learn about their specific guidelines for broken vacuum cleaners.

Condition of the Vacuum:

When assessing broken vacuum cleaners, Goodwill considers the extent of the damage and the potential for repair or resale. Here’s what to consider:

a. Minor Repairs: Goodwill may accept vacuum cleaners that require minor repairs. Examples include replacing a belt or fixing a minor clog. If the vacuum is otherwise in good condition, they may be willing to invest in repairs to make it usable again.

b. Major Damage: If the vacuum cleaner has significant or irreparable damage, such as a non-functioning motor or broken parts, Goodwill may be less likely to accept it. In such cases, they may not have the resources or expertise to repair or resell the item.

c. Completeness of the Vacuum: Goodwill prefers to receive complete items. If your vacuum cleaner is missing essential parts or accessories, like the hose or attachments, it may be less likely to be accepted.

Vacuum-Cleaners

Alternative Options for Broken Vacuum Cleaners:

If Goodwill does not accept broken vacuum cleaners or if your local branch has specific policies against them, there are alternative options for disposing of or recycling these items. Here are a few options to consider:

a. Manufacturer Take-Back Programs: Some vacuum cleaner manufacturers have take-back programs where they accept old or broken models for proper disposal or recycling. Check with the manufacturer of your vacuum cleaner to see if they offer such a program.

b. Local Electronics Recycling Programs: Many communities have electronics recycling programs where residents can drop off broken or outdated electronics, including vacuum cleaners. Contact your local government or waste management department to learn about recycling options in your area.

c. Repair Shops or Vacuum Cleaner Retailers: Local repair shops or vacuum cleaner retailers may accept broken vacuum cleaners. They may be able to salvage usable parts or recycle the vacuum properly. Contact them to inquire about their policies and any associated fees.

d. Online Recycling Platforms: Several online platforms specialize in recycling and disposing of electronic waste. These platforms connect individuals with recycling facilities that can handle broken vacuum cleaners and other electronic devices. Research reputable online recycling platforms and follow their instructions for proper disposal.

e. Curbside Pickup or Bulk Waste Collection: Some municipalities offer curbside pickup or designated days for bulk waste collection. Check with your local government or waste management department to determine if they accept broken vacuum cleaners through these services.

f. Private Recycling Facilities: Private recycling facilities may accept broken vacuum cleaners for recycling. Research local recycling facilities that specialize in electronic waste and inquire about their policies, fees, and drop-off locations.

Vacuum-Cleaners

Repair or DIY Solutions:

If you are willing and able to repair your broken vacuum cleaner, there are options available to salvage or replace specific parts. Consider the following:

a. Replacement Parts: Research the availability of replacement parts for your specific vacuum cleaner model. Many manufacturers or third-party suppliers offer replacement parts for common issues such as motors, belts, filters, or hoses. By replacing the faulty component, you can restore functionality to your vacuum cleaner.

b. Repair Services: Some local repair shops specialize in fixing vacuum cleaners. They have the expertise and tools necessary to diagnose and repair various issues. Contact these shops to inquire about their services, costs, and turnaround times.

c. DIY Repairs: If you have some technical know-how, you may attempt to repair the vacuum cleaner yourself. Online tutorials, forums, and manufacturer guides can provide step-by-step instructions and troubleshooting tips for common issues. Exercise caution and ensure your safety while working on electrical appliances.

Local Charities and Nonprofits:

In addition to Goodwill, other local charities and nonprofits may accept broken vacuum cleaners. These organizations may have different guidelines and policies regarding acceptable donations. Contact local homeless shelters, women’s shelters, or community centers to inquire about their specific needs and donation policies. Some organizations may have the capability to repair or refurbish broken vacuum cleaners for their own use or for redistribution to those in need.

Vacuum-Cleaners

Freecycle or Online Classifieds:

Freecycle and online classified platforms provide a means to give away items for free or find individuals who may be interested in broken vacuum cleaners for parts or repair projects. While some people may be looking for functional vacuums, others may be interested in salvaging specific components or practicing their repair skills. List your broken vacuum cleaner on these platforms, clearly explaining its condition, and connect with individuals who express an interest.

Recycling Centers and E-Waste Facilities:

If all other options fail or if the vacuum cleaner is beyond repair, consider recycling it at a local recycling center or electronic waste (e-waste) facility. These facilities specialize in the proper disposal and recycling of electronic devices. Research local recycling centers or contact your municipality’s waste management department to learn about drop-off locations or e-waste collection events in your area.

Manufacturer Trade-In or Disposal Programs:

Some vacuum cleaner manufacturers offer trade-in or disposal programs for old or broken units. These programs allow you to exchange your vacuum cleaner for a discounted price on a new model or provide instructions for proper disposal. Check the manufacturer’s website or contact their customer service to learn about any available programs.

Vacuum-Cleaners

Several potential benefits to taking broken vacuum cleaners

There are several potential benefits to taking broken vacuum cleaners instead of disposing of them. Here are a few:

Environmental Sustainability:

By taking broken vacuum cleaners, you contribute to reducing electronic waste that would otherwise end up in landfills. Electronics often contain hazardous materials that can leach into the environment, so recycling or repairing them helps minimize their negative impact on the planet.

Cost Savings:

Instead of purchasing a brand new vacuum cleaner, you may be able to save money by repairing a broken one. Many times, a simple fix or replacement part can bring the vacuum back to working condition, saving you the expense of buying a new one.

Skill Development:

Repairing broken vacuum cleaners can be an opportunity to develop new skills or expand existing ones. It provides a chance to learn about electronics, understand how the vacuum cleaner functions, and gain troubleshooting and repair experience.

Personal satisfaction:

Successfully repairing a broken vacuum cleaner can be a rewarding experience. It gives you a sense of achievement and self-sufficiency, knowing that you were able to bring a broken item back to life rather than discarding it.

Donation or Resale:

After repairing the broken vacuum cleaner, you may choose to donate it to someone in need or sell it at a lower cost. This allows someone else to benefit from the repaired vacuum cleaner, extending its useful life and reducing the need for new appliances to be manufactured.

While there are benefits to taking broken vacuum cleaners, keep in mind that not all repairs may be feasible or cost-effective. It’s important to assess the condition of the vacuum and the potential costs of repair before deciding the best course of action.

Conclusion:

Whether or not Goodwill accepts broken vacuum cleaners depends on their specific donation guidelines, the condition of the vacuum, and their ability to repair or resell the item. Goodwill generally prefers items that are in good, working condition or require only minor repairs. If Goodwill does not accept broken vacuum cleaners or if your local branch has specific policies against them, alternative options include manufacturer take-back programs, local electronics recycling programs, repair shops, online recycling platforms, curbside pickup or bulk waste collection, and private recycling facilities. By considering these options, individuals can responsibly dispose of broken vacuum cleaners and contribute to environmental sustainability.

How to remodel kitchen with black appliances?

black appliances

Introduction:

Remodeling a kitchen with black appliances can be an exciting and transformative project. Black appliances can add a sleek and modern touch to your kitchen design. When planning a kitchen remodel with black appliances of 2024, it is important to consider factors such as color coordination, materials, lighting, and layout to ensure a cohesive and visually appealing result. In this article, we will explore various strategies and tips to help you remodel your kitchen with black appliances successfully.

black appliances

How to remodel kitchen with black appliances?

Kitchen black appliances

Establish a Design Plan:

a. Determine Your Style: Before starting your kitchen remodel, consider the style you want to achieve. Decide whether you prefer a contemporary, minimalist, industrial, or even a traditional look. This will guide your color and material choices throughout the remodeling process.

b. Coordinate Colors: Select a color palette that complements black appliances. Popular choices include white, gray, and natural wood tones. Consider incorporating these colors in cabinetry, countertops, backsplashes, and flooring to create a cohesive and visually appealing design.

c. Research Inspiration: Look for inspiration in magazines, online platforms, and home improvement shows to gather ideas for your kitchen remodel. Pay attention to kitchens with black appliances to get a sense of how different design elements can be integrated.

Cabinets and Countertops:

a. Contrasting Colors: Choose cabinets and countertops in colors that create contrast with black appliances. For example, white or light-colored cabinets can provide a striking contrast and make the appliances stand out. Alternatively, dark cabinets can create a seamless and sophisticated look when paired with black appliances.

b. Material Selection: Consider the materials used for cabinets and countertops. Opt for durable and low-maintenance materials such as quartz or granite for countertops, and choose high-quality finishes for cabinets to ensure longevity.

c. Finishes and Hardware: Select finishes and hardware that complement the overall design. Brushed nickel or stainless steel finishes can provide a modern and cohesive look when paired with black appliances. Alternatively, consider matte black or brass hardware to create a sophisticated and trendy aesthetic.

black appliances

Backsplashes and Flooring:

a. Backsplash Options: Choose a backsplash that complements the color scheme and style of your kitchen. Consider materials such as subway tiles, ceramic tiles, or even glass tiles in neutral colors. These can create a visually pleasing backdrop for your black appliances.

b. Patterns and Textures: Play with patterns and textures to add visual interest. Consider herringbone, chevron, or mosaic patterns for your backsplash. Textured tiles or natural stone materials can also enhance the overall design and provide a unique touch.

c. Flooring Choices: Select flooring that complements the black appliances and other design elements in your kitchen. Light-colored flooring, such as white oak or light gray tiles, can create a beautiful contrast and make the space feel more open. Alternatively, dark hardwood or tile can create a seamless and elegant look when paired with black appliances.

Lighting and Fixtures:

a. Natural Lighting: Maximize natural lighting by incorporating larger windows or skylights in your kitchen remodel. Natural light can help counterbalance the dark color of black appliances and create a brighter and more inviting space.

b. Task Lighting: Install task lighting in key areas such as above the stove, sink, and countertops. This ensures proper illumination for cooking and food preparation tasks. Consider stylish pendant lights or under-cabinet lighting to enhance both functionality and aesthetics.

c. Ambient Lighting: Use ambient lighting to create a warm and inviting atmosphere. Consider recessed lighting, chandeliers, or wall sconces to provide overall illumination and complement the design elements in your kitchen.

black appliances

Layout and Functionality:

Black appliances in kitchen

a. Ergonomics and Workflow: Consider the layout of your kitchen to maximize functionality and workflow. Ensure that the placement of appliances allows for easy access and efficient movement between work areas. This includes positioning the refrigerator, stove, sink, and preparation areas in a logical and convenient manner.

b. Ample Storage: Maximize storage space to keep your kitchen organized and clutter-free. Incorporate a mix of cabinets, drawers, and open shelving to accommodate different types of items and utilize space efficiently.

c. Appliance Placement: Plan the placement of your black appliances strategically to ensure a cohesive and balanced design. Consider creating a focal point by placing the appliances in a prominent area, such as the cooking zone or an island.

black appliances

Accessories and Decor:

Black appliance kitchen

a. Color Accents: Introduce pops of color through accessories and decor to enhance the overall design. Consider vibrant dishware, decorative items, or even fresh plants and flowers to add life and personality to your kitchen.

b. Textiles and Soft Furnishings: Use textiles such as curtains, rugs, and seat cushions to add warmth and texture to the space. Choose colors and patterns that complement the black appliances and other design elements.

c. Personal Touches: Incorporate personal touches and artwork that reflect your style and personality. Hang artwork or display items that inspire you and create a welcoming atmosphere in your kitchen.

Maintenance and Cleaning:

a. Consider Finishes: When selecting materials for your kitchen remodel, consider finishes that are easy to clean and maintain. Black appliances can show fingerprints and smudges more easily, so opt for finishes that resist smudging and are easy to wipe clean.

b. Cleaning Techniques: Learn the proper cleaning techniques for your black appliances and surfaces. Use non-abrasive cleaners and microfiber cloths to avoid scratching or damaging the finish. Regularly wipe down the appliances and surfaces to keep them looking their best.

c. Preventative Care: Take preventative measures to keep your black appliances in good condition. Use appliance covers or protective films to prevent scratches or dings. Additionally, avoid using abrasive cleaners or scouring pads that can damage the finish.

Popular trends associated with black appliances in kitchens:

Kitchen remodel ideas with black appliances

The trend of having a kitchen with black appliances has gained popularity in recent years. Here are some popular trends associated with black appliances in kitchens:

Bold and Modern Look:

Black appliances create a sleek, modern, and sophisticated look in the kitchen. They add a touch of elegance and create a dramatic contrast against light-colored countertops or cabinets.

Matte Black Finish:

Matte black finishes have become particularly trendy for kitchen appliances. This finish offers a smooth texture and a non-glossy appearance, giving the appliances a contemporary and seamless look.

Integration with Dark Cabinetry:

Pairing black appliances with dark-colored cabinetry, such as deep wood tones or rich charcoal finishes, creates a cohesive and cohesive aesthetic. It provides a seamless flow and creates a monochromatic or high-contrast look in the kitchen.

Black Stainless Steel:

Black stainless steel appliances have gained popularity in recent years. This alternative to traditional stainless steel adds a touch of modern sophistication with its black finish, while still offering the durability and ease of cleaning associated with stainless steel.

Minimalist Design:

The use of black appliances contributes to a minimalist design approach in the kitchen. Black appliances often have clean lines and sleek profiles, allowing them to blend seamlessly with minimalist or contemporary kitchen styles.

Timelessness:

Black appliances are considered timeless, as they can complement a range of kitchen design styles. Whether your kitchen has a traditional, industrial, or modern design theme, black appliances can fit in seamlessly and provide a classic yet trendy look.

Easy Maintenance:

Black appliances are known to be relatively easier to maintain compared to traditional stainless steel appliances. They are less prone to showing fingerprints or smudges, making them more forgiving in terms of cleaning and upkeep.

Remember, kitchen design trends can vary over time, so it’s important to consider your personal preferences and the overall aesthetic you want to achieve in your kitchen. Ultimately, choose appliances and design elements that you love and will stand the test of time.

black appliances

Conclusion:

Kitchen remodel with black appliances

Remodeling a kitchen with black appliances offers a unique opportunity to create a sleek and modern space. By establishing a design plan, coordinating colors, and carefully selecting materials, you can ensure a cohesive and visually appealing result. Consider contrasting colors for cabinets and countertops, explore different backsplash and flooring options, and pay attention to lighting and fixtures to enhance both functionality and aesthetics. Additionally, consider the layout and functionality of your kitchen, ensuring that the placement of appliances allows for efficient movement and workflow. Finally, incorporate accessories and personal touches to add warmth and personality to your kitchen remodel. With careful consideration and attention to detail, you can successfully remodel your kitchen with black appliances and create a stylish and inviting space.

How to Use Ammonia to Clean Your Oven?

OvenIntroduction of clean oven with ammonia of 2024:


Cleaning your oven is an essential task to maintain its performance and ensure that your food is cooked in a clean and healthy environment. While there are various cleaning methods available, using ammonia is an effective and popular option. Ammonia can help dissolve grease, remove baked-on food, and eliminate stubborn stains from the oven surfaces. In this article, we will guide you through the step-by-step process of using ammonia to clean your oven effectively. From preparation to application and post-cleaning care, you will learn how to maximize the benefits of ammonia for a sparkling clean oven.

Some common types of ovens:

There are several types of ovens available on the market with different features and functionalities. Here are some common types of ovens:

Conventional Oven:

Conventional ovens, also known as traditional or standard ovens, provide heat from heating elements located at the bottom and top of the oven. They offer a range of temperature settings and usually have separate controls for cooking and broiling.

Convection Oven:

Convection ovens use a fan and exhaust system to circulate hot air evenly throughout the oven cavity. This results in faster and more even cooking, making them popular for baking, roasting, and broiling dishes. Convection ovens can be either electric or gas-powered.

Microwave Oven:

Microwave ovens use electromagnetic waves (microwaves) to cook or heat food. They offer quick heating and defrosting options but may not provide the browning or crisping effect that conventional ovens can achieve. Microwave ovens come in various sizes, from countertop models to built-in units.

Steam Oven:

Steam ovens use hot steam to cook food, which helps retain moisture and nutrients. They are suitable for steaming vegetables, fish, and other delicate foods. Some steam ovens also offer combination cooking features, allowing both steam and convection cooking.

Double Oven:

Double ovens feature two separate oven compartments stacked vertically or placed side by side, providing independent cooking spaces. This allows for more flexibility in cooking different dishes at different temperatures simultaneously, making them popular in larger households or for those who frequently entertain.

Toaster Oven:

Toaster ovens are small countertop appliances that combine the functionality of a toaster and a smaller oven. They are convenient for toasting bread, heating up small dishes, or preparing simple meals.

Self-Cleaning Oven:

Self-cleaning ovens have a built-in cleaning function that uses high heat to burn off food residue and grease. This eliminates the need for manual scrubbing and helps maintain a clean oven interior.

Each type of oven offers different advantages and suits different cooking needs. Consider your cooking preferences, available space, and desired features when selecting the most suitable oven for your kitchen.


OvenHow to Use Ammonia to Clean Your Oven?

Using ammonia to clean oven

Ammonia to clean oven racks

How to clean oven racks with ammonia

Cleaning oven racks with ammonia

Preparing for the Cleaning Process:

a. Gather Supplies: Before starting, gather all the necessary supplies. You will need a spray bottle, ammonia, a large sealable plastic bag or bowl, a scrub brush or sponge, dish soap, water, gloves, and a cloth or paper towels.

b. Safety Precautions: Ammonia can produce strong fumes, so it is crucial to take safety precautions. Ensure proper ventilation in the kitchen by opening windows or using exhaust fans. Wear gloves and avoid inhaling the fumes.

c. Removing Oven Racks: Take out the oven racks and set them aside. Cleaning them separately will make the process easier and more thorough.

Preparing the Ammonia Solution:

a. Diluting Ammonia: In a well-ventilated area, mix one part ammonia with one part water in a spray bottle. Avoid using concentrated ammonia directly on oven surfaces, as it can be too harsh.

b. Bowl or Bag Method: Alternatively, you can place a small bowl or dish filled with ammonia in the oven and leave it overnight. The fumes from the ammonia will help dissolve grease and food residues.

Applying the Ammonia Solution:

Cleaning oven grates with ammonia

a. Spraying Method: Spray the ammonia solution generously on the interior surfaces of the oven, focusing on areas with stubborn stains or heavy grease buildup. Ensure that the solution reaches all areas, including the sides, back, and bottom of the oven.

b. Bowl or Bag Method: If using the bowl or bag method, place the bowl with ammonia in the center of the oven or pour ammonia into a sealable plastic bag. Close the oven door and let it sit overnight to allow the fumes to work on the grease and grime.

OvenAllowing the Ammonia to Work:

a. Dwell Time: Let the ammonia solution sit on the oven surfaces for at least one to two hours, or overnight if using the bowl or bag method. The ammonia will soften the baked-on food and grease, making them easier to remove.

b. Closing the Oven Door: Keep the oven door closed during this time to prevent the fumes from escaping. This will enhance the cleaning effectiveness of the ammonia.

Cleaning the Oven Interior:

a. Scrubbing Method: After the dwell time, put on gloves and use a scrub brush or sponge to scrub the oven interior, focusing on areas with stubborn stains or residues. The ammonia solution will have loosened the grime, making it easier to remove.

b. Dish Soap and Water: Create a mixture of dish soap and warm water in a bucket or sink. Dip the brush or sponge into the soapy water and continue scrubbing the oven surfaces, rinsing the brush or sponge as needed.

c. Pay Attention to Corners and Edges: While scrubbing, pay close attention to the corners, edges, and hard-to-reach areas of the oven. These areas can accumulate grease and food particles, which may require extra effort to remove.

d. Wiping Away Residues: Use a cloth or paper towels to wipe away the loosened residues and cleaning solution from the oven surfaces. Rinse the cloth or towels frequently to ensure effective cleaning.

e. Repeat if Necessary: For stubborn or heavily soiled areas, you may need to repeat the process, applying more ammonia solution and allowing it to dwell for additional time before scrubbing.

Cleaning the Oven Racks:

a. Soaking Method: Place the oven racks in a sink or bathtub and fill it with warm water. Add dish soap or a dishwasher tablet to the water and let the racks soak for at least one hour to loosen grease and food residues.

b. Scrubbing Method: After soaking, use a scrub brush or sponge to scrub the oven racks, paying attention to any stubborn stains or residues. Rinse the racks thoroughly with water.

c. Drying the Racks: After cleaning, dry the oven racks completely before placing them back in the oven. This will prevent rusting and ensure proper functioning.

OvenPost-Cleaning Care and Safety:

Cleaning oven with ammonia

a. Ventilation: Once you have finished cleaning the oven, ensure proper ventilation in the kitchen to dissipate any remaining ammonia fumes. Open windows or use exhaust fans to facilitate air circulation.

b. Wipe Down Surfaces: Use a damp cloth to wipe down the interior surfaces of the oven, removing any residue or cleaning solution that may remain.

c. Safety Precautions: Dispose of the ammonia solution properly and according to local regulations. Rinse all cleaning tools thoroughly after use and wash your hands to remove any residue.

d. Regular Maintenance: To keep your oven clean and in good working condition, practice regular maintenance. Wipe up spills and splatters as they occur and perform routine cleaning to prevent excessive buildup.

Using ammonia to clean your oven can have both advantages and disadvantages. Here are some points to consider:

Advantages of Using Ammonia to Clean Your Oven:

Powerful Degreasing Agent: Ammonia is a strong degreaser, making it effective at removing stubborn grease, oil, and baked-on food residues from the oven surface.

Cost-effective: Ammonia is relatively inexpensive compared to some commercial oven cleaners. It offers a more affordable option for deep cleaning your oven.

Non-toxic: Ammonia is generally considered safe for use in the home when used properly. It does not release harmful fumes or leave toxic residue as long as proper safety precautions are taken.

Disadvantages of Using Ammonia to Clean Your Oven:

Strong Odor: Ammonia has a pungent smell that can be unpleasant. The strong odor can linger in the kitchen and may require proper ventilation to dissipate the smell effectively.

Safety Precautions: When using ammonia, it is important to follow safety precautions as directed by the manufacturer. This includes wearing protective gloves, ensuring proper ventilation, and avoiding contact with skin or eyes.

Potentially Hazardous: While ammonia itself is not extremely toxic, it can be harmful if ingested or if it comes into contact with eyes or skin. Care should be taken to keep it out of reach of children and pets.

Time-consuming: Cleaning your oven with ammonia can be a time-consuming process. It typically involves leaving a bowl of ammonia inside the oven overnight or for several hours to loosen the grime, followed by scrubbing and rinsing off the residue.

Limited Effectiveness on Baked-on Stains: Although ammonia is effective for general oven cleaning, it may not be as effective for stubborn, baked-on stains or heavily soiled ovens. In such cases, additional scrubbing with specialized oven cleaners or using other cleaning methods may be necessary.

Consider these advantages and disadvantages before deciding to use ammonia to clean your oven. It is important to weigh the benefits against any potential challenges and choose a cleaning method that suits your preferences, safety guidelines, and the specific condition of your oven.

OvenConclusion:

Using ammonia to clean your oven can be an effective and efficient method to remove grease, baked-on food, and stubborn stains. By following the step-by-step process outlined in this article, you can ensure proper preparation, application, and post-cleaning care. Remember to take safety precautions, including proper ventilation and wearing gloves, and follow local regulations for disposing of cleaning solutions. With regular maintenance and cleaning, your oven will remain in excellent condition, ensuring optimal performance and a clean cooking environment.

What happens if you don’t change microwave filter?

microwave filter

Introduction:

Do microwaves have filters of 2024?

Regular maintenance of a microwave filter is essential for optimal performance and longevity of the appliance. The filter plays a crucial role in trapping grease, smoke, and other particles generated during cooking, preventing them from circulating back into the kitchen. Neglecting to change the microwave filter can have several consequences that can affect the microwave’s efficiency, air quality, and even pose potential safety risks. In this article, we will explore the impact of not changing a microwave filter, discussing the potential issues that can arise and the importance of regular filter maintenance.


microwaveSome of its key functionalities:

Do microwaves have filters?

The microwave filter serves an important function in a microwave oven. Here are some of its key functionalities:

Grease and Smoke Removal:

The microwave filter helps remove grease, oil, and smoke that are released during cooking. It captures these particles and prevents them from circulating back into the kitchen or being deposited on surfaces, providing a cleaner and healthier cooking environment.

Odor Reduction:

The microwave filter helps to reduce and eliminate odors that can be generated while cooking various foods. It traps particles that contribute to unpleasant smells, keeping the kitchen smelling fresh.

Air Purification:

Along with grease and odor removal, the microwave filter also helps purify the air by capturing other airborne particles, such as dust and allergens. It improves indoor air quality by preventing these particles from being dispersed throughout the kitchen and surrounding areas.

Protection of Internal Components:

The microwave filter helps protect the internal components of the microwave oven, such as the fan and motor, by trapping debris and preventing them from reaching and potentially damaging these sensitive parts.

Efficiency and Performance:

A clean and well-maintained microwave filter ensures optimal performance of the microwave oven. It allows for proper air circulation and ventilation, enhancing the overall efficiency and effectiveness of the appliance during cooking.

It is important to clean or replace the microwave filter regularly, following the manufacturer’s instructions or recommendations. Proper maintenance of the microwave filter ensures its continued functionality and helps prolong the lifespan of the microwave oven.

microwaveWhat happens if you don’t change microwave filter?

Reduced Airflow and Efficiency:

A clean filter is vital for maintaining proper airflow within the microwave. When the filter becomes clogged with grease, food particles, and other debris, it restricts the airflow, reducing the microwave’s efficiency. The consequences of a clogged or dirty filter include:

a. Inefficient Ventilation: A clogged filter impedes the circulation of air, preventing the efficient removal of smoke, odors, and steam generated during cooking. This can lead to poor ventilation, resulting in a lingering smell in the kitchen and potentially affecting the overall air quality.

b. Ineffective Grease Removal: The primary function of a microwave filter is to trap grease particles, preventing them from spreading throughout the kitchen. When the filter is dirty or clogged, it becomes less effective in capturing grease, allowing it to accumulate on the interior surfaces of the microwave and potentially impairing its functionality.

c. Increased Cooking Times: As airflow is restricted, the microwave may take longer to cook or heat food due to reduced ventilation. This can result in longer cooking times and potentially affect the overall efficiency of the microwave.


Compromised Air Quality:


The pDo microwaves have filters? urpose of a microwave filter is to improve the air quality in the kitchen by trapping and removing particles generated during cooking. Neglecting to change the filter can have several negative impacts on air quality:

a. Lingering Odors: A dirty or clogged filter is less effective in removing cooking odors from the air. This can result in unpleasant and lingering smells in the kitchen, affecting the overall comfort and ambiance of the space.

b. Smoke Accumulation: A clogged filter can hinder the removal of smoke generated during cooking, especially when grilling or using high heat settings. The smoke may linger in the kitchen, causing discomfort and potentially triggering smoke detectors.

c. Poor Indoor Air Quality: When the filter is not changed regularly, airborne particles, including allergens, bacteria, and mold spores, may not be efficiently filtered out. This can compromise the indoor air quality, potentially leading to allergic reactions, respiratory issues, or other health concerns.

Increased Fire Risk:

A microwave filter that is not properly maintained poses a potential fire risk, especially when it becomes excessively clogged or contaminated:

a. Grease Buildup: Over time, grease particles can accumulate on the filter surface and within the microwave cavity. If the filter is not changed regularly, this grease buildup can become a fire hazard. Grease is highly flammable, and any spark or heat source in the microwave can ignite it, potentially causing a fire.

b. Increased Smoke and Safety Risks: A clogged filter can lead to an increase in smoke production during cooking, which can trigger smoke detectors and potentially lead to false alarms or even evacuation. Excessive smoke in the kitchen can also reduce visibility, increasing the risk of accidents and injuries.

c. Malfunction or Damage: In extreme cases, a heavily clogged filter can impair the proper functioning of the microwave. Excessive grease accumulation inside the microwave can damage electrical components or lead to malfunctioning, posing safety risks to both the appliance and the user.


General Guidelines for Filter Maintenance:

To avoid the potential issues mentioned above, it is important to follow general guidelines for microwave filter maintenance:

a. Regular Cleaning: Clean the microwave filter regularly, following the manufacturer’s instructions. This typically involves removing the filter and washing it with warm, soapy water or placing it in a dishwasher if it is dishwasher-safe. Allow the filter to dry completely before reinstalling it.

b. Replacement Schedule: Consult the microwave’s user manual or manufacturer’s guidelines to determine the recommended frequency for filter replacement. As a general rule of thumb, filters should be replaced every 6 to 12 months or as specified by the manufacturer.

c. Visual Inspection: Regularly inspect the filter for any signs of damage, such as cracks, tears, or excessive grease buildup. If the filter appears damaged or heavily contaminated, it should be replaced immediately, even if it is before the recommended replacement schedule.

d. Proper Installation: Ensure the filter is correctly installed in the microwave, following the manufacturer’s instructions. Improper installation can compromise the filter’s effectiveness and potentially lead to safety risks.

e. Professional Maintenance: If there are any concerns or issues related to the microwave’s filter or ventilation system, it is advisable to seek professional maintenance or repair services. A technician can inspect and clean the filter, as well as address any potential problems with the microwave’s ventilation.

Convenience and Functionality:

Do microwaves have filters?

a. Cooking Flexibility: Having a clean and properly functioning microwave filter allows for greater cooking flexibility. With an efficient filter, users can confidently experiment with a wide range of recipes and cooking methods, including grilling, baking, or roasting, without the worry of compromising the microwave’s performance or air quality.

b. Odor Reduction: A clean filter helps eliminate strong and lingering cooking odors, enhancing the overall kitchen environment. This is particularly beneficial for households that regularly cook fragrant or pungent dishes, as it prevents the smells from permeating the kitchen and other areas of the house.

c. Quick Cleanup: Microwaving certain foods can result in splatters or spills that might accumulate over time if the filter is not regularly cleaned or replaced. A clean filter aids in quick and easy cleanup, as it traps grease and food particles, preventing them from settling on the interior surfaces of the microwave.


microwaveExtended Lifespan of the Microwave:

Regular maintenance, including the cleaning and replacement of the filter, contributes to the overall longevity of the microwave. By keeping the filter clean and functional, users reduce the risk of excessive strain on the microwave’s internal components and minimize the potential for malfunctions or damage that could shorten its lifespan.

Hygiene and Food Safety:

Do microwaves have filters?

A clean and well-maintained microwave filter plays a crucial role in maintaining hygiene and food safety:

a. Avoiding Cross-Contamination: An unclean filter can harbor bacteria, mold, and other contaminants that may contaminate the food being cooked or reheated in the microwave. Regular cleaning or replacement of the filter helps prevent cross-contamination, ensuring that the microwave is a safe and hygienic environment for food preparation.

b. Allergen Control: A clean filter helps minimize the presence of allergens in the microwave, benefiting individuals with food allergies or sensitivities. Proper maintenance reduces the risk of allergen cross-contact and helps create a safer cooking environment.

c. Food Quality Preservation: A clean filter prevents the transfer of odors, flavors, and excess grease to different food items. This helps preserve the quality, taste, and aroma of the food being cooked or reheated in the microwave.

Cost Savings:

Do microwaves have filters?

Maintaining a clean and functional microwave filter can lead to cost savings in the long run:

a. Energy Efficiency: A clean filter promotes better airflow and ventilation, allowing the microwave to operate at optimal efficiency. This translates into energy savings, as the microwave can reach desired cooking temperatures faster and complete cooking tasks more efficiently.

b. Reduced Repair Costs: Proper maintenance of the microwave filter minimizes the risk of malfunctions or damage to the appliance. By avoiding potential issues caused by a neglected filter, users can save on repair or replacement costs.

c. Extended Replacement Intervals: Regular maintenance, including filter cleaning and replacement, can help extend the lifespan of the microwave. This reduces the need for frequent replacement, resulting in cost savings for users.


microwaveConclusion:

Do microwaves have filters?

Regular maintenance of a microwave filter is crucial for optimal performance, air quality, and safety. Neglecting to change the filter can result in reduced airflow and efficiency, compromised air quality, and an increased risk of fire. By following general guidelines for filter maintenance, such as regular cleaning, replacement based on manufacturer’s recommendations, and visual inspection, users can ensure that their microwave operates efficiently and safely. Proper filter maintenance contributes to a better cooking experience, improved air quality, and the longevity of the microwave.

A Fusion: Black Cabinets with Stainless Steel Appliances

Black Cabinets with Stainless Steel AppliancesIntroduction to Modern Kitchen Design of2024

Black cabinets with stainless steel appliances

The Allure of Contemporary Kitchens

Contemporary kitchen designs have gained immense popularity, blending functionality with aesthetically pleasing elements. One of the trending combinations in modern kitchen design is black cabinets paired with stainless steel appliances. This striking duo offers an upscale, timeless look while maintaining practical benefits. Understanding why this combination works can help homeowners and designers make thoughtful, impactful choices.

Black cabinets serve as a bold statement, giving a kitchen a sophisticated, elegant feel. They act as a dramatic backdrop, allowing other design elements to shine. Stainless steel appliances complement the black cabinets beautifully, providing a sleek, polished look. The reflective surface of stainless steel helps bounce light around the room, counteracting the potential darkness of black cabinets.

Moreover, this combination is highly versatile, fitting seamlessly into various design styles. Whether your kitchen leans towards industrial, minimalist, or even traditional styles, black cabinets and stainless steel appliances can adapt to fit. This adaptability ensures that the kitchen remains stylish and relevant for years to come.

In addition to their visual appeal, black cabinets and stainless steel appliances offer practical benefits. For example, black cabinets are less likely to show dirt and smudges compared to lighter cabinets. Stainless steel appliances are known for their durability and ease of cleaning, making them a practical choice for busy kitchens.

The allure of contemporary kitchens lies not just in their stylish design but also in their functionality. The combination of black cabinets and stainless steel appliances provides an ideal balance of form and function. Understanding this can help homeowners create a kitchen space that is both beautiful and practical.

Black Cabinets with Stainless Steel AppliancesA Timeless Aesthetic

black stainless steel appliances with black cabinets

Black cabinets paired with stainless steel appliances create a timeless aesthetic that transcends fleeting design trends. This combination exudes a sense of permanence and sophistication, ensuring that the kitchen remains stylish over the years. Understanding the elements that contribute to this timeless appeal can guide homeowners in making enduring design decisions.

The color black traditionally symbolizes elegance, power, and sophistication. In the context of kitchen cabinetry, black imbues the space with a sense of luxury and refinement. While some might worry that black cabinets could make the kitchen feel dark or confined, the reflective surface of stainless steel appliances creates a counterbalance. The interplay of matte and shiny surfaces adds depth and interest, making the space feel dynamic yet cohesive.

Stainless steel appliances are the epitome of modern luxury and functionality. Their sleek appearance complements a variety of cabinet styles, from shaker to flat-panel, ensuring versatility. Stainless steel also has a neutral quality that pairs well with different color palettes and materials, making it an evergreen choice in kitchen design.

Another factor that adds to the timeless appeal is the harmony between traditional and contemporary elements. Black cabinets have a classic undertone, while stainless steel conveys a modern sensibility. This blend ensures that the kitchen remains relevant and elegant through various design evolution phases.

The timeless aesthetic of black cabinets with stainless steel appliances derives from their balanced and complementary nature. This combination of classic and modern elements creates a harmonious and enduring kitchen design. Understanding these principles can help homeowners achieve a look that stands the test of time.

Black Cabinets with Stainless Steel AppliancesPractical Benefits

Durability and Maintenance

The practical benefits of black cabinets and stainless steel appliances go beyond their aesthetic appeal. Both elements are known for their durability and ease of maintenance, making them perfect for busy households. Understanding these benefits helps homeowners make decisions that align with both their lifestyle and design preferences.

Black cabinets are less prone to showing dirt, smudges, and wear compared to lighter-colored cabinets. This makes them an ideal choice for families or individuals who may not have the time for constant cleaning. When minor scratches or wear do occur, they are often less noticeable on black surfaces. Regular wiping with a damp cloth usually suffices to keep black cabinets looking pristine.

Stainless steel appliances, too, offer remarkable durability. Resistant to rust, heat, and stains, these appliances are built to withstand the rigors of daily use. Stainless steel surfaces are non-porous, making them resistant to bacterial growth and easy to sanitize. To maintain their gleaming appearance, all it typically takes is a swipe with a microfiber cloth and a suitable cleaner.

Furthermore, both black cabinets and stainless steel appliances are incredibly resilient. Whether you are dealing with high humidity levels or frequent temperature changes, these materials are unlikely to deteriorate quickly. This durability ensures that your kitchen will retain its stylish appearance and functionality for many years.

Understanding the durability and maintenance benefits of black cabinets and stainless steel appliances underscores their practicality. These elements not only enhance the kitchen’s aesthetic appeal but also offer long-lasting performance. Choosing them ensures that the kitchen remains both beautiful and functional over time.

Black Cabinets with Stainless Steel AppliancesVersatility in Design

One of the standout features of black cabinets and stainless steel appliances is their versatility in design. This combination can adapt to various styles, making it a favorite among designers and homeowners alike. Understanding how this versatility works can help in creating a kitchen that reflects individual tastes.

Black cabinets provide a neutral yet bold backdrop, allowing other design elements to take center stage. Whether you prefer a minimalist look or a more elaborate design, black cabinets can serve as the perfect canvas. You can pair them with different countertop materials, such as marble, quartz, or wood, to achieve the desired aesthetic. The neutral nature of black ensures that it complements a wide range of colors and materials.

Stainless steel appliances are equally versatile. Their sleek, modern appearance works well with both traditional and contemporary cabinet styles. Stainless steel’s reflective quality adds brightness and depth to the kitchen, balancing the boldness of the black cabinets. This allows for flexibility in choosing other design elements, such as backsplashes, lighting, and fixtures.

Moreover, this combination allows for creative expression. For instance, you can add pops of color through accessories like kitchen towels, bar stools, or small appliances. These accents can easily be changed to update the look of the kitchen without major renovations. Additionally, you can experiment with different textures and finishes, such as matte or glossy cabinets, to add visual interest.

Understanding the versatility of black cabinets and stainless steel appliances enables homeowners to create a customized kitchen. This adaptability ensures that the space can evolve with changing tastes and trends. Choosing this combination allows for endless possibilities in kitchen design, making it a timeless choice.

Complementary Elements

Lighting and Accents

Lighting plays a crucial role in enhancing the beauty of black cabinets and stainless steel appliances. Proper lighting not only illuminates the space but also highlights the design elements. Understanding the importance of lighting and accents can help create a balanced and inviting kitchen.

Ambient lighting, such as recessed ceiling lights, provides overall illumination, ensuring that the kitchen is well-lit. However, task lighting is essential for specific areas like countertops and kitchen islands. Under-cabinet lighting is an excellent choice, as it brightens the workspace and accentuates the sleek lines of the cabinets. Pendant lights over the kitchen island add a decorative touch while providing focused light for meal prep and dining.

Accents and accessories can further enhance the kitchen’s aesthetic. Metallic accents, such as chrome or brushed nickel hardware, complement stainless steel appliances beautifully. These elements add a cohesive look and tie the design together. You can also introduce glass elements, such as glass cabinet doors or decorative glass tiles, to add a touch of elegance and sophistication.

In addition to metallic accents, natural materials like wood or stone can create a harmonious balance. Wooden bar stools, cutting boards, or open shelving add warmth and texture to the kitchen. Stone countertops, such as quartz or granite, provide a durable and elegant surface that complements the overall design.

Understanding the role of lighting and accents helps in creating a cohesive and inviting kitchen. The right lighting enhances the beauty of black cabinets and stainless steel appliances, while strategically chosen accents add personality and style. By incorporating these elements, homeowners can create a well-balanced and aesthetically pleasing kitchen space.

Black Cabinets with Stainless Steel AppliancesFlooring and Backsplashes

The choice of flooring and backsplashes can significantly impact the overall look and feel of the kitchen. Complementing black cabinets and stainless steel appliances with the right flooring and backsplash materials enhances the kitchen’s design. Understanding how to harmonize these elements can help create a cohesive and stylish kitchen.

For flooring, consider materials that provide contrast and complement the dark cabinets. Light-colored flooring, such as light hardwood, tile, or vinyl, can create a striking contrast and make the kitchen feel more spacious. On the other hand, dark flooring, such as deep-toned wood or dark tiles, can create a dramatic and cohesive look. The choice depends on the desired aesthetic and the overall design of the home.

Backsplashes offer an opportunity to add texture, color, and personality to the kitchen. Subway tiles are a popular choice, providing a classic and timeless look that pairs well with black cabinets and stainless steel appliances. Glass tiles can add a touch of modernity and reflect light, creating a brighter space. For a more unique look, consider patterned or mosaic tiles that add visual interest and a focal point to the kitchen.

Additionally, materials like stainless steel or natural stone can be used for backsplashes to create a cohesive look. A stainless steel backsplash can seamlessly blend with stainless steel appliances, while natural stone adds texture and warmth to the kitchen.

Understanding the importance of flooring and backsplashes in enhancing the kitchen design helps create a harmonious and visually appealing space. The right choice of materials complements the bold black cabinets and sleek stainless steel appliances, adding depth and character to the kitchen. Homeowners can create a well-coordinated and stylish kitchen by thoughtfully selecting these elements.

Conclusion: A Harmonious and Modern Kitchen Design

Black cabinets paired with stainless steel appliances create a harmonious and modern kitchen design that is both stylish and functional. By understanding the key elements contributing to this combination’s appeal, homeowners can make informed design choices that stand the test of time.

The allure of contemporary kitchens lies in their ability to blend bold design with practicality. Black cabinets provide a sophisticated backdrop, while stainless steel appliances add a sleek and polished look. This combination offers a timeless aesthetic that transcends fleeting design trends.

Practical benefits, such as durability and ease of maintenance, make black cabinets and stainless steel appliances a smart choice for busy households. Their resilience ensures that the kitchen remains beautiful and functional for years to come.

The versatility of this combination allows it to adapt to various design styles, making it suitable for different preferences and spaces. By carefully selecting lighting, accents, flooring, and backsplashes, homeowners can create a cohesive and inviting kitchen that reflects their unique taste.

In conclusion, the harmonious blend offers a perfect balance of elegance, practicality, and versatility. This combination creates a kitchen that is not only visually appealing but also a joy to use. By embracing this stylish fusion, homeowners can achieve a modern and timeless kitchen design that enhances their living space.

Do Primo Water Dispensers Have Filters?

Primo Water Dispensers

Primo Water DispensersIntroduction to Primo Water Dispensers of 2024

The Rise in Popularity of Water Dispensers

Does primo water dispenser have a filter

Water dispensers have increasingly become essential appliances in homes and offices, offering convenient access to clean water. With concerns about tap water quality, many people turn to water dispensers for a reliable alternative. Primo Water Dispensers are among the top choices, known for their modern design and practical features. Understanding these dispensers’ specific attributes can help users appreciate their benefits.

Primo Water Dispensers cater to a range of needs by providing both hot and cold water. This dual functionality goes beyond just hydration; it supports various daily activities, from cooking to brewing coffee. The ease of use and instant access to water at the desired temperature save time and effort. Additionally, the aesthetic appeal of Primo dispensers makes them suitable for diverse environments, including kitchens and office spaces.

One significant advantage of using water dispensers is the consistent quality of the water they deliver. Bottled water, often preferred for these devices, undergoes rigorous purification processes. This ensures that the water is free from common contaminants and has an improved taste. For many users, this reliability is a significant factor in choosing a water dispenser over regular tap water.

With the growing emphasis on health and convenience, it’s clear why Primo Water Dispensers have gained such popularity. They not only offer a practical hydration solution but also fit seamlessly into modern lifestyles. Their combination of functionality, design, and consistent water quality makes them a valuable addition to any space.

By understanding the rise in popularity of water dispensers like Primo, we can better appreciate their role in everyday life. These devices provide a straightforward way to access clean, safe water, promoting better hydration habits.

Primo Water DispensersDistinguishing Features of Primo Water Dispensers

Does primo water have chlorine

Primo Water Dispensers come equipped with a variety of features designed to enhance user experience. These features contribute to their reputation for convenience, efficiency, and safety. Knowing what sets Primo dispensers apart can help users make an informed decision.

One standout feature is the hot and cold water dispensing options. Users can quickly access hot water for cooking or making hot beverages and cold water for refreshing drinks. The ability to switch between different temperatures at the push of a button adds significant convenience.

Primo Water Dispensers are also energy efficient. Many models include an energy-saving mode, which lowers electricity consumption when the dispenser is not in frequent use. This feature helps users save on utility bills and reduces the appliance’s environmental impact.

Safety is another essential aspect of Primo Water Dispensers. Many models come with a child safety lock to prevent accidental hot water dispensing. This is particularly important in households with young children, providing peace of mind for parents. Furthermore, self-cleaning options are available in some models. These use ozone or ultraviolet (UV) light to sanitize the water and internal components. This technology ensures that the dispenser remains clean and reduces the need for manual maintenance.

Ease of use is another critical feature. Primo Water Dispensers often have a bottom-loading design, making it easier to load and replace water bottles. This design eliminates the need to lift heavy water bottles, reducing the risk of strain or injury.

The sleek and modern design of Primo Water Dispensers allows them to blend seamlessly into various settings. Whether in a home kitchen or an office break room, their aesthetic appeal enhances the overall environment. Understanding the distinguishing features of Primo Water Dispensers reveals why they are a preferred choice. The combination of functionality, safety, efficiency, and design meets the needs of a wide range of users.

Primo Water DispensersThe Role of Filters in Water Dispensers

Importance of Water Filtration

Does the primo water dispenser have a filter

Water filtration is crucial for ensuring the safety and quality of drinking water. Filters remove contaminants, improve taste, and make water safe for consumption. Understanding the role of filters can highlight their importance in maintaining healthy hydration habits.

Most basic filtration systems use activated carbon to remove chlorine, sediment, and organic compounds. These filters improve the taste and odor of water, making it more palatable. More advanced systems, like reverse osmosis, remove a broader range of contaminants, including heavy metals and dissolved solids. Ultraviolet (UV) light systems neutralize harmful microorganisms, adding another layer of protection.

Filtered water is particularly beneficial in areas with poor tap water quality. Municipal water supplies can sometimes contain impurities that affect taste and health. Using a water dispenser with a reliable filtration system ensures that these contaminants are removed. This is especially important for vulnerable populations, such as young children and the elderly.

Filtration systems also play a role in extending the lifespan of water dispensers. By removing impurities, filters help prevent the buildup of scale and sediment in the appliance. This reduces maintenance needs and improves the dispenser’s overall performance and efficiency.

In conclusion, the importance of water filtration lies in its ability to enhance water quality and safety. Filters remove harmful contaminants, improve taste, and can even contribute to the longevity of appliances. Understanding these benefits underscores why many people choose filtered water for their daily hydration needs.

Primo Water DispensersDo Primo Water Dispensers Have Built-In Filters?

Is primo water safe

Primo Water Dispensers are designed to provide high-quality water, but the presence of built-in filters varies by model. Some models do not include built-in filtration systems but offer other effective ways to ensure water purity.

Firstly, many Primo dispensers use pre-bottled water, which has already undergone a rigorous purification process. This bottled water is typically treated using methods like reverse osmosis and UV sterilization. These processes remove contaminants, ensuring that the water is pure and safe to drink. Therefore, even without a built-in filter, Primo dispensers can still provide high-quality water.

Some Primo dispenser models feature self-sanitizing technology. These models may use ozone or UV light to sanitize the water and internal components continuously. While this is not the same as a traditional filter, it helps maintain the cleanliness and freshness of the water. This technology significantly reduces the risk of bacterial growth within the dispenser, adding an extra layer of safety.

Primo also offers options for users who prefer to filter their tap water before using the dispenser. Consumers can use external filtration systems, such as countertop or under-sink filters, to purify their tap water. This filtered water can then be used in the dispenser, ensuring that it meets the desired quality standards.

For those who prefer a more integrated solution, Primo provides filter-compatible models. These dispensers can be paired with Primo’s standalone filtration kits, which attach to the dispenser and provide additional water purification. This option allows users to benefit from the added security of a filtration system without compromising convenience.

Understanding whether Primo Water Dispensers have filters requires examining the specific model and its features. While not all models have built-in filters, options are available to ensure high-quality water. From pre-bottled purified water to external filtration systems, Primo offers multiple solutions to meet consumer needs.

Benefits of Primo Water Dispensers

Ensuring Water Quality and Safety

Ensuring water quality and safety is a primary concern for many consumers, and Primo Water Dispensers address this need effectively. By offering various purification options, Primo ensures that users can enjoy clean and refreshing water.

The multi-step purification process used for Primo’s pre-bottled water is a key factor in ensuring quality. This process includes methods like reverse osmosis and UV sterilization, which effectively remove contaminants. These steps remove chlorine, heavy metals, bacteria, and other impurities, providing safe and great-tasting water.

Another advantage of Primo Water Dispensers is the reduced reliance on single-use plastic bottles. By using a reusable dispenser, consumers can minimize environmental impact while still enjoying purified water. This sustainable approach aligns with the growing emphasis on eco-friendly practices.

Primo’s self-sanitizing technology further enhances water safety. Models equipped with ozone or UV light continuously sanitize the dispenser’s internal components. This prevents bacterial growth and maintains the cleanliness of the water, reducing the risk of contamination. Users can enjoy peace of mind knowing that their water is safe and free from harmful microorganisms.

The ability to use external filtration systems with Primo dispensers adds another layer of flexibility. Consumers can choose their preferred filtration method to ensure the water meets their desired standards. This adaptability allows users to control the water quality and customize their hydration experience.

Understanding how Primo Water Dispensers ensure water quality and safety underscores their value. The combination of multi-step purification, self-sanitizing technology, and flexibility in filtration options provides a comprehensive solution for clean water. Consumers can enjoy reliable access to safe and delicious water, enhancing their overall well-being.

Primo Water DispensersEnhancing User Convenience

Primo Water Dispensers are designed with user convenience in mind, offering features that simplify daily hydration routines. These features make Primo dispensers a practical choice for both homes and offices.

One of the standout features is the bottom-loading design found in many Primo dispensers. This design eliminates the need to lift heavy water bottles, making it easier and safer to replace them. Changing the bottle takes just a few simple steps, reducing the hassle typically associated with top-loading models.

Primo Water Dispensers also offer user-friendly controls, allowing for easy operation. The clearly labeled push-button controls for hot and cold water make it straightforward to get water at the desired temperature. This simplicity ensures that all users, regardless of age or technical skill, can operate the dispenser effortlessly.

Energy efficiency is another convenient feature of Primo dispensers. Many models include an energy-saving mode, which reduces power consumption during periods of low use. This not only helps users save on electricity bills but also aligns with environmentally conscious practices.

Maintenance is made easy with Primo Water Dispensers. Models with self-sanitizing technology automatically keep the internal components clean, reducing the need for manual cleaning. Additionally, the use of high-quality materials ensures that the dispensers are durable and long-lasting, requiring minimal upkeep.

The sleek and modern design of Primo dispensers enhances both functionality and aesthetics. These dispensers fit seamlessly into a variety of settings, from kitchens to office break rooms. Their stylish appearance adds to the overall decor while providing practical use.

Understanding how Primo Water Dispensers enhance user convenience emphasizes their suitability for everyday use. Features like the bottom-loading design, user-friendly controls, energy efficiency, and easy maintenance make them a practical addition to any space. Users can enjoy the benefits of reliable hydration without sacrificing convenience.

Primo water dispensers, like any other product, have their own advantages and disadvantages. Here are some points to consider:

Advantages of Primo Water Dispensers:

Convenient Access to Clean Water: Primo water dispensers provide a convenient way to access clean drinking water at home or in the office. They eliminate the need to constantly refill and store water bottles, making it easy to stay hydrated.

Filtration System: Many Primo water dispensers come with built-in filtration systems that help remove impurities, chlorine, and unpleasant tastes or odors from the water. This ensures that you are drinking purer and potentially healthier water.

Hot and Cold Water Options: Primo water dispensers often offer both hot and cold water options. This versatility allows you to enjoy hot beverages like tea or coffee and chilled drinks without the need for separate appliances or refrigeration.

Environmentally Friendly: By using a Primo water dispenser, you can reduce plastic bottle waste, which helps protect the environment. It’s a more sustainable option compared to single-use plastic bottles.

Cost-effective: Over time, using a Primo water dispenser can be more cost-effective compared to continuously purchasing bottled water. It eliminates the expense of buying single-use water bottles and offers a more economical long-term solution.

Disadvantages of Primo Water Dispensers:

Initial Investment: Purchasing a Primo water dispenser requires an initial investment. The cost of the dispenser itself and any additional maintenance or replacement filters can add to the overall expense.

Maintenance: Primo water dispensers require regular maintenance, such as cleaning the dispenser and replacing filters. Failure to perform proper maintenance can result in decreased performance or water quality.

Limited Capacity: The capacity of Primo water dispensers can vary, and some models may have a smaller water storage capacity. Depending on your water consumption needs, you may need to refill the dispenser more frequently.

Space Requirements: Primo water dispensers occupy space in your kitchen or office. Consider the available space and choose a model that fits appropriately in your desired location.

Dependence on Water Source: Primo water dispensers rely on a water source, such as a refillable container or a water supply line. Ensure that you have access to clean and reliable water sources to prevent interruptions in supply.

Considering these points will help you assess whether a Primo water dispenser aligns with your needs, preferences, and practical circumstances.

Conclusion: The Value of Primo Water Dispensers

Primo Water Dispensers offer a reliable and convenient solution for accessing clean, refreshing water. By exploring their features, filtration options, and benefits, we gain a comprehensive understanding of their value.

Primo Water Dispensers effectively address water quality and safety concerns through various purification methods. Whether using pre-bottled water, self-sanitizing technology, or external filtration systems, Primo ensures that users enjoy safe and great-tasting water. The flexibility in filtration options provides users with peace of mind, knowing their water is free from contaminants.

The user-friendly design of Primo Water Dispensers enhances daily convenience. Features like bottom-loading, easy controls, energy efficiency, and low maintenance requirements make these dispensers a practical choice for homes and offices. Their sleek and modern design allows them to blend seamlessly into various environments, adding both functionality and aesthetic appeal.

Understanding the value of Primo Water Dispensers highlights their role in promoting better hydration habits. By providing easy access to purified water, Primo dispensers support a healthy lifestyle while also being environmentally conscious. Consumers can enjoy the benefits of clean water with minimal effort, making Primo dispensers a worthwhile investment.

In conclusion, Primo Water Dispensers combine quality, convenience, and design to offer a comprehensive hydration solution. Their ability to ensure water safety, enhance user experience, and fit into diverse settings makes them a preferred choice for many consumers. Prioritizing both functionality and user satisfaction, Primo Water Dispensers stand out as a valuable addition to any space.

Iron Stains on Clothes: Effective Techniques for Removal

Iron Stains on ClothesIntroduction of iron stain on clothes of 2024:

Iron stains on clothes can be a frustrating and stubborn problem that can make your favorite garments appear unsightly. Whether caused by rusty water, iron-rich soil, or an accidental encounter with a metal object, these stains can be a challenge to remove. In this comprehensive article, we will explore various techniques and home remedies to effectively eliminate iron stains from clothes. From understanding the nature of iron stains to step-by-step removal methods, join us as we delve into how to remove iron burn stain from clothes and reclaim the pristine condition of your garments.


Iron Stains on ClothesIron marks on clothes can have several potential hazards and impacts:

Aesthetic Damage:

Iron stains can cause unsightly brown or orange discoloration on clothes. These stains are often difficult to remove completely, impacting the appearance and overall quality of the garments. Stained clothes may appear dirty, worn, or poorly maintained, diminishing their visual appeal.

Fabric Damage:

Iron stains can weaken the fabric fibers, leading to potential damage or deterioration. Over time, the affected fabric may become more susceptible to tearing, fraying, or developing holes, reducing the lifespan of the garments.

Care Challenges:

Removing iron stains from clothes can be challenging. The staining can become more embedded into the fabric, making it harder to remove with regular laundering or stain removal methods. This may require specialized stain removal techniques or professional cleaning services, adding extra effort and potential costs.

Increased Replacement Costs:

If iron stains cannot be effectively removed, the affected clothes may no longer be suitable for use. This can result in additional expenses to replace the stained items, especially if they are valuable or essential pieces in a wardrobe.

Negative Impression:

Wearing clothes with visible iron stains may give the perception of poor personal hygiene or lack of care. This can reflect negatively on an individual’s personal or professional image, potentially affecting confidence and social interactions.

Prevention is key to avoiding the hazards of iron stains on clothes. It is important to address the source of iron staining, such as water quality or iron particles in the iron itself. Ensuring that your iron is clean, using distilled or filtered water when necessary, and employing proper ironing techniques can help minimize the risk of iron stains on clothes. Promptly treating and removing any stains that do occur can also reduce the hazards and preserve the condition of the garments.

Understanding Iron Stains: What Causes Them and How They Behave

To effectively remove iron stains from clothes, it is important to have a basic understanding of what causes these stains and how they interact with different fabrics.

Iron Stains on ClothesThe Culprit: Iron and Its Interaction with Fabrics:‘

Iron, a common element found in water, soil, and various everyday objects, can oxidize and leave behind unsightly stains on fabrics. When iron comes into contact with moisture, it can react with the oxygen in the air, forming rust. These rust particles can adhere to fabrics, especially porous ones like cotton or linen, resulting in visible stains. Understanding this chemical reaction is crucial for selecting appropriate stain removal techniques.

Different Types of Iron Stains and Their Characteristics:

Removing iron stains from clothes

Iron stains can vary in appearance, texture, and severity depending on their source and the fabric they affect. Some stains may appear as reddish-brown spots, while others can cause yellowish discoloration. Additionally, the age of the stains and the fabric composition can affect the level of difficulty in removing them. Identifying the type and characteristics of the iron stains will enable you to choose the most suitable method to eliminate them effectively.

Tried and Tested Methods for Removing Iron Stains from Clothes

Now that we understand the nature of iron stains, let’s explore tried and tested methods for effectively removing them from clothes.

Pre-Treatment: Immediate Actions to Minimize Stain Setting:

When dealing with fresh iron stains, taking quick action can prevent the stain from setting deeper into the fabric. Rinse the stained area with cold water to flush out as much iron residue as possible. Avoid using hot water, as it can set the stain further. If the stain persists, you can move on to more targeted removal techniques.

Natural Remedies:

Harnessing the Power of Household Ingredients: Many household ingredients have stain-removing properties that can be effective in removing iron stains from clothes. For example, lemon juice, vinegar, or hydrogen peroxide can break down the rust particles and lift them from the fabric. Applying these remedies, either directly or through soaking, and allowing them to work on the stain before washing can yield positive results. However, it’s important to test these remedies on a small, inconspicuous area of the garment before using them more extensively.

Commercial Stain Removers:

Effective Products for Iron Stain Removal: If natural remedies don’t yield satisfactory results, commercial stain removers specially formulated for iron stains can be a valuable option. Look for products that contain rust-specific ingredients to break down the stain effectively. Follow the manufacturer’s instructions for application and ensure compatibility with your fabric type. Regular laundry detergent with added stain-fighting agents can also be effective in removing iron stains.

Iron Stains on ClothesSpecial Considerations for Delicate Fabrics: Iron Stain Removal Techniques

How to get iron stain out of clothes

When dealing with delicate fabrics, such as silk, wool, lace, or synthetic materials, special care must be taken to remove iron stains effectively without damaging the fabric itself.

Treating Iron Stains on Silk, Wool, and Lace:

Delicate fabrics like silk, wool, and lace require gentle stain removal techniques. It is essential to avoid using harsh chemicals or vigorous rubbing that can cause further damage. Instead, start by blotting the stained area with a clean, white cloth or paper towel to absorb any excess moisture. Next, apply a small amount of a mild detergent or enzyme-based stain remover directly to the stain and gently work it into the fabric using your fingertips or a soft-bristled brush. Allow the product to sit for a few minutes before rinsing with cool water. Repeat this process if necessary until the stain is no longer visible. Finally, hand wash or follow the fabric’s care instructions for proper cleaning and drying.

Caring for Synthetic Fabrics: Polyester and Nylon:

Synthetic fabrics, such as polyester and nylon, can be more forgiving when it comes to stain removal. Begin by pre-treating the iron stain by rinsing the affected area with cold water. To further break down the stain, apply a small amount of liquid laundry detergent directly to the stain and gently rub it in. Allow the detergent to penetrate the fabric for a few minutes before washing the garment as usual. If the stain persists, repeat the process or consider using a pre-wash stain remover specifically designed for synthetic fabrics. Always follow the fabric’s care instructions to ensure the garment’s longevity and quality are maintained.

Preventing Future Iron Stains: Tips for Care and Maintenance

How to get burn marks from iron out of clothes

To prevent future iron stains on clothes, a proactive approach to care and maintenance can make a significant difference. Implement these preventive measures to keep your garments stain-free.

Assessing Water Quality:

Installing a Water Softener or Filter: One common source of iron stains is water with high iron content. Assessing your water quality can help identify if this is a concern. Depending on the severity of the issue, installing a water softener or filter can help reduce iron particles, preventing them from staining your clothes. Consulting with a water treatment specialist can assist in determining the most suitable system for your specific needs.

Precautions during Activities:

Shielding Clothes from Potential Iron Contamination: Certain activities or environments can expose your clothes to iron-staining agents, such as iron-rich soil or metal objects. Taking precautions like wearing protective gloves, aprons, or coveralls can help keep your clothes safe from potential iron stains. Additionally, rinsing or washing outdoor clothing immediately after exposure to iron-rich elements can minimize the chances of stains setting.

Iron Stains on ClothesConclusion:

How to remove iron marks from clothes

How to remove iron stain from shirt

Iron stains on clothes can be a frustrating nuisance, but with the right knowledge and techniques, you can restore your garments to their former glory. By understanding the causes and behavior of iron stains, you can select appropriate methods to eliminate them. Whether you choose to pre-treat with immediate actions, harness the power of natural remedies, or utilize commercial stain removers, persistence and patience are key. So, the next time you encounter iron stains on your clothes, armed with the information and techniques from this article, you can confidently tackle the stains and reclaim the pristine condition of your garments.

Removing iron stains from clothes requires an understanding of the fabric’s composition and selecting the appropriate stain removal techniques accordingly. Delicate fabrics, such as silk, wool, and lace, demand a gentle approach to avoid damage, while synthetic materials like polyester and nylon can tolerate slightly more robust methods. By taking preventive measures, such as water assessment and protective clothing during specific activities, you can minimize the likelihood of future iron stains on your garments. Armed with these techniques and preventive strategies, you can confidently tackle iron stains, ensuring your clothes remain clean, fresh, and stain-free.

Art of Efficient Ironing: The Fastest Way to Iron Clothes

Efficient Ironing

Efficient Ironing

Introduction

In the fast-paced world we live in, the task of ironing clothes can often feel like a time-consuming chore that stands between us and a polished, presentable appearance. However, with the right techniques and a strategic approach, it is possible to streamline the ironing process and achieve crisp, wrinkle-free garments in a fraction of the time. In this comprehensive guide, we will explore the fastest way to iron clothes, equipping you with the knowledge and practical tips to elevate your ironing prowess and reclaim precious time in your daily routine. Whether you’re a busy professional, a meticulous homemaker, or simply someone who values a well-groomed appearance, this article will provide you with the insights and strategies to master the art of efficient ironing and keep your clothes looking their best.

Fastest way to iron clothes

Prepare to discover the secrets to lightning-fast ironing and experience the transformative power of a well-pressed wardrobe.


Efficient IroningFastest way to iron clothes: Preparing for Efficient Ironing

Before you even pick up the iron, setting the stage for a streamlined ironing process can make a significant difference in the overall speed and effectiveness of your efforts.

Organizing Your Ironing Space

Fastest way to iron a shirt

Maintaining a well-organized and clutter-free ironing area can greatly contribute to a faster and more efficient ironing experience.

Selecting the Right Ironing Board

Choose an adjustable, sturdy ironing board that provides a stable and spacious surface for your garments.

Optimizing Your Ironing Station

Arrange your ironing station with all the necessary supplies, such as your iron, starch, and hangers, within easy reach to minimize interruptions during the ironing process.

Sorting and Prioritizing Your Clothes

Taking the time to sort and prioritize your clothes can help you tackle the ironing process in a strategic and time-efficient manner.

Categorizing by Fabric and Garment Type

Group your clothes by fabric type and garment category to streamline the ironing process and ensure consistent temperature and technique settings.

Addressing the Most Wrinkled Items First

Start with the most wrinkled or heavily creased garments, as they will require the most attention and may take longer to iron.

Efficient IroningFastest way to iron clothes: Mastering the Ironing Technique

With your ironing space and clothes properly prepared, it’s time to delve into the essential techniques and strategies that will help you iron your garments quickly and effectively.

Optimizing Iron Temperature and Steam Settings

Selecting the appropriate temperature and steam settings for each fabric type is crucial for achieving efficient and damage-free ironing.

Understanding Fabric-Specific Settings

Familiarize yourself with the recommended temperature and steam settings for common fabric types, such as cotton, linen, and synthetic blends.

Utilizing the Steam Function Efficiently

Strategically use the steam function to tackle heavily wrinkled areas, as it can help relax and smooth the fabric more quickly.

Establishing a Systematic Ironing Approach

Adopting a methodical and efficient ironing approach can greatly reduce the time and effort required to tackle your entire wardrobe.

Mastering the Inside-Out Technique

Iron the inside of the garment first, then flip it over and iron the outside for a crisp, professional-looking finish.

Incorporating Targeted Folding and Creasing

Fold and crease your garments in specific ways to minimize the number of passes required with the iron.

Leveraging Time-Saving Tricks and Techniques

Incorporating a few strategic tricks and techniques can further streamline the ironing process and help you achieve lightning-fast results.

Using the Edge of the Ironing Board

Utilize the edge of the ironing board to efficiently iron sleeves, collars, and other hard-to-reach areas.

Mastering the “Spritz and Press” Method

Lightly spraying the garment with water before ironing can help relax the fabric and reduce the number of passes required.

Efficient IroningFastest way to iron clothes: Optimizing Your Ironing Routine

To maintain the efficiency and effectiveness of your ironing efforts, it’s essential to incorporate strategic routines and habits that will keep your clothes looking their best with minimal time and effort.

Developing a Consistent Ironing Cadence

Establishing a regular ironing routine can help you stay on top of your laundry and prevent the buildup of wrinkled clothes.

Scheduling Ironing Sessions

Set aside dedicated time for ironing, whether it’s weekly, bi-weekly, or as needed, to ensure your clothes are always well-maintained.

Incorporating Ironing into Your Laundry Cycle

Integrate the ironing process seamlessly into your overall laundry routine to streamline the task and prevent the accumulation of wrinkled garments.

Maintaining Your Ironing Equipment

Properly caring for your iron and ironing board can extend their lifespan and ensure they continue to perform at their best.

Cleaning and Descaling the Iron

Regularly clean and descale your iron to prevent the buildup of mineral deposits and maintain optimal steam performance.

Storing the Ironing Board Properly

Store your ironing board in a way that preserves its shape and ensures it’s ready for use whenever you need it.

Leveraging Fabric-Friendly Storage Solutions

Implementing smart storage solutions for your freshly ironed clothes can help maintain their crisp appearance and minimize the need for future ironing.

Using Garment Hangers and Folders

Invest in high-quality hangers and folding solutions to store your clothes in a way that prevents wrinkles and creases.

Incorporating Breathable Storage Containers

Opt for storage containers made of breathable materials, such as fabric or mesh, to prevent the buildup of moisture and wrinkles.

Important considerations to keep in mind:

When it comes to efficient ironing, here are some important considerations to keep in mind:

Read the Instructions:

Familiarize yourself with the instructions provided by the manufacturer for your specific iron model. Different irons may have specific features or settings, and understanding how to use them correctly will help maximize efficiency.

Preparation:

Prepare your garments or fabrics by checking the care labels for specific ironing instructions. Sort the items based on fabric type and set aside any delicate or specialty materials that may require lower heat or special ironing techniques.

Heat Settings:

Adjust the heat setting on your iron according to the fabric you are ironing. Lower heat settings are typically suitable for delicate fabrics, while higher heat settings are appropriate for linen or cotton. Following the recommended heat settings will protect the fabric and optimize efficiency.

Preparing the Ironing Surface:

Ensure that your ironing board or surface is clean and smooth. If necessary, cover the ironing board with a clean, heat-resistant ironing pad or cover to provide a smooth and stable surface for efficient ironing.

Ironing Technique:

Start with the items that require lower heat and gradually move to fabrics that require higher heat. Iron in sections, working from one area to another in smooth and continuous movements. Avoid lingering too long in one spot to minimize the risk of burning or damaging the fabric.

Steam Function:

Utilize the steam function on your iron when appropriate and based on the fabric’s care instructions. Steam can help remove wrinkles with ease and enhance ironing efficiency. Ensure that your iron has enough water for efficient steam production.

Hanging or Folding:

After ironing each item, hang or fold it immediately to prevent wrinkles from forming again. This helps retain the freshness and pressed look of the garments for longer periods, reducing the need for frequent ironing.

Proper Maintenance:

Regularly clean the iron’s soleplate to remove any residue or lint, as this can affect its efficiency. Follow the manufacturer’s instructions for cleaning and maintenance to ensure optimal performance.

Remember, efficient ironing also involves working on a well-lit and comfortable area, having accessibility to a nearby power outlet, and practicing good posture to avoid strain or fatigue. By following these tips, you can streamline the ironing process and achieve efficient results while maintaining the condition of your garments.

Efficient IroningConclusion: Fastest way to iron clothes:

Mastering the art of efficient ironing is a transformative skill that can save you time, energy, and the frustration of dealing with wrinkled, unkempt clothes. Through this comprehensive guide, you have unlocked the secrets to lightning-fast ironing, equipping you with the knowledge, techniques, and strategic routines to elevate your wardrobe maintenance and presentation.

From preparing your ironing space and prioritizing your clothes to optimizing your ironing technique and maintaining a consistent routine, you now possess the tools and strategies to streamline the ironing process and achieve crisp, wrinkle-free results in a fraction of the time. By embracing the insights and practical tips outlined in this article, you’ll not only save precious time but also enjoy the confidence and satisfaction that comes with a well-pressed, polished appearance.

As you continue to refine your ironing prowess, remember to approach the task with a spirit of experimentation and a willingness to adapt. Continuously seek out new time-saving tricks, stay attuned to the latest advancements in ironing technology, and be open to adjusting your routine to suit your evolving needs and preferences. By doing so, you’ll unlock the true power of efficient ironing and reap the benefits of a well-groomed, presentable wardrobe that reflects your personal style and attention to detail.

Unlock the secrets to lightning-fast ironing and experience the transformative power of a wrinkle-free, polished wardrobe that elevates your confidence and streamlines your daily routine.

Effective Methods for Removing Iron Stains

Iron Stains of clothes Introduction of removing iron stains from clothes of 2024

Iron stains on clothing can be stubborn and unsightly, presenting a challenge for many households. However, removing them can be easier than you think. This article will guide you through several proven techniques to removing iron stains from clothes, restoring your clothes to their former glory.

Iron Stains of clothes Some common reasons for the formation of iron stain removal

Iron stains are typically caused by the presence of iron in water or other sources. Here are some common reasons for the formation of iron stains:

High Iron Content in Water:

When the water supply has a high concentration of dissolved iron, it can lead to iron staining. This can occur due to natural geological factors or as a result of iron-containing minerals in the soil or water source.

Corroded Iron Pipes or Plumbing:

If the plumbing system, including iron pipes or fixtures, is old, deteriorated, or corroded, it can release iron particles into the water. These particles can then cause staining on surfaces that come into contact with the water.

Well Water:

Private well water is more susceptible to iron staining since it is not treated or filtered by a municipal water supply. Well water often contains higher levels of iron, particularly if the well is located in an area with iron-rich soil or geological formations.

pH Levels:

The acidity or alkalinity of water can affect the solubility of iron. When the water has a low pH (acidic), it can cause iron to oxidize and form solid particles that contribute to staining. Conversely, high pH (alkaline) water can keep iron in a dissolved form and may not cause immediate staining, but it can still result in iron buildup over time.

Water Treatment Processes:

In some cases, iron staining can develop as a result of water treatment processes or changes in water chemistry. Certain chemical reactions or interactions during filtration, disinfection, or conditioning can cause iron to precipitate, leading to staining issues.

It’s important to note that iron staining is generally a cosmetic issue and not a health hazard in most cases. However, persistent iron staining may indicate the need for water treatment methods, such as iron filters or water softeners, to alleviate the problem and enhance water quality and appearance.

Iron stains can have several potential hazards and impacts:

How to remove iron stains from clothes

Aesthetic Damage:

Iron stains can leave unsightly brown or orange stains on surfaces like clothing, fabrics, pipes, fixtures, sinks, toilets, and other water-using appliances. These stains can be difficult to remove, negatively impacting the appearance and value of affected items.

Potential Health Risks:

Iron stains can indicate the presence of elevated iron levels in water sources. While consuming small amounts of iron through water is generally not harmful, excessive iron intake can cause health issues. High iron levels in water may result in a metallic taste, staining of teeth, and potentially contribute to the development of liver disease or other health conditions.

Clogging and Damage to Plumbing Systems:

Iron stains often accompany the presence of iron deposits or buildup, which can accumulate over time and lead to the clogging of pipes, faucets, and plumbing fixtures. This can reduce water flow, affect water pressure, and damage plumbing systems, requiring costly repairs or replacements.

Corrosion of Appliances and Equipment:

Excessive iron in water can cause corrosion and damage to appliances and equipment that come into contact with water regularly. This includes water heaters, washing machines, dishwashers, irrigation systems, and other water-dependent devices. Corrosion can decrease their efficiency, performance, and longevity, leading to increased maintenance and replacement costs.

Impact on Industrial Processes:

In industrial settings, iron stains and high iron concentrations in water can be problematic. Industries that rely on water for processes, such as manufacturing, power generation, and agriculture, can experience reduced efficiency, increased equipment maintenance, and potential water contamination issues.

Environmental Impact:

Excess iron can contaminate groundwater and surface water sources, affecting aquatic ecosystems. High concentrations of iron can negatively impact water quality, reduce dissolved oxygen levels, and harm aquatic plants, animals, and their habitats.

Dealing with iron stains typically involves implementing water treatment methods to reduce iron levels, such as filtration, oxidation, or ion exchange processes. Regular testing of water quality and addressing any elevated iron levels are advisable to minimize the hazards associated with iron stains.

Iron Stains of clothes Understanding Iron Stains on Fabric

The Science Behind Iron Stains

Discover what causes iron stains on clothes and why they’re particularly difficult to remove.

Identifying Iron Stains on Clothing

Learn how to recognize iron stains and distinguish them from other types of fabric discoloration.


Pre-Treatment: The Key to Successful Stain Removal

The Importance of Pre-Treating Stains

Emphasize the significance of addressing iron stains as soon as they’re spotted.

DIY Pre-Treatment Solutions

Offer recipes for homemade pre-treatments that are both effective and safe for most fabrics.

Home Remedies for Removing Iron Stains

The Power of Common Household Items

Uncover the stain-removing potential of everyday items like lemon juice and vinegar.

Step-By-Step Guide to Home Remedies

Provide a detailed walkthrough of various home treatments for lifting iron stains from clothes.

Iron Stains of clothes Commercial Iron Stain Removers

Selecting the Right Product for Your Fabrics

Discuss what to look for when choosing a commercial iron stain remover.

Application Tips for Best Results

Share best practices for using commercial removers to ensure maximum effectiveness.

Laundry Best Practices to Prevent Iron Stains

Sorting and Washing Guidelines

Outline how proper laundry sorting and washing can prevent iron staining.

Understanding Water Quality and Its Impact on Staining

Explain how water hardness and the presence of iron in water supply can contribute to the problem.

Special Considerations for Delicate Fabrics

Handling Iron Stains on Delicates

Navigate the complexities of removing iron stains from sensitive materials like silk and wool.

Professional Cleaning vs. At-Home Removal

Assess when to take your delicate items to a professional versus when to tackle stains at home.

Troubleshooting Common Issues in Iron Stain Removal

When Stains Persist: Next Steps

Detail what to do if initial stain removal attempts don’t work.

Preventing Damage to Clothing During Stain Removal

Provide tips on avoiding common pitfalls that can damage clothes during the stain removal process.

Iron Stain Removal and Fabric Care

Removing iron stains from clothes

Peserving the Integrity of Your Clothes

Discuss ways to maintain the quality of your garments while treating iron stains.

Regular Maintenance to Avoid Recurring Stains

Advice on long-term garment care to minimize the risk of future iron stains.

Removing Iron Stains From Clothes: A Comprehensive Guide

Iron stains on clothes are a common laundry nuisance. They occur when iron deposits from hard water or rust come into contact with fabric. This article provides a comprehensive guide on removing iron stains from clothes, offering practical solutions and preventative measures.

Understanding Iron Stains

Iron stains manifest as reddish-brown or yellowish discoloration on fabric. They can stem from various sources:

1. Hard Water: Water with high iron content can leave rust-colored stains on clothes during washing.

2. Rusty Pipes or Appliances: Rusty plumbing or washing machines can transfer iron deposits onto laundry.

3. Metallic Objects: Contact with metallic items, like zippers, buttons, or jewelry, can cause iron staining.

Removing Iron Stains: Step-by-Step

1. Act Promptly: Address iron stains as soon as you notice them, as fresh stains are easier to remove than set-in stains.

2. Identify the Stain Type: Determine whether the stain is from iron or another source, as different stain types require different treatment methods.

3. Choose the Right Removal Method: Various methods effectively remove iron stains, ranging from commercial rust removers to natural solutions.

Commercial Rust Removers

1. Follow Product Instructions: Carefully read and follow the instructions on the rust remover’s packaging.

2. Test on a Hidden Area: Before applying to the entire stain, test the remover on an inconspicuous area of the garment to ensure colorfastness.

3. Apply to the Stain: Apply the rust remover directly to the stain, following the product’s recommended dwell time.

4. Rinse Thoroughly: Rinse the treated area thoroughly with water to remove the rust remover and loosened iron deposits.

Natural Solutions

1. Lemon Juice and Salt: This classic combination effectively tackles iron stains. Apply a paste of lemon juice and salt to the stain, let it sit for 30 minutes, then wash as usual.

2. Vinegar: White vinegar is another powerful natural rust remover. Soak the stained area in a solution of equal parts vinegar and water for 30 minutes, then launder as usual.

3. Cream of Tartar: This baking staple can also remove iron stains. Mix cream of tartar with water to form a paste, apply it to the stain, let it dry, then brush it off before washing the garment.

Additional Tips for Iron Stain Removal

1. Avoid Chlorine Bleach: Chlorine bleach can exacerbate iron stains, making them darker and more difficult to remove.

2. Use Cold Water: Hot water can set iron stains, so it’s best to use cold water for washing and rinsing stained items.

3. Don’t Iron Stained Clothes: Ironing over an iron stain can set it permanently, making it virtually impossible to remove.

Preventing Iron Stains

1. Address Water Hardness: If you have hard water, consider installing a water softener to reduce iron content.

2. Inspect Washing Machine: Regularly check your washing machine for rust and address any issues promptly.

3. Use Rust-Inhibiting Laundry Products: Several laundry detergents and additives are specifically designed to prevent rust stains.

4. Avoid Overloading Washing Machine: Overloading the washing machine can hinder proper water circulation and increase the likelihood of iron stains.

5. Promptly Transfer Wet Laundry: Don’t leave wet laundry sitting in the washing machine for extended periods, as this can promote rust formation.

Iron Stains of clothes Conclusion

Removing iron stains from clothes

Iron stains can be a nuisance, but they aren’t indestructible. By using the right techniques and tackling stains early, you can successfully remove them from your clothes without damage. Implementing the methods discussed will ensure your clothing remains vibrant and stain-free.

Removing iron stains from clothes requires prompt action and the appropriate treatment method. Commercial rust removers and natural solutions, like lemon juice, vinegar, and cream of tartar, can effectively eliminate these unsightly stains. Implementing preventative measures, such as addressing hard water issues and maintaining your washing machine, can minimize the occurrence of iron stains on your clothes.