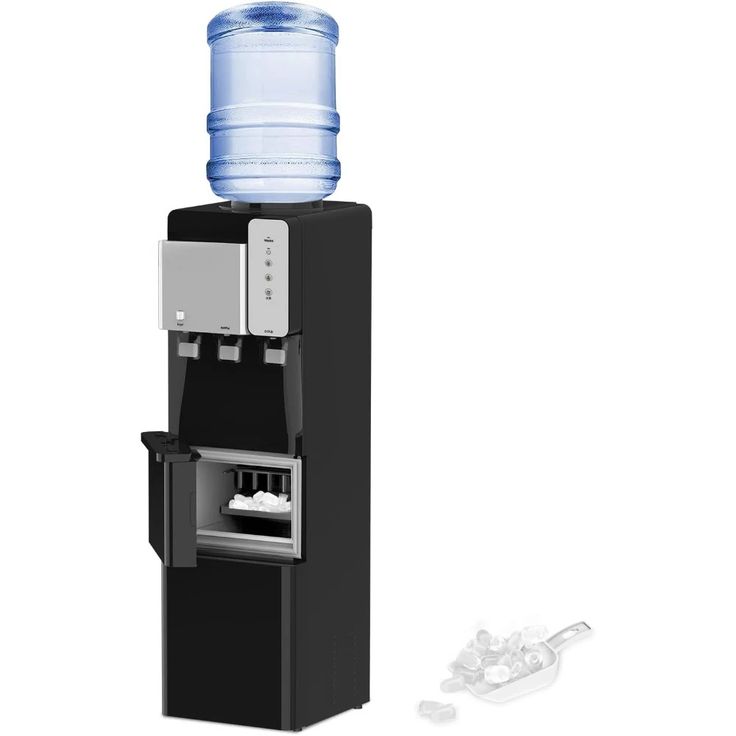
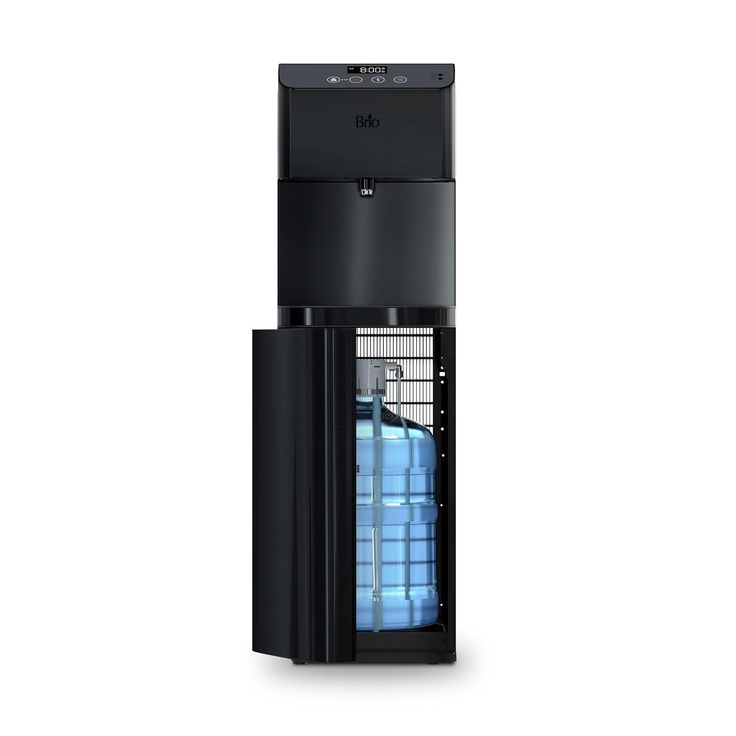
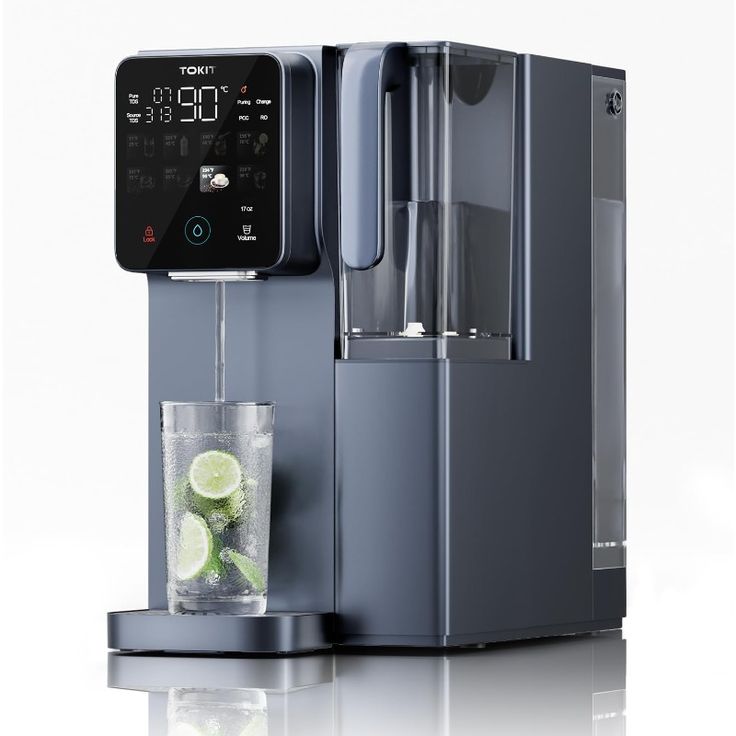
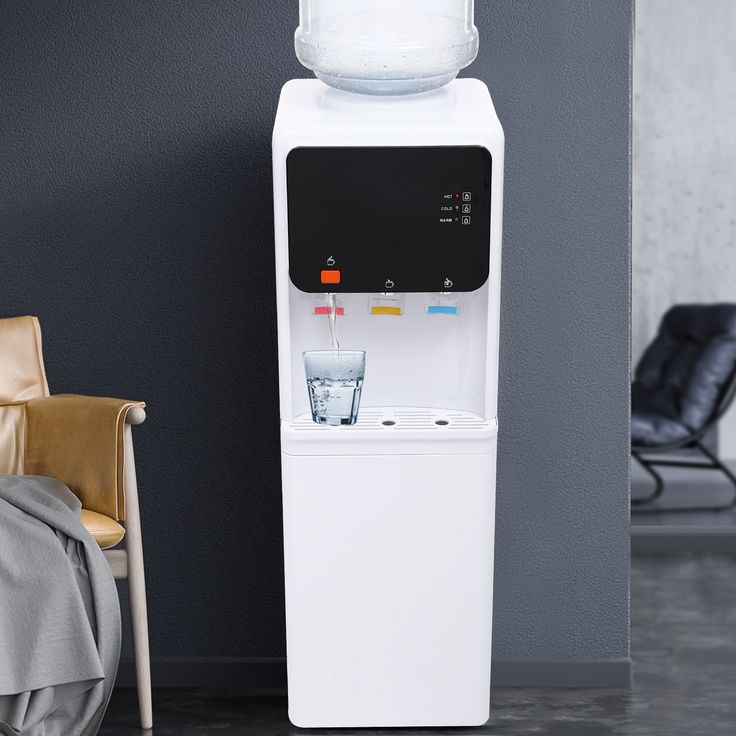
Bacteria in Refrigerator Water Dispenser: Cleaning Steps to Follow

refrigerator water dispenser

Introduction to Refrigerator Water Dispenser Safety

Ensuring safe drinking water is essential for the well-being of every household. Many people trust their refrigerator’s water dispenser to provide clean, purified water. But how safe is this water, really? How to eliminate bacteria in refrigerator water dispenser? Knowing about the safety of your refrigerator water dispenser is crucial. It protects your family from potential health risks.
water dispenser

Most of the modern refrigerators come with built-in water dispensers and filters. These systems are made to block various impurities. They can remove unwanted tastes and smells from water. But there’s more to water purity than taste and smell.

Bacteria can sometimes creep into your fridge water dispenser. Through touch or contamination, these microorganisms might pollute the water you drink. This can happen even with filters in place. The filters mainly improve water’s taste and smell, not its microbiological safety.

The dispenser itself can be a hotspot for bacteria. Touching the dispenser with dirty hands or not cleaning it can add bacteria to your water. You must learn how to maintain and clean your system. This ensures your fridge water dispenser remains a safe source of drinking water.

In this section, we will delve into the workings of refrigerator water dispensers. We will examine their effectiveness. We will look at the risks of bacteria and the importance of filter maintenance. Understanding these aspects is key to a safer kitchen and healthier family.

How Refrigerator Filters Work and Their Effectiveness

Refrigerator filters are common in most households. They promise to give us cleaner, tastier water. But how do they work? Inside these filters, activated carbon acts like a sponge. It absorbs impurities that affect taste and smell, such as chlorine.

The effectiveness of these filters varies. Their job is to capture certain particles and chemicals. But, they do not catch all contaminants. Their ability to purify relies on water contact time with the carbon. In busy homes, contact time is often too short.

Bacteria is a major concern with fridge dispensers. Studies show fridge filters sometimes fail to catch harmful microorganisms. Filters cannot always stop bacteria like salmonella and coliform.

Regular filter maintenance is crucial. Over time, filters collect impurities. If not changed, they can release the contaminants back into the water. Changing filters every six months is a common recommendation.

Even if you change the filter, the dispenser can harbor bacteria. Touching it with unclean hands or not cleaning it can introduce bacteria. No matter how good the filter, it’s vital to maintain the entire dispenser system.

In summary, refrigerator filters help with taste and smell by trapping impurities. Yet, their effectiveness has limits. Regular maintenance and dispenser cleaning are key to clean water. Filters are part of the solution, but not the only step to ensure water safety.
refrigerator water dispenser

The Impact of Filter Maintenance on Water Quality

Regular filter maintenance is crucial for maintaining the quality of water dispensed from your refrigerator. Neglecting this important aspect can lead to a decrease in water purity and an increase in health risks.

Why Regular Filter Changes Are Necessary

Filters in refrigerators work by trapping contaminants that degrade water taste and smell. Over time, these filters can become clogged with impurities. This reduces their effectiveness and can even lead to the reintroduction of contaminants into the water. Changing the filter approximately every six months is recommended to ensure optimal performance.

Consequences of Neglected Filter Maintenance

When filters are not replaced periodically, it not only compromises the taste and smell of the water but also its overall safety. A clogged filter cannot efficiently remove contaminants. Worse, it can become a breeding ground for bacteria. These bacteria can then be dispensed alongside water, posing serious health risks.

Enhancing Filter Performance

To enhance the performance of your refrigerator’s water filter, ensure regular checks and replacements. Follow the manufacturer’s guidelines on maintenance schedules. Keep track of the last time your filter was changed and remind yourself when it is due to be replaced again. This proactive approach helps in providing your household with cleaner, safer water.

In summary, the maintenance of water filters in your refrigerator has a direct impact on water quality. Regular replacement and careful handling of these filters ensure the removal of harmful contaminants and the safety of the dispensed water. By staying vigilant with filter changes, you can significantly mitigate the risks associated with bacteria in refrigerator water dispensers.

Common Bacteria Found in Refrigerator Water and Health Implications

Having examined the effectiveness of refrigerator filters and maintenance issues, it’s crucial to understand the types of bacteria that can be present in dispenser water and their potential health implications.

Types of Bacteria Commonly Found

In refrigerator water dispensers, certain bacteria are more commonly encountered than others. Among these, coliforms and salmonella stand out as frequent contaminants. Coliform bacteria, often found in the environment, are a sign that other, possibly harmful, bacteria may be present. Salmonella, known for causing foodborne illnesses, can also thrive in the moist, dark environment of a water dispenser.

Other bacteria that might be found include Pseudomonas and various fungi or mold species. These organisms can enter through several ways, such as contaminated hands or food stored in the fridge.

Health Implications of Bacteria in Water

The health risks associated with these bacteria range from mild to severe. Drinking water containing harmful bacteria can lead to gastrointestinal discomfort and illnesses like diarrhea and vomiting. In more severe cases, especially with bacteria like salmonella, the infection can be more serious and even require medical attention.

People with weakened immune systems, such as the elderly, young children, and those with chronic illnesses, are more vulnerable. For them, the presence of bacteria in drinking water can be a significant threat.

By being aware of the types of bacteria that can lurk in your refrigerator’s water dispenser and their possible effects on health, you can take steps to ensure your drinking water is safe. Regular cleaning and timely filter replacement are vital to keeping harmful bacteria at bay.
bacteria in refrigerator water dispenser

Cleaning Best Practices for Refrigerator Water Dispensers

Effective cleaning of your refrigerator water dispenser is key to ensuring water safety. Simple steps can prevent bacteria from contaminating your water. Here are some best practices to follow:

  • Use the Right Cleaning Agents: Regularly sanitize the dispenser with a solution that kills bacteria and mold. Diluted bleach or vinegar works well. Spray the solution on the dispensing area and let it sit.
  • Clean the Dispenser Regularly: Make cleaning a regular part of kitchen maintenance. Weekly cleaning can reduce the risk of bacteria growth.
  • Keep Contact Points Sanitary: Wipe the areas touched most often, such as the handle or push-button, with disinfectant wipes. Avoid touching these points with dirty hands.
  • Don’t Forget Internal Components: Occasionally dismantle and clean internal components. Refer to the manufacturer’s manual for guidance. Some parts may need careful handling.
  • Dry the Dispenser Area: After cleaning, allow the dispenser to air dry. This prevents moisture buildup, which can promote bacteria growth.
  • Use Clean Containers: Always fill clean bottles and glasses. Dirty containers can transfer bacteria back into the dispenser.

By keeping your refrigerator water dispenser clean, you help ensure your family drinks safe water. It takes little time and effort, but the health benefits are significant.

Alternatives to Refrigerator Water Filters

While refrigerator filters can reduce certain contaminants, they may not always be enough for pure, safe drinking water. Let’s look at some alternatives that can offer higher levels of purification:

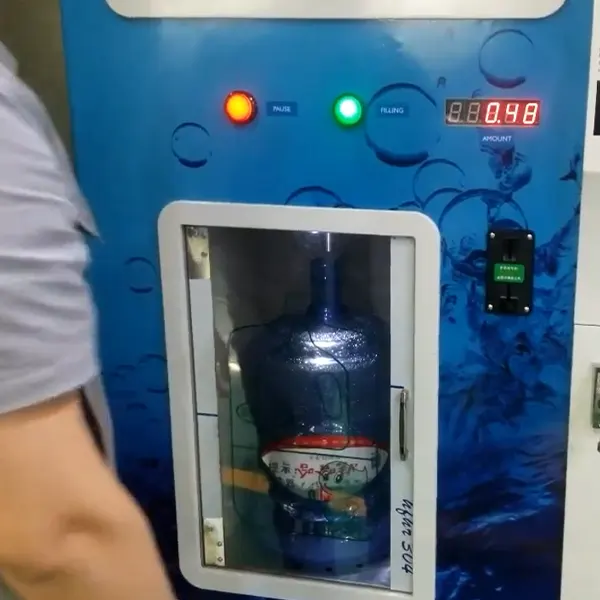
  • Bottleless Water Coolers: These systems use advanced technology like reverse osmosis. They remove a broad range of impurities, including bacteria and viruses.
  • Under-Sink Water Filters: Install these filters directly to your plumbing. They often have stronger filtration capabilities than fridge filters.
  • Whole House Water Filtration Systems: These systems purify all water entering your house. They ensure clean water from every tap.
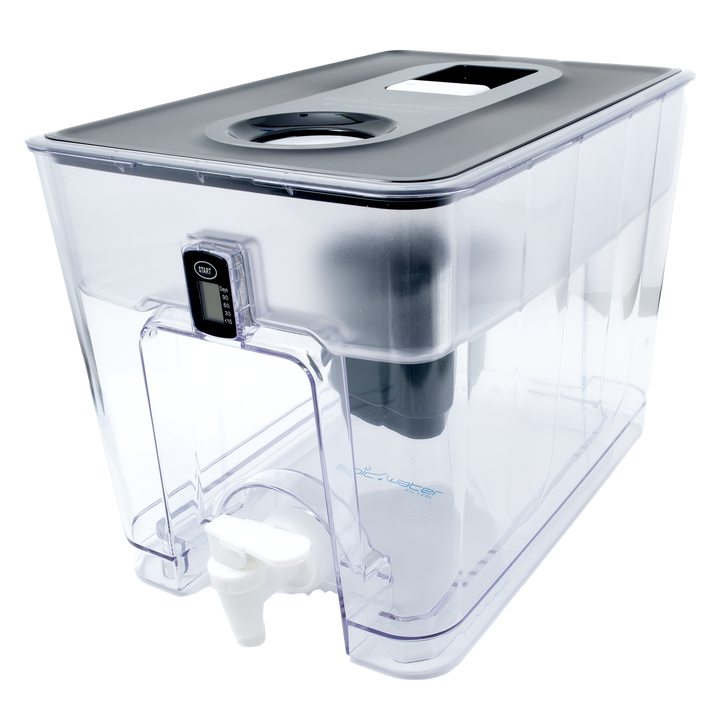
  • Pitcher Water Filters: A simple and cost-effective option. Make sure to choose a pitcher with a filter that removes bacteria and other contaminants.
  • Faucet-Mounted Filters: These are attached directly to your faucet. They offer an extra layer of filtration, easy to use and replace.

Remember, no matter which alternative you choose, regular maintenance is key. Always replace filters as suggested by the manufacturer to maintain water safety.

Conclusion: Ensuring Safe Drinking Water at Home

Ensuring safe drinking water at home is crucial for health. As we have discussed, refrigerator water dispensers can harbor bacteria if not properly maintained. Remember to regularly change the water filter and clean the dispenser unit. This will help keep your water safe from contaminants including harmful bacteria like coliform and salmonella.

For those seeking higher levels of water purity, consider alternatives. Options such as bottleless water coolers or under-sink filters can provide more comprehensive filtration. These systems often remove a broader range of impurities.

Make sure to assess the specific needs of your household. Choose a water purification solution that meets these needs effectively. Regular maintenance and alertness to the risks can significantly improve water quality. By taking these steps, you can provide safer drinking water for your family and reduce health risks associated with contaminated water.

Staying informed and proactive is key. It ensures that your home remains a place of wellness and safety through clean water.

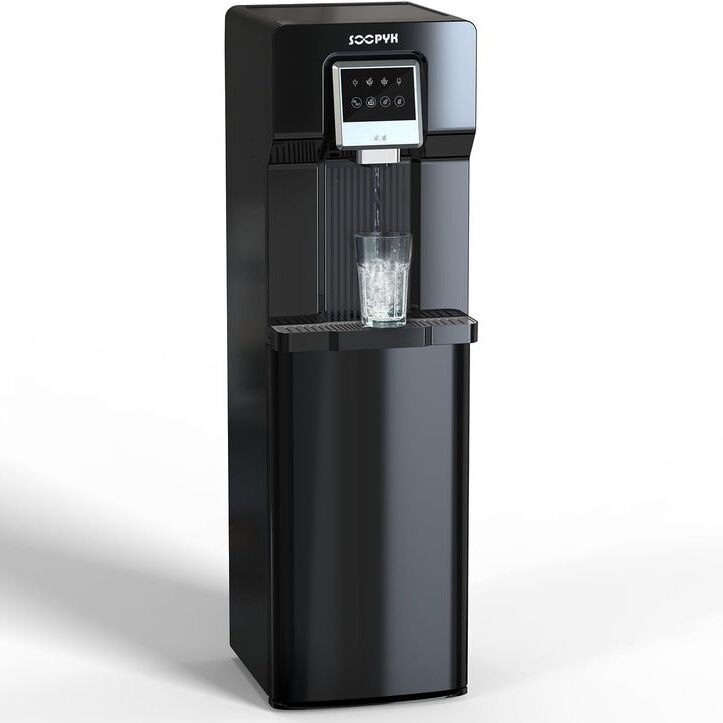
How to Clean the Water Dispenser: A Complete Guide for You

water dispenser

Importance of Regular Water Dispenser Maintenance

Keeping a water dispenser clean is more than just a good habit. It’s essential for health, performance, and the life of your appliance. Regular maintenance means clean, safe water every day. It helps avoid waterborne illnesses. It also ensures your dispenser works well and lasts longer. How to clean the water dispenser?

how to clean the water dispenser

Health Benefits of Clean Water Dispensers

A well-maintained water dispenser is a source of safe, clean drinking water. This reduces risks of bacteria and illness. Regular cleaning removes harmful microbes. This means better health for everyone who drinks from it.

Enhancing Performance and Water Quality

Cleaning your water dispenser enhances its function. A buildup of mold or minerals can block water flow. Regular cleaning ensures the water tastes good and is clean. It also keeps the heating and cooling systems running right.

Extending Dispenser Longevity

Careful upkeep can extend the life of your water dispenser. It prevents wear and tear. It also means fewer repairs. Cleaning stops buildup that can damage your dispenser over time.

Preparing to Clean Your Water Dispenser

Before you start, it’s key to prepare properly. This makes sure you clean safely and effectively.

Safety Measures Before Cleaning

Follow these safety tips to protect yourself and your water dispenser:

  1. Unplug the Dispenser: Always unplug it from the power source to prevent electric shock.
  2. Wear Protective Gear: Use gloves and safety glasses to shield your hands and eyes from cleaning agents.
  3. Empty the Water: Drain any remaining water from your dispenser to avoid diluting the cleaning solution.
  4. Read the Manual: Check your water dispenser’s manual for any specific cleaning instructions.

Assembling Cleaning Materials

Gather the right tools and cleaning agents:

  1. Bleach or Vinegar: Choose bleach for sanitizing or vinegar for a natural option. Never mix them.
  2. Warm Water: Have plenty of warm water ready for mixing with cleaning agents and rinsing.
  3. Cleaning Brushes: Get a long-handled brush for the reservoir and a smaller one for nooks.
  4. Microfiber Cloths: Use these for wiping down the exterior and drying off parts.
  5. Sponge: Have a sponge for cleaning surfaces and removable parts.
  6. Bucket: You’ll need a bucket to drain cleaning solutions into.
  7. Gloves: Rubber gloves will protect your skin from cleaners.

water dispenser

Step-by-Step Cleaning Process

Exterior Cleaning and Disinfection

First, unplug your water dispenser for safety. Using a microfiber cloth, wipe the dispenser’s exterior. Mix warm water with mild soap. Dip the cloth in this mixture. Gently clean the surface to remove dirt and residues. Rinse the cloth in clean water. Wipe the surface again to remove soap traces. Ensure you clean high-touch areas thoroughly. These include taps and the handle.

Cleaning the Water Reservoir and Removable Parts

Empty the water reservoir next. Remove all detachable parts like the drip tray and nozzles. Soak these parts in a solution of warm water and mild detergent. Use a soft brush to scrub off any mildew or deposits. Pay special attention to the reservoir. Scrub it with a long-handled brush to reach all corners. Use a mix of warm water and a splash of bleach for a tougher clean. Rinse all parts thoroughly with clean water until no soap remains.

Detailed Sanitization Process

After a thorough cleaning, sanitizing is crucial. Prepare a solution of one tablespoon of unscented bleach in one gallon of water. Fill the reservoir with this sanitizing solution. Let it stand for five minutes. This will kill any remaining bacteria. Drain the solution completely. Rinse the reservoir and parts several times with clean water. This ensures no bleach residue remains. Assemble the dispenser. It’s now ready to provide safe, clean water.

Advanced Water Dispenser Maintenance Tips

To keep your water dispenser in optimal condition, here are some advanced maintenance tips.

Preventing Mold and Bacteria Buildup

Prevent mold and bacteria by cleaning your water dispenser regularly. Dry all cleaned parts before reassembling. Ensure that every nook and cranny is free of moisture to avoid mold growth.

Regular Filter Replacement and Care

Replace water filters as recommended by the manufacturer. Regular filter replacement ensures clean, healthy water. Check and clean the filters quarterly to maintain water quality.

Utilizing Self-Cleaning Features

Select water dispensers with self-cleaning technology. This feature automatically cleans the internal system. It helps maintain hygiene without manual effort.

clean the water dispenser

Maintaining Cleanliness Between Deep Cleanings

To ensure your water dispenser remains clean, adopt these routine practices between major cleaning sessions.

Routine Surface Wiping

Regularly wipe down the exterior surfaces of your water dispenser. Use a damp cloth with mild soap. Focus on areas frequently touched, such as taps and handles. This prevents dirt buildup and maintains hygiene.

Managing the Drip Tray

Regularly check and clean the drip tray. Empty and wash it with soapy water weekly. This prevents mold and odors from developing.

Ensuring Safe Water Storage Practices

Store water in a cool, dry place away from direct sunlight. Replace the water bottle promptly to avoid contamination. This keeps the water fresh and safe for drinking.

Selecting the Right Water Dispenser for Easier Maintenance

Selecting the right water dispenser can simplify maintenance and enhance user convenience. Many modern water dispensers come with user-friendly features that minimize the effort required for cleaning and upkeep. Here are key aspects to consider.

Benefits of Tankless Water Dispensers

Tankless water dispensers offer several maintenance advantages:

  1. No Water Storage: They heat and cool water on demand, so there is no stored water that can breed bacteria. This results in fresher water and less frequent cleaning.
  2. Compact Design: The tankless setup is compact, making it easier to access internal components. This makes routine cleaning less cumbersome.
  3. Reduced Scale Buildup: Since there’s no standing water, there’s less chance for scale and mineral deposits to form, which means less descaling is required.

Features to Look For in Low-Maintenance Models

When looking for a water dispenser that’s easy to maintain, consider the following features:

  1. Self-Cleaning Technology: Some models have self-cleaning functions that regularly sanitize the water dispenser, reducing manual cleaning requirements.
  2. Simple Dispensing Area: Models with fewer nooks and crannies around the taps and dispensing area are easier to clean. This limits areas where mold and bacteria can accumulate.
  3. Smart Features: Advanced water dispensers may include diagnostics that alert you when cleaning and maintenance are needed. This helps maintain optimal performance without guesswork.

Choosing the right water dispenser based on your maintenance preferences can save time, effort, and ensure clean water any time.

Conclusion

To ensure the health and efficiency of your water dispenser, regular maintenance is paramount. Let’s recap the cleaning practices that will help keep your dispenser in top condition.

Summary of Cleaning Best Practices

  • Always unplug and drain the dispenser before cleaning.
  • Use bleach or vinegar for sanitizing, but never mix them.
  • Clean all surfaces, especially high-touch areas, with mild soap.
  • Disassemble and wash all detachable parts.
  • Thoroughly rinse after cleaning to remove soap or bleach.
  • Replace water filters regularly as per manufacturer guidelines.
  • If available, utilize self-cleaning functions.
  • Between deep cleans, wipe surfaces and empty the drip tray.

By following these steps, you will maintain a dispenser that delivers clean, safe drinking water.

The Value of Investing Time in Maintenance

Investing time in cleaning your water dispenser is invaluable. It improves health by keeping water clean. It also enhances dispenser performance and extends its lifespan. Regular maintenance saves money on repairs and replacements. Make the effort, and you’ll benefit from clean water every day.

Water Dispenser Health Risks: What You Need to Know Today

Water cooler

Potential Contamination from Water Coolers

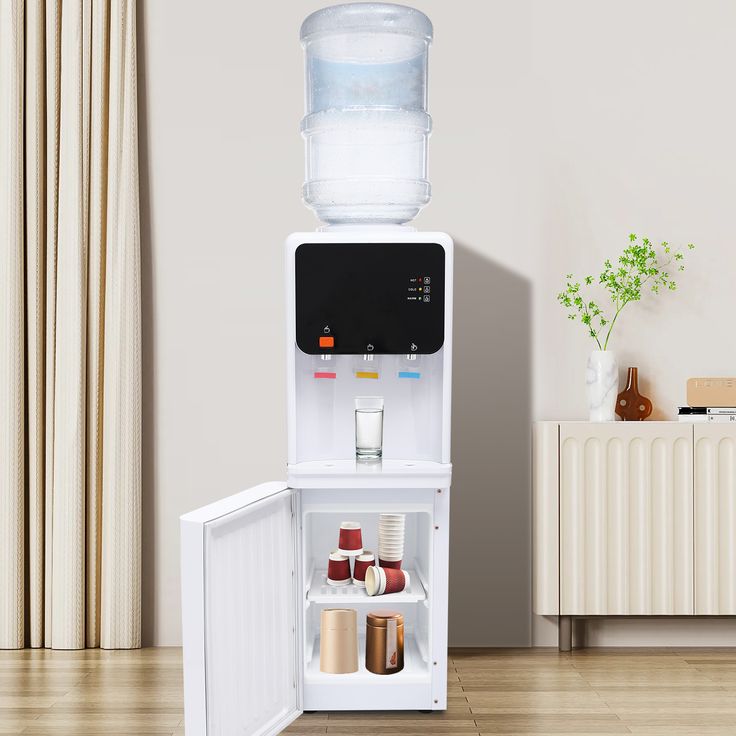
Water coolers offer convenience in offices and homes. However, they could harbor harmful pathogens. Regularly, people raise concerns about illness from water dispenser use. So, it’s vital to understand the water dispenser health risks.

water dispenser health risks

Bacteria and Mold in Water Dispensers

Bacteria like E.coli and molds can thrive in unclean dispensers. Water sitting stagnant in coolers becomes a breeding ground for microorganisms. Illnesses, like diarrhea and fever, may result from using contaminated dispensers. Hence, it’s crucial to maintain cleanliness.

Precautionary Measures for Safe Usage

Taking precautionary steps can safeguard health. First, always follow the manufacturer’s cleaning guidelines. Use sanitizers that tackle a broad range of microbes. Moreover, inspect for mold and smells. They indicate the need for cleaning. Also, if left unused, drain the water cooler to prevent microbe growth.

Ensure electrical safety around the dispenser. Keep it away from outlets to prevent accidents. Moreover, be cautious with hot water to avoid burns. Implement a regular cleaning schedule and use protective gear when necessary. Clean drip trays and water taps consistently to prevent bacteria build-up. Doing these things can help mitigate water dispenser health risks.

Risks of Using Hot Water from Taps

Using hot water from taps for drinking or cooking might pose health risks. Hot water systems can harbor sediments, rust, and contaminants. These compounds can negatively impact water quality over time. Bacteria, such as Legionella, often grow in hot water tanks due to the warmth. This presents a real health hazard when water isn’t used regularly.

Contaminants in Hot Water Systems

Pipes leading to your tap may leach metals, like lead. These can seep into your hot water and may cause health issues with long-term consumption. Chemicals used to treat hot water can also be harmful for drinking. This introduces a risk of consuming unwanted substances through your hot water tap.

Alternatives to Hot Water Taps

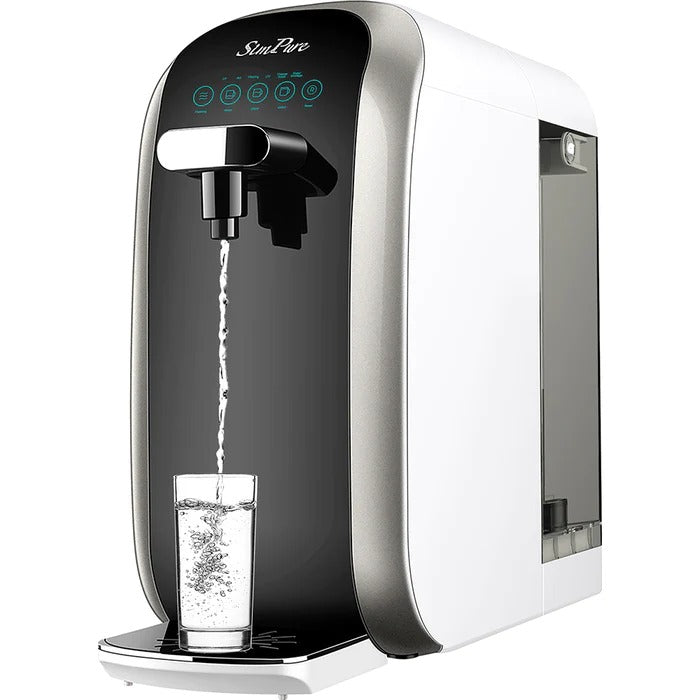
Hot water dispensers are safer than hot taps for getting clean, hot water. They provide water on demand, so it doesn’t sit long enough to allow bacteria to grow. These dispensers have filters that remove impurities, making sure the water is pure. They are also designed to heat water instantly, minimizing the presence of harmful contaminants. Switching to a hot water dispenser can ensure the safety of your water. It can also improve the taste and smell, making drinks and food more enjoyable.

Water cooler

Regular Maintenance and Cleaning

Keeping a water dispenser clean is crucial for health and safety reasons. Proper maintenance not only ensures that the water is safe for consumption but also extends the lifespan of the dispenser.

Cleaning Schedule for Water Dispensers

  1. Establish a Routine: To effectively manage cleanliness, it’s essential to set a regular cleaning schedule. Aim for weekly cleanings using a suitable disinfectant to eradicate germs.
  2. Focus on Key Areas: During each cleaning session, pay special attention to the taps, drip trays, and all external surfaces. These areas are prime spots for bacteria and contamination.
  3. Prevent Microbial Growth: Consistent cleaning prevents the growth of harmful microbes, guaranteeing safe drinking water for everyone.
  4. Assign Responsibilities: To ensure consistency, designate specific individuals for cleaning duties or use digital reminders. This helps maintain organization and accountability within a workplace or home setting.

Importance of Disinfecting Water Dispensers

  1. Choose Effective Sanitizers: Using a broad-spectrum sanitizer is essential for disinfecting a water dispenser. This practice effectively eliminates various types of bacteria, molds, and pathogens that can lead to illnesses.
  2. Follow Manufacturer Guidelines: Always refer to the dispenser’s user manual for appropriate cleaning agents and procedures. This ensures you are using safe and effective products.
  3. Health Benefits: Regular disinfection not only keeps the water clean and drinkable but also protects the overall health of all users. Maintaining a clean water dispenser is a simple yet vital step to promote wellness in any environment.

Proper Usage to Prevent Bacterial Spread

Proper use of water dispensers is key in avoiding bacterial spread. Simple habits can make a big difference in maintaining health and safety.

Tips for Using Cups and Bottles

When using a water dispenser, it’s important to keep hygiene in mind. Here are some concise tips:

  • Always use clean cups or bottles. This prevents germ transfer.
  • Refrain from sharing drinkware. It lowers the risk of cross-contamination.
  • Bring personal reusable containers. This is eco-friendly and safe.
  • If using disposable cups, store them properly. Keep them dry and away from the dispenser area.

Following these tips can significantly reduce the chances of bacteria entering your body through drinking water.

Importance of Not Touching the Dispenser Nozzle

The nozzle is often overlooked but it’s a hotspot for germs. Take note:

  • Handle the dispenser lever with a paper towel if possible. This minimizes direct contact with the nozzle.
  • Teach others to avoid touching the nozzle. Spread awareness for community health.
  • Look for dispensers with no-touch features. These come with sensors for more hygienic use.

By prioritizing these simple actions, we help maintain the purity of our drinking water. Ensuring the nozzle remains untouched by hands protects us all against bacteria and viruses.

water dispenser

Water Dispenser Design and Features for Safety

Water dispensers are designed with features that boost safety and health.

Automatic Sterilization Functions

Modern water dispensers include automatic sterilization features for enhanced safety. They use UV light or heat to kill germs and prevent bacterial growth. This feature ensures that every drop of water is safe for consumption, without manual intervention.

Filtration Systems in Dispensers

Water dispensers often have built-in filtration systems. These systems remove contaminants like chlorine, lead, and microbes. Ensuring the water is not just clean, but also tastes and smells better. Regular filter replacement is essential to maintain the effectiveness of the system.

Best Practices for Ensuring Water Quality

Maintaining top-notch water quality from dispensers is crucial.

Keeping the Dispenser Area Clean

A clean dispenser area helps prevent contamination. Here are some steps to achieve it:

  • Wipe the dispenser daily with a disinfectant. This removes spills and stains.
  • Dry the drip tray often to stop mold growth. Humidity breeds bacteria.
  • Keep cups and bottles tidy, arranged, and covered. This reduces dust and debris.
  • Encourage users to clean the area after use. A collective effort keeps it sanitary.

These actions hinder bacteria and mold from affecting water quality.

Replacing Water Filters Regularly

Changing filters is vital for pure water. It stops contaminants from seeping in. Remember:

  • Follow the manufacturer’s schedule for filter changes. Timely replacements are key.
  • Check for signs of filter wear, like odd tastes or reduced flow. Don’t ignore them.
  • Use the right filters for your dispenser. Compatibility ensures effectiveness.
  • Document each replacement date. Tracking helps maintain a routine.

Regular filter updates keep water safe and tasting fresh.

Conclusion and Recommendations

In wrapping up, water dispensers pose health risks if not used or maintained properly. To avoid illnesses, regular cleaning is crucial. Follow the manufacturer’s guidelines to disinfect and remove germs. Do not touch the nozzle directly; use clean cups and do not share them. Replace water filters as advised

to keep the quality of water high.

Summary of Health Risks and Prevention Tips

Bacteria and mold can grow in water dispensers and make you sick. Clean often, using the right sanitizers and proper methods. Watch for mold and stale smells; they signal a need for cleaning.

Always handle the dispenser carefully, especially if it dispenses hot water, to prevent burns.

Advantages of Water Dispensers with Health Safeguards

Modern water dispensers come with features that protect your health. They have filtration systems to clean the water and automatic sterilization to kill bacteria. These features ensure you get safer and tastier drinking water.

Choose dispensers with these advantages for the wellbeing of all who use them.

5 Water Dispenser Health Risks to Avoid

water dispenser health risk

Hot Water Burns Prevention

Hot water can pose a burn risk from dispensers. To reduce this, always be mindful when dispensing. Hot and cold water dispensers often include a safety switch. This switch helps to prevent accidental burns. Still, you must take care when filling cups or bottles. It’s safest to use containers with wide openings. This helps to avoid splashes that can scald skin. Also, be aware of steam that can rise from hot water. Educate family members, colleagues, and especially children, on the proper usage. Your vigilance can prevent painful injuries and ensure safe dispenser operation.

Proper Lifting Techniques for Refills

Proper lifting is crucial to avoid back injuries. Water bottles for dispensers are heavy, increasing the risk of strain. Use these techniques when refilling your water dispenser:

  1. Stand Close to the Water Bottle: Before lifting, stand close to the water bottle. This minimizes the need to lean over, protecting your back.
  2. Bend From the Knees, Not the Waist: Always bend your knees, not your waist, when picking up the bottle. This distributes weight to your legs instead of your back.
  3. Hold the Bottle Close to Your Body: When lifting, keep the bottle close to your torso. This lessens the load on your back muscles.
  4. Lift with Your Legs: Employ the strength of your legs to lift the bottle upwards. This safe practice significantly reduces the chance of back injury.
  5. Keep Your Back Straight: During the lift, make sure your back is straight. A curved back increases the possibility of muscle strain.
  6. Avoid Twisting Movements: Turning your body while holding the bottle can harm your spine. Face the dispenser before you lift the bottle.
  7. Get Help If Needed: Don’t hesitate to ask for assistance. Lifting a water bottle is easier and safer with two people.

Remember, adopting these proper lifting techniques not only preserves your back health but also promotes overall safety around water dispensers. After all, prevention is better than needing to seek treatment for a preventable injury.

water dispenser health risk

Regular Cleaning and Sanitizing

Regular cleaning and sanitizing are key to avoiding water dispenser health risks. Dirt and germs can build up fast. Public dispensers are touched by many hands each day. This can spread germs if not cleaned properly. Make sure to clean your water dispenser often. Use a proper cleaning solution. Wipe down the exterior and the spouts. Remember to clean the drip tray too. For home dispensers, once a week should be enough. For office or public dispensers, a daily wipe-down with disinfectant is best. Keeping cleaning supplies nearby can remind people to clean regularly. Always follow the manufacturer’s cleaning instructions. This keeps the dispenser working well and safe for everyone.

Mold Detection and Removal

Mold in water dispensers can pose serious health risks. Detecting and removing mold is crucial. Check your dispenser weekly for any signs of mold. Unseen areas are especially prone to mold growth. Look for a musty smell which can indicate the presence of mold. To remove mold, clean with mild soap, water, and a sponge. Focus on hard-to-see areas where mold likes to hide. After cleaning, dry all parts completely to prevent mold from returning. For prevention, ensure the space around the dispenser is well-ventilated. This reduces moisture, which mold needs to grow. If mold is a consistent problem, consider a dispenser with a self-cleaning feature. Always follow your dispenser’s maintenance guide for specific cleaning advice. Remember, regular mold checks keep your water safe and your health protected.

Electrical Safety Measures

Proper electrical safety around water dispensers is vital. Water and electricity are a risky combination. They can lead to shock or fire hazards. Prevent these risks by adhering to these safety measures:

  1. Use the Top Socket: Always plug the dispenser into the top outlet socket. This minimizes the risk of water reaching the plug.
  2. Keep Distance from the Outlet: Position the water dispenser as far from the outlet as the cord allows. This reduces the risk of electrical accidents in case of leaks.
  3. Dry Hands Before Use: Ensure your hands are dry before touching the dispenser’s plug or switch. This is a simple yet effective way to prevent electric shocks.
  4. Regular Inspections: Check the water dispenser for any signs of damaged cords or plugs. Replace them immediately if found to prevent electrical issues.
  5. Safe Installation: Secure cords safely to avoid tripping or water contact. If uncertain, consult a professional to install your dispenser properly.

By following these electrical safety measures, you can keep yourself and others safe around water dispensers. Preventing accidents is always better than dealing with their consequences. Ensure everyone using the dispenser knows these safety tips.

water dispenser health risk

Preventing Slippery Floors Around the Dispenser

Preventing slippery floors is crucial for safety around water dispensers. Follow these guidelines to minimize risks:

  1. Regularly Check for Leaks: Inspect your dispenser often for any signs of leaks that can cause wet floors.
  2. Use Non-Slip Mats: Place non-slip mats beneath the dispenser to absorb spills and provide traction.
  3. Maintain Clean Spill Trays: Empty and clean drip trays regularly to prevent overflow and pooling water.
  4. Promptly Clean Spills: If water spills, clean it up immediately to avoid slips and falls.
  5. Educate Users: Inform everyone about the risks and ensure they take care when dispensing water.
  6. Install Dispensers Properly: Ensure your dispenser is stable and not prone to tipping over and leaking.

By taking these steps, you can help to keep floors dry and safe and reduce water dispenser health risks.

Safe Cup and Bottle Usage

When using a water dispenser, the cups or bottles you choose are important. Ensure they are clean. This prevents the transfer of germs and bacteria. Follow these steps for safe cup and bottle usage around water dispensers:

  1. Always Use Clean Containers: Rinse your cups or bottles before refilling. This helps keep water pure.
  2. Avoid Sharing: Do not share containers. This cuts down the risk of spreading illness.
  3. Keep Cups Covered: Store cups or bottles upside down or covered to keep dust and debris out.
  4. Use a Personal Container: Having your own bottle or cup reduces cross-contamination.
  5. Dispose Properly: If using disposable cups, throw them away after a single use. Do not leave used cups near the dispenser.

By following these simple steps, you can maintain the health benefits of your water dispenser. A little care goes a long way to safeguard against water dispenser health risks.

water dispenser health risk

Proper Handling of Dispenser Nozzles

Handling dispenser nozzles correctly is vital for health. Nozzles come into contact with many hands. This can spread germs quickly. Here are steps to reduce risks:

  1. Avoid Direct Touch: Touching nozzles can transfer bacteria. Use a paper towel or tissue to dispense water. This helps keep the nozzle clean.
  2. Teach Proper Use: Show others how to use dispensers without touching nozzles. Display signs as reminders. Education is key to prevent contamination.
  3. Check for Auto-Cleaning Features: Some models auto-clean their nozzles. If yours does, ensure this feature works properly. Auto-cleaning helps kill germs without manual cleaning.
  4. Regular Cleaning Schedule: Even with auto-cleaning, set a schedule to clean nozzles manually. Use a disinfectant. Clean daily in public spaces, and weekly at home.
  5. Replace Nozzles as Needed: Inspect nozzles for wear or damage. Replace them if they show signs of deterioration. A damaged nozzle can harbor more bacteria.

By following these steps, you can help reduce water dispenser health risks. Clean and well-maintained nozzles contribute to safer drinking water.

Importance of a Filtration System

Ensuring your water dispenser has a good filtration system is crucial. Unfiltered water may contain impurities like chlorine, lead, and other contaminants. These can harm your health. A filtration system cleans the water, making it safer to drink. Remember to replace filters as the manufacturer recommends. This keeps the water pure and the dispenser running smoothly. By using a filtered water dispenser, you protect yourself from health risks. Clean water is vital for a healthy home or office.

Why is GE water dispenser not working after replacing filter?

GE Fridge Water Issue

Why is my ge refrigerator water dispenser not working after replacing filter?A malfunctioning water dispenser in your GE refrigerator of 2024 can be a frustrating experience, especially after replacing the water filter. While a new filter is expected to improve water quality and flow, sometimes ge refrigerator water filter not working as expected. In this guide, we will explore common reasons why a GE refrigerator water dispenser may not function correctly after replacing the filter. By identifying potential causes and offering troubleshooting tips, we aim to help you resolve the issue and ensure a properly working water dispenser for your convenience.

GE Fridge Water Issue

Why ge refrigerator water dispenser not working

This comprehensive guide explores the reasons why ge refrigerator water not working after changing filter and equips you with the knowledge to diagnose and fix common issues. We’ll delve into the importance of the water filter, explore solutions for low water pressure, and guide you through a step-by-step reset process specific to your GE refrigerator model. By following these tips, you can transform yourself from a frustrated homeowner into a self-sufficient appliance troubleshooter.

Unveiling the Marvel of GE Refrigeration: A Spectrum of Styles for Modern Needs

Ge fridge water dispenser not working? GE refrigerator water a reputation for quality and innovation. They come in a variety of styles to suit your kitchen’s design and functionality needs. From sleek side-by-side models with cavernous storage to space-saving top-freezers, GE offers an option for every household.

In 2024, GE continues to push boundaries with features like smart connectivity, allowing you to remotely monitor your refrigerator’s temperature and even order water filters. But at the heart of it all lies a fundamental feature: the reliable water dispenser.

GE Fridge Water Issue

Why is ge fridge not dispensing water after changing filter?

Air Pockets and Initial Usage

  1. Airlock in the Water System:

  • After replacing the water filter, air pockets can accumulate in the water system, leading to a temporary loss of water flow. This airlock can disrupt the dispenser’s function until the air is purged from the system.
  1. Initial Usage Recommendations:

  • To overcome initial airlock issues, it is recommended to perform a few troubleshooting steps. These include dispensing and discarding several gallons of water to flush out any trapped air in the system and allowing time for the dispenser to regain normal functionality.

Water Filter Installation and Alignment

  1. Proper Installation:

  • Ensure the water filter is installed correctly and fully seated in its housing. If the filter is not properly inserted, it can restrict water flow and affect the dispenser’s performance.
  1. Alignment of Filter Bypass:

  • Sometimes, GE refrigerators have a bypass plug that substitutes the filter for water dispensing. If you have removed the filter and replaced it with the bypass plug, ensure it is appropriately aligned with the housing. Misalignment can impede water flow and prevent the dispenser from working.

Water Supply Issues

  1. Water Shut-Off Valve:

  • Check if the water supply valve, typically located near the refrigerator, is fully open. Partially shut or closed supply valves can restrict water flow and affect the dispenser’s function.
  1. Frozen Water Lines:

  • In colder climates or during winter months, exposed water lines can freeze, leading to blockages in the water supply. Inspect the water lines behind or beneath the refrigerator for any signs of freezing.

GE Fridge Water Issue

Dispenser Control and Settings

  1. Child Lock or Control Lock:

  • Many GE refrigerators offer child lock or control lock features to prevent accidental dispensing. Incorrectly activated control locks can restrict water flow and disable dispenser functionality.
  1. Temperature Settings:

  • Verify that the temperature settings within the refrigerator are functioning normally. Extremely low freezer or refrigerator temperatures can lead to frozen water lines, affecting water flow to the dispenser. Adjust the temperature settings to the manufacturer’s recommended levels and monitor the dispenser’s performance.

Additional Water Dispenser Issues

  1. Replaced ge water filter and no water: Dispenser Lever or Switch:

  • Examine the dispenser lever or switch to ensure it is fully engaged and functioning correctly. Sometimes, the lever or switch can become loose, resulting in inconsistent or ge refrigerator no water after replacing filter. Tighten or adjust the dispenser components according to the manufacturer’s instructions.
  1. Calcification or Clogs:

  • Over time, mineral deposits or other debris can accumulate in the water lines or dispenser components, leading to clogs or reduced water flow. If you suspect calcification or clogs, consult the user manual for instructions on cleaning or flushing the water system. This maintenance procedure can improve water flow and resolve dispenser issues.

Professional Assistance and Support

  1. Manufacturer’s Guidelines and Customer Service:

  • If none of the troubleshooting steps mentioned above resolve the water dispenser issue, it may be necessary to consult the manufacturer’s guidelines or reach out to customer service. Those resources can provide further assistance, offer specific recommendations, or arrange for professional repair.
  1. Professional Repair Services:

  • In some cases, complex issues or component failures may require professional repair services. If the problem persists and is beyond your expertise, contacting an authorized technician or repair service familiar with GE refrigerators can help diagnose and resolve the underlying cause of the malfunctioning water dispenser.

Preventive Measures and Maintenance Tips

GE Fridge Water Issue

  1. Regular Filter Replacement:

  • To maintain optimal performance of your GE refrigerator water dispenser, it is essential to regularly replace the water filter according to the manufacturer’s guidelines. Over time, filters can become clogged or lose their effectiveness, leading to reduced water flow. Adhering to the recommended filter replacement schedule ensures clean and properly filtered water.
  1. Proper Refrigerator Care:

  • Performing regular maintenance on your refrigerator can help prevent water dispenser issues. Regularly inspect the water lines for any signs of damage or leaks and address them promptly. Maintaining a well-functioning refrigerator overall contributes to the proper functioning of the water dispenser.
  1. Water Quality Considerations:

  • The quality of the water supply can also impact the performance of your refrigerator water dispenser. If you notice issues like clogging or reduced flow after replacing the filter, it may be worth testing the source water for any abnormalities or contaminants. A water quality test can help identify any potential issues and guide you in addressing them effectively.
  1. Gentle Handling:

  • When using the water dispenser, practice gentle handling to prevent damage to the dispenser components. Avoid excessive force or aggressive movements, which can result in wear and tear or misalignment of essential parts. Treating the dispenser with care and avoiding any unnecessary roughness helps maintain its functionality for an extended period.

Beyond the Basics: Unveiling Advanced Features in GE Water Dispensers

Ge water filter not working. Select models boast innovative features that elevate your hydration experience:

  • Hot Water Dispensing: Enjoy instant hot water for tea, coffee, or instant soups with a simple press of the lever. Perfect for busy mornings or quick meals.

  • Filtered Water Dispensing: Many GE models come equipped with built-in water filters, ensuring you get clean, great-tasting water straight from the dispenser.

  • Automatic Fill: Some models boast an automatic fill feature that dispenses a specific amount of water, eliminating the need for constant monitoring.

  • Nightlight: Illuminate the dispenser area for easy access to water during nighttime hours.

  • Ice and Water Dispensing in One: Certain GE models offer a combined ice and water dispenser, maximizing convenience and minimizing countertop space occupied by separate dispensers.

These features showcase GE’s commitment to innovation and catering to diverse consumer needs. Consider these advancements when choosing a GE refrigerator to find the perfect fit for your lifestyle.

GE Fridge Water Issue

Safety Precautions

  1. Power Disconnection:

  • Before attempting any troubleshooting or maintenance, ensure the refrigerator is disconnected from the power source. This precautionary measure prevents the risk of electrical shock or injury while working with the internal components of the appliance.
  1. Adherence to Manufacturer Guidelines:

  • Always follow the manufacturer’s instructions and guidelines provided in the user manual regarding maintenance, troubleshooting, or repairs. This ensures your safety and helps prevent damage to the refrigerator or water dispenser.
  1. Professional Assistance:

  • If at any point you feel unsure or uncomfortable with diagnosing or resolving the water dispenser issue, it is recommended to seek professional assistance. Trained technicians have the expertise and tools necessary to handle complex repairs and ensure proper functioning of your refrigerator.

Elevate Your Kitchen with a GE Refrigerator Water Dispenser

Dealing with a GE refrigerator water dispenser malfunction after replacing the filter can be frustrating. By considering potential causes and applying troubleshooting techniques, you can often identify and resolve the issue. Factors such as air pockets, proper filter installation, adequate water supply, dispenser control settings, and dispenser components can all impact the functionality of the water dispenser. Follow the suggested steps for troubleshooting the ge refrigerator water filter problems and consult the manufacturer’s guidelines or customer service for further assistance if necessary. With a diligent approach and support, you can restore the proper functioning of your ge fridge water stopped working, ensuring uninterrupted access to refreshing and filtered water.

How do I clean my Primo water dispenser?

Introduction


Regular maintenance and cleaning of your Primo water dispenser are essential to ensure the freshness and cleanliness of the water it dispenses. Primowater.com cleaning instructions not only helps maintain optimal performance but also promotes the safety and enjoyment of every drink. How do you clean a primo water cooler? In this comprehensive guide of primo water cooler cleaning, we will provide how to clean a primo water dispenser effectively. From gathering the necessary supplies to addressing various components of the dispenser, we will cover all the essentials to leave your dispenser sparkling clean and ready for use.


 primo water dispenserSome key advantages of using a Primo water dispenser:

Primo water dispensers offer several advantages that make them a popular choice for providing safe and convenient access to drinking water. Here are some key advantages of using a Primo water dispenser:

How to clean a water dispenser primo?

Filtered and Clean Drinking Water:

Primo water dispensers are equipped with advanced filtration systems that effectively remove impurities, chlorine, odors, and unpleasant tastes from tap water. This ensures that you have access to clean and great-tasting drinking water at all times.

Convenience and Accessibility:

Primo water dispensers provide a convenient and readily accessible source of water. Whether it’s in your home, office, or public spaces, you can easily access fresh drinking water without the need for bottled water or constantly refilling pitchers.

Hot and Cold Water Options:

Most Primo water dispensers offer both hot and cold water options. This allows you to enjoy a refreshing cold drink or prepare hot beverages like tea, coffee, or instant soups conveniently and instantly.

Environmentally Friendly:

By using a Primo water dispenser, you can eliminate the need for single-use plastic water bottles, reducing plastic waste and environmental impact. This promotes sustainability and eco-friendliness in your daily water consumption habits.

Cost Savings:

Investing in a Primo water dispenser can result in long-term cost savings. By using a dispenser instead of purchasing bottled water, you can significantly reduce your expenses associated with buying packaged water.

Design and Aesthetic Appeal:

Primo water dispensers are available in various designs and styles to complement your home or office decor. They not only provide functionality but can also add a stylish element to your space.

Easy Maintenance:

Primo water dispensers are designed for easy maintenance and cleaning. They typically have removable drip trays and spill-resistant features to make cleaning a primo water cooler and upkeep hassle-free.

BPA-Free Material:

Primo water dispensers are usually made from BPA-free materials, ensuring that the water remains free from harmful chemicals and contaminants.

Overall, Primo water dispensers offer the advantages of filtered and clean water, convenience, accessibility, sustainability, cost savings, and appealing design. These features make them a popular and practical choice for ensuring access to quality drinking water in various environments.

How do I clean my Primo water dispenser?

 primo water dispenserHow do you clean a primo water dispenser? Gather Cleaning Supplies

1.1. Mild Soap or Cleaner

Choose a mild soap or cleaner suitable for cleaning water dispensers. Avoid using harsh chemicals or abrasive cleaners as they may damage the dispenser’s components.


1.2. Soft Cloth or Sponge

Select a soft cloth or sponge to use for cleaning. Avoid using abrasive materials that may scratch or damage the surfaces of the dispenser.


1.3. Scrub Brush or Toothbrush (Optional)

For hard-to-reach areas or stubborn dirt, you may find it useful to have a small scrub brush or toothbrush to assist with cleaning.


1.4. Vinegar or Lemon Juice (Optional)

How to clean primo water dispenser with vinegar? Vinegar or lemon juice can be used as natural cleaners to remove mineral deposits or stains. These options are particularly effective for primo water dispenser cleaning drip tray removal or other areas where water accumulates.


1.5. Clean Water

Ensure you have access to clean water for rinsing and flushing the various components of the dispenser.


How to clean the primo water dispenser? Unplug and Empty the Dispenser

2.1. Power Down the Dispenser

Before starting the cleaning process, unplug the Primo water dispenser to ensure your safety. This step prevents any electrical hazards while handling water and cleaning solutions.


2.2. Empty the Water Bottle

Remove the water bottle from the dispenser. Empty any remaining water into a sink or drain.


2.3. Drain the Reservoir

Dispense any remaining water from the reservoir. Place a cup or container underneath the spout and press the dispensing buttons to empty the reservoir completely.


How do you clean primo water dispenser? Cleaning the Exterior

3.1. Prepare the Cleaning Solution

Mix a small amount of mild soap or cleaner with warm water in a bowl or container. Ensure the solution is properly diluted according to the www.primowater.com cleaning instructions.


3.2. Dampen the Cloth or Sponge

Dip the soft cloth or sponge into the cleaning solution, wringing out any excess liquid. The cloth should be damp, not soaked.


3.3. Wipe the Exterior Surfaces

How to clean primo water dispenser top load? Gently wipe the exterior surfaces of the Primo water dispenser using the cloth or sponge. Pay attention to areas that are prone to fingerprints, spills, or dirt accumulation. This includes the front panel, sides, top, and any buttons or control panels.


3.4. Rinse with Clean Water

After primo water dispenser cleaning, rinse the cloth or sponge with clean water. Wipe the exterior surfaces again, this time using only water to remove any residual cleaning solution. Ensure that all cleaning residue is removed from the dispenser.


3.5. Dry the Exterior

After rinsing, use a dry cloth or towel to wipe down the exterior surfaces, ensuring they are thoroughly dried.


 primo water dispenserHow to clean out primo water dispenser? Cleaning the Drip Tray and Water Basin

4.1. Remove the Drip Tray and Water Basin

Carefully detach the drip tray and water basin from the dispenser. These components may be removable for easy cleaning.


4.2. Soak in Cleaning Solution (Optional)

If the drip tray or water basin is particularly dirty, you may choose to soak them in a solution of mild soap and warm water. Allow them to sit for a few minutes to loosen any grime or stains.


4.3. Scrub and Rinse

Using a soft cloth or sponge, gently scrub the drip tray and water basin to remove any dirt or residue. Pay attention to corners or crevices where buildup may occur.


4.4. Rinse and Dry

Thoroughly rinse the drip tray and water basin with clean water to remove any primo water cleaning instructions or debris. Allow them to air dry completely before reattaching them to the dispenser.


 primo water dispenserHow to clean out a primo water dispenser? Cleaning the Internal Components

5.1. Open the Dispenser

How to open primo water dispenser? If applicable, open the door or panel on the front of the dispenser to access the internal components.


5.2. Clean the Faucet

Using a soft cloth or sponge, wipe down the faucet or spigot inside the dispenser. Pay attention to the area where water is dispensed, ensuring it is free from any contaminants or residue.


5.3. Rinse and Flush

Flush the dispenser by running clean water through the faucet for a few minutes. This flushes out any remaining cleaning solution or debris from the internal system.


5.4. Dry the Internal Components

Use a clean, dry cloth to wipe down the internal components, ensuring they are completely dry before closing the dispenser.


Reassembling and Final Steps of how to clean your primo water dispenser

6.1. Reattach Components

Place the cleaned drip tray and water basin back into their respective positions in the dispenser. Ensure they are securely in place.


6.2. Insert a Fresh Water Bottle

Insert a new, full water bottle into the dispenser, aligning it properly with the spout or nozzle.

How to clean primo water dispenser nozzle?

Primo water dispenser how to clean the nozzle, begin by unplugging the unit for safety. Use a solution of warm water mixed with a few drops of mild dish soap or a disinfectant designed for food contact surfaces. Dampen a clean cloth or sponge with the solution, then carefully wipe down the nozzle, making sure to remove any dried water residue or mineral deposits. For a thorough clean, you can use a cotton swab dipped in the solution to reach smaller crevices. Rinse the nozzle with a damp cloth to remove any soap residue, and then wipe it dry with a separate clean cloth. Finally, plug the dispenser back in and ensure it’s ready for use. Regular cleaning will help maintain hygiene and improve the quality of your drinking water.


6.3. Plug in and Power On

Once all the components are reassembled, plug in the Primo water dispenser and turn it on. This prepares it for use with clean water.


6.4. Prime the Dispenser (If Required)

If your Primo dispenser requires priming after cleaning or bottle replacement, follow the manufacturer’s instructions for priming. This ensures that any air trapped in the lines is released before the dispenser is ready for use.


Regular Maintenance and Cleaning Schedule

7.1. Frequency of Cleaning

How to clean a primo water cooler? To maintain optimal performance and cleanliness, it is recommended to clean Primo water dispenser every 1-3 months. However, factors such as usage, the quality of the water source, and the presence of any visual dirt or residue may influence the cleaning frequency.


7.2. Reminder and Schedule

Create a regular maintenance and cleaning schedule to remind yourself when it is time for primo dispenser cleaning. Set a reminder in your calendar or use a smartphone app to ensure you stay on top of the cleaning routine.


7.3. Replacement Filters

If your Primo water dispenser has a filtration system, refer to the manufacturer’s instructions regarding the recommended schedule for replacing filters or primo water filter cleaning. Following the recommended filter replacement schedule helps maintain water quality and keeps your dispenser functioning optimally.

How to change filter on primo water dispenser?

Changing the filter on a Primo water dispenser is a straightforward process that ensures your water stays fresh and clean. First, turn off the dispenser and unplug it for safety. Locate the filter compartment, usually found at the back or bottom of the unit. Remove the cover by pressing the release tabs or unscrewing it, depending on the model. Take out the old filter by twisting or pulling it out gently. Before installing the new filter, rinse it under cool water to remove any dust. Insert the new filter firmly into the compartment, ensuring it clicks into place. Replace the cover and plug in the dispenser. Finally, run a few gallons of water through the system to ensure proper flow and to clear any air or residue. Your Primo water dispenser is now ready to provide refreshing, filtered water!

How to sanitize primo water dispenser?

To sanitize your Primo water dispenser, first, unplug the unit and remove any remaining water. Disassemble the components, including the drip tray and nozzle, and wash them with warm, soapy water, or place them in the dishwasher if they’re dishwasher-safe. Next, prepare a sanitizing solution using a mixture of 1 tablespoon of unscented liquid chlorine bleach per gallon of water. Carefully pour this solution into the reservoir and allow it to sit for about 10 minutes to effectively kill any bacteria. Afterward, drain the reservoir, then rinse it thoroughly with clean water to remove any bleach residue. Finally, reassemble the dispenser, plug it back in, and fill it with fresh water, allowing it to run through the system before use. Regular sanitization helps ensure safe and clean drinking water for you and your family.

Conclusion

Cleaning your Primo water dispenser is crucial for maintaining optimal performance, water quality, and overall enjoyment of clean and refreshing water. By following this step-by-step guide of how to clean my primo water dispenser, you can effectively clean all the components and surfaces of your dispenser. Regular cleaning, following a primo water dispenser maintenance schedule, and adhering to the primo water dispenser cleaning instructions for specific models ensure a continuous and reliable supply of fresh, clean water from your Primo water dispenser.

What is red button on back of Primo Water dispenser?

Primo Dispenser Reset

Ever stare at your Primo water dispenser, baffled by a malfunction and unsure how to fix a primo water dispenser? You’re not alone. Primo water dispensers offer convenient access to purified hot and cold water, but even the best appliances can encounter glitches. Here, we’ll delve into troubleshooting common Primo water dispenser issues and guide you through the elusive reset button, if your model even has one.

Demystifying the Primo Water Dispenser: A Range of Reliable Hydration Solutions

Primo water dispenser buttons come in various models, catering to different needs and preferences. Whether you opt for a top-loading or bottom-loading design, a sleek stainless steel finish, or a space-saving countertop option, Primo prioritizes quality and functionality.

Primo Dispenser Reset

These dispensers utilize replaceable water jugs, eliminating the need for bulky plumbing installations. They also boast features like child safety locks for hot water dispensing and nightlights for convenient nighttime use. In 2024, Primo continues to innovate, offering models with self-sanitization capabilities and smart touch controls for a truly hands-free experience.

Troubleshooting Common Primo Water Dispenser Issues: Restoring Refreshment

Why my primo water dispenser is not dispensing water? While primo water dispenser buttons on back are generally reliable, occasional issues can arise. Here’s a breakdown of common problems and their solutions about primo water dispenser switches on back:

Primo Dispenser Reset

  • Primo water dispenser no water coming out: This could be due to a low water level in the jug, a faulty water pump, or air trapped in the system. Check the jug’s water level, ensure it’s properly seated, and prime the dispenser by pressing the dispensing lever several times. If the issue persists, consult your user manual or contact Primo customer support.

  • Leaking Water: Leaks can originate from the jug base, dispenser spout, or internal components. Inspect the jug for cracks or damage, tighten any loose connections, and ensure the jug is properly seated. If the leak persists, it’s advisable to contact Primo for assistance.

  • Primo not dispensing water properly: Primo water dispenser not dispensing water could be caused by a clogged dispenser spout, a faulty dispensing lever, or a malfunctioning temperature control switch. Clean the spout with warm, soapy water, and check if is the primo water dispenser button stuck. The primo water dispenser button not working will cause the primo water dispenser problems. If these solutions fail, refer to your user manual or contact Primo customer support.

  • Lukewarm or Not Hot Enough Water: Primo water dispenser no hot water might indicate a malfunctioning heating element or a build-up of limescale. Check your user manual for specific cleaning instructions to remove limescale. If the problem persists, contact Primo customer support.

  • Cold Water Not Chilling: Similar to hot water issues, this could be due to a malfunctioning cooling element or a lack of proper ventilation around the dispenser. Ensure there’s adequate clearance around the unit and consult your user manual for troubleshooting steps. If the problem persists, contact Primo customer support.

  • Primo water dispenser cold water button not working: If the cold water button on your Primo water dispenser is not working, it could be due to several factors. One common reason is that the unit is not plugged in properly or the power source is interrupted, preventing the cooling mechanism from functioning. Another possibility is that the cooling system has malfunctioned, possibly due to a faulty compressor or a refrigerant leak. Additionally, there may be an issue with the controls or wiring, where a loose connection or damaged internal component is preventing the cold water feature from operating correctly.

The Elusive Reset Button: Myth or Reality?

How to reset primo water dispenser? Unfortunately, there isn’t a universal reset button on all Primo water dispenser models. Some models may have a power button that functions as a basic primo water dispenser on off switch, but this wouldn’t necessarily reset the dispenser to factory settings.

For troubleshooting purposes, following the steps outlined above for specific issues is generally more effective. However, if you’re unsure about your model or the solution seems beyond your comfort zone, contacting Primo customer support is always the best course of action.

Maintaining Peak Performance: Tips for Optimal Primo Water Dispenser Care

Here are some handy tips to keep your Primo water dispenser functioning optimally for years to come:

Primo Dispenser Reset

  • Regular Cleaning: Clean the dispenser spout, drip tray, and exterior surfaces regularly with warm, soapy water. Refer to your user manual for specific cleaning instructions for your model.

  • Preventative Maintenance: Replace water jugs promptly to avoid bacterial growth. Consider using a Primo water filter for additional purification.

  • Descaling: Descale your dispenser periodically to remove limescale buildup, following the instructions provided in your user manual.

  • Proper Use: Avoid overloading the jug or using excessive force when dispensing water.

By following these simple routines, you can ensure your Primo water dispenser continues to provide you with clean, refreshing water for a long time.

Embracing Convenience and Refreshment: The Allure of Primo Water Dispensers

Primo water dispensers offer a multitude of benefits that enhance your daily hydration experience. Here are some reasons to consider a Primo for your home or office:

  • Convenience: Enjoy instant access to hot, cold, or room temperature purified water without the need for bulky plumbing installations.

  • Cost-Effective: Primo water jugs are generally more affordable than bottled water, making it a budget-friendly option.

  • Environmentally Conscious: Reusable water jugs reduce plastic waste compared to single-use bottled water.

Unlocking Primo’s Potential: A Look at Advanced Features

Primo caters to diverse needs by offering water dispensers with advanced features. Here’s a glimpse into some of the innovations that might pique your interest:

Primo Dispenser Reset

  • Self-Sanitization: Select Primo models boast self-sanitization capabilities, offering peace of mind with automated cleaning cycles.

  • Smart Touch Controls: Experience the convenience of touch-activated dispensing with Primo’s smart touch models.

  • Nightlight: Primo dispensers with nightlights provide a touch of illumination for easy access to water during nighttime hours.

  • Child Safety Lock: Ensure the safety of your little ones with Primo’s child safety locks on hot water dispensing buttons.

  • Spill Proof Design: Minimize the mess with Primo’s spill-proof water dispensers.

These features elevate your Primo water dispenser from a simple appliance to a sophisticated hydration station, seamlessly integrating with your modern lifestyle.

Primo Water Dispenser Reset Button: When to Seek Professional Help

If you’ve exhausted the troubleshooting tips outlined above and your Primo water dispenser continues to malfunction, it’s time to seek professional assistance. Here’s when to consider contacting Primo customer support:

Primo Dispenser Reset

  • Leakage: Persistent leaks can indicate a more significant issue requiring professional attention.

  • No Power: If your dispenser receives no power and the troubleshooting steps in your manual prove ineffective, contact Primo customer support.

  • Unusual Noises: Any unusual noises emanating from your dispenser warrant a call to Primo customer support for diagnosis.

  • Error Codes: Some Primo models might display error codes on their control panels. Refer to your user manual for the specific meaning of the code and contact Primo customer support if the solution is unclear.

Primo customer support is readily available to assist you with any technical difficulties you encounter. They can provide further troubleshooting guidance, answer your questions, and if necessary, help facilitate repairs or replacements.

What does a flashing blue light indicate on the water?

A flashing blue light on a Primo water dispenser typically indicates that the unit is in the process of heating or cooling water, depending on the model. It can also signal that there is a status update or operational check occurring. If you’re unsure or if the light continues to flash without changes, it’s a good idea to consult the user manual or contact Primo customer support for specific guidance.

Peace of Mind with Primo: Warranties and Support

Primo prioritizes customer satisfaction and offers warranties on their water dispensers. The specific warranty terms may vary depending on your model, so it’s crucial to consult your user manual for details. Generally, Primo warranties cover manufacturing defects for a specific period.

Primo also maintains a comprehensive support website with helpful resources, including user manuals, primo water cooler troubleshooting guides, and frequently asked questions (FAQs). Additionally, their customer support representatives are available by phone or email to address your concerns.

With a robust warranty program and readily available support, Primo empowers you to feel confident about your purchase.

Invest in Hydration: Choosing the Right Primo Water Dispenser for You

Primo offers a diverse range of water dispensers to suit various needs and budgets. Here are some factors to consider when making your selection:

  • Size and Capacity: Consider the available space in your home or office and the volume of water you typically consume.

  • Features: Decide which features are most important to you, such as self-sanitization, smart touch controls, or a child safety lock.

  • Budget: Primo water dispensers cater to a range of price points, so you can find one that aligns with your financial comfort zone.

  • Aesthetics: Choose a dispenser that complements your existing décor.

By carefully considering these factors, you can select the ideal Primo water dispenser to elevate your hydration experience.

Primo water dispensers offer a convenient, cost-effective, and eco-friendly solution for enjoying purified hot, cold, or room temperature water at home or in the office. With a variety of models to choose from, advanced features to explore, and robust customer support available, Primo empowers you to make informed decisions and invest in your well-being.

Keeping Your Hydration Flowing Smoothly

Primo water dispensers offer a convenient and healthy way to stay hydrated. Understanding the function of the reset button and how to properly reset your dispenser can help you resolve minor glitches and keep your water flowing smoothly. If you encounter a more complex issue, don’t hesitate to consult the user manual or contact Primo customer service for further assistance. Remember, preventive maintenance plays a crucial role in keeping your Primo water dispenser functioning optimally. Here are some key takeaways to ensure long-lasting performance:

  • Regular Filter Replacement: As mentioned earlier, replacing your water filter regularly (every 3-6 months) is essential. A clogged filter can restrict water flow and potentially lead to dispenser malfunctions.
  • Proper Cleaning and Sanitization: Following the recommended cleaning and sanitization procedures outlined in your user manual helps prevent bacteria build-up and clogged components. A clean dispenser is less likely to experience problems.
  • Safe Water Handling: Always practice safe water handling techniques when using your Primo dispenser. Clean your hands before handling the water bottle or dispensing water. Store your water bottle properly to prevent contamination.

By following these simple tips and utilizing the reset button effectively, you can ensure your Primo water dispenser continues to be a reliable source of clean, refreshing hydration for your home or office in 2024 and beyond.

How do you remove limescale from a Primo water dispenser?

water dispenser

Introduction


Limescale buildup is a common challenge faced by owners of water dispensers, including those by Primo. Limescale, or mineral deposits, can accumulate over time, affecting the performance and aesthetics of the dispenser. To restore the optimal functioning and appearance of a Primo water dispenser, it is important to remove limescale effectively. In this guide, we will explore various methods and techniques for removing limescale from a Primo water dispenser, providing specific instructions to help you achieve a clean and well-maintained appliance.

water dispenser

How do you remove limescale from a Primo water dispenser?

The Importance of Removing Limescale

1.1. Limescale Impact on Water Dispenser Performance

Limescale can negatively impact the performance of a Primo water dispenser. Mineral deposits can clog pipes, faucets, and filters, affecting water flow and reducing the appliance’s efficiency. Regular removal of limescale ensures that the dispenser operates optimally, providing a continuous supply of clean and refreshing water.


1.2. Aesthetics and Hygiene Considerations

Limescale buildup can also affect the appearance of the Primo water dispenser. The presence of white or brownish deposits can be unsightly and create a negative impression. Additionally, limescale can harbor bacteria or impurities, compromising the hygiene of the appliance. Removing limescale not only improves the aesthetics but also promotes a sanitary water dispensing experience.


Methods for Removing Limescale

2.1. Vinegar Solution

Vinegar is a popular and effective natural cleaning agent for removing limescale. Follow these steps to use a vinegar solution for cleaning a Primo water dispenser:


  1. Mix equal parts white vinegar and water in a container.
  2. Disconnect the water dispenser from the power source and empty the water reservoir.
  3. Use a clean cloth or sponge soaked in the vinegar solution to wipe down the interior and exterior surfaces of the dispenser, paying special attention to areas with limescale deposits.
  4. For stubborn limescale, soak a cloth or paper towel in the vinegar solution and place it on the affected area. Let it sit for several hours or overnight to loosen the mineral deposits.
  5. Once the limescale is loosened, scrub the area gently with a soft brush or sponge.
  6. Rinse all components thoroughly with clean water to remove any vinegar residue.
  7. Reassemble the Primo water dispenser and run water through the taps for several minutes to flush out any remaining traces of vinegar.

water dispenser

2.2. Lemon Juice and Baking Soda Paste

An alternative natural method for removing limescale involves the use of lemon juice and baking soda to create a paste. Follow these steps to use this method:


  1. Squeeze fresh lemon juice into a bowl and gradually add baking soda, stirring to form a thick paste.
  2. Disconnect the water dispenser from the power source and empty the water reservoir.
  3. Apply the lemon juice and baking soda paste to the limescale deposits, ensuring complete coverage.
  4. Allow the paste to sit on the affected areas for at least 30 minutes or longer for tougher deposits.
  5. Scrub the limescale gently with a soft brush or sponge, applying additional paste as needed.
  6. Rinse thoroughly with clean water to remove any residue.
  7. Reassemble the Primo water dispenser and run water through the taps for several minutes to flush out any remaining traces of the paste or limescale.


2.3. Commercial Descaling Products

Commercial descaling products specifically formulated for removing limescale are widely available. These products often come in liquid or powder form and can be effective in removing tough mineral deposits. Follow the instructions provided by the manufacturer on the product packaging for the best results. It is essential to ensure that any product used is safe for use in Primo water dispensers and does not pose a risk to water quality or the appliance itself.


Precautions and Tips for Limescale Removal

3.1. Safety Precautions

When using any cleaning method to remove limescale, it is important to follow safety precautions:


Ensure proper ventilation when using vinegar or any other cleaning solutions.

Wear gloves to protect your hands from the cleaning agents.

Avoid using abrasive tools or materials that may scratch the dispenser’s surfaces.

3.2. Surface Compatibility

Check the user manual or contact Primo customer support to ensure that the cleaning method and agents used are compatible with the specific model of the water dispenser. Some surfaces or materials may be sensitive to certain cleaning agents, and using improper solutions can damage the appliance.

water dispenser

3.3. Regular Maintenance

To prevent future limescale buildup, implement regular maintenance practices:


  1. Empty and clean the water reservoir on a regular basis to minimize mineral deposits.
  2. Periodically flush the dispenser with clean water to remove any lingering traces of limescale.
  3. Follow the manufacturer’s recommendations for filter maintenance or replacement to ensure optimal performance and reduce limescale accumulation.


Professional Servicing

4.1. Expert Assistance

If limescale buildup persists or you are unsure about how to effectively remove limescale from your Primo water dispenser, seek professional assistance. This can involve contacting customer support or hiring a technician specializing in water dispenser maintenance to ensure that the appliance is thoroughly cleaned and restored to its optimal condition.


Prevention of Limescale Buildup

6.1. Use Filtered Water

Using filtered water in the Primo water dispenser can greatly reduce the amount of mineral deposits and limescale buildup. Filtering the water before it enters the dispenser removes impurities and minerals, resulting in cleaner and fresher-tasting water.

water dispenser

6.2. Regular Flushing

In addition to regular cleaning, performing periodic flushing of the water dispenser can help prevent limescale buildup. Follow these steps for flushing:


  1. Disconnect the water dispenser from the power source and empty the water reservoir.
  2. Fill the reservoir with clean water.
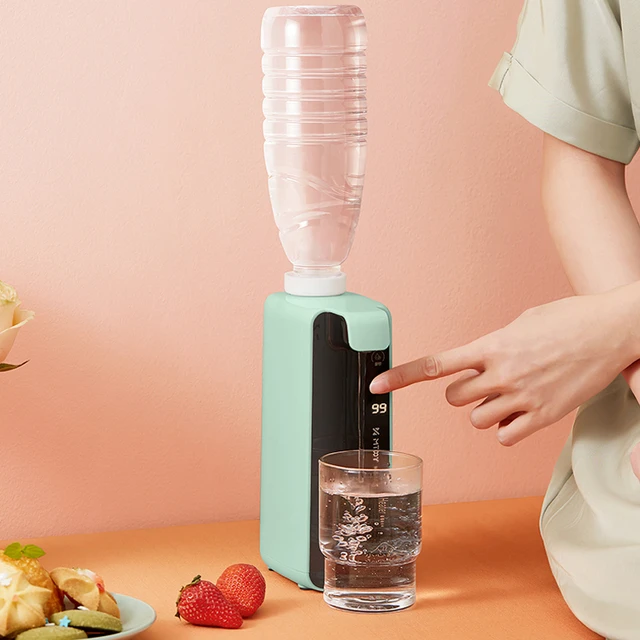
  3. Open the taps and let the water run for several minutes, ensuring that the entire system is flushed.
  4. Repeat this process regularly, depending on the level of mineral content in your water supply.


6.3. Descaling Maintenance

Periodically descaling the water dispenser is another preventive measure to keep limescale at bay. Follow the manufacturer’s recommendations for descaling intervals and use appropriate descaling agents. This maintenance step helps break down and remove any mineral deposits that may have accumulated over time, preserving the efficiency and longevity of the appliance.

water dispenser

Conclusion

Removing limescale from a Primo water dispenser is essential for maintaining its performance, appearance, and hygiene. Methods such as using a vinegar solution or a lemon juice and baking soda paste can effectively dissolve and remove limescale deposits. Ensure proper precautions are taken, such as ventilation, wearing gloves, and using appropriate cleaning agents that are safe for the appliance. Implementing regular maintenance practices and seeking professional assistance when needed will help ensure the continued cleanliness and functionality of the Primo water dispenser. With proper care and cleaning, your Primo water dispenser will provide you with a reliable and refreshing water source.

How often should a Primo water dispenser be cleaned?

water cooler

Introduction


Primo water dispensers provide a convenient way to access clean and refreshing drinking water. To ensure the best possible water quality and prevent the buildup of bacteria or contaminants, regular cleaning of the Primo water dispenser is essential. In this guide, we will explore how often a Primo water dispenser should be cleaned, outlining specific cleaning schedules and considerations for maintaining optimal cleanliness.
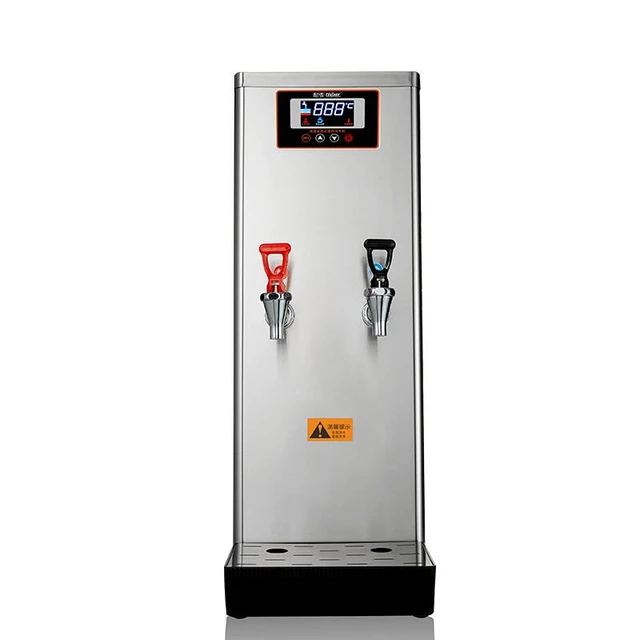
water cooler

How often should a Primo water dispenser be cleaned?

Initial Cleaning Before Use

1.1. Cleaning New Primo Water Dispensers

Before using a new Primo water dispenser, it is important to perform an initial cleaning. Follow the manufacturer’s instructions provided in the user manual to ensure proper cleaning and preparation of the dispenser. This step helps remove any residues or impurities that might have accumulated during manufacturing or transportation.


1.2. Flushing the System

Flushing the Primo water dispenser initially is crucial to ensure that any excess debris or particles are removed from the system. This can be done by filling the water reservoir with clean water, running water through the taps for several minutes, and then discarding the water.
 

Regular Cleaning Schedule

2.1. Daily Cleaning Checks

Performing daily cleaning checks is a proactive step to maintain cleanliness and identify any visible dirt, spills, or residue on the exterior of the dispenser. Wipe down the surfaces with a clean cloth or sponge and mild detergent or disinfectant, paying attention to the taps, buttons, and surrounding areas.


2.2. Weekly Cleaning

A weekly cleaning routine helps keep the Primo water dispenser in good condition and prevents the buildup of dirt and contaminants. Follow these steps to perform a thorough cleaning:


Unplug the dispenser from the power source and disconnect the water bottle.

Remove and clean the drip tray, as it can collect spills and debris over time.

Clean the taps or nozzles using a brush or sponge soaked in a mixture of mild detergent or vinegar and warm water.
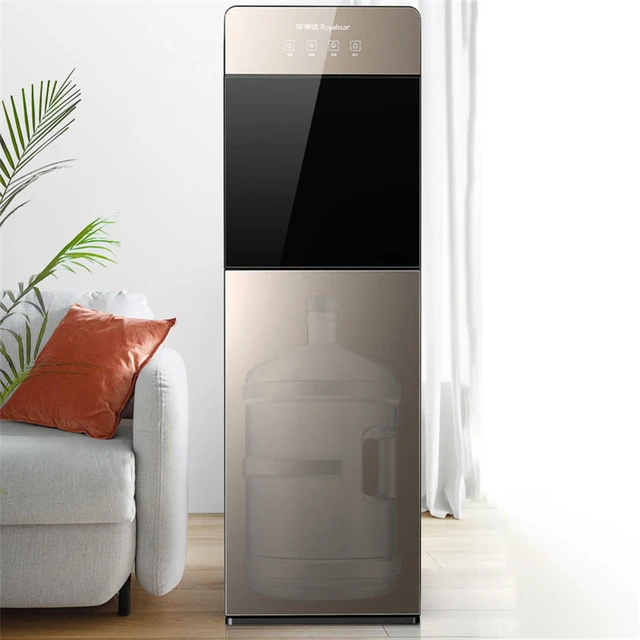
Wipe down the exterior surfaces of the dispenser, including the body and buttons, using a cloth or sponge dampened with mild detergent or disinfectant.

Rinse all components thoroughly to remove any cleaning residue.

Allow the dispenser to dry completely before reconnecting the water bottle and plugging it back in.

water cooler

Signs Indicating the Need for Cleaning

3.1. Foul Odors or Tastes

If the water dispensed from the Primo water dispenser has an unpleasant taste or odor, it may be an indication of bacterial growth or contamination. In such cases, immediate cleaning is necessary to eliminate any potential health risks and restore the quality of the water.


3.2. Visible Sediment or Discoloration

The presence of visible sediment or discoloration in the water, or in the dispenser itself, is an obvious sign that cleaning is required. Sediment buildup can clog the dispenser or affect the taste and quality of the water, necessitating a thorough cleaning to remove any accumulated debris.


Additional Cleaning Considerations

4.1. Water Source Considerations

Water quality and source play a vital role in the maintenance of the Primo water dispenser. If the water supply used in the dispenser is known to contain high levels of impurities or sediment, more frequent cleaning may be required. It is advisable to follow the manufacturer’s recommendations and consult water testing professionals or local authorities to ensure that the water source is safe and meets quality standards.
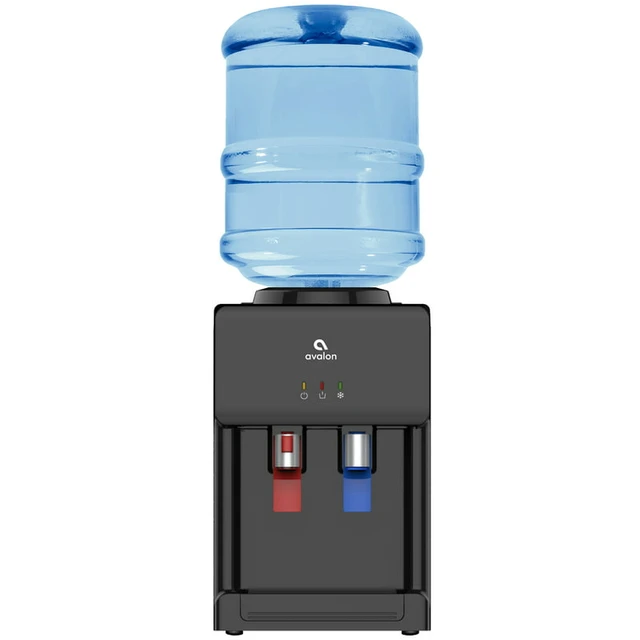
 

4.2. Seasonal Changes and Usage Frequency

The frequency of cleaning is influenced by seasonal changes and the frequency of usage. In high-demand seasons or during periods of increased usage, such as holidays or gatherings, the dispenser may require more frequent cleaning to keep up with the demand and prevent bacterial growth.


4.3. Regular Filter Replacements

If the Primo water dispenser is equipped with a filtration system, regular filter replacements are essential. Follow the manufacturer’s recommendations for filter replacement schedules to maintain optimal filtration efficiency and prevent the buildup of contaminants.

water cooler

Maintenance Tips for Cleanliness

5.1. Hygiene Practices

Maintaining hygiene practices while using the Primo water dispenser is equally important in preventing contamination. Encourage users to wash their hands before accessing the dispenser, avoid touching the dispenser spigots directly with dirty hands or containers, and refrain from letting the water tap come into contact with the water bottle or other surfaces.


5.2. Spill and Leak Cleanup

Promptly clean up any spills or leaks around the Primo water dispenser to prevent the accumulation of moisture, which can lead to mold or bacterial growth. Absorb spills using a clean cloth or paper towel, and disinfect the area with a suitable cleaning agent.


5.3. Regular Inspection

Regularly inspect the dispenser for any signs of wear, damage, or malfunction that may compromise its cleanliness or operation. Pay attention to components such as seals, hoses, or filters, as deteriorated or worn parts may require replacement.


Professional Servicing and Maintenance

7.1. Periodic Professional Servicing

In addition to regular cleaning performed by the user, periodic professional servicing of the Primo water dispenser is recommended. Professional technicians can conduct thorough inspections, deep cleanings, and maintenance tasks that may require specialized tools or expertise. This ensures that the dispenser operates optimally and remains in good condition.


7.2. Filter Replacements and Upgrades

Professional servicing also provides an opportunity to replace or upgrade the filtration system in the Primo water dispenser. Technicians can recommend the appropriate filters based on water quality or specific needs, ensuring that the dispenser continues to provide clean and great-tasting water.
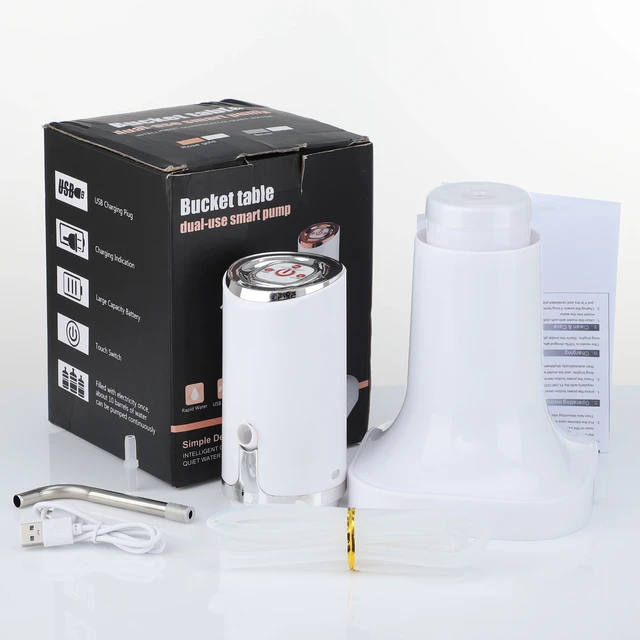
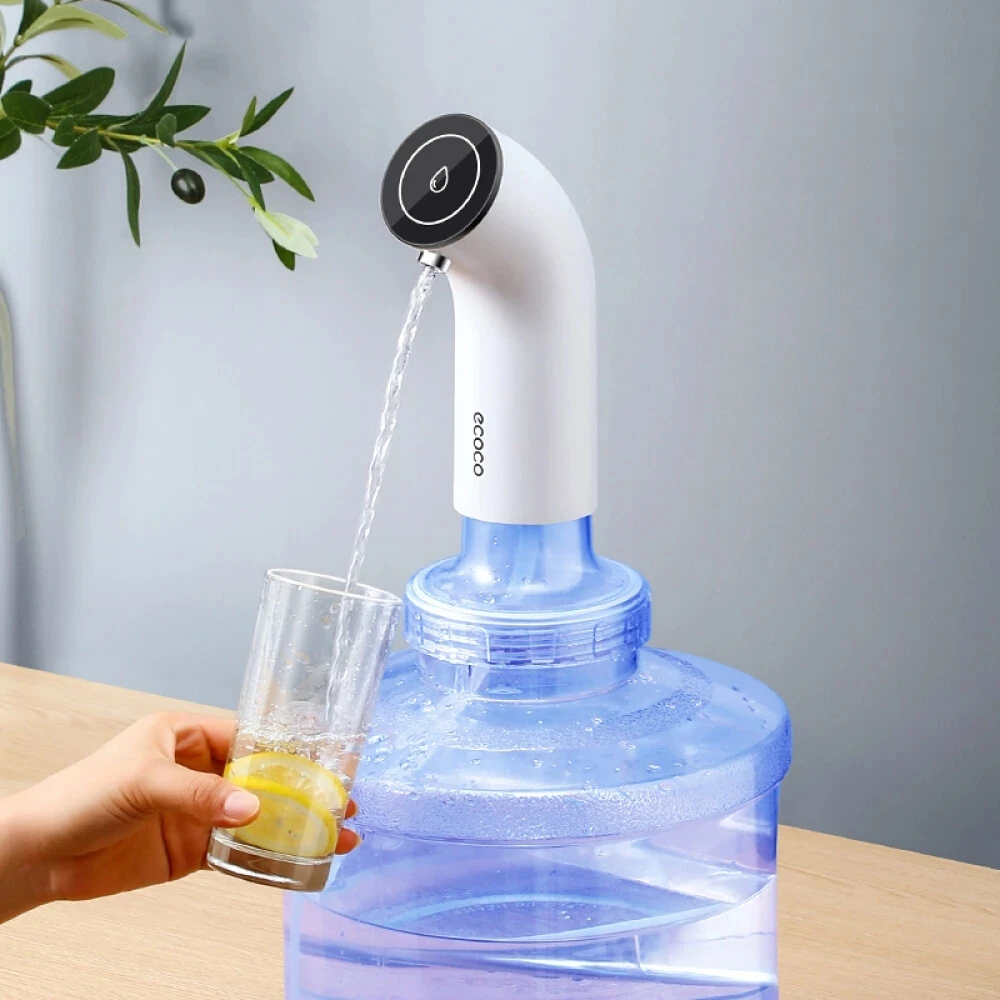
water cooler

Safety and Health Considerations

8.1. Sanitary Precautions

Maintaining proper sanitation and hygiene practices is crucial when using a Primo water dispenser. Users should wash their hands before handling the dispenser or filling water bottles. Additionally, if someone in the household or workplace is sick or has a contagious illness, appropriate precautions should be taken to avoid cross-contamination.


8.2. Bacterial Growth and Legionella Risk

Regular cleaning of the Primo water dispenser helps prevent bacterial growth and reduces the risk of Legionella, a bacteria that can cause Legionnaires’ disease. Following cleaning guidelines and schedules ensures that the dispenser remains free from harmful bacteria and provides safe drinking water.

water cooler

Conclusion

Maintaining cleanliness in a Primo water dispenser is essential for ensuring the quality and safety of the dispensed water. Daily cleaning checks, weekly cleanings, and immediate attention to signs of contamination or impurities help maintain optimal cleanliness. Considerations such as water source, usage frequency, and seasonal changes influence the cleaning frequency. Regular filter replacements, hygiene practices, and proactive spill cleanup contribute to the overall cleanliness and hygiene of the dispenser. By following these guidelines and incorporating regular cleaning as part of the maintenance routine, users can enjoy clean and refreshing water from their Primo water dispensers.

How do you clean mold out of a refrigerator water dispenser?

water cooler

Introduction


A refrigerator water dispenser is a convenient feature that provides refreshing and chilled water. However, over time, mold and mildew can accumulate inside the dispenser due to moisture and organic matter. Cleaning mold from a refrigerator water dispenser is essential for maintaining a clean and hygienic water supply. In this comprehensive guide, we will provide you with step-by-step instructions and effective methods to clean mold from your refrigerator water dispenser.

water cooler

How do you clean mold out of a refrigerator water dispenser?

Gather the Necessary Supplies

1.1. Cleaning Solutions

Prepare a mild cleaning solution by mixing equal parts of white vinegar and warm water. Alternatively, you can use a mixture of baking soda and water as an effective and natural cleaning option to tackle mold and mildew.


1.2. Soft Brush or Toothbrush

Obtain a soft brush or toothbrush that will allow you to scrub the inner surfaces of the water dispenser gently. Ensure that the brush has soft bristles to avoid damaging the dispenser.


1.3. Microfiber Cloth or Sponge

Grab a microfiber cloth or sponge that can be used in conjunction with the cleaning solution to wipe down the dispenser’s surfaces.


1.4. Warm Water

Have a bowl or container filled with warm water nearby for rinsing the dispenser after cleaning.


Disconnect the Water Supply and Empty the Dispenser

2.1. Unplug the Refrigerator

Before starting the cleaning process, unplug your refrigerator from the power source to ensure safety and prevent any accidental dispensing of water.


2.2. Disconnect the Water Supply

Check the back of your refrigerator to locate the water supply line. Turn off the water supply valve and carefully disconnect the water line from the dispenser. This step ensures that no water flows into the dispenser during the cleaning process.


2.3. Empty the Dispenser

Dispense any remaining water from the dispenser into a sink or container. Holding down the dispenser lever for a few seconds will drain out any residual water.


Remove Removable Parts

3.1. Check for Removable Parts

Inspect the water dispenser for any removable parts, such as drip trays, grilles, or water reservoirs. These parts are usually designed to be easily detached for cleaning purposes.


3.2. Remove and Soak in Cleaning Solution

Gently remove any detachable parts from the dispenser and soak them in the prepared cleaning solution. Allow them to soak for several minutes to loosen any mold or mildew buildup.


Clean the Dispenser Interior

4.1. Dampen the Microfiber Cloth or Sponge

Dampen the microfiber cloth or sponge in the cleaning solution. Ensure that it is well saturated but not dripping.


4.2. Wipe the Inner Surfaces

Carefully wipe the inner surfaces of the water dispenser. Pay special attention to the areas where mold and mildew are likely to accumulate, such as the nozzle, spout, and the areas around the dispenser lever.


4.3. Use the Soft Brush or Toothbrush

If the water dispenser is not cleaned for a long period of time, stubborn mold or mildew spots may develop. For stubborn mold or mildew spots, use a soft brush or toothbrush to gently scrub the affected areas. Apply light pressure and small circular motions to dislodge any embedded mold.


4.4. Repeat the Cleaning Process

If necessary, dip the brush into the cleaning solution or sprinkle baking soda onto the bristles for additional cleaning power. Continue gently scrubbing until the mold has been completely removed.


Clean the Removable Parts

5.1. Scrub the Soaked Parts

While the removable parts are soaking in the cleaning solution, scrub them with a soft brush or toothbrush to remove any mold or mildew. Pay attention to crevices or grooves where mold can hide.


5.2. Rinse the Parts

Thoroughly rinse the soaked parts with warm water to remove any remaining cleaning solution and loosened mold. Ensure that there are no residual cleaning products left on the parts.


5.3. Dry the Parts Completely

After rinsing, dry the removable parts completely before reattaching them to the water dispenser. Use a clean towel or allow them to air dry.


Rinse and Wipe Down the Dispenser

6.1. Rinse the Dispenser

Fill a bowl or container with warm water and use it to rinse the dispenser’s interior. Use a clean microfiber cloth or sponge soaked in warm water to wipe away any remaining cleaning residue. Make sure to rinse thoroughly to remove all traces of the cleaning solution.


6.2. Dry the Dispenser

After rinsing, use a clean, dry microfiber cloth to wipe down the dispenser’s surfaces. Ensure that all areas are completely dry, as moisture can contribute to mold growth.


Reattach and Reconnect

7.1. Reattach the Removable Parts

Once the dispenser is completely dry, reattach the removable parts, such as drip trays, grilles, or water reservoirs. Ensure that they are securely and properly placed.


7.2. Reconnect the Water Supply

Carefully reconnect the water supply line to the dispenser, ensuring it is tightly connected to prevent any leaks. Turn on the water supply valve, and check for any leaks or water drips.


Regular Maintenance and Prevention Tips

8.1. Routinely Clean the Water Dispenser

To prevent mold and mildew from recurring, it is important to regularly clean your refrigerator water dispenser. Aim to clean it every three months or more frequently if you notice any signs of mold or mildew buildup. The self-cleaning function that comes with the water dispenser can also be used.


8.2. Wipe the Dispenser Dry After Use

After dispensing water, wipe down the dispenser’s spout and surrounding areas with a clean, dry cloth or paper towel to remove any moisture and prevent mold growth.


8.3. Check and Replace Water Filters

Regularly check and replace the water filters in your refrigerator to maintain clean and fresh water. Consult your refrigerator’s manual or contact the manufacturer for guidance on filter replacement intervals.


Conclusion


Cleaning mold from a refrigerator water dispenser is an important task to maintain a clean and hygienic water supply. By following the step-by-step instructions provided in this guide, utilizing the necessary supplies, and practicing regular maintenance, you can effectively remove mold and prevent its recurrence. This will ensure that you continue to enjoy clean and healthy water from your refrigerator water dispenser.