Introduction
Regular maintenance and cleaning of your Primo water dispenser are essential to ensure the freshness and cleanliness of the water it dispenses. Primowater.com cleaning instructions not only helps maintain optimal performance but also promotes the safety and enjoyment of every drink. How do you clean a primo water cooler? In this comprehensive guide of primo water cooler cleaning, we will provide how to clean a primo water dispenser effectively. From gathering the necessary supplies to addressing various components of the dispenser, we will cover all the essentials to leave your dispenser sparkling clean and ready for use.
 Some key advantages of using a Primo water dispenser:
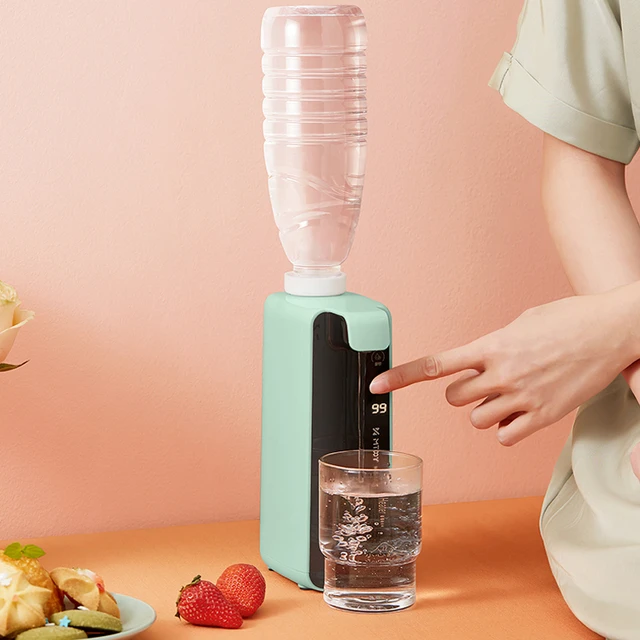
Primo water dispensers offer several advantages that make them a popular choice for providing safe and convenient access to drinking water. Here are some key advantages of using a Primo water dispenser:
How to clean a water dispenser primo?
Filtered and Clean Drinking Water:
Primo water dispensers are equipped with advanced filtration systems that effectively remove impurities, chlorine, odors, and unpleasant tastes from tap water. This ensures that you have access to clean and great-tasting drinking water at all times.
Convenience and Accessibility:
Primo water dispensers provide a convenient and readily accessible source of water. Whether it’s in your home, office, or public spaces, you can easily access fresh drinking water without the need for bottled water or constantly refilling pitchers.
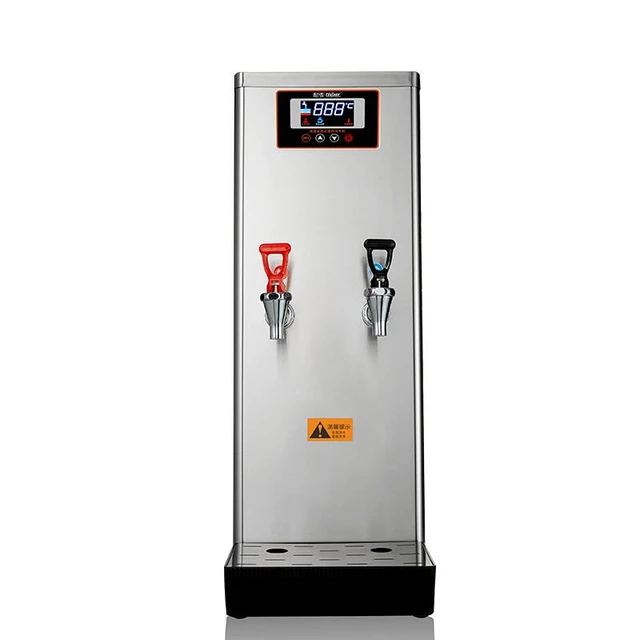
Hot and Cold Water Options:
Most Primo water dispensers offer both hot and cold water options. This allows you to enjoy a refreshing cold drink or prepare hot beverages like tea, coffee, or instant soups conveniently and instantly.
Environmentally Friendly:
By using a Primo water dispenser, you can eliminate the need for single-use plastic water bottles, reducing plastic waste and environmental impact. This promotes sustainability and eco-friendliness in your daily water consumption habits.
Cost Savings:
Investing in a Primo water dispenser can result in long-term cost savings. By using a dispenser instead of purchasing bottled water, you can significantly reduce your expenses associated with buying packaged water.
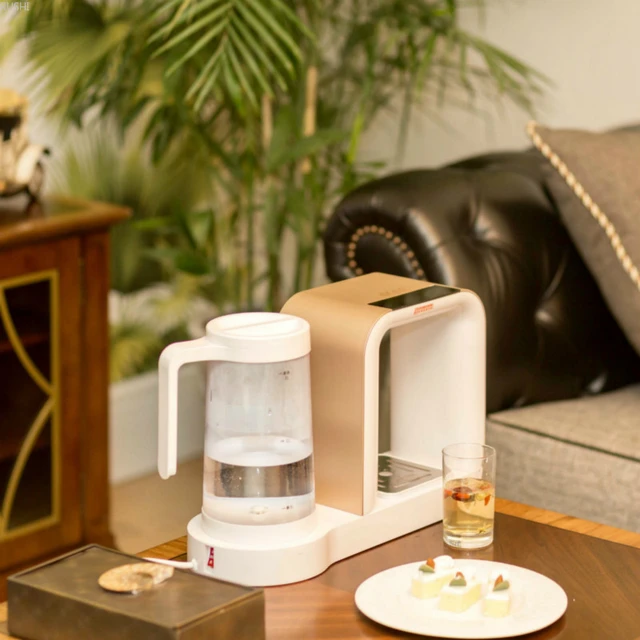
Design and Aesthetic Appeal:
Primo water dispensers are available in various designs and styles to complement your home or office decor. They not only provide functionality but can also add a stylish element to your space.
Easy Maintenance:
Primo water dispensers are designed for easy maintenance and cleaning. They typically have removable drip trays and spill-resistant features to make cleaning a primo water cooler and upkeep hassle-free.
BPA-Free Material:
Primo water dispensers are usually made from BPA-free materials, ensuring that the water remains free from harmful chemicals and contaminants.
Overall, Primo water dispensers offer the advantages of filtered and clean water, convenience, accessibility, sustainability, cost savings, and appealing design. These features make them a popular and practical choice for ensuring access to quality drinking water in various environments.
How do I clean my Primo water dispenser?
 How do you clean a primo water dispenser? Gather Cleaning Supplies
1.1. Mild Soap or Cleaner
Choose a mild soap or cleaner suitable for cleaning water dispensers. Avoid using harsh chemicals or abrasive cleaners as they may damage the dispenser’s components.
1.2. Soft Cloth or Sponge
Select a soft cloth or sponge to use for cleaning. Avoid using abrasive materials that may scratch or damage the surfaces of the dispenser.
1.3. Scrub Brush or Toothbrush (Optional)
For hard-to-reach areas or stubborn dirt, you may find it useful to have a small scrub brush or toothbrush to assist with cleaning.
1.4. Vinegar or Lemon Juice (Optional)
How to clean primo water dispenser with vinegar? Vinegar or lemon juice can be used as natural cleaners to remove mineral deposits or stains. These options are particularly effective for primo water dispenser cleaning drip tray removal or other areas where water accumulates.
1.5. Clean Water
Ensure you have access to clean water for rinsing and flushing the various components of the dispenser.
How to clean the primo water dispenser? Unplug and Empty the Dispenser
2.1. Power Down the Dispenser
Before starting the cleaning process, unplug the Primo water dispenser to ensure your safety. This step prevents any electrical hazards while handling water and cleaning solutions.
2.2. Empty the Water Bottle
Remove the water bottle from the dispenser. Empty any remaining water into a sink or drain.
2.3. Drain the Reservoir
Dispense any remaining water from the reservoir. Place a cup or container underneath the spout and press the dispensing buttons to empty the reservoir completely.
How do you clean primo water dispenser? Cleaning the Exterior
3.1. Prepare the Cleaning Solution
Mix a small amount of mild soap or cleaner with warm water in a bowl or container. Ensure the solution is properly diluted according to the www.primowater.com cleaning instructions.
3.2. Dampen the Cloth or Sponge
Dip the soft cloth or sponge into the cleaning solution, wringing out any excess liquid. The cloth should be damp, not soaked.
3.3. Wipe the Exterior Surfaces
How to clean primo water dispenser top load? Gently wipe the exterior surfaces of the Primo water dispenser using the cloth or sponge. Pay attention to areas that are prone to fingerprints, spills, or dirt accumulation. This includes the front panel, sides, top, and any buttons or control panels.
3.4. Rinse with Clean Water
After primo water dispenser cleaning, rinse the cloth or sponge with clean water. Wipe the exterior surfaces again, this time using only water to remove any residual cleaning solution. Ensure that all cleaning residue is removed from the dispenser.
3.5. Dry the Exterior
After rinsing, use a dry cloth or towel to wipe down the exterior surfaces, ensuring they are thoroughly dried.
 How to clean out primo water dispenser? Cleaning the Drip Tray and Water Basin
4.1. Remove the Drip Tray and Water Basin
Carefully detach the drip tray and water basin from the dispenser. These components may be removable for easy cleaning.
4.2. Soak in Cleaning Solution (Optional)
If the drip tray or water basin is particularly dirty, you may choose to soak them in a solution of mild soap and warm water. Allow them to sit for a few minutes to loosen any grime or stains.
4.3. Scrub and Rinse
Using a soft cloth or sponge, gently scrub the drip tray and water basin to remove any dirt or residue. Pay attention to corners or crevices where buildup may occur.
4.4. Rinse and Dry
Thoroughly rinse the drip tray and water basin with clean water to remove any primo water cleaning instructions or debris. Allow them to air dry completely before reattaching them to the dispenser.
 How to clean out a primo water dispenser? Cleaning the Internal Components
5.1. Open the Dispenser
How to open primo water dispenser? If applicable, open the door or panel on the front of the dispenser to access the internal components.
5.2. Clean the Faucet
Using a soft cloth or sponge, wipe down the faucet or spigot inside the dispenser. Pay attention to the area where water is dispensed, ensuring it is free from any contaminants or residue.
5.3. Rinse and Flush
Flush the dispenser by running clean water through the faucet for a few minutes. This flushes out any remaining cleaning solution or debris from the internal system.
5.4. Dry the Internal Components
Use a clean, dry cloth to wipe down the internal components, ensuring they are completely dry before closing the dispenser.
Reassembling and Final Steps of how to clean your primo water dispenser
6.1. Reattach Components
Place the cleaned drip tray and water basin back into their respective positions in the dispenser. Ensure they are securely in place.
6.2. Insert a Fresh Water Bottle
Insert a new, full water bottle into the dispenser, aligning it properly with the spout or nozzle.
How to clean primo water dispenser nozzle?
Primo water dispenser how to clean the nozzle, begin by unplugging the unit for safety. Use a solution of warm water mixed with a few drops of mild dish soap or a disinfectant designed for food contact surfaces. Dampen a clean cloth or sponge with the solution, then carefully wipe down the nozzle, making sure to remove any dried water residue or mineral deposits. For a thorough clean, you can use a cotton swab dipped in the solution to reach smaller crevices. Rinse the nozzle with a damp cloth to remove any soap residue, and then wipe it dry with a separate clean cloth. Finally, plug the dispenser back in and ensure it’s ready for use. Regular cleaning will help maintain hygiene and improve the quality of your drinking water.
6.3. Plug in and Power On
Once all the components are reassembled, plug in the Primo water dispenser and turn it on. This prepares it for use with clean water.
6.4. Prime the Dispenser (If Required)
If your Primo dispenser requires priming after cleaning or bottle replacement, follow the manufacturer’s instructions for priming. This ensures that any air trapped in the lines is released before the dispenser is ready for use.
 Regular Maintenance and Cleaning Schedule
7.1. Frequency of Cleaning
How to clean a primo water cooler? To maintain optimal performance and cleanliness, it is recommended to clean Primo water dispenser every 1-3 months. However, factors such as usage, the quality of the water source, and the presence of any visual dirt or residue may influence the cleaning frequency.
7.2. Reminder and Schedule
Create a regular maintenance and cleaning schedule to remind yourself when it is time for primo dispenser cleaning. Set a reminder in your calendar or use a smartphone app to ensure you stay on top of the cleaning routine.
7.3. Replacement Filters
If your Primo water dispenser has a filtration system, refer to the manufacturer’s instructions regarding the recommended schedule for replacing filters or primo water filter cleaning. Following the recommended filter replacement schedule helps maintain water quality and keeps your dispenser functioning optimally.
How to change filter on primo water dispenser?
Changing the filter on a Primo water dispenser is a straightforward process that ensures your water stays fresh and clean. First, turn off the dispenser and unplug it for safety. Locate the filter compartment, usually found at the back or bottom of the unit. Remove the cover by pressing the release tabs or unscrewing it, depending on the model. Take out the old filter by twisting or pulling it out gently. Before installing the new filter, rinse it under cool water to remove any dust. Insert the new filter firmly into the compartment, ensuring it clicks into place. Replace the cover and plug in the dispenser. Finally, run a few gallons of water through the system to ensure proper flow and to clear any air or residue. Your Primo water dispenser is now ready to provide refreshing, filtered water!
How to sanitize primo water dispenser?
To sanitize your Primo water dispenser, first, unplug the unit and remove any remaining water. Disassemble the components, including the drip tray and nozzle, and wash them with warm, soapy water, or place them in the dishwasher if they’re dishwasher-safe. Next, prepare a sanitizing solution using a mixture of 1 tablespoon of unscented liquid chlorine bleach per gallon of water. Carefully pour this solution into the reservoir and allow it to sit for about 10 minutes to effectively kill any bacteria. Afterward, drain the reservoir, then rinse it thoroughly with clean water to remove any bleach residue. Finally, reassemble the dispenser, plug it back in, and fill it with fresh water, allowing it to run through the system before use. Regular sanitization helps ensure safe and clean drinking water for you and your family.
Conclusion
Cleaning your Primo water dispenser is crucial for maintaining optimal performance, water quality, and overall enjoyment of clean and refreshing water. By following this step-by-step guide of how to clean my primo water dispenser, you can effectively clean all the components and surfaces of your dispenser. Regular cleaning, following a primo water dispenser maintenance schedule, and adhering to the primo water dispenser cleaning instructions for specific models ensure a continuous and reliable supply of fresh, clean water from your Primo water dispenser.